
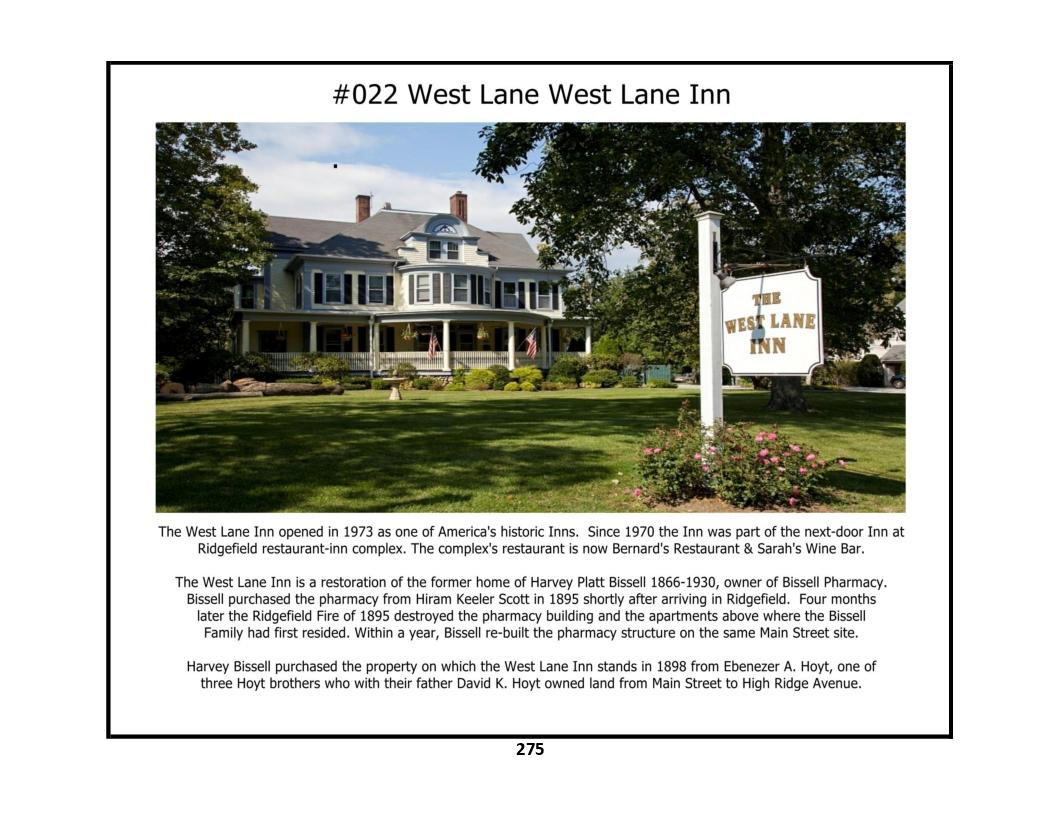
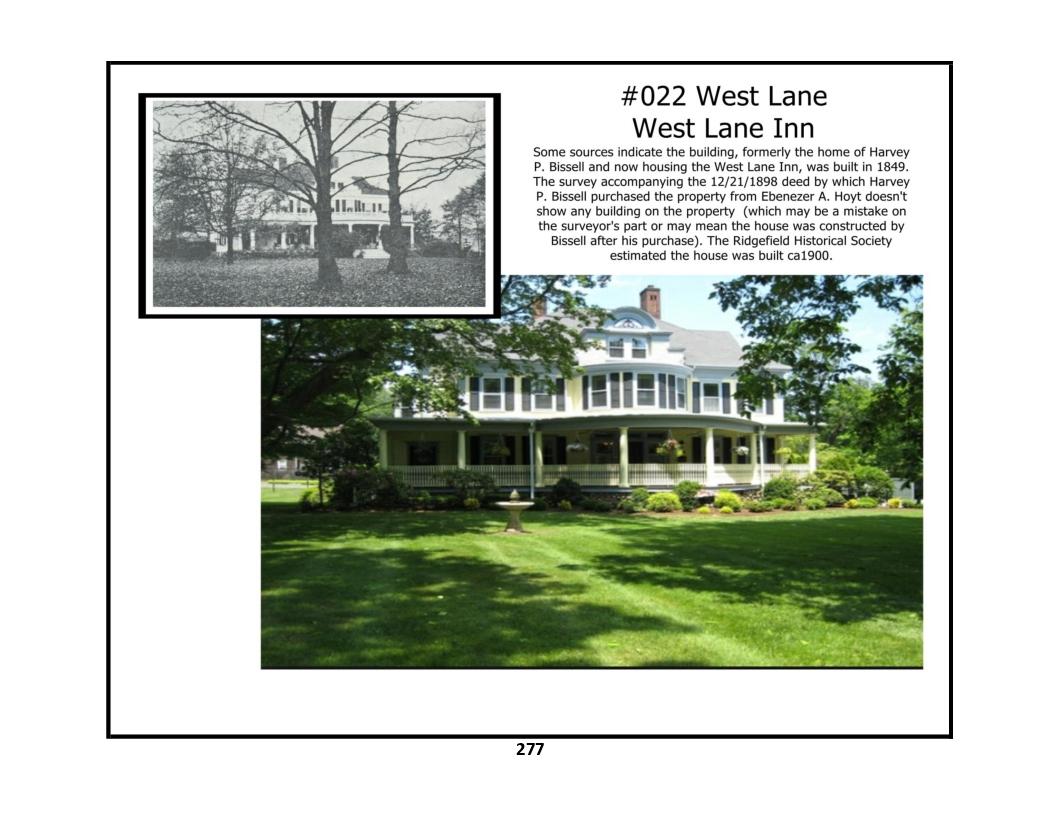
Historic District Properties - Photos and History

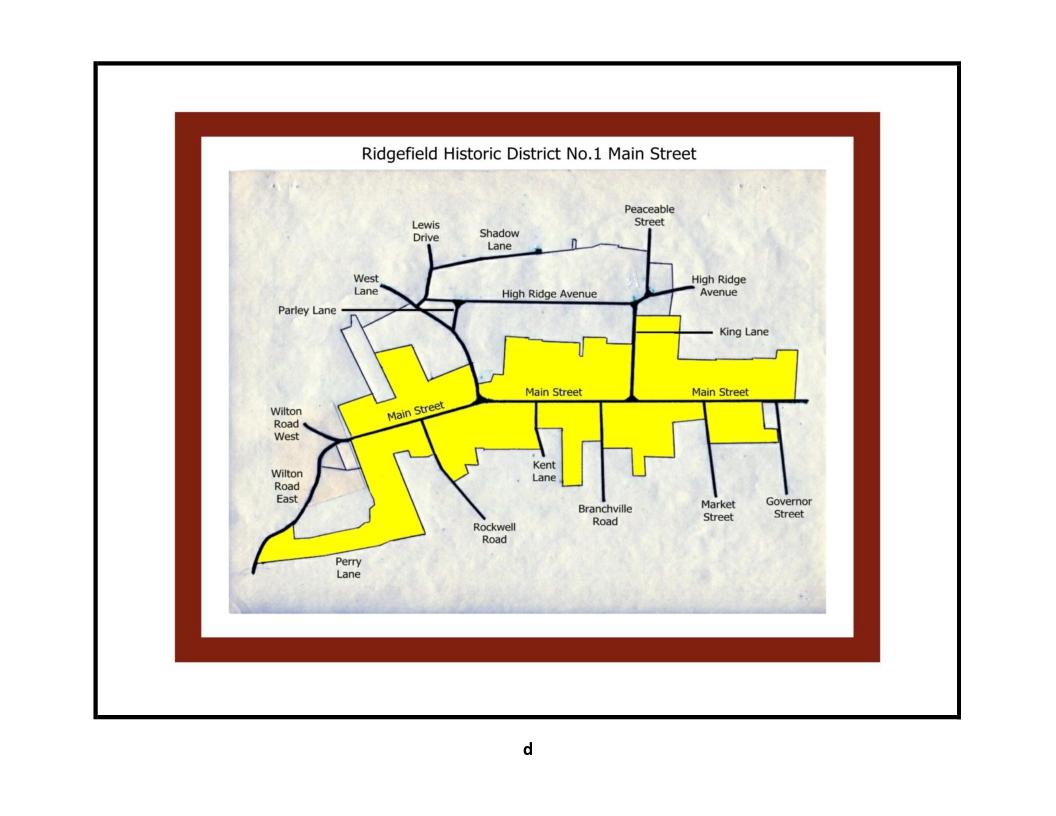
Ridgefield Historic District No 1
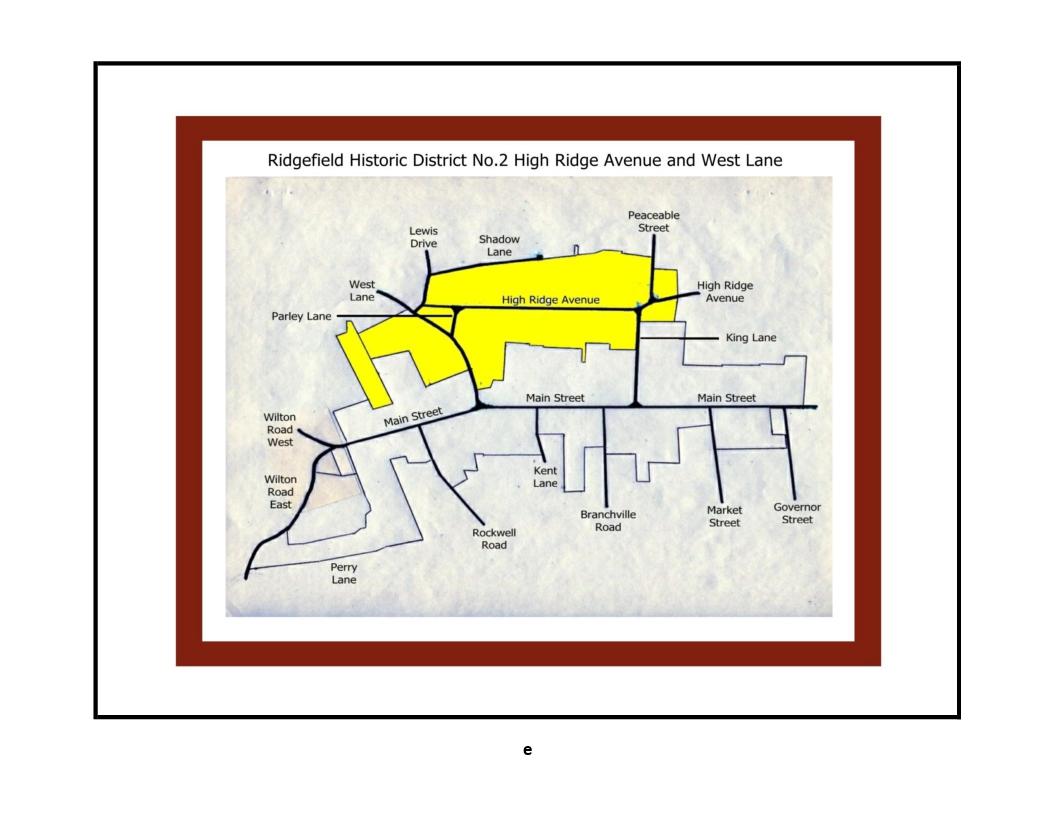
Ridgefield Historic District No 2
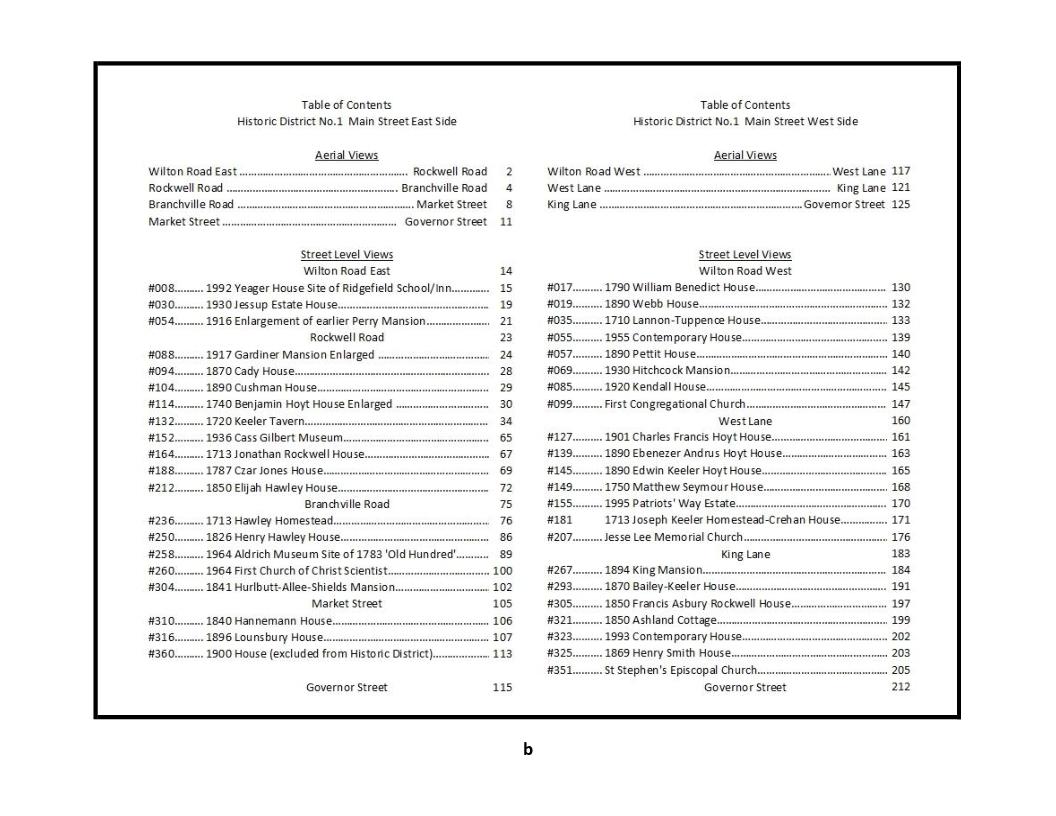
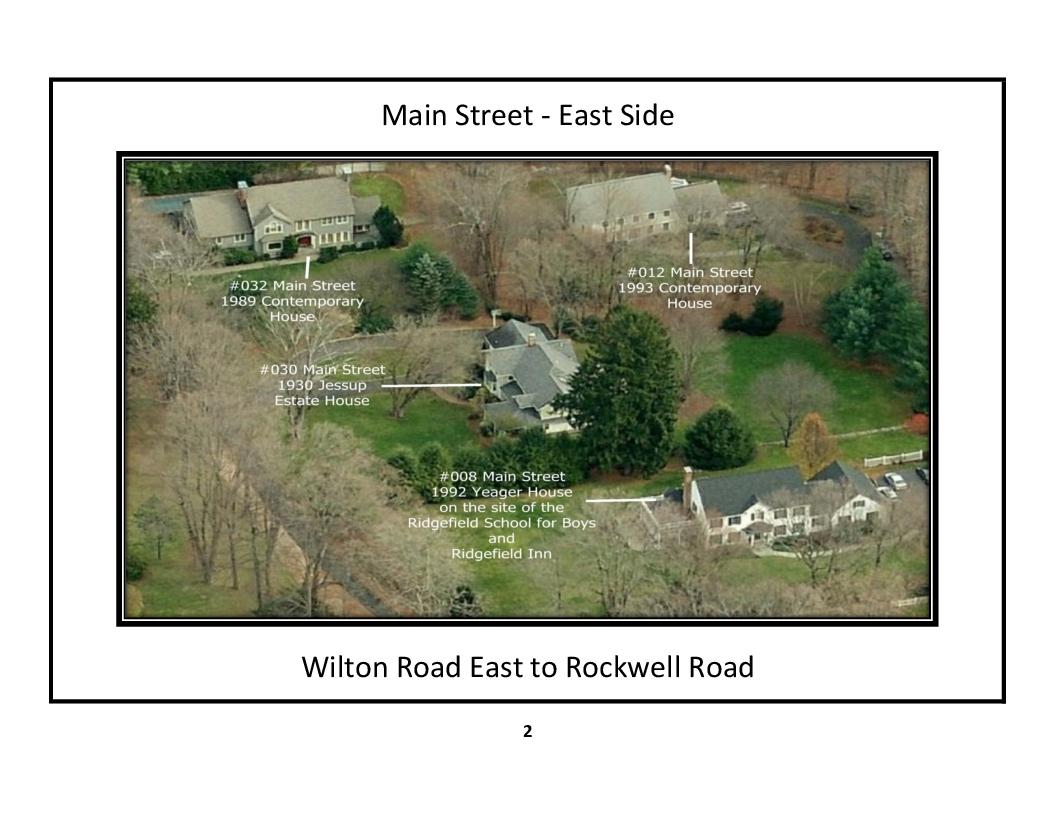
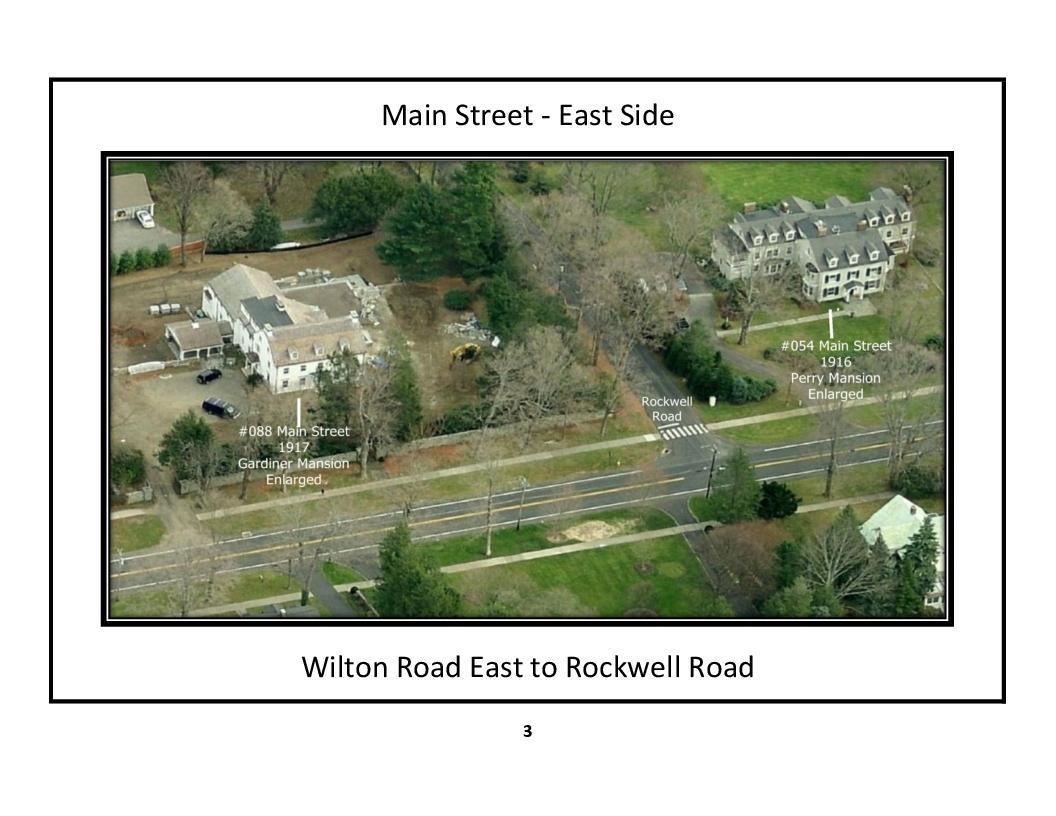
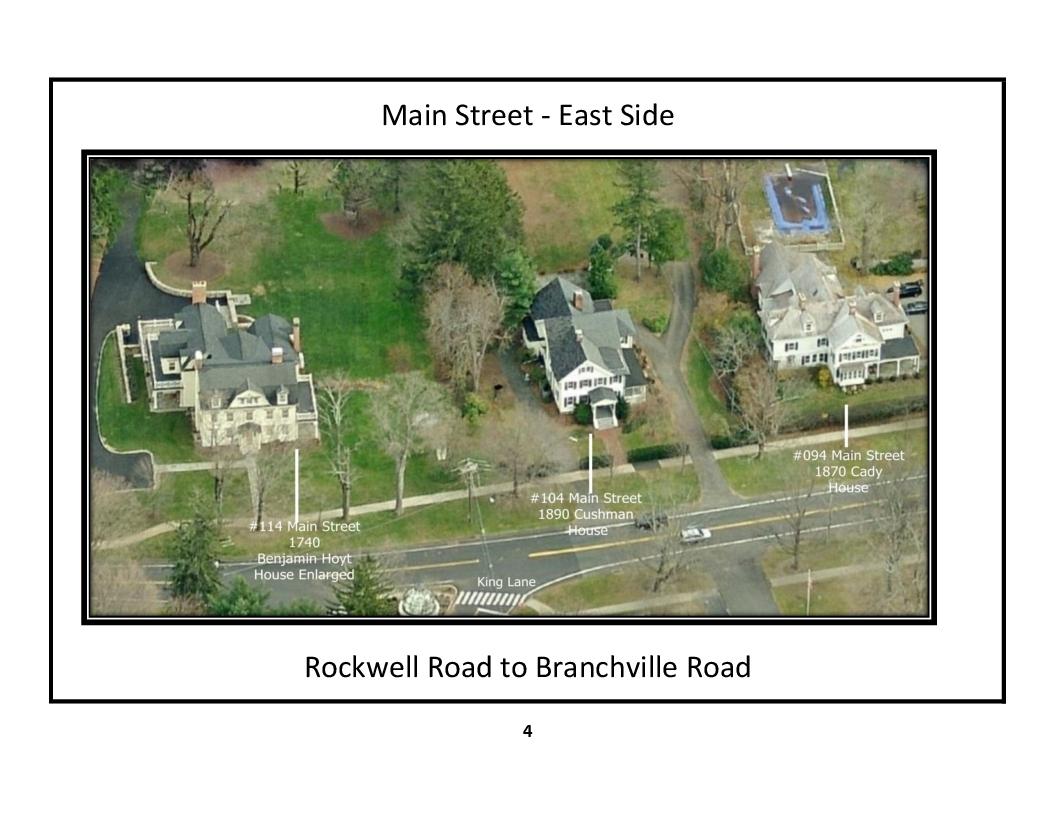
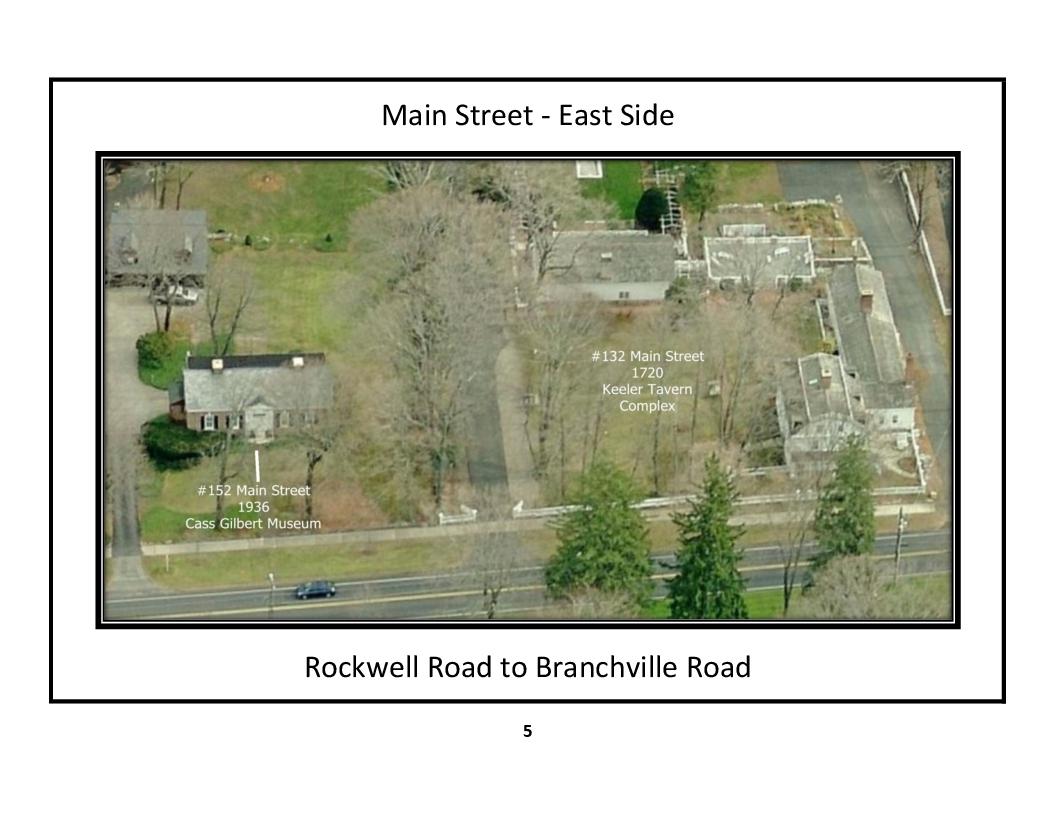
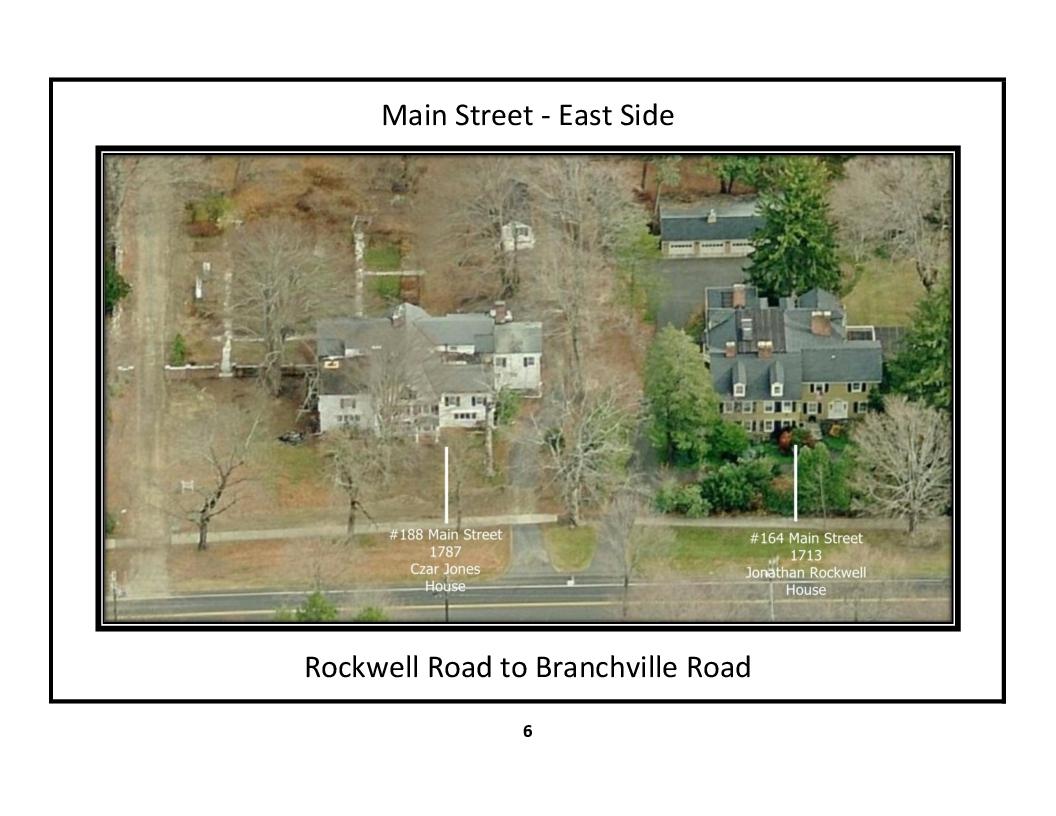
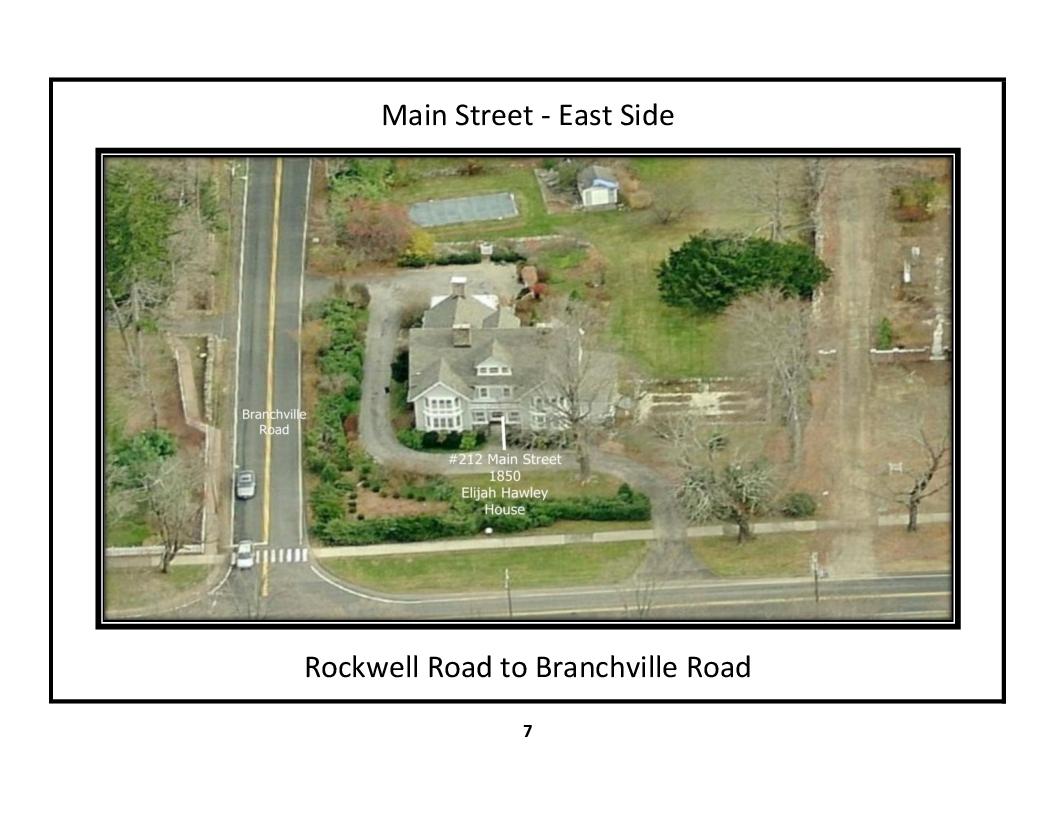
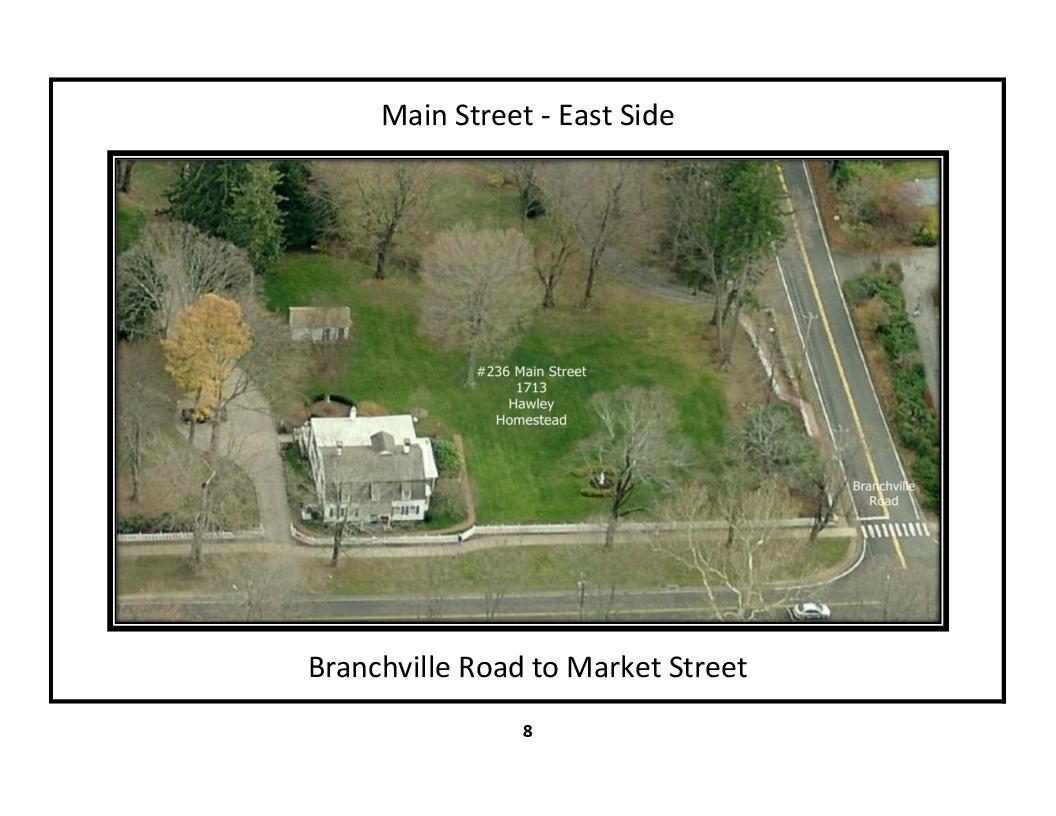
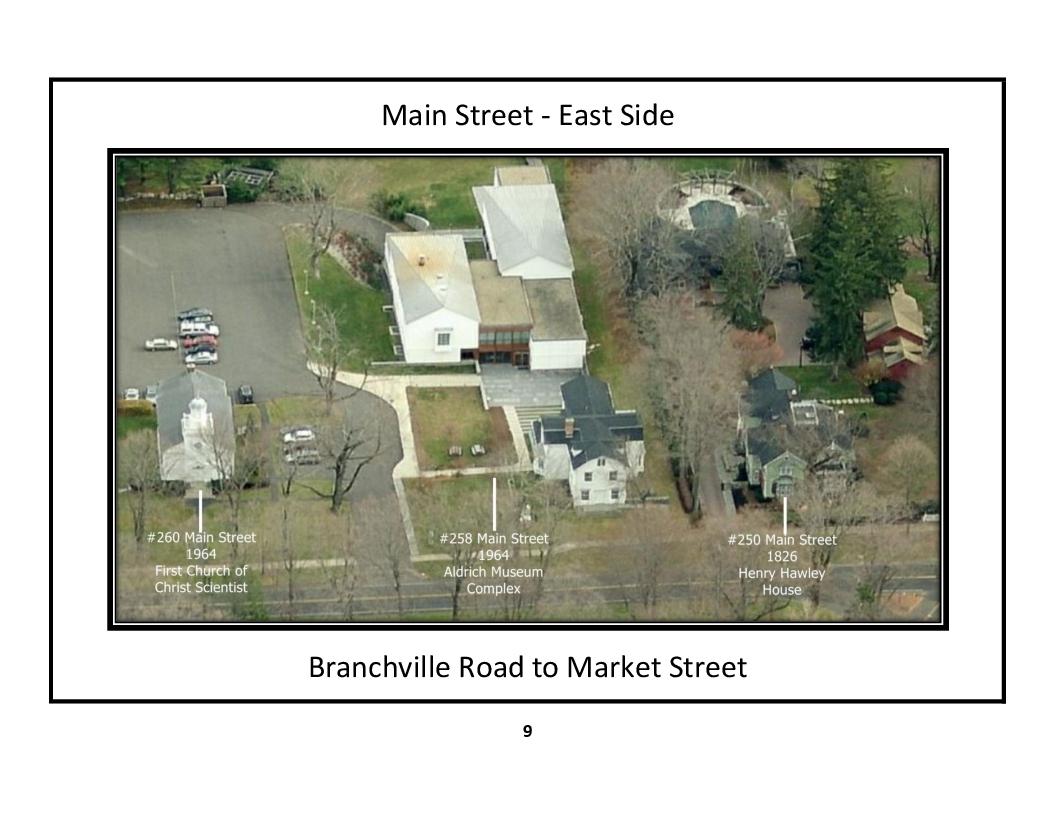
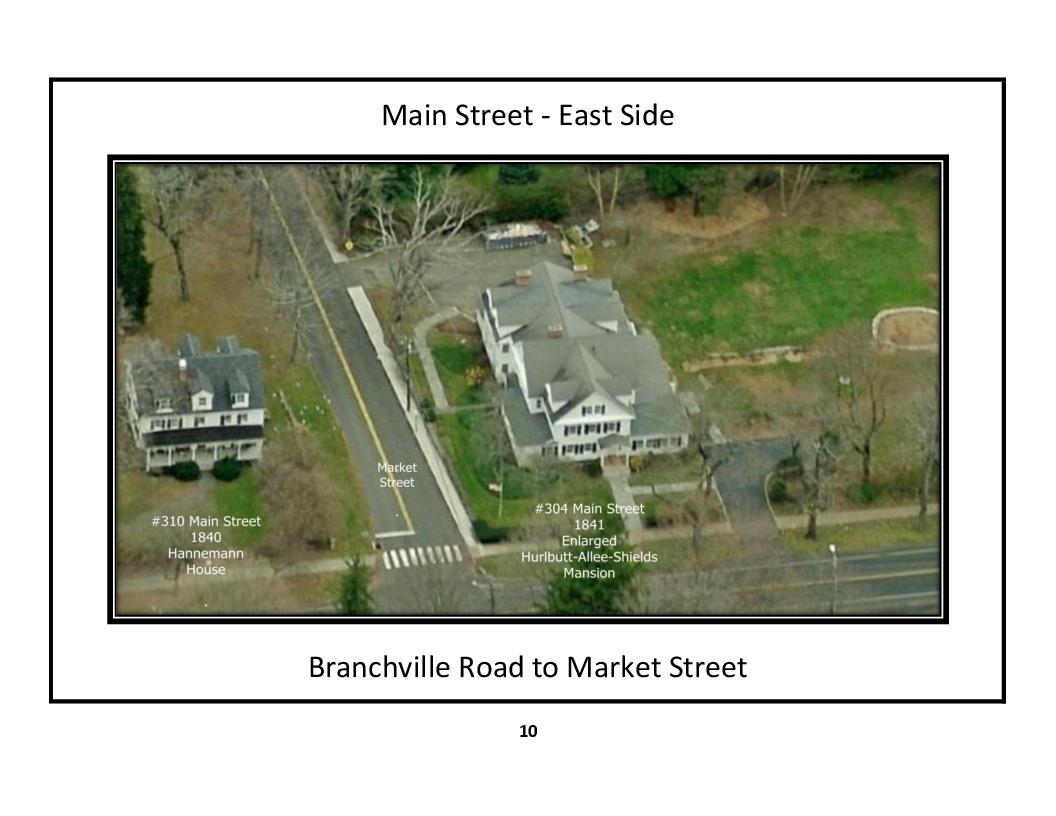
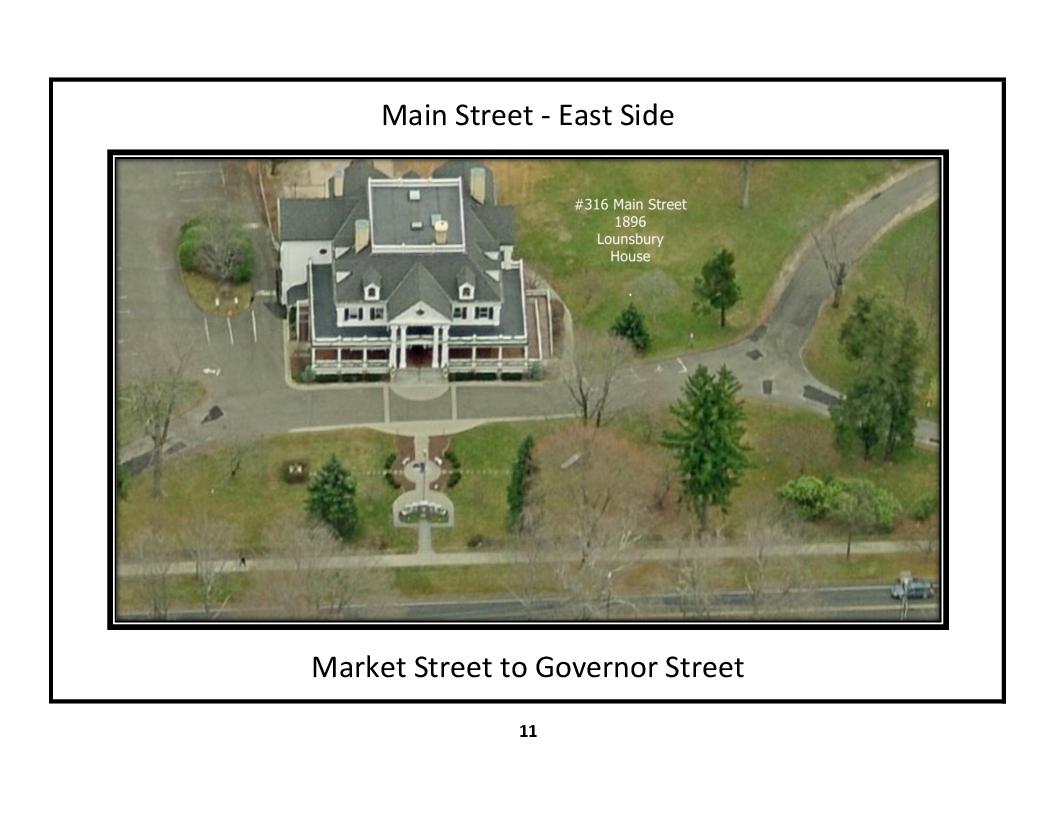
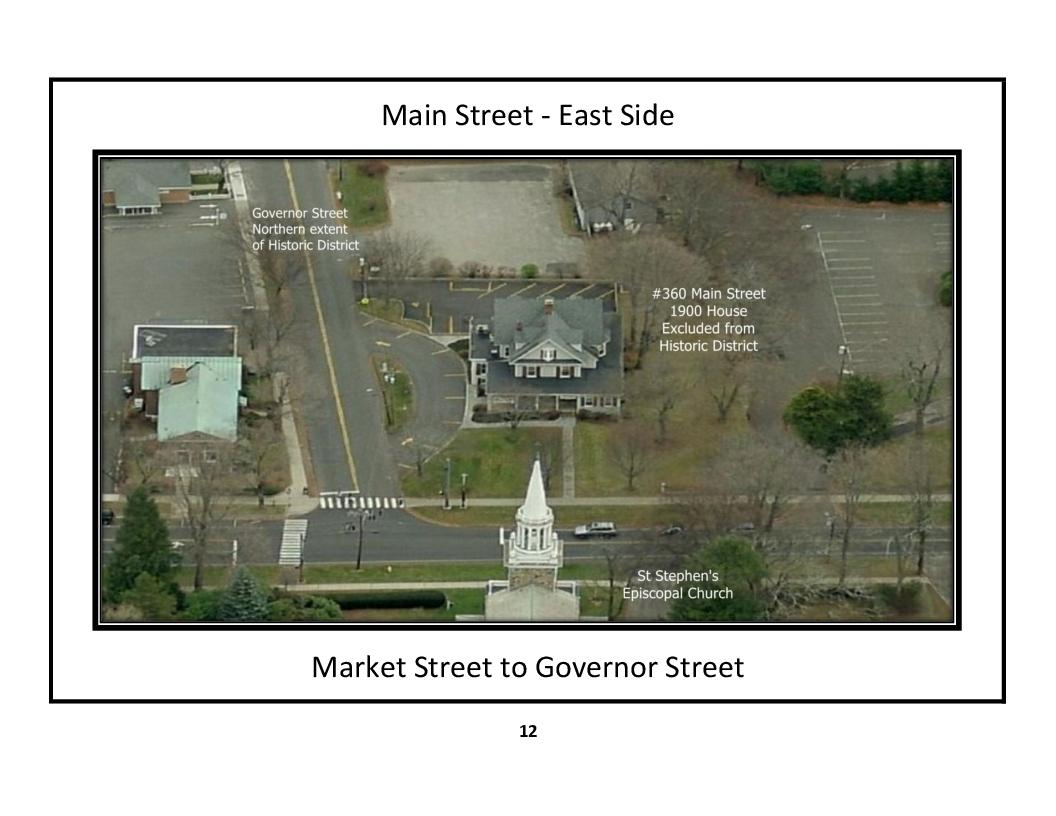
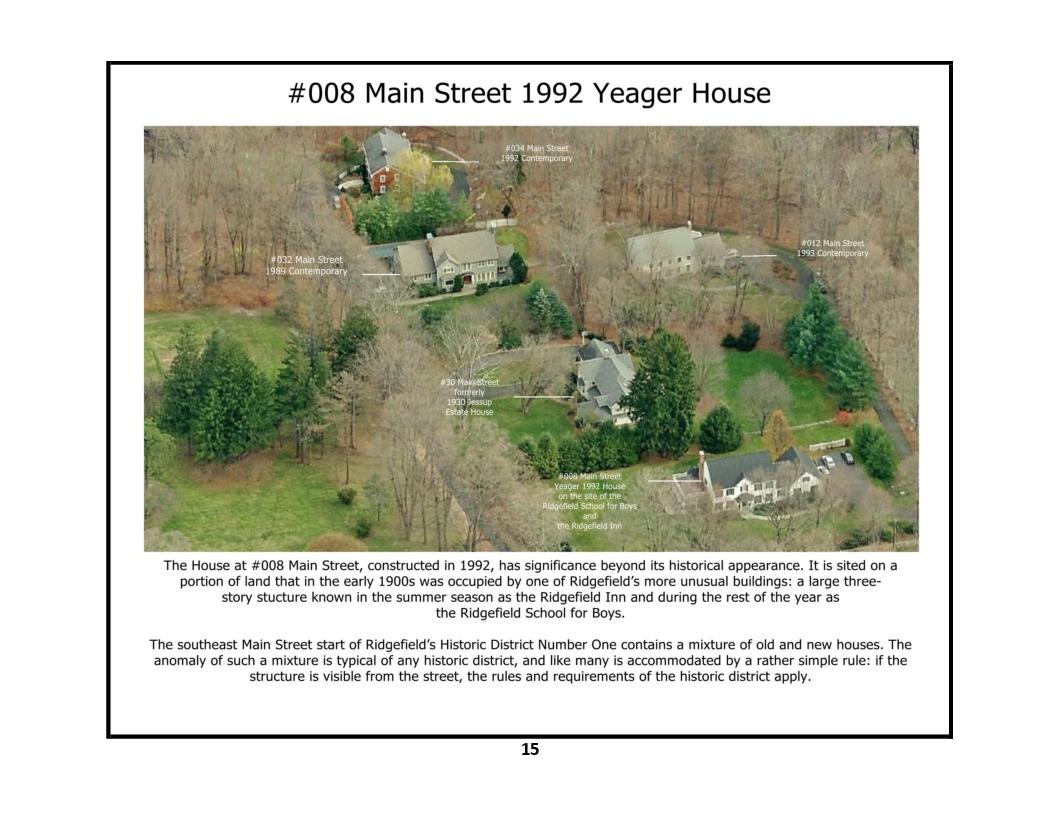
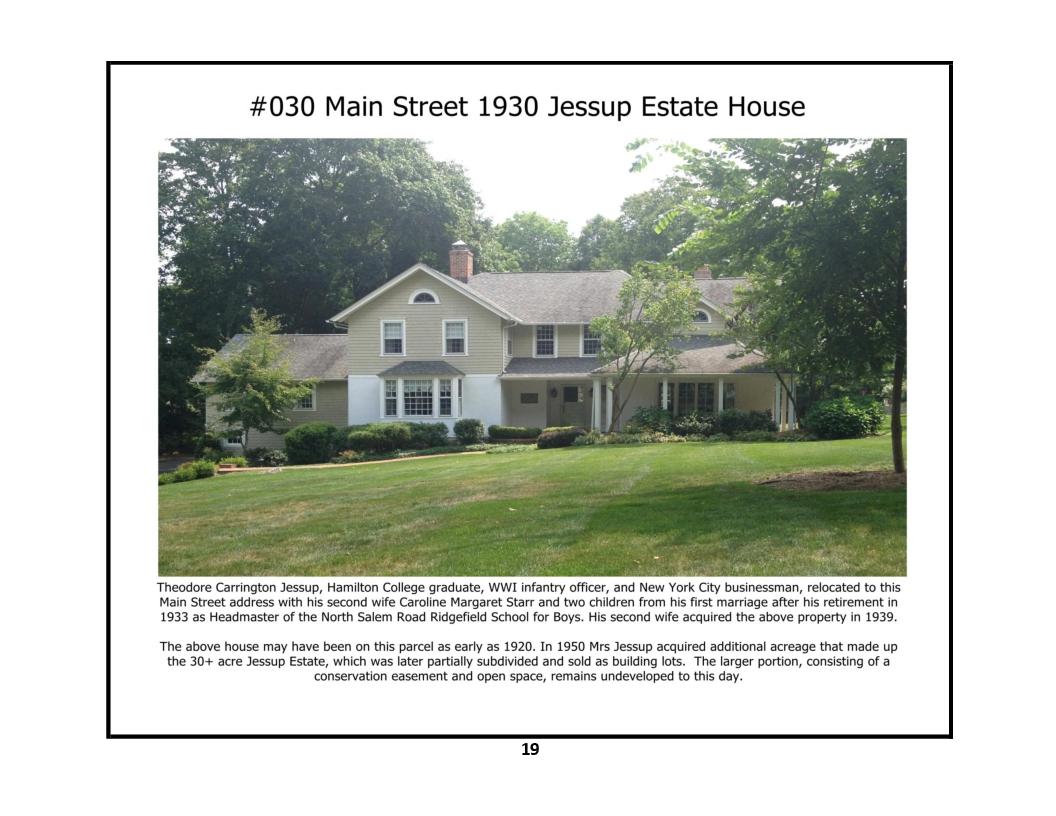
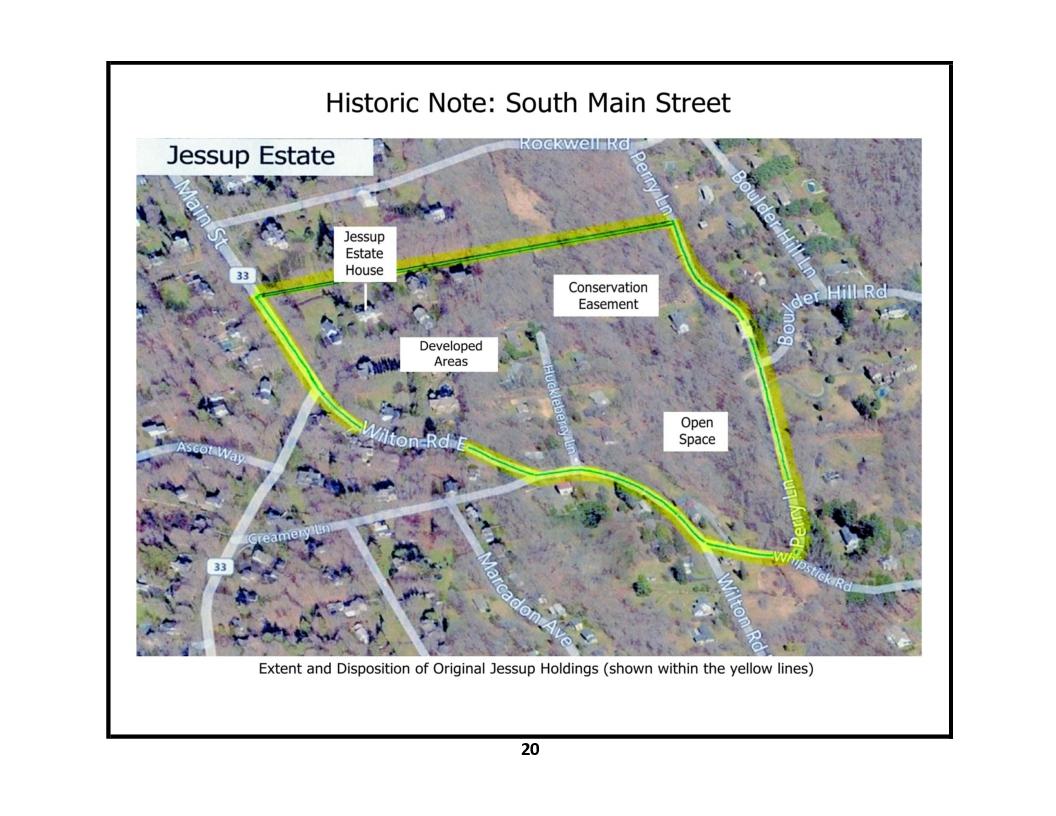
Aerial Views: "Main Street - East" - photos a, b, c, d, e, f, g, h, i, j, k
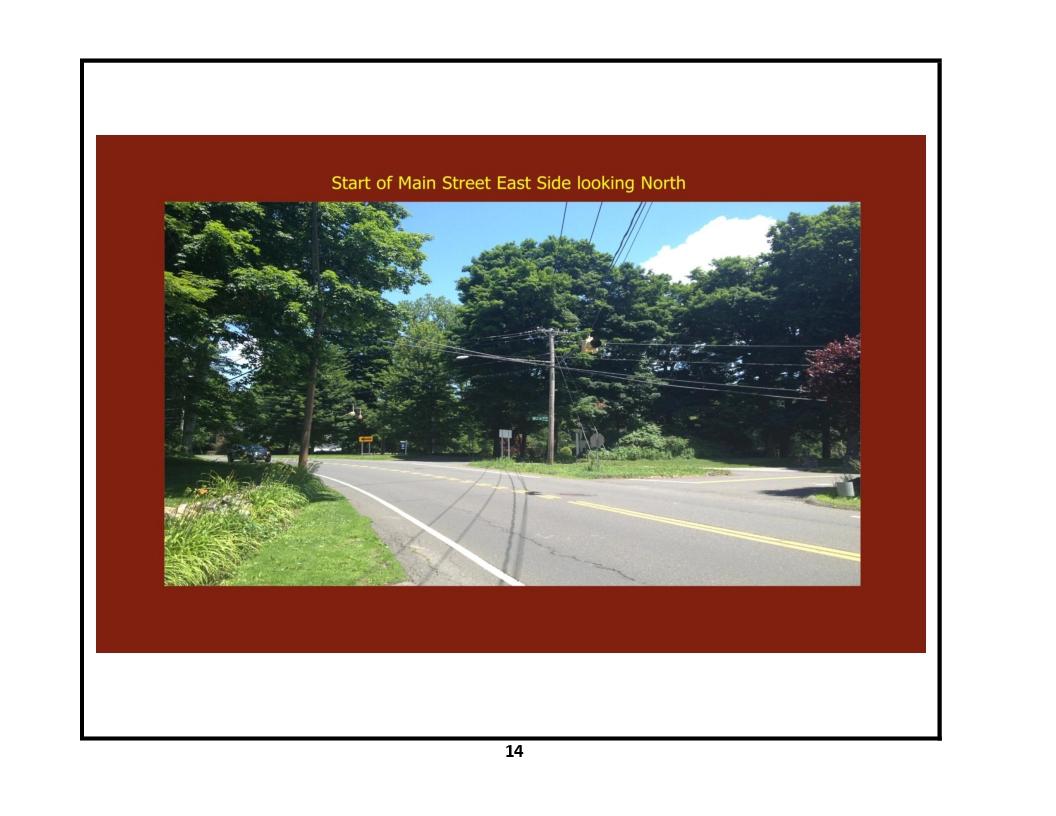
Street Level Views: Main Street - East Side
Main Street - East Side - Looking North
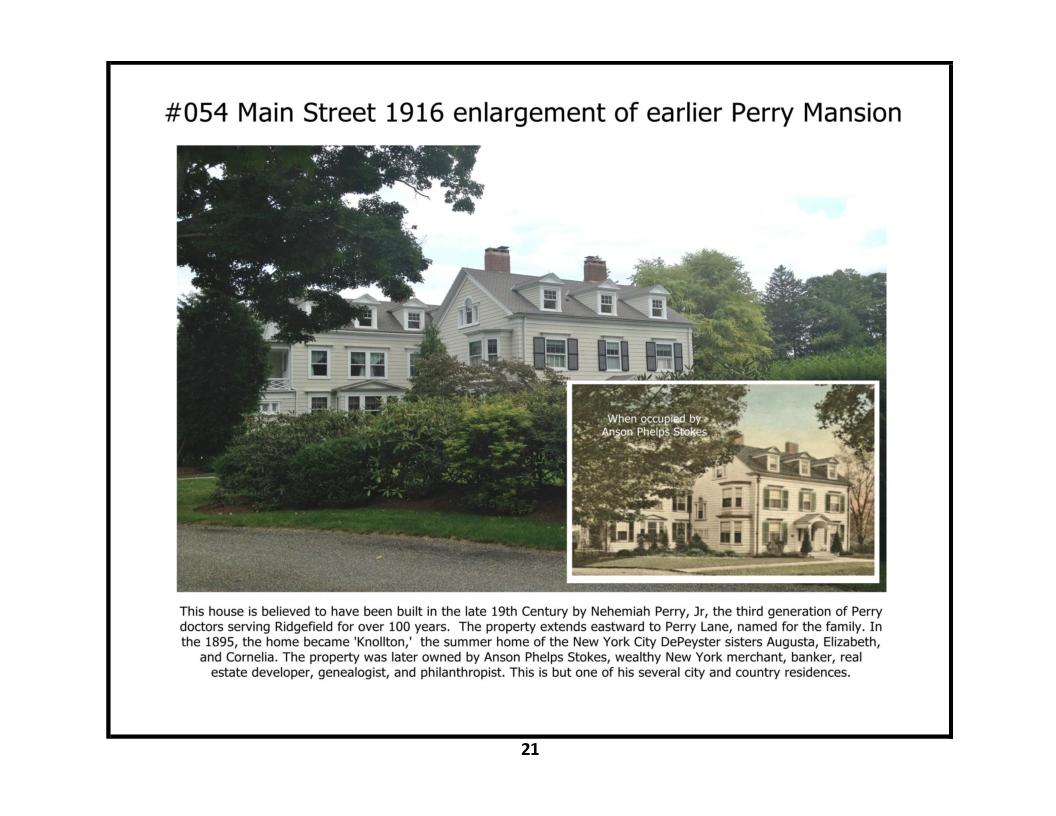
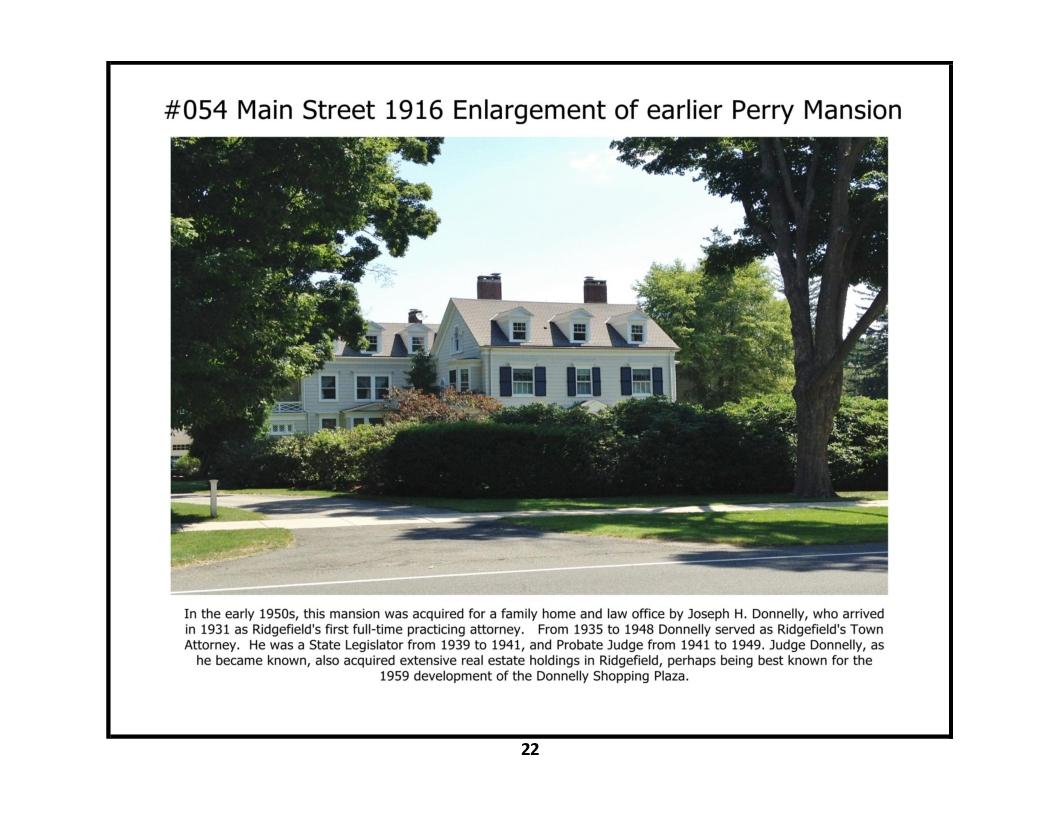
8 Main Street- photos 1, 2, 3, 4
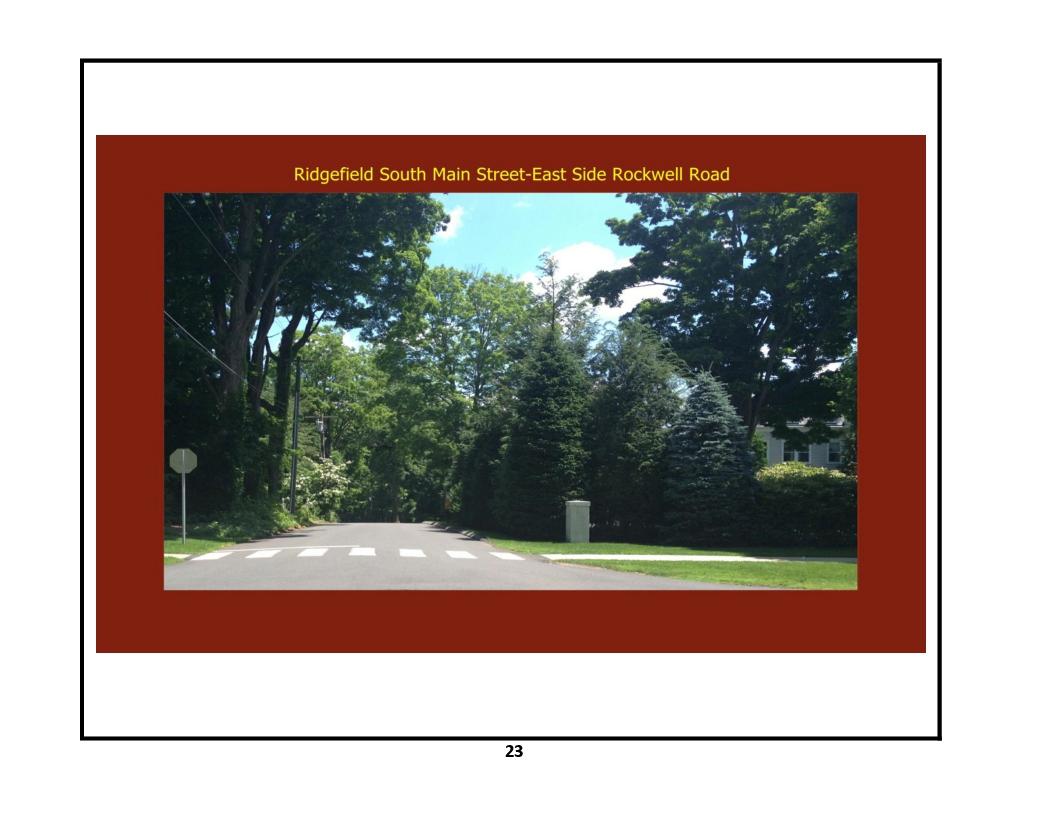
Street Level Views: South Main Street - East Side - Rockwell Road
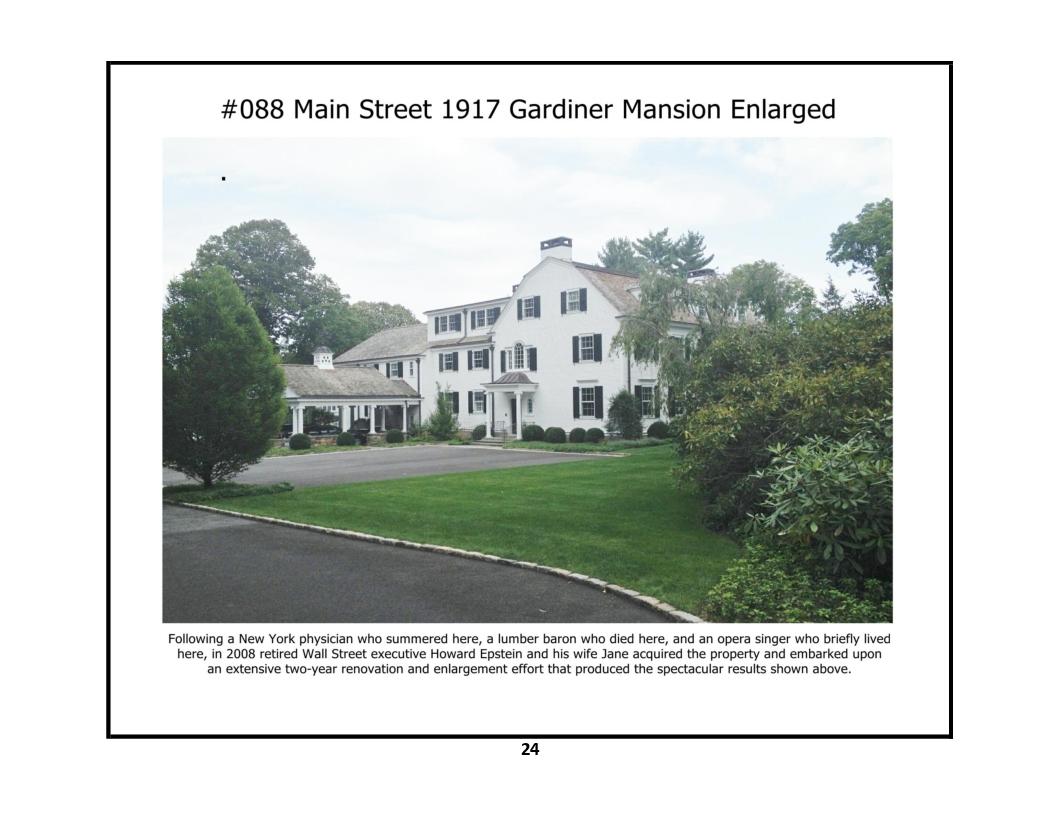
88 Main Street - photos 1, 2, 3, 4
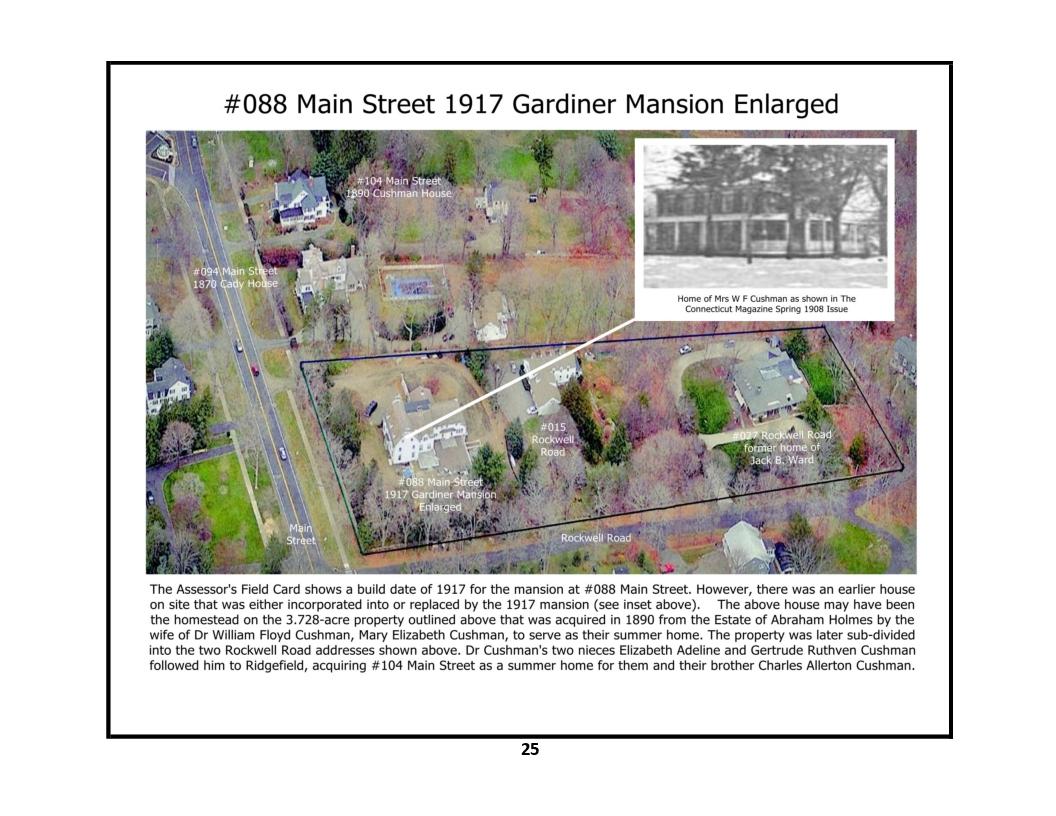
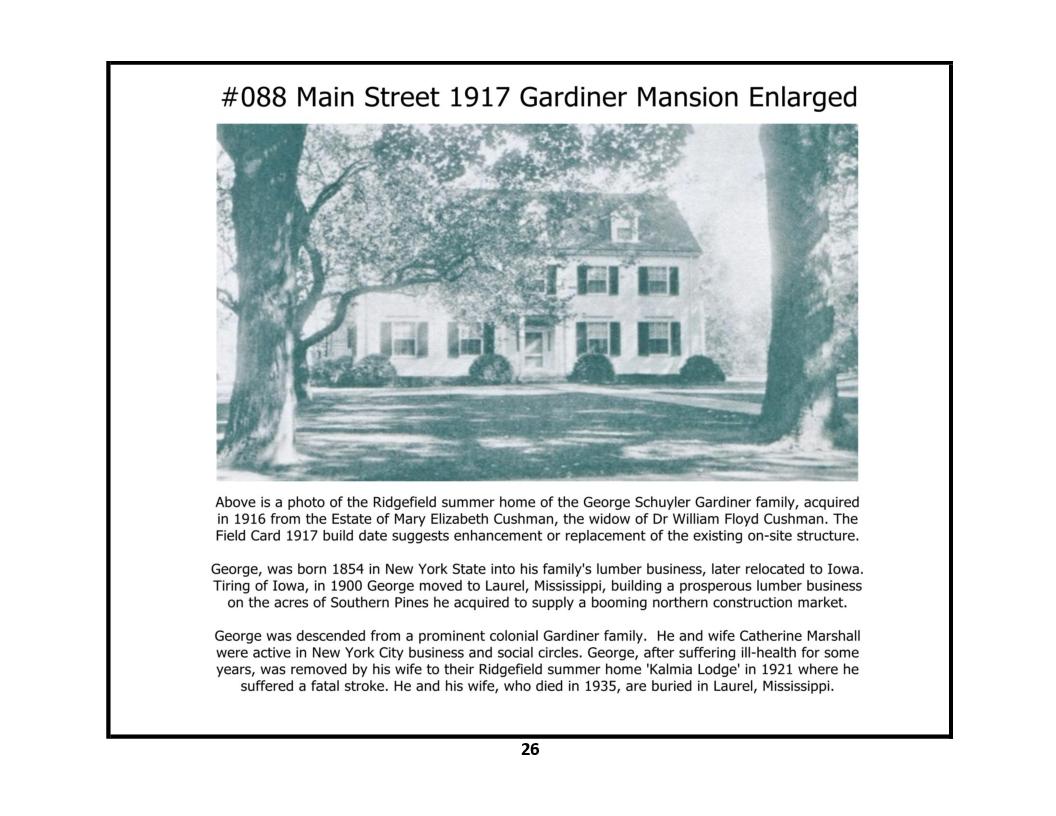
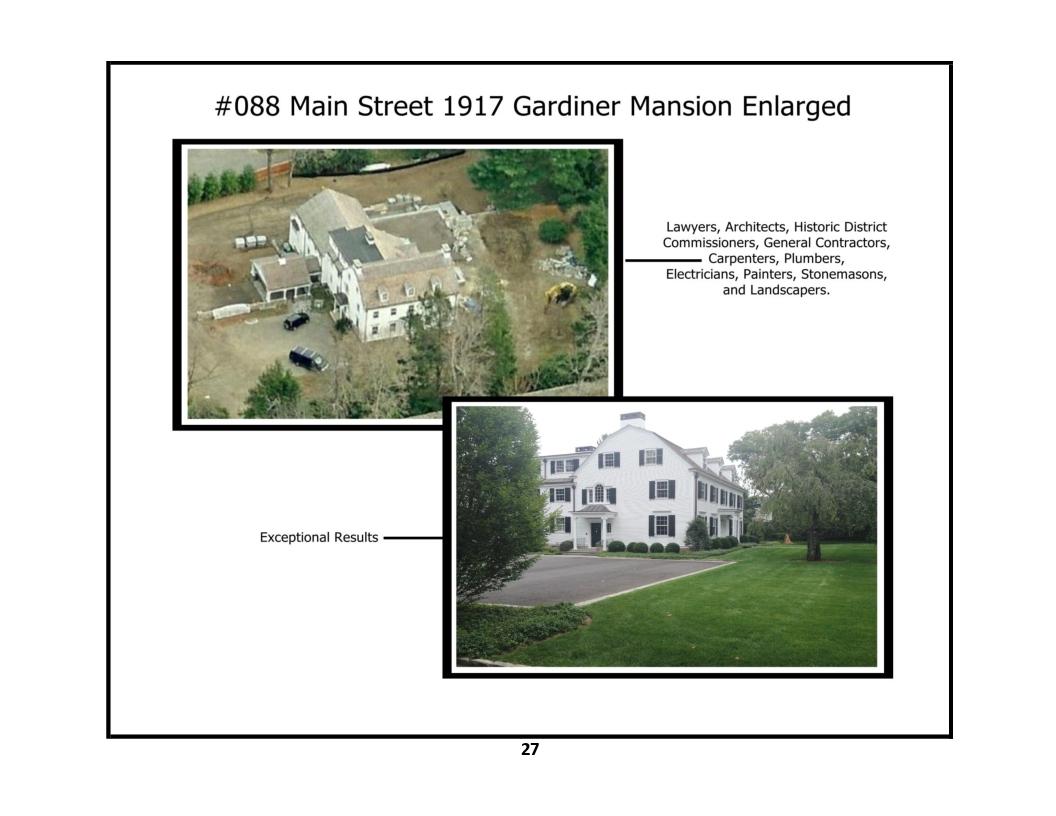
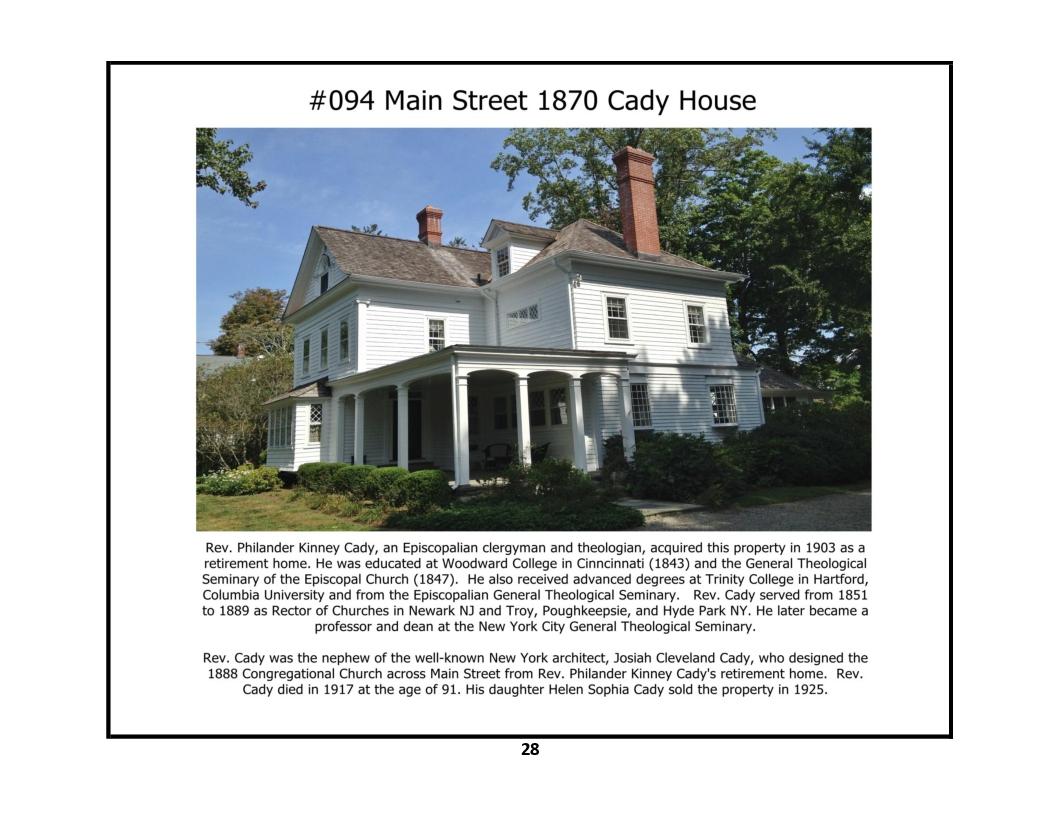
94 Main Street - photo 1
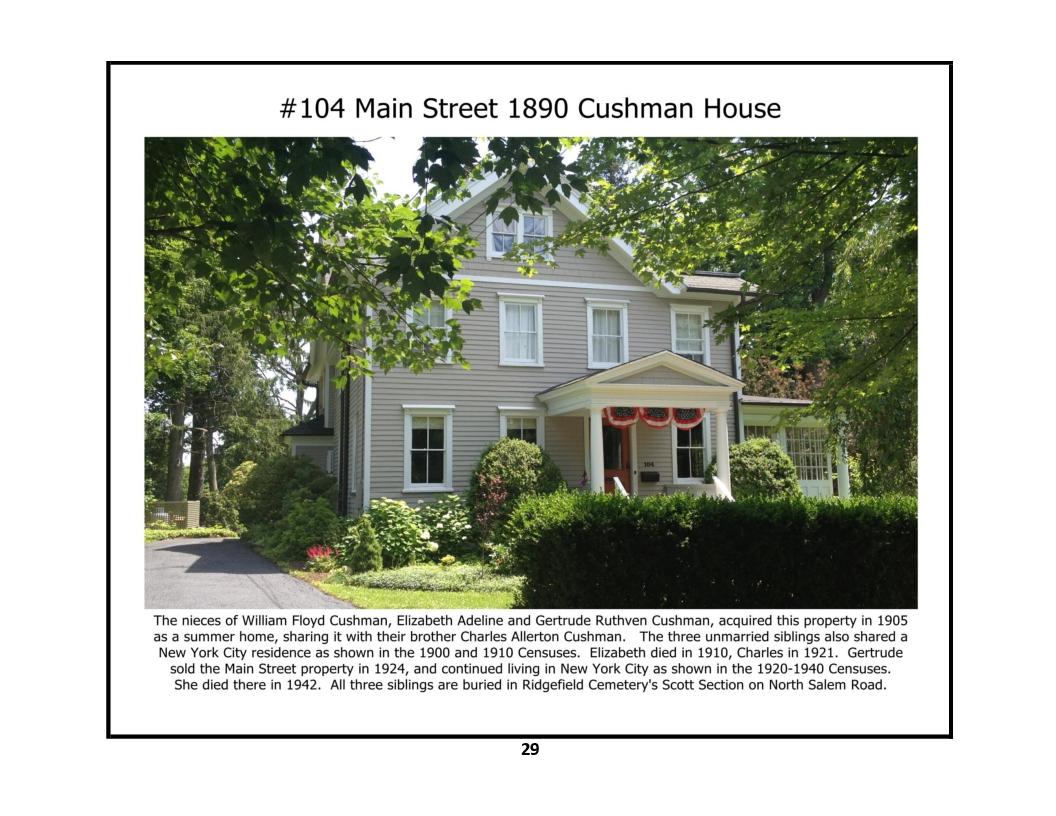
104 Main Street - photo 1
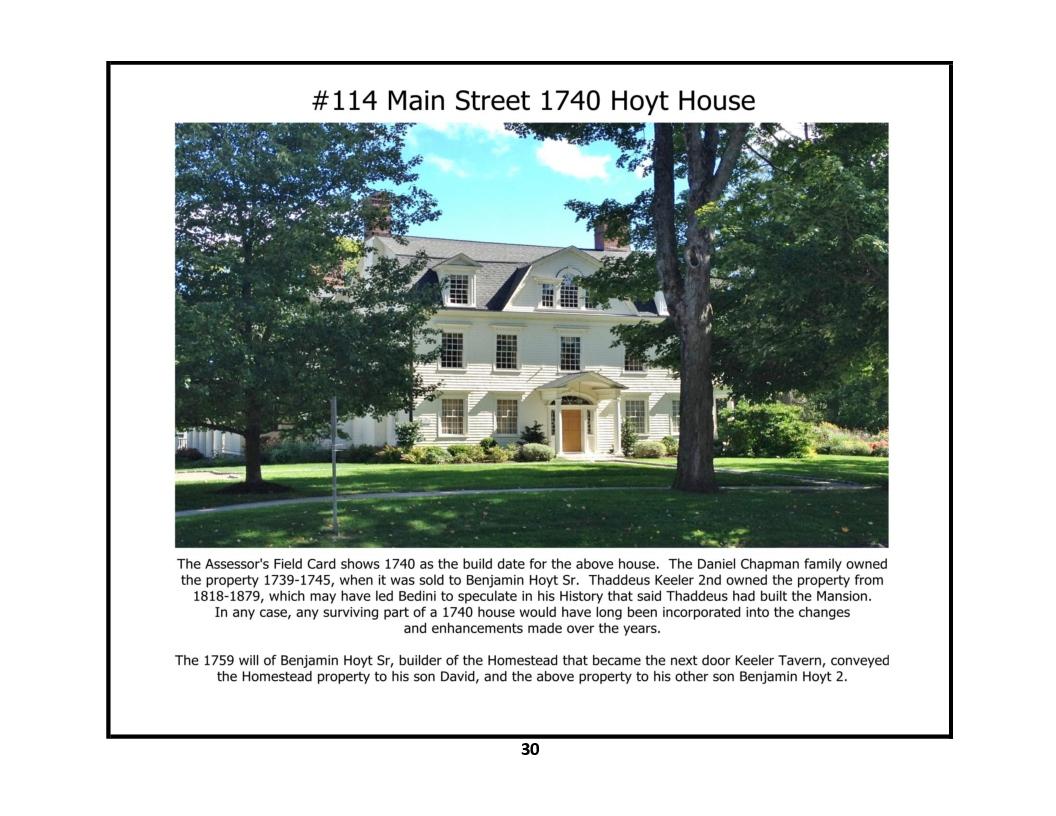
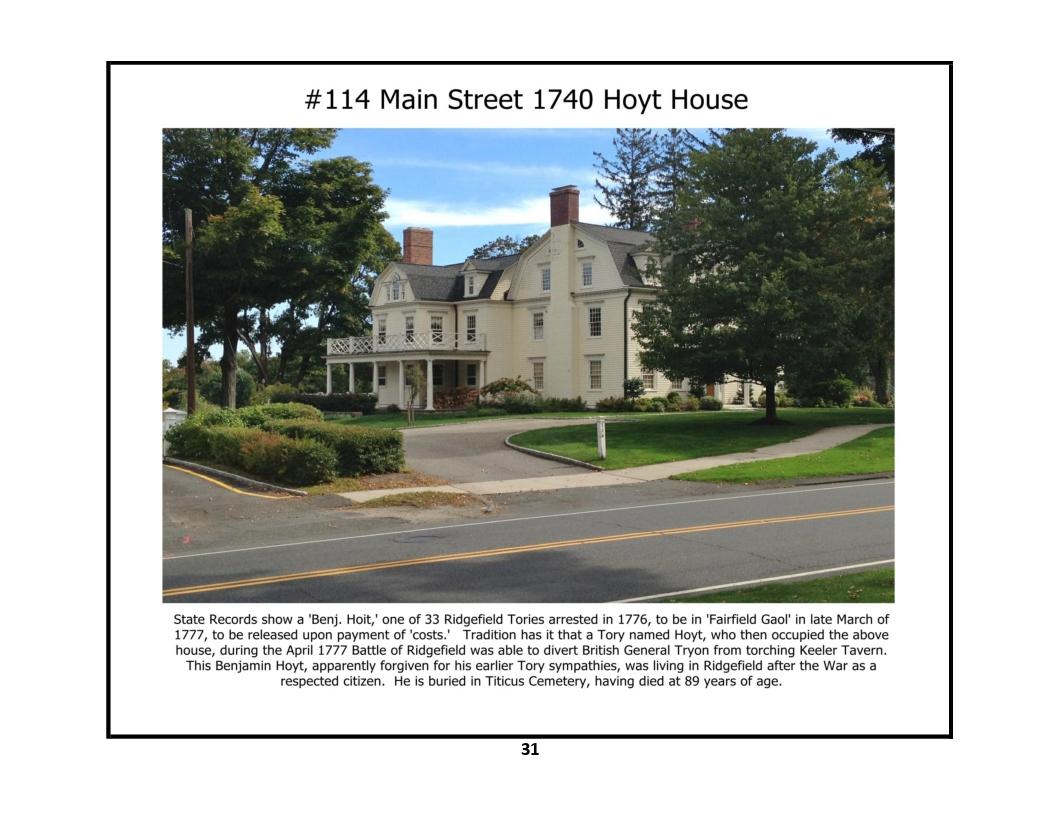
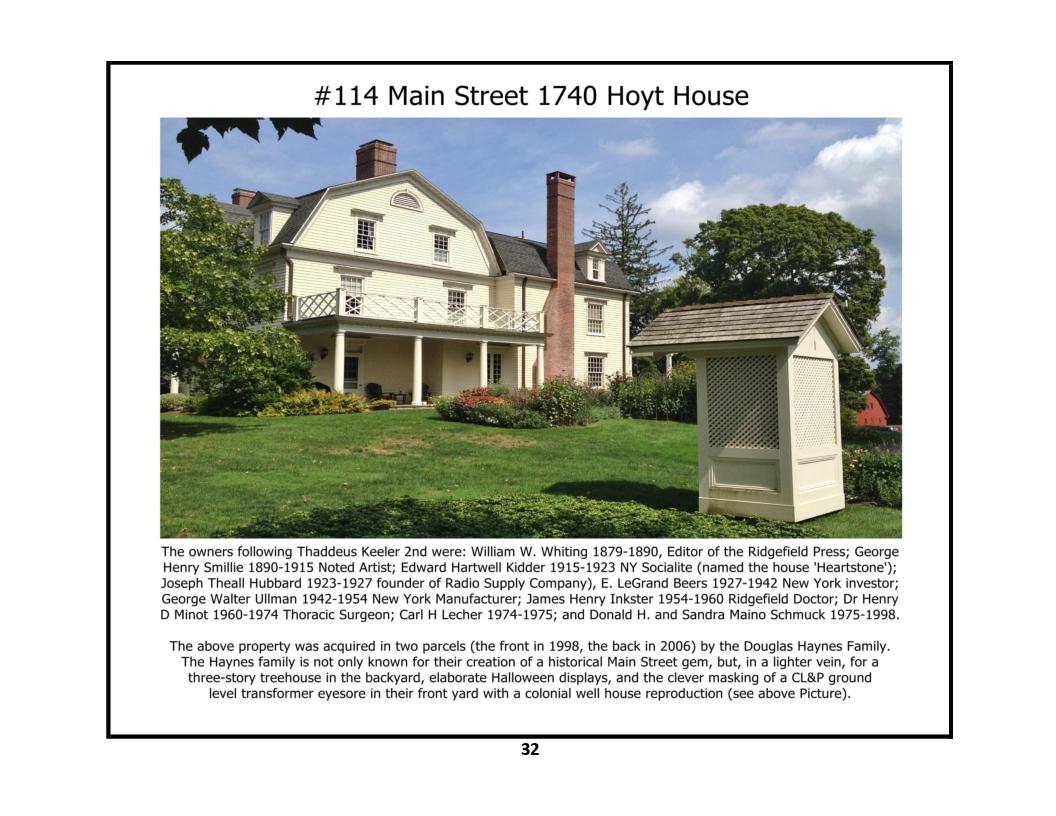
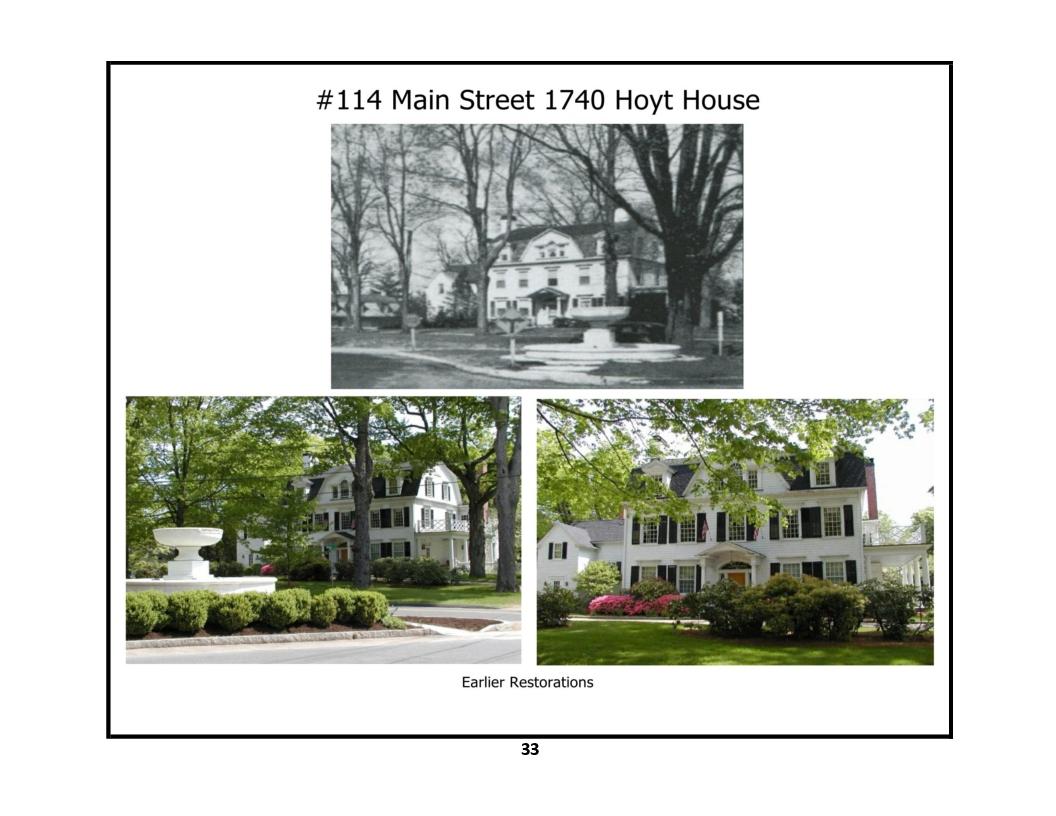
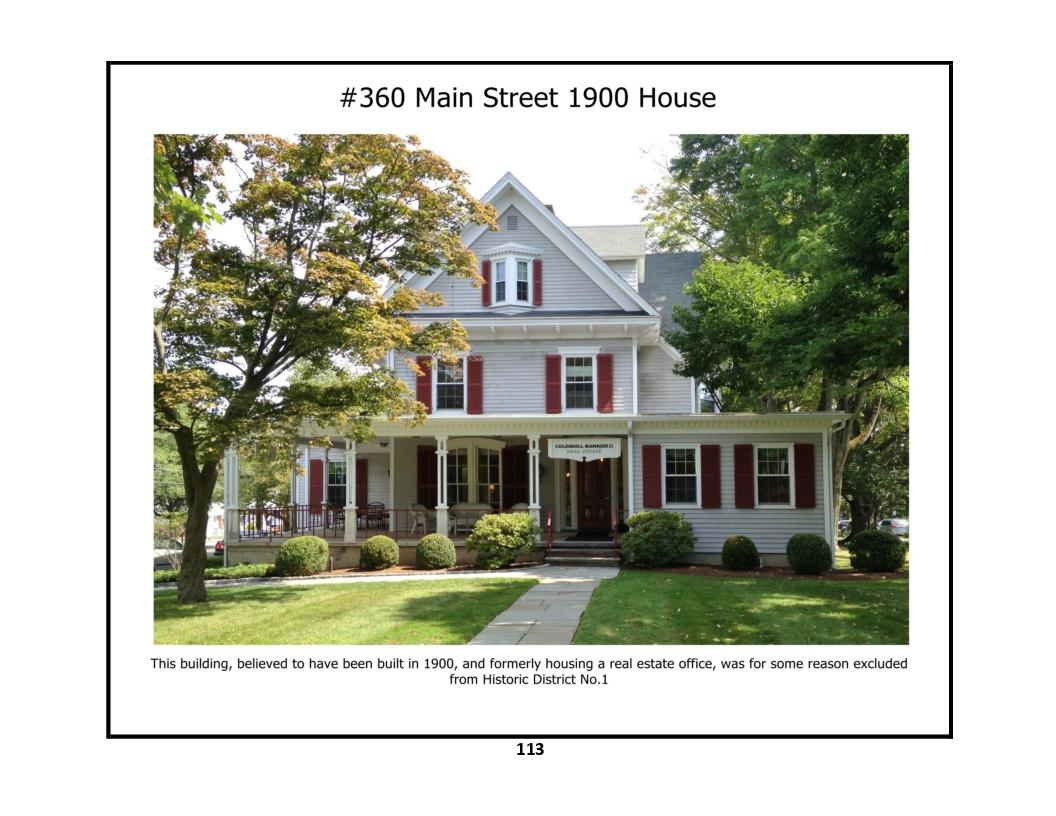
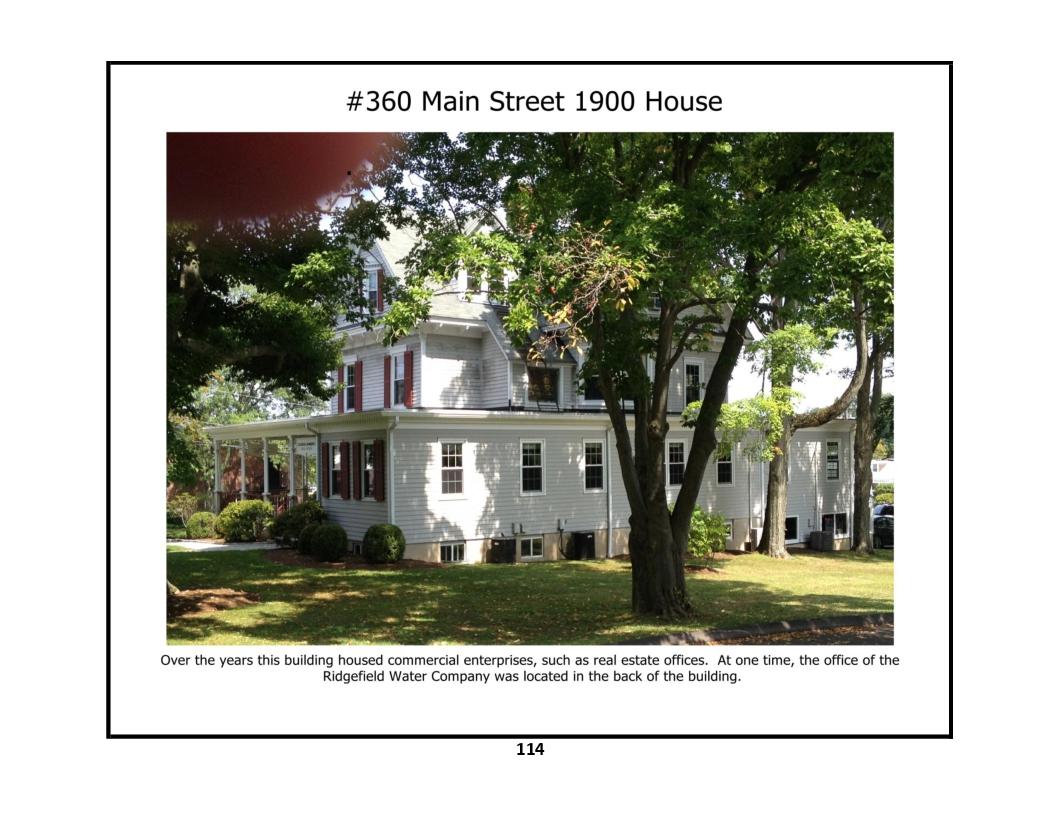
114 Main Street - photos 1, 2, 3, 4
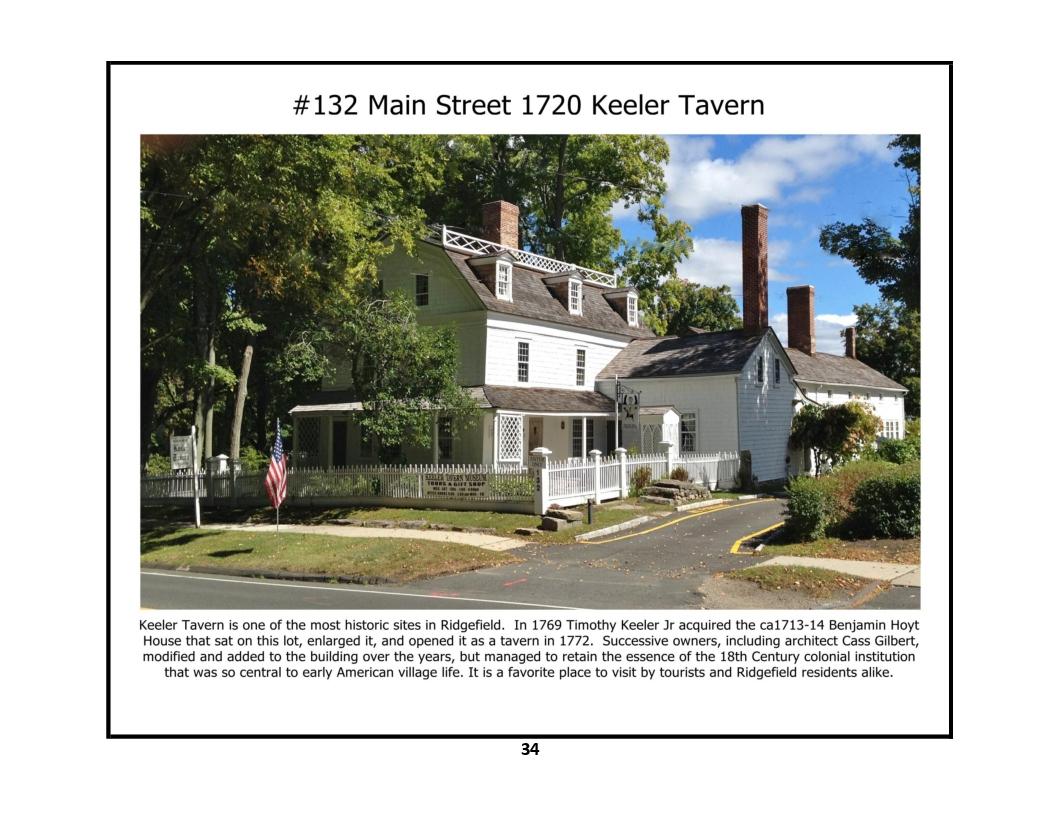
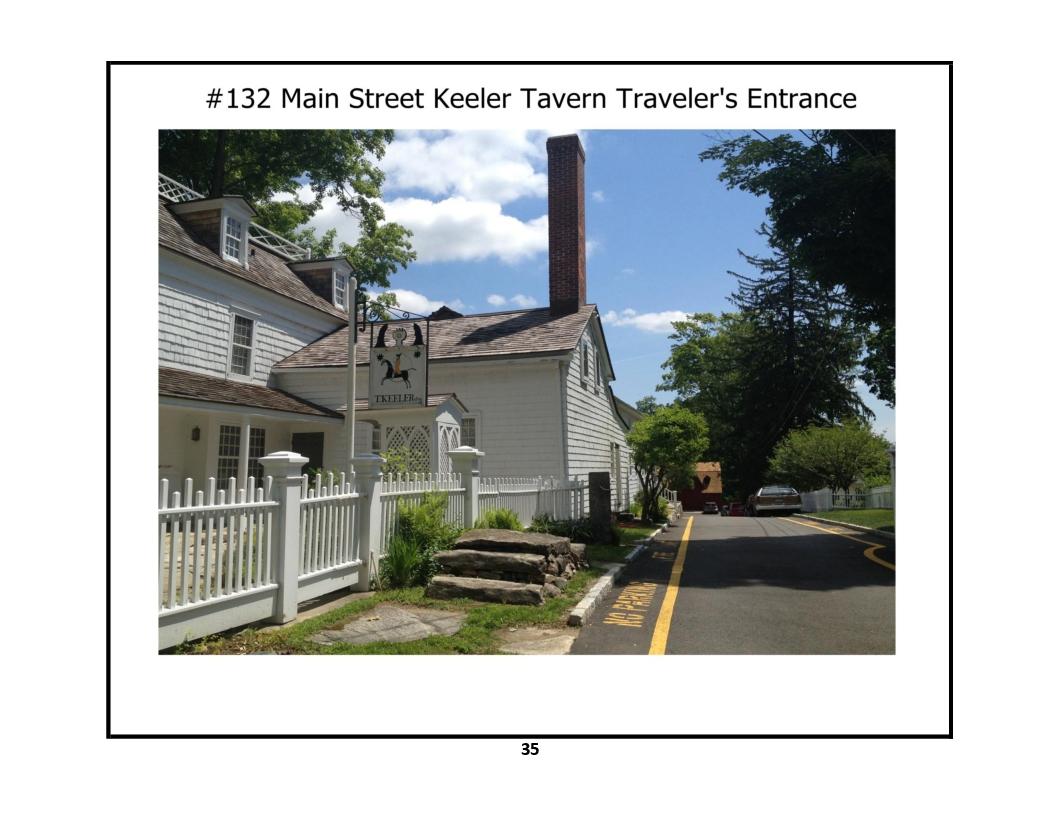
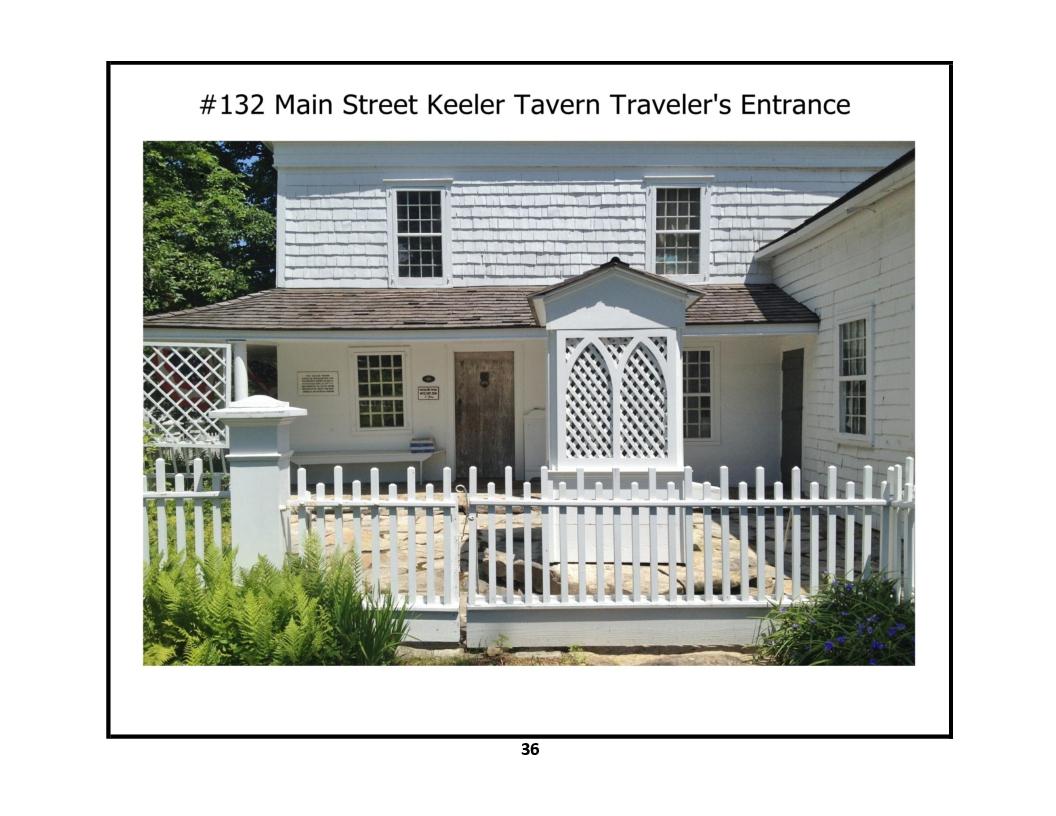
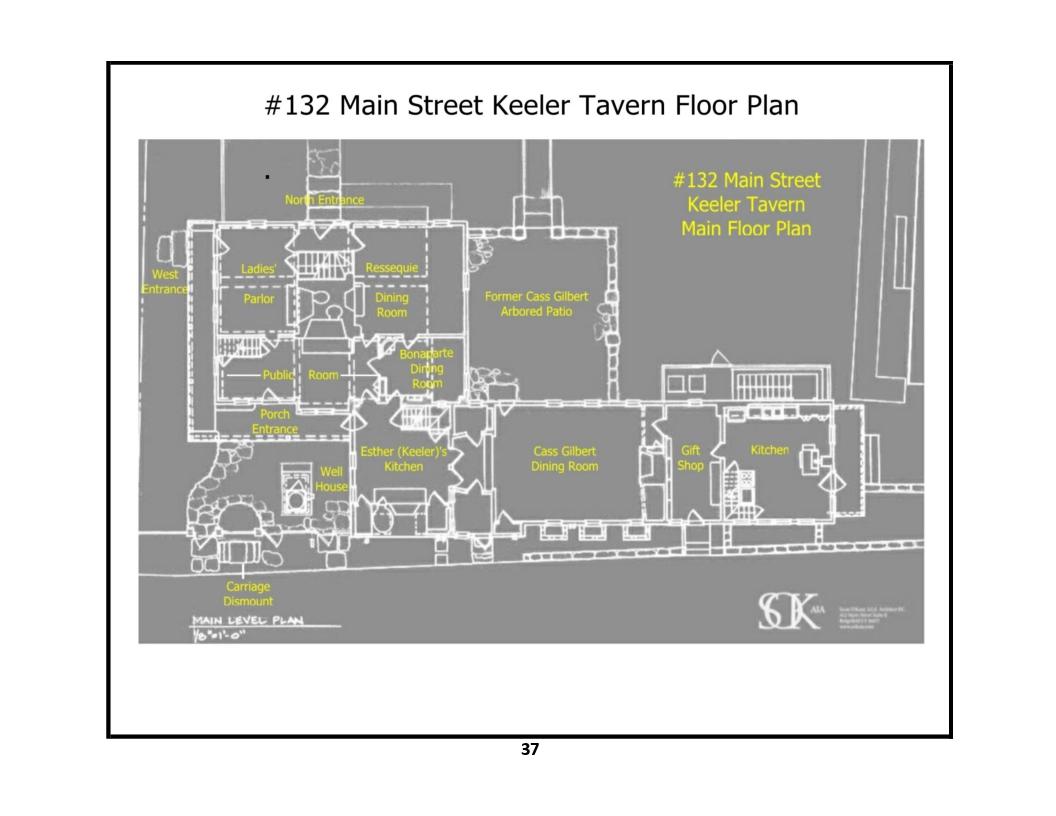
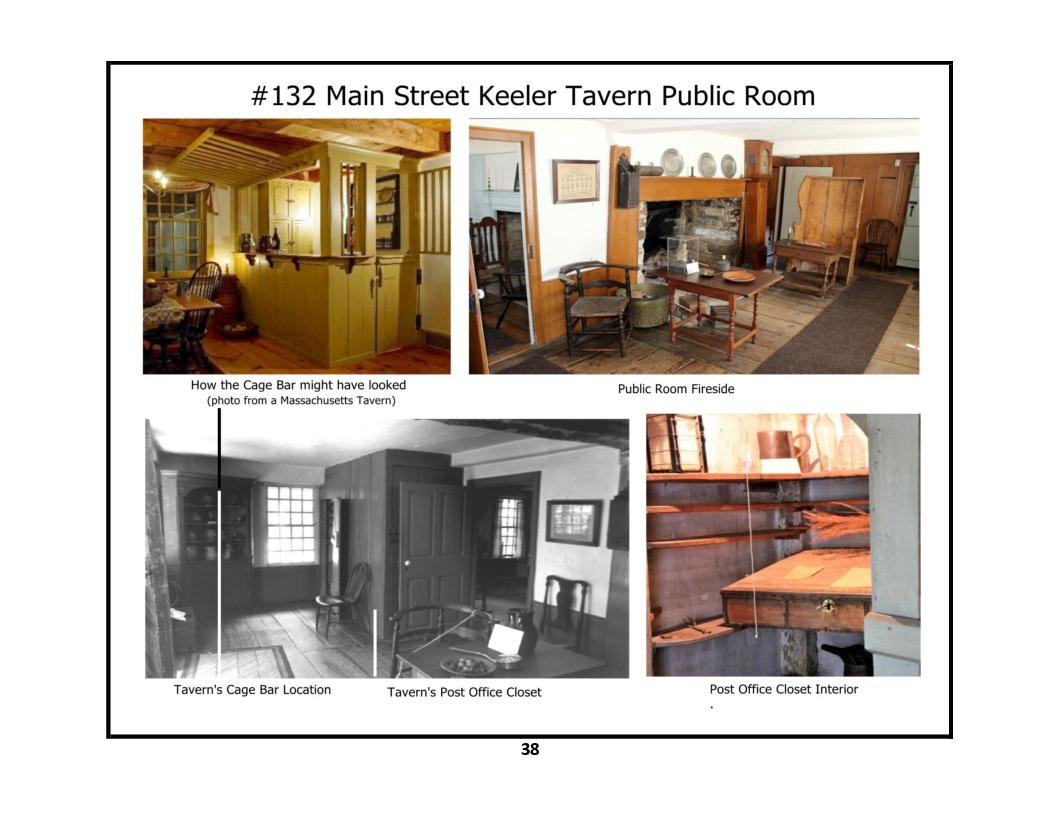
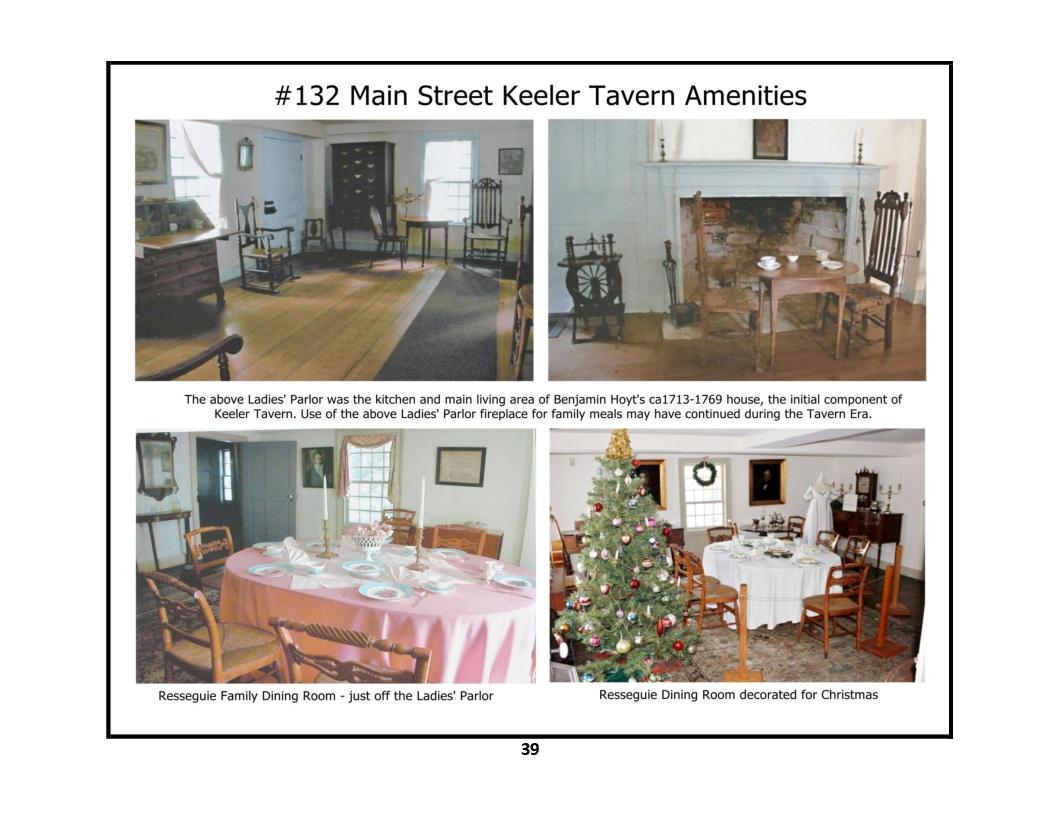
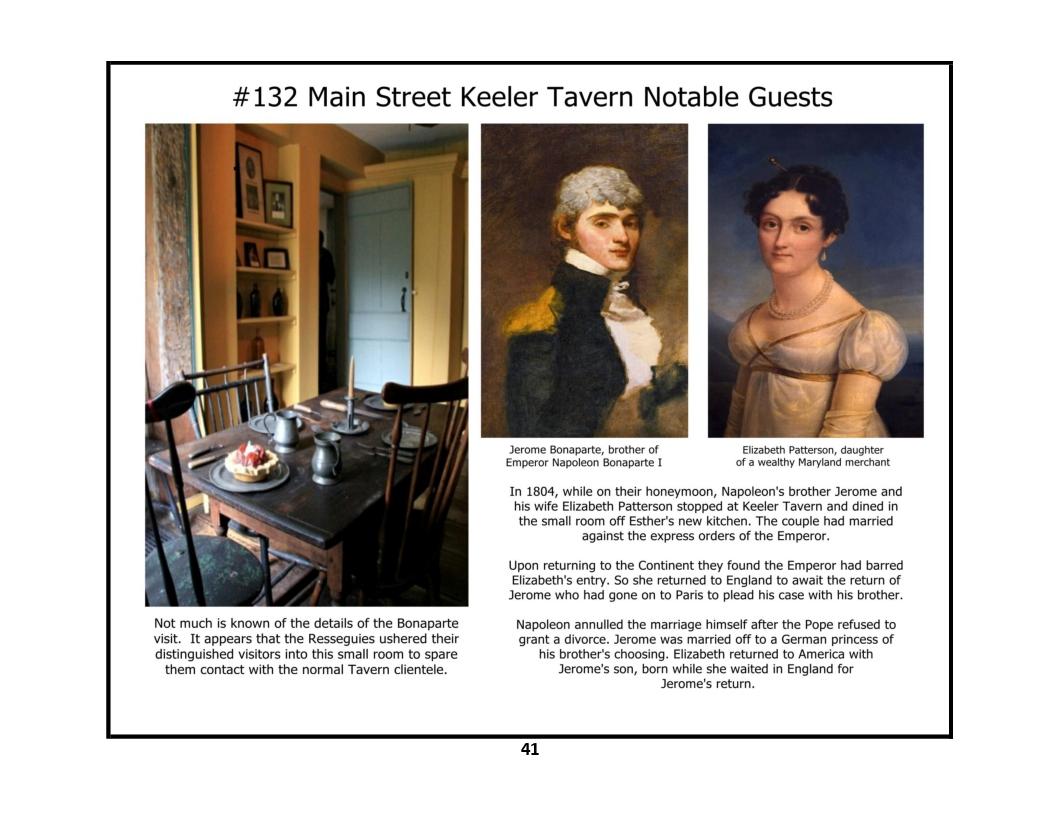
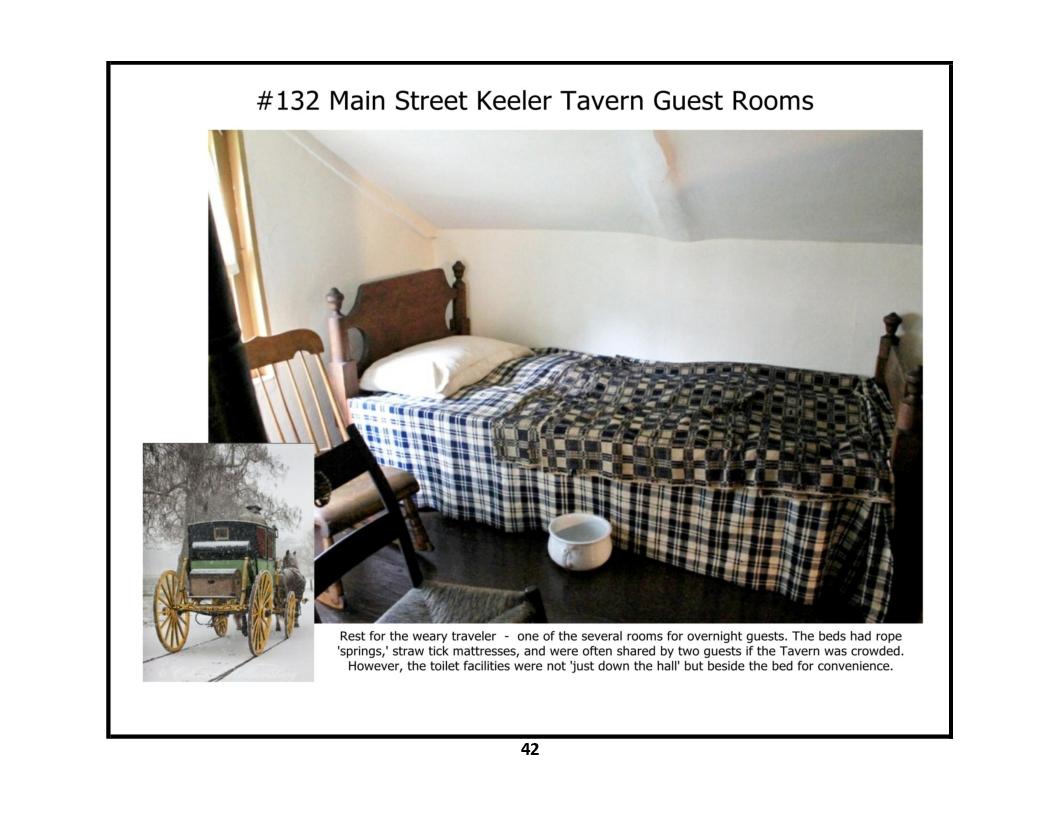
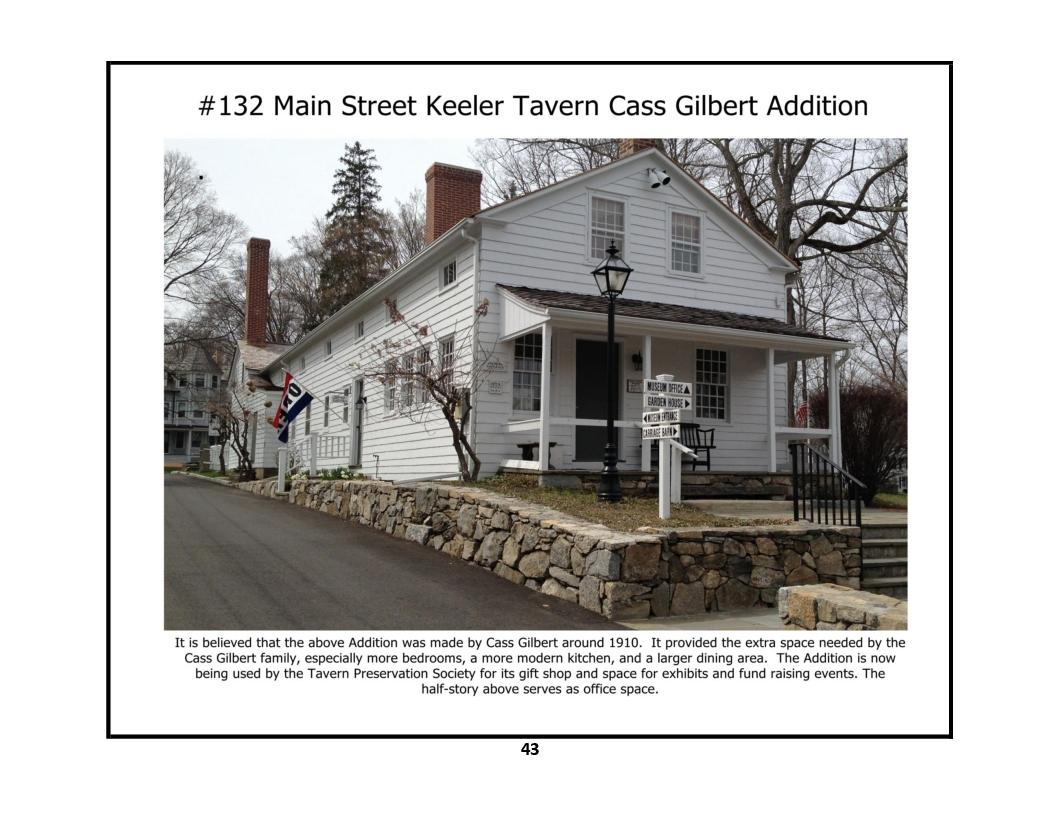
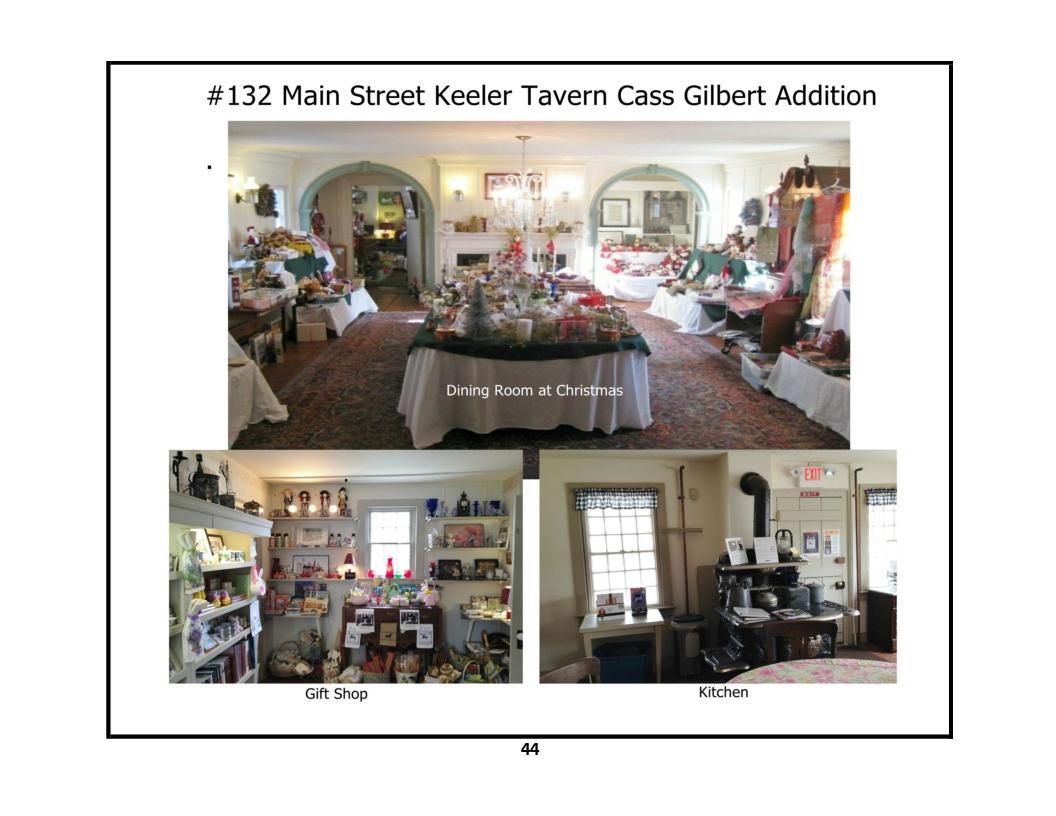
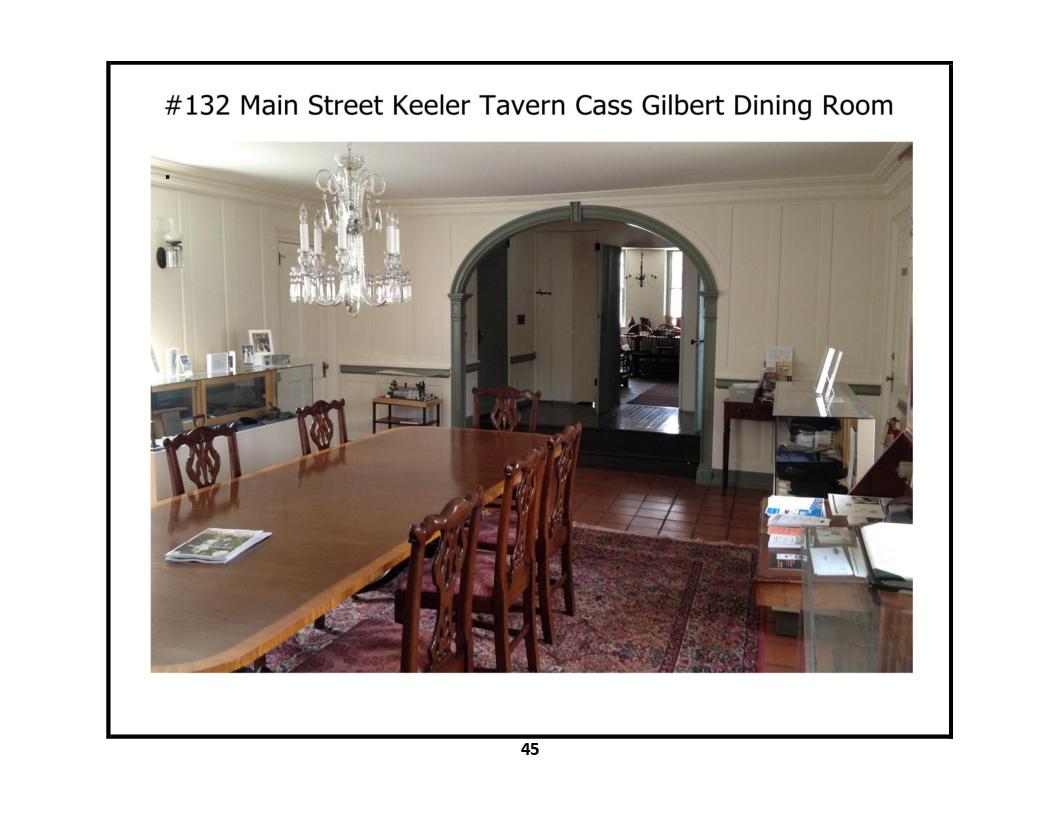
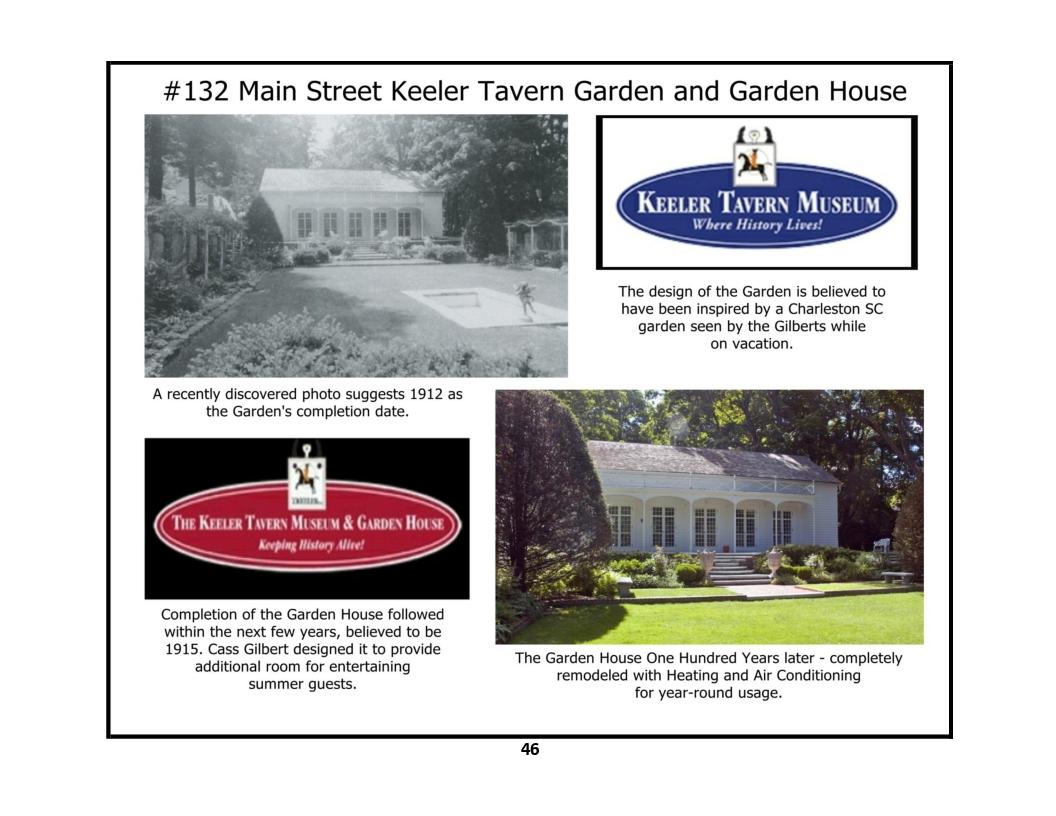
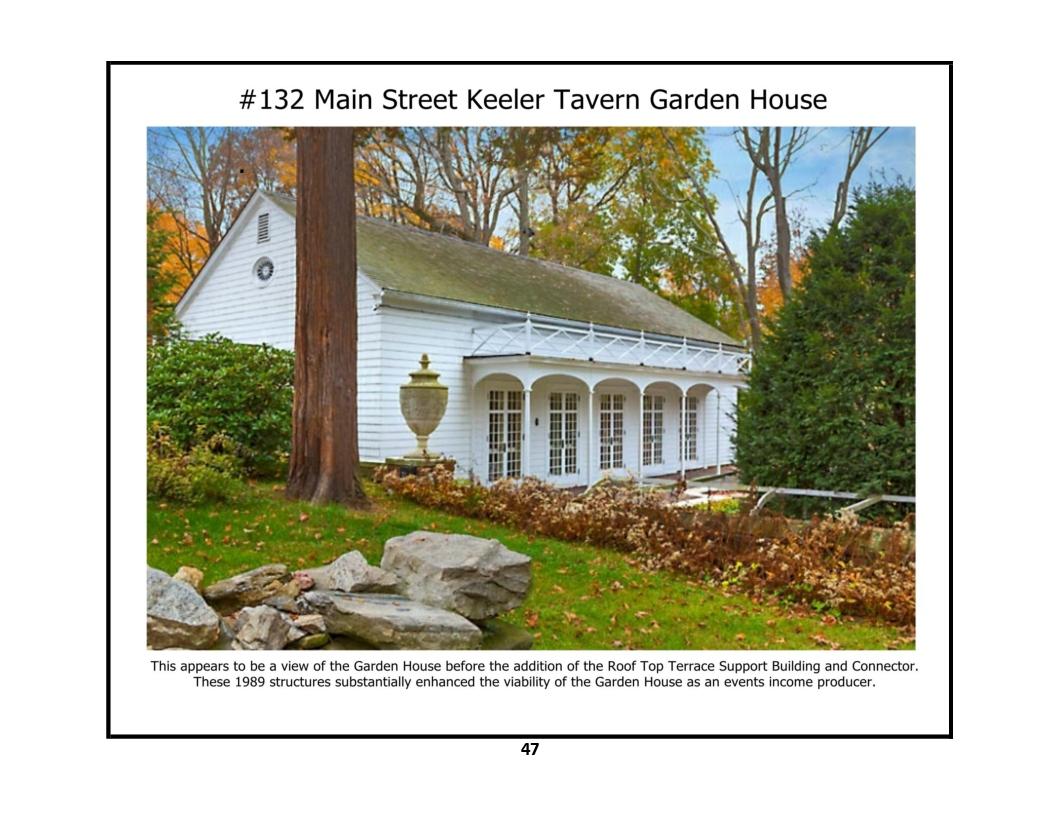
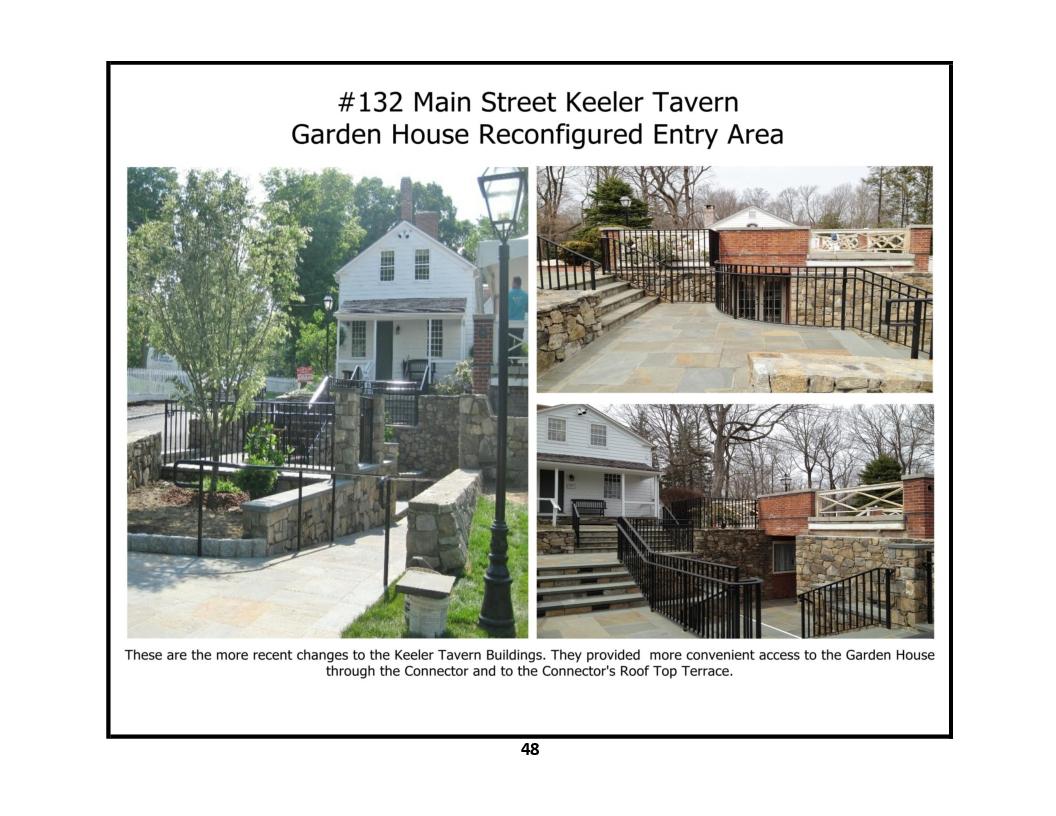
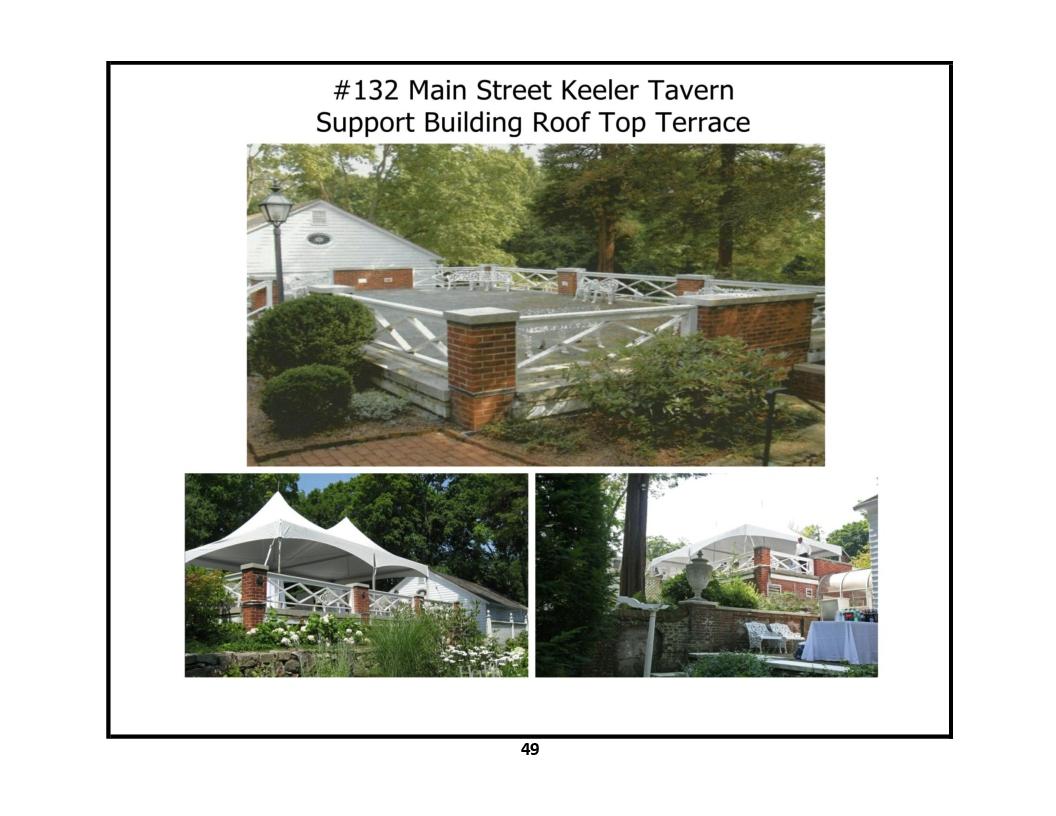
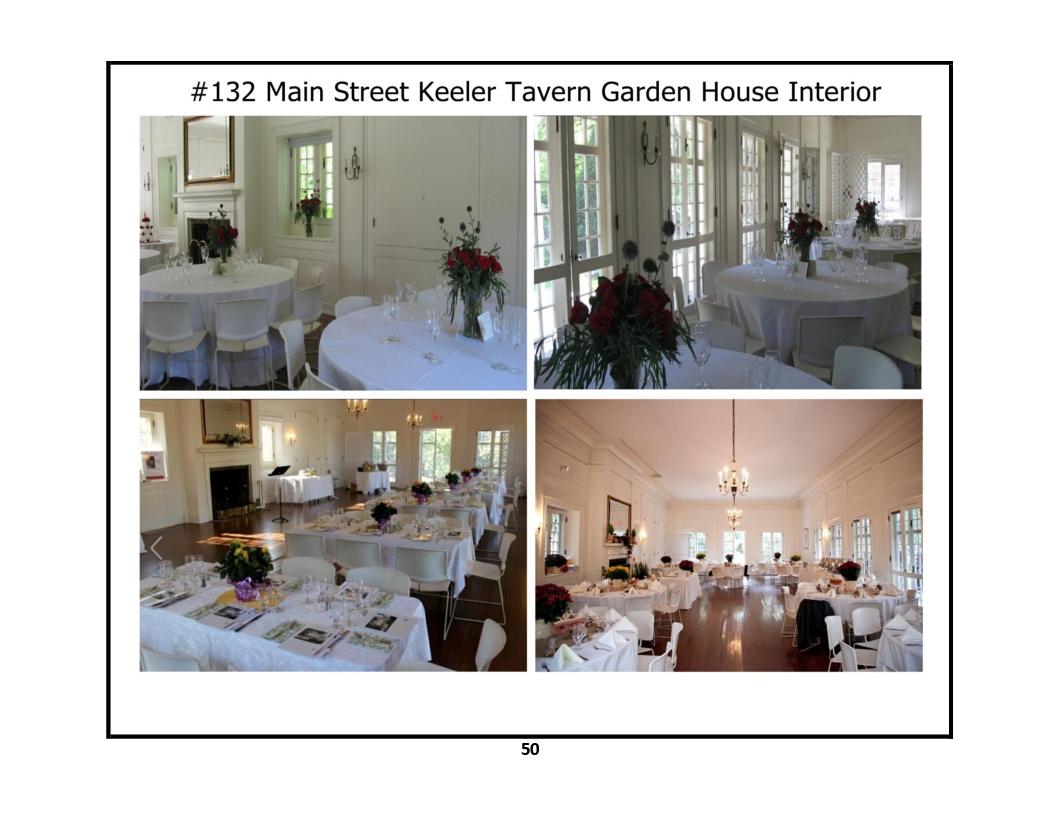
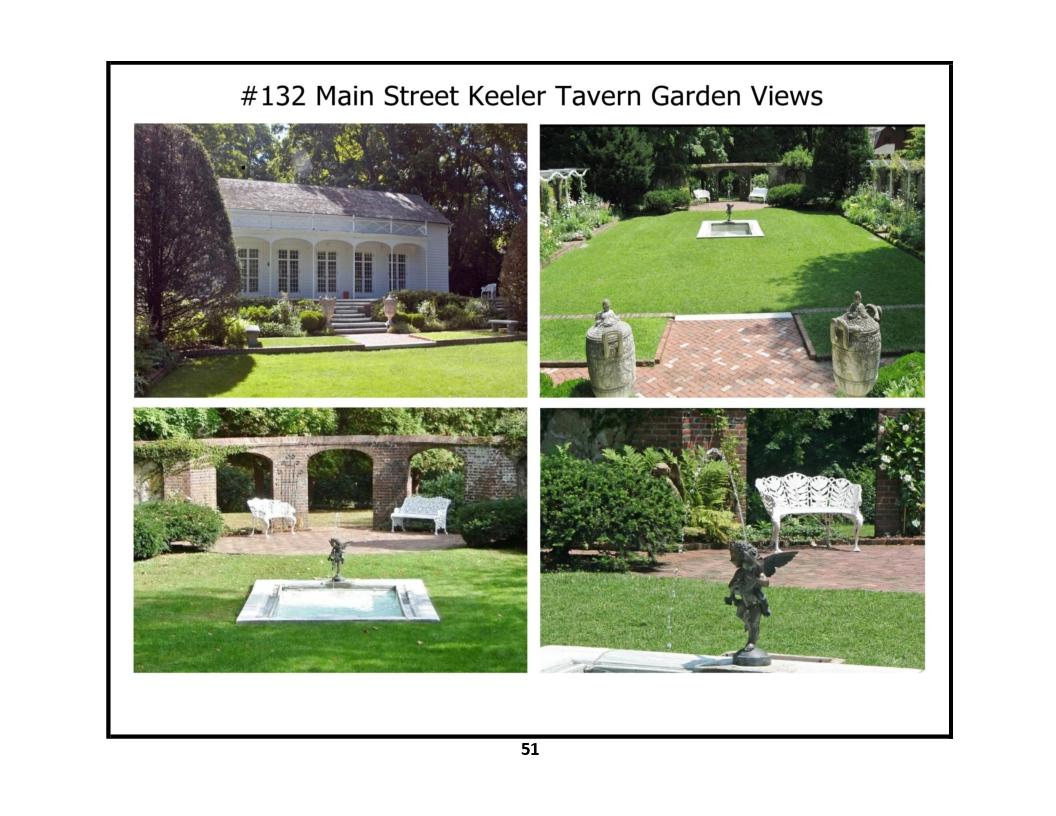
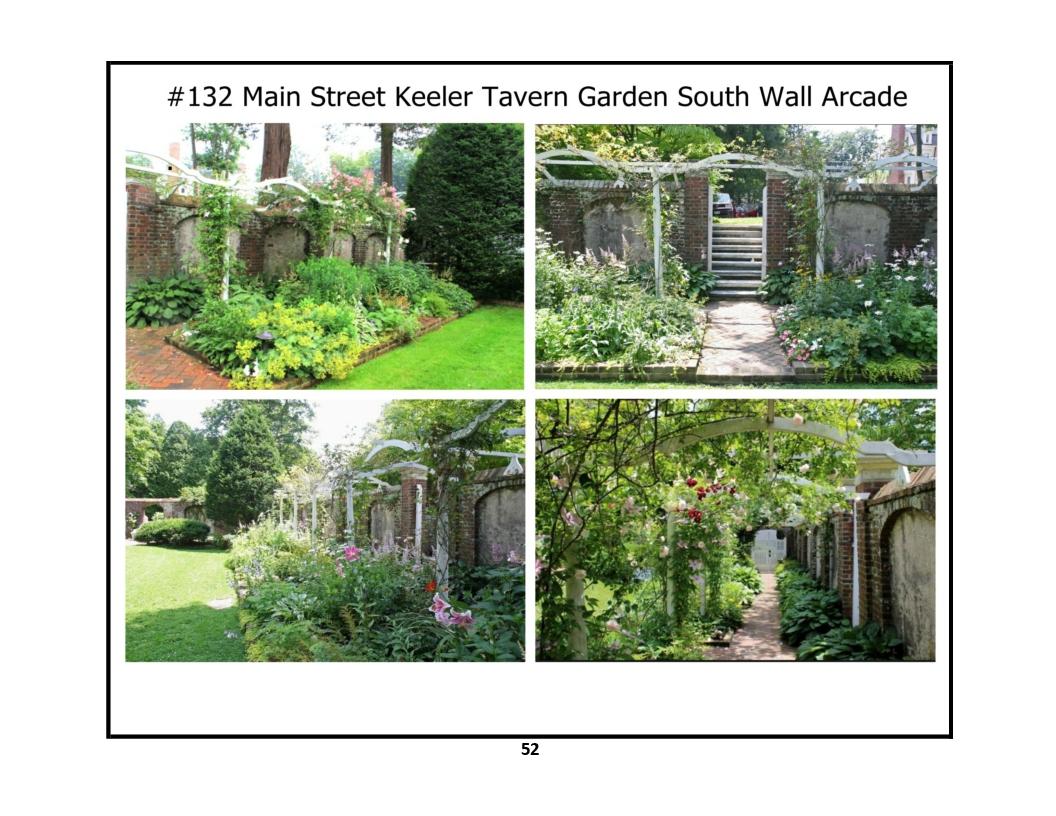
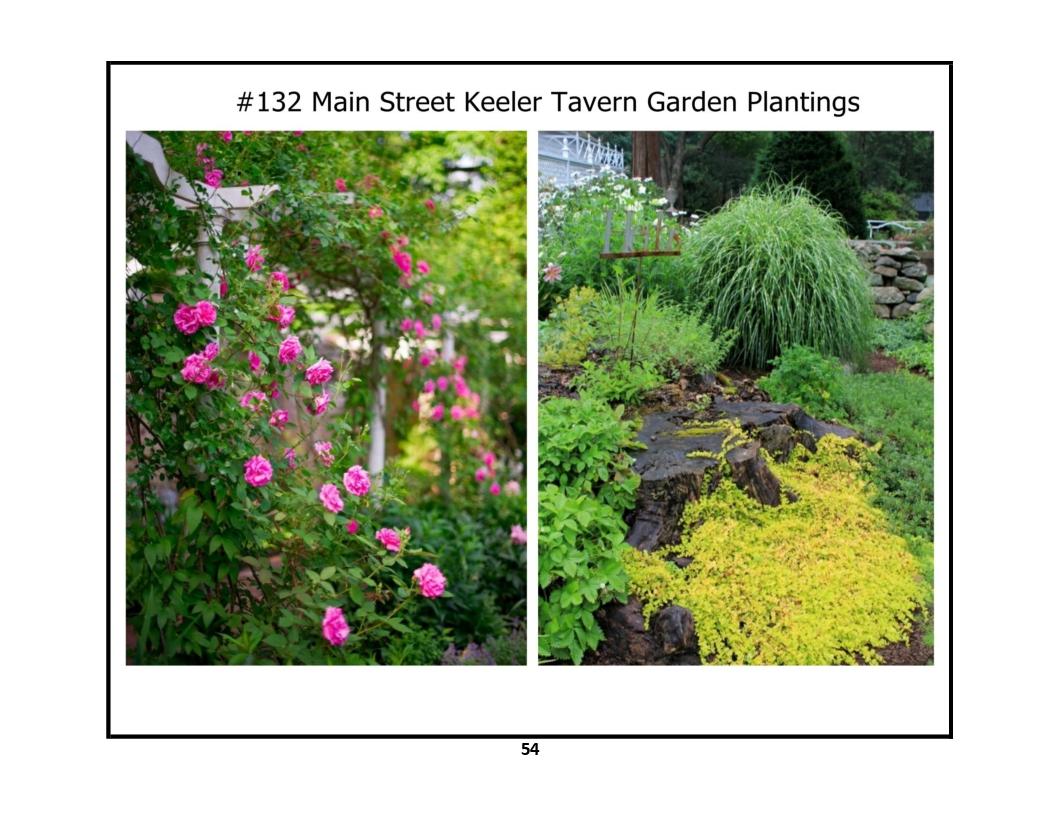
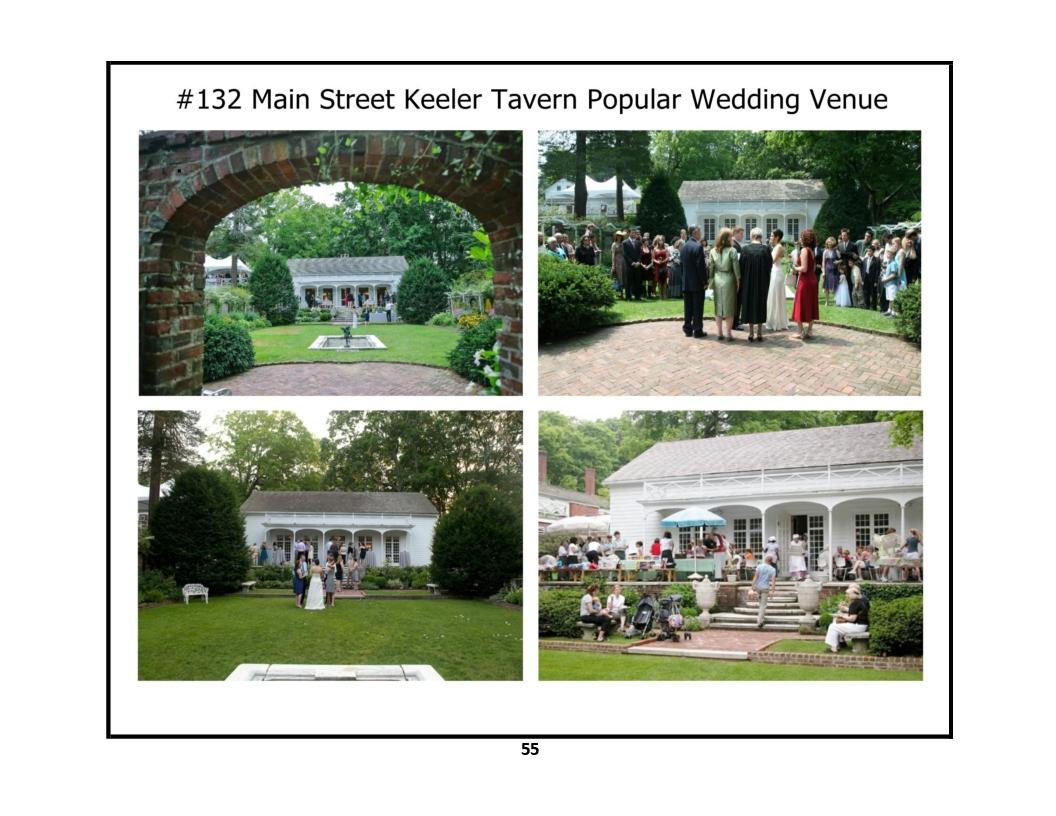
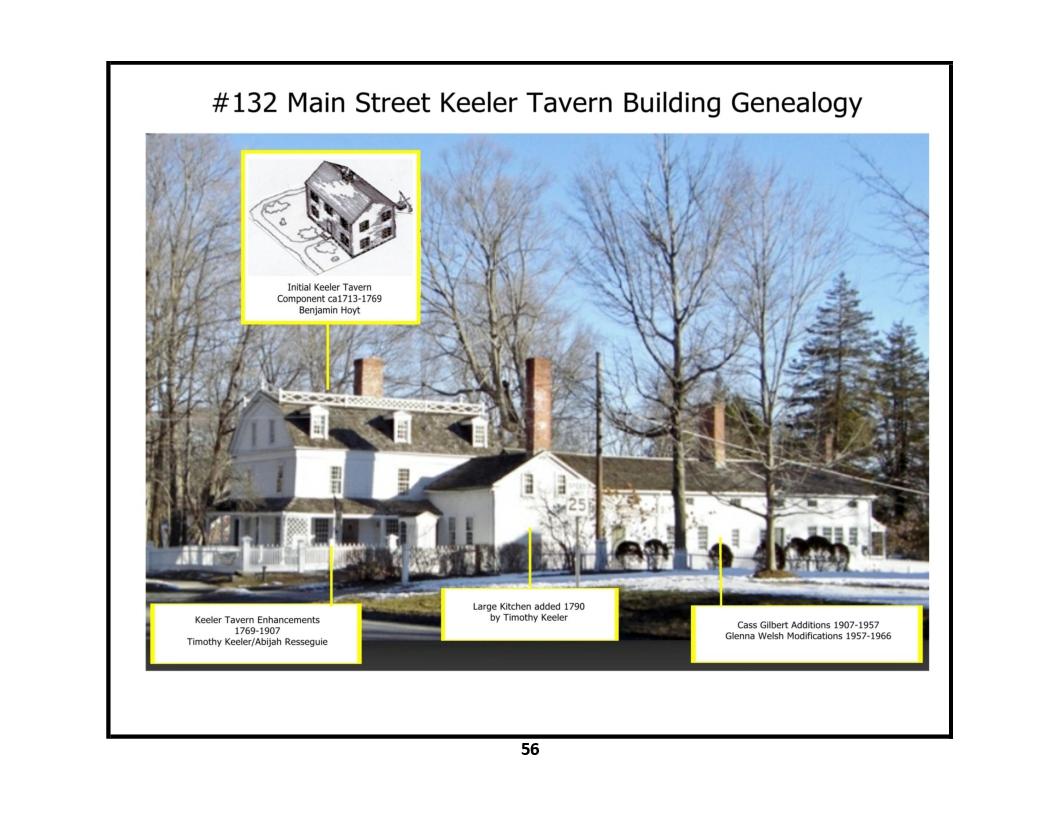
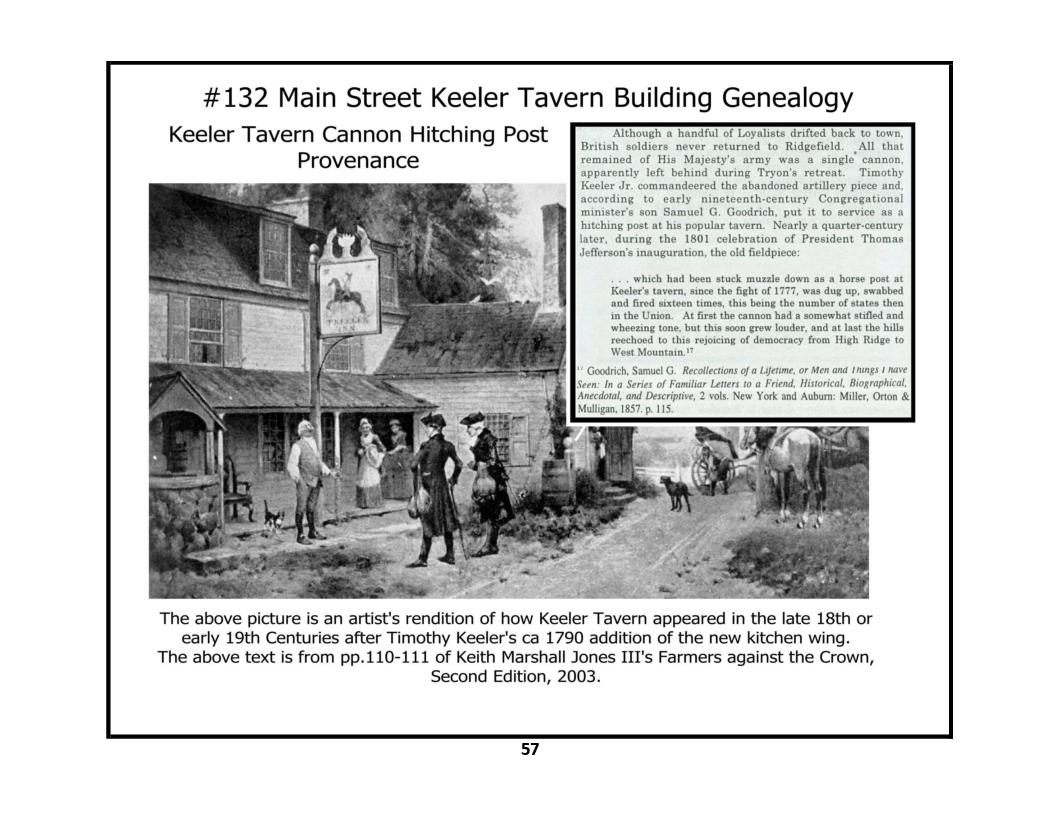
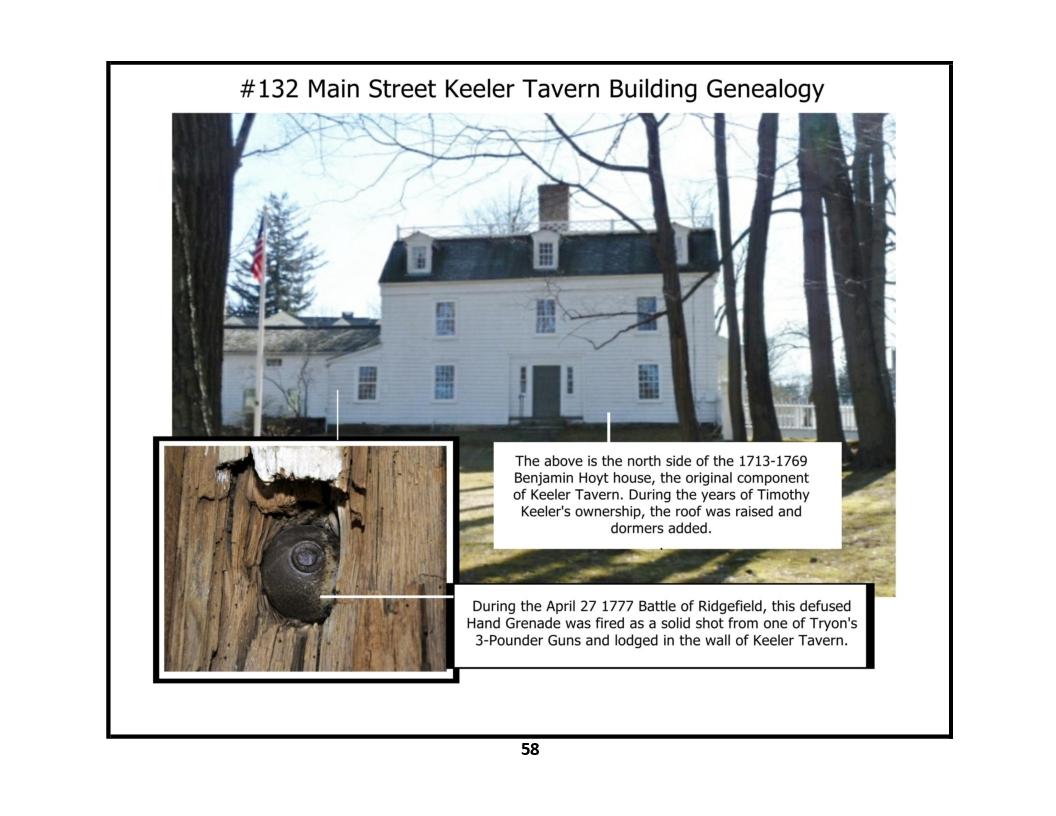
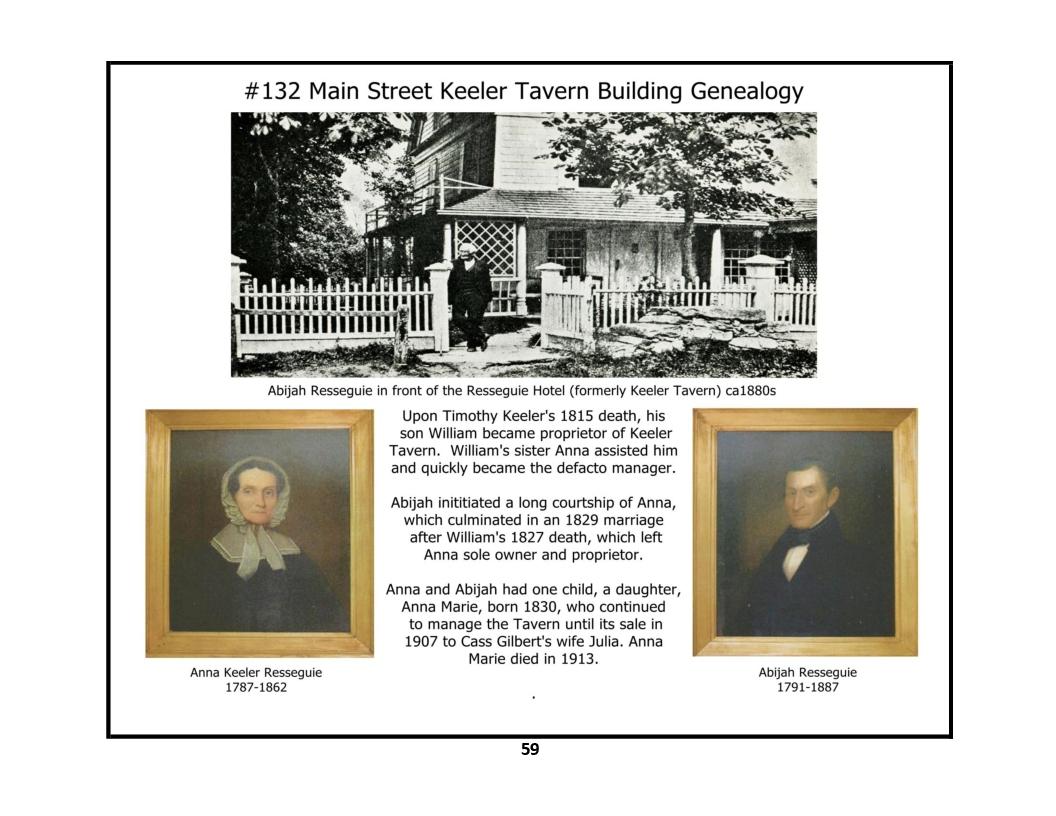
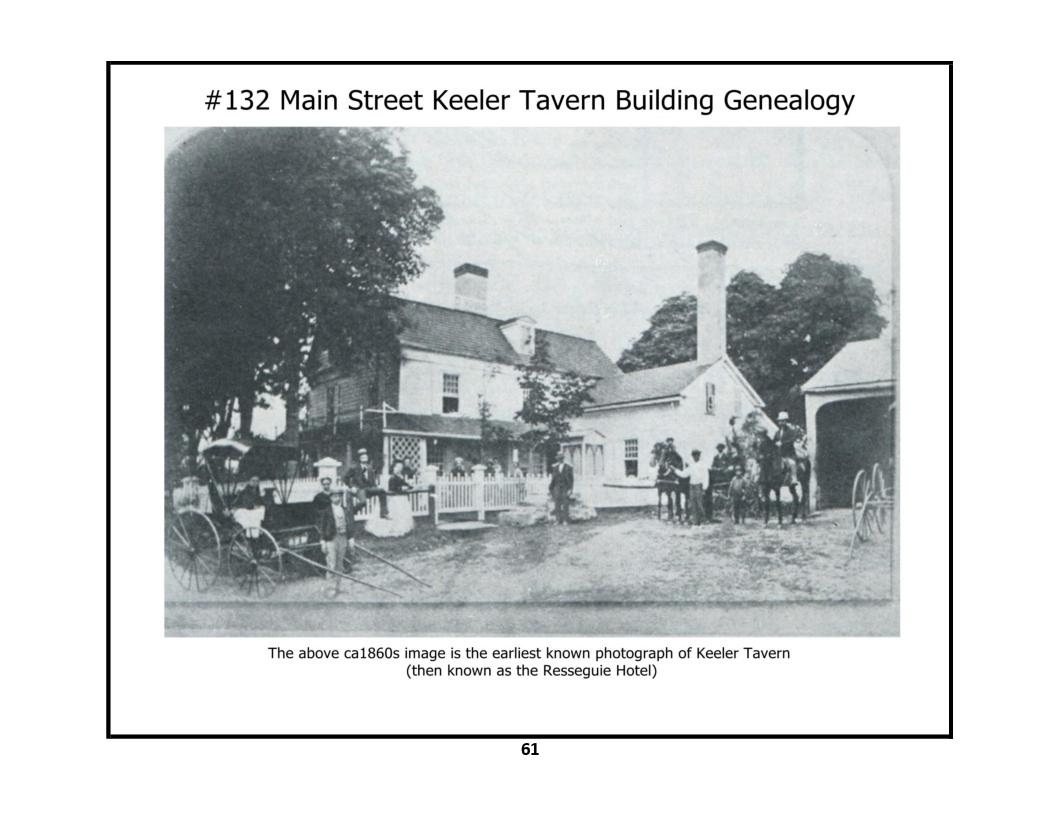
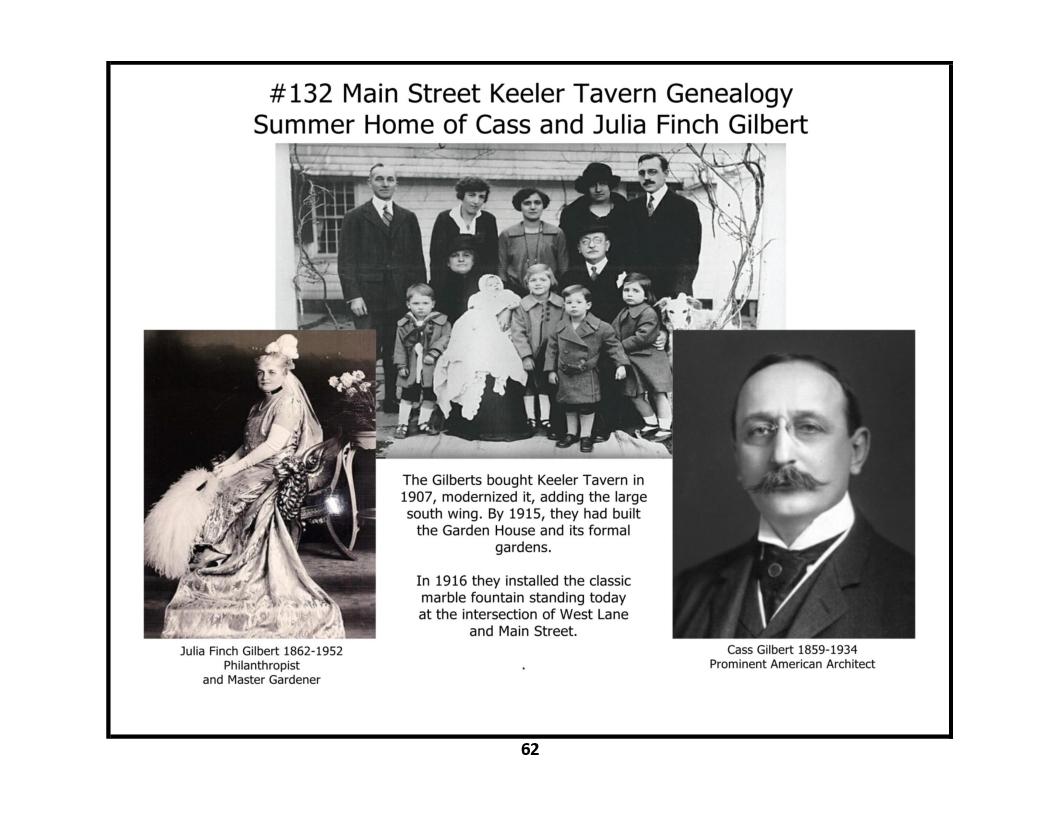
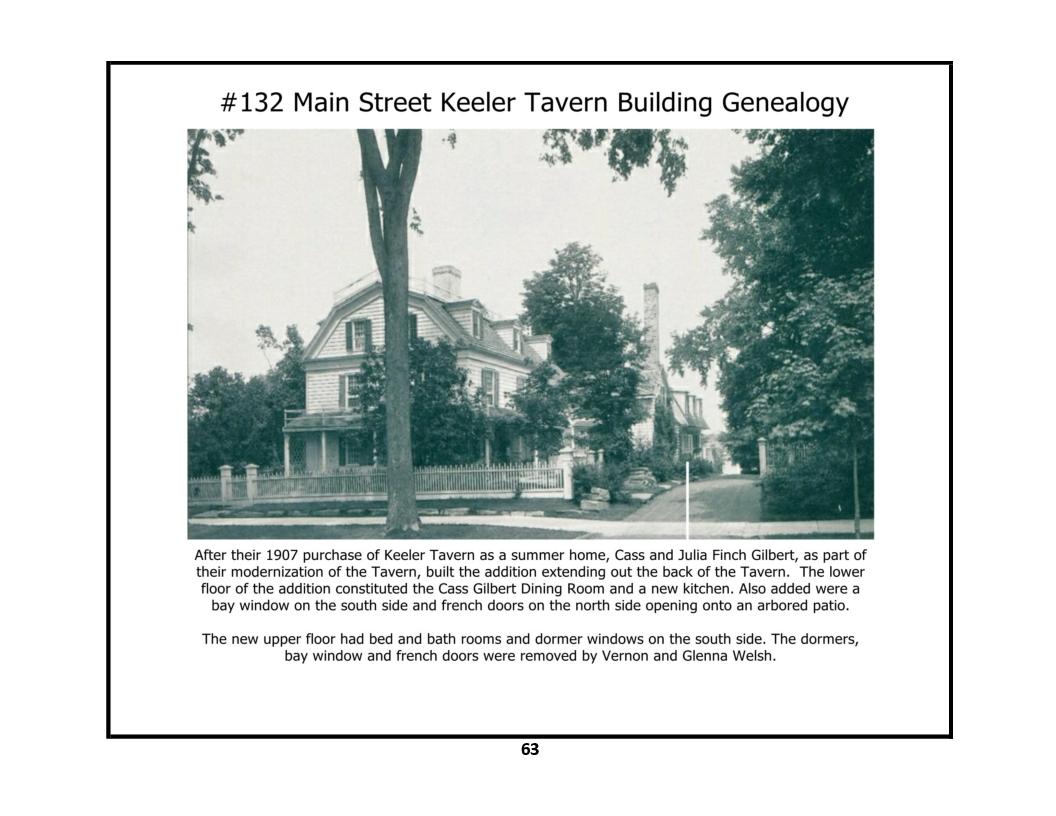
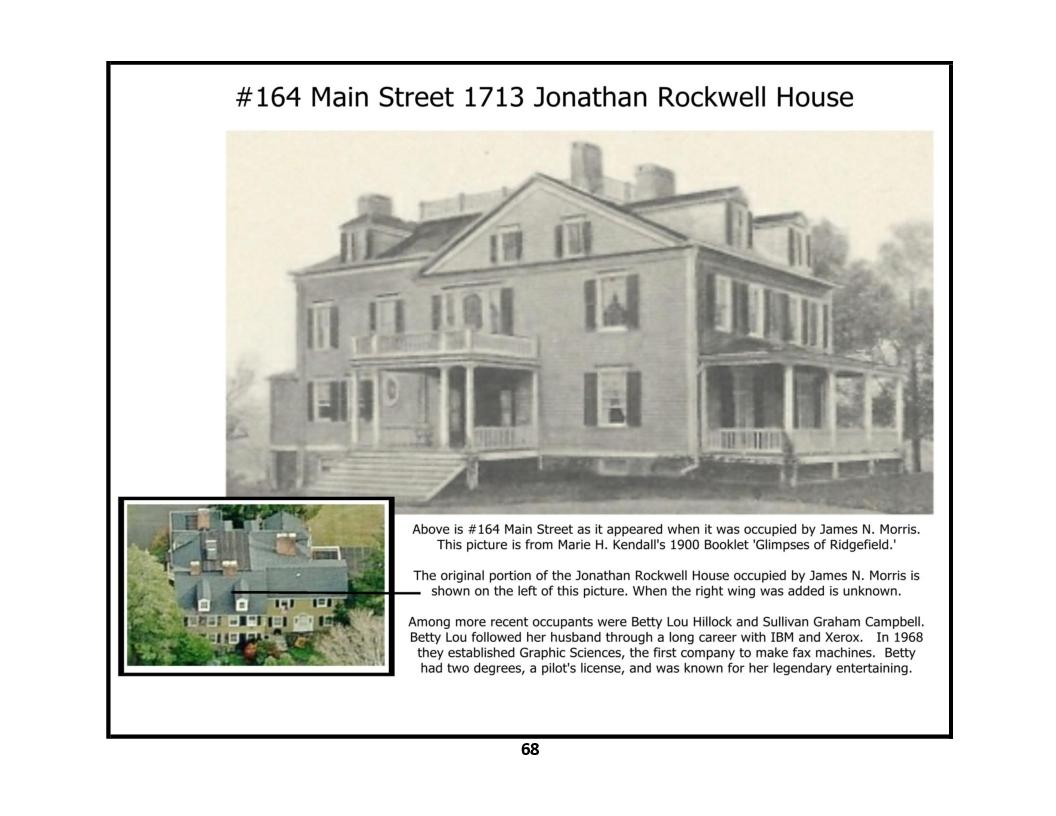
132 Main Street - photos 1, 2, 3, 4, 5, 6, 7, 8, 9, 10, 11, 12, 13, 14, 15, 16, 17, 18, 19, 20, 21, 22, 23, 24, 25, 26, 27, 28, 29, 30, 31
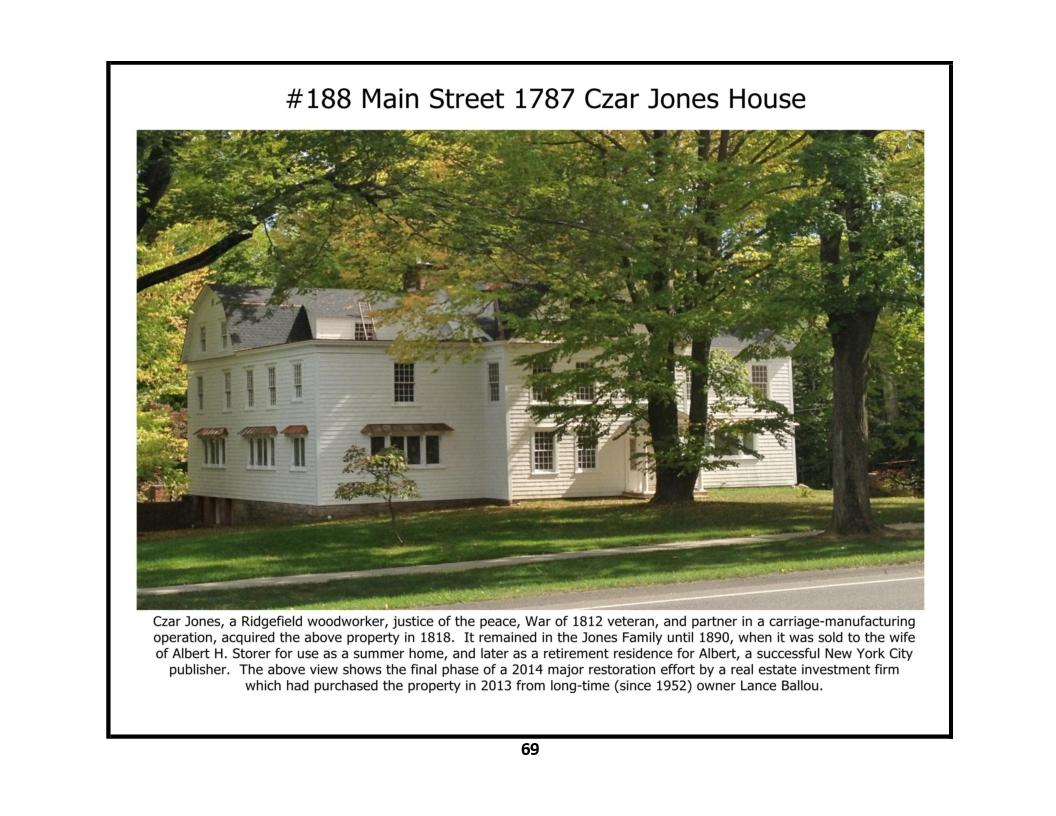
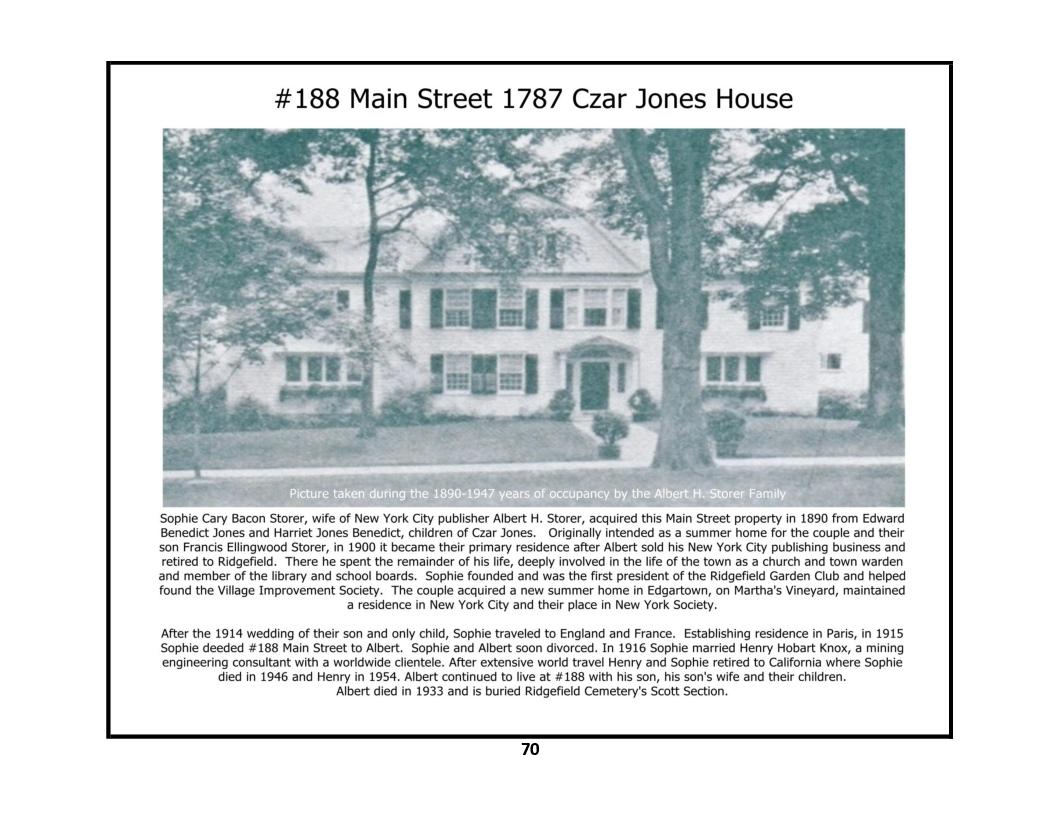
188 Main Street - photos 1, 2, 3
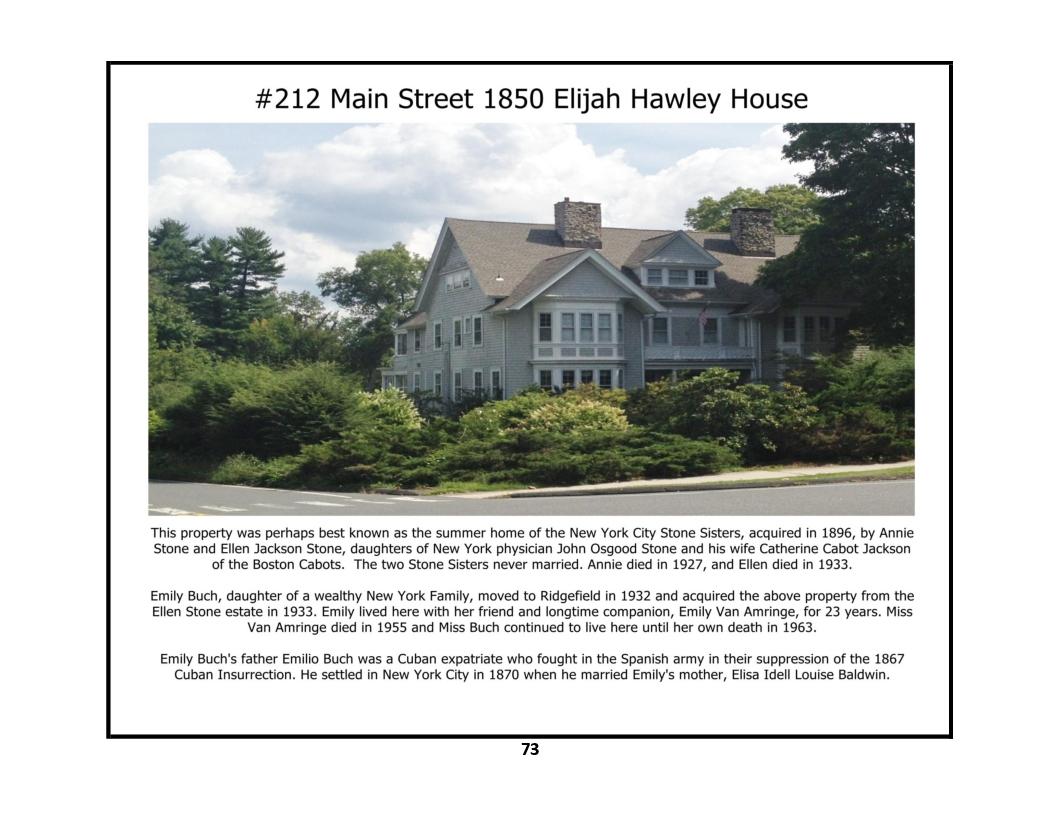
212 Main Street - photos 1, 2, 3
Street Level Views: South Street - East Side - Branchville Road
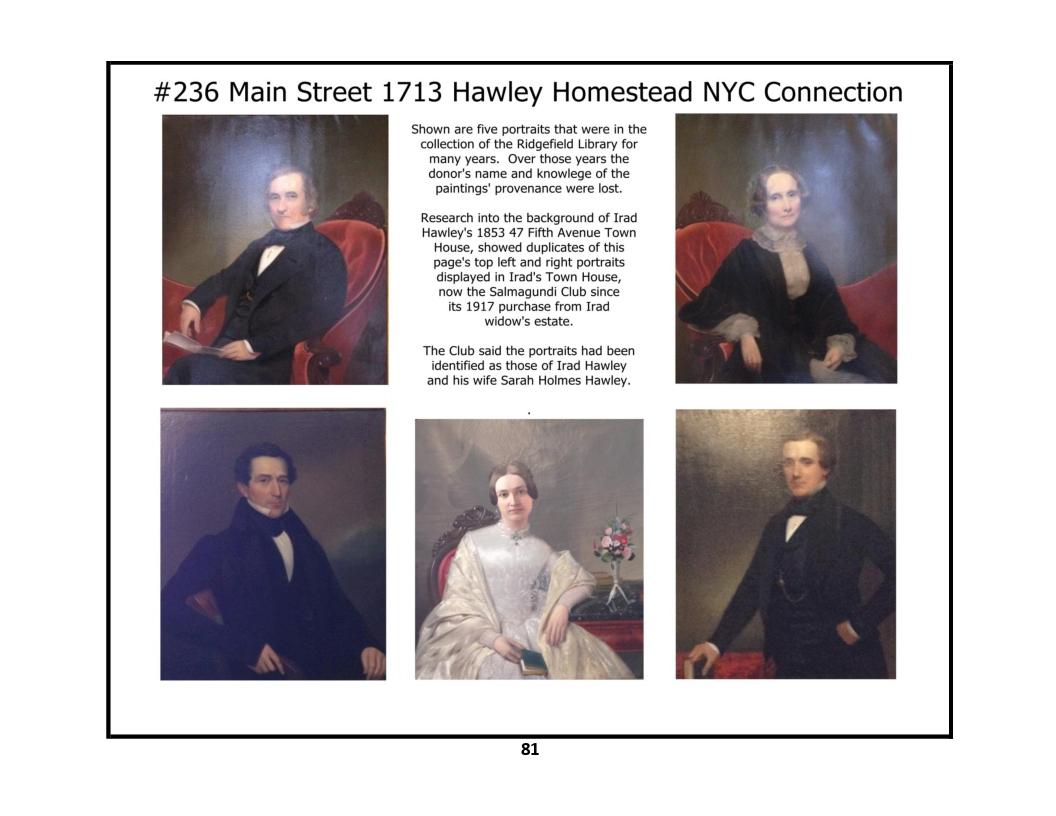
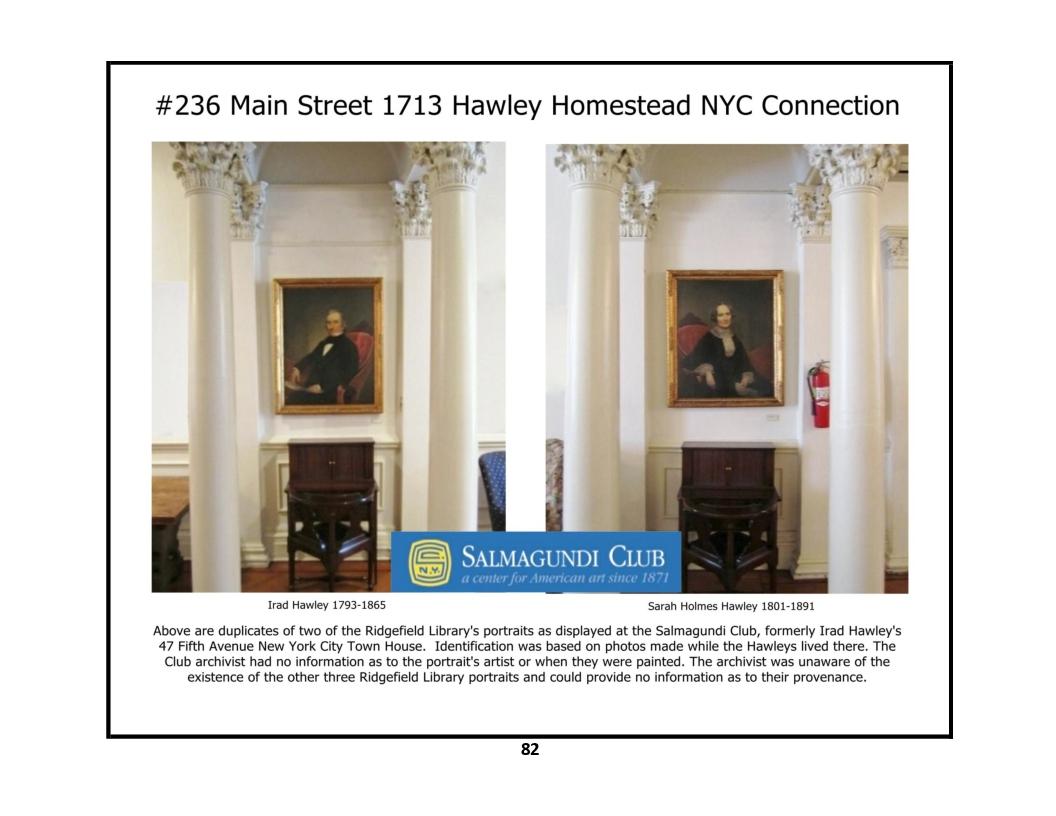
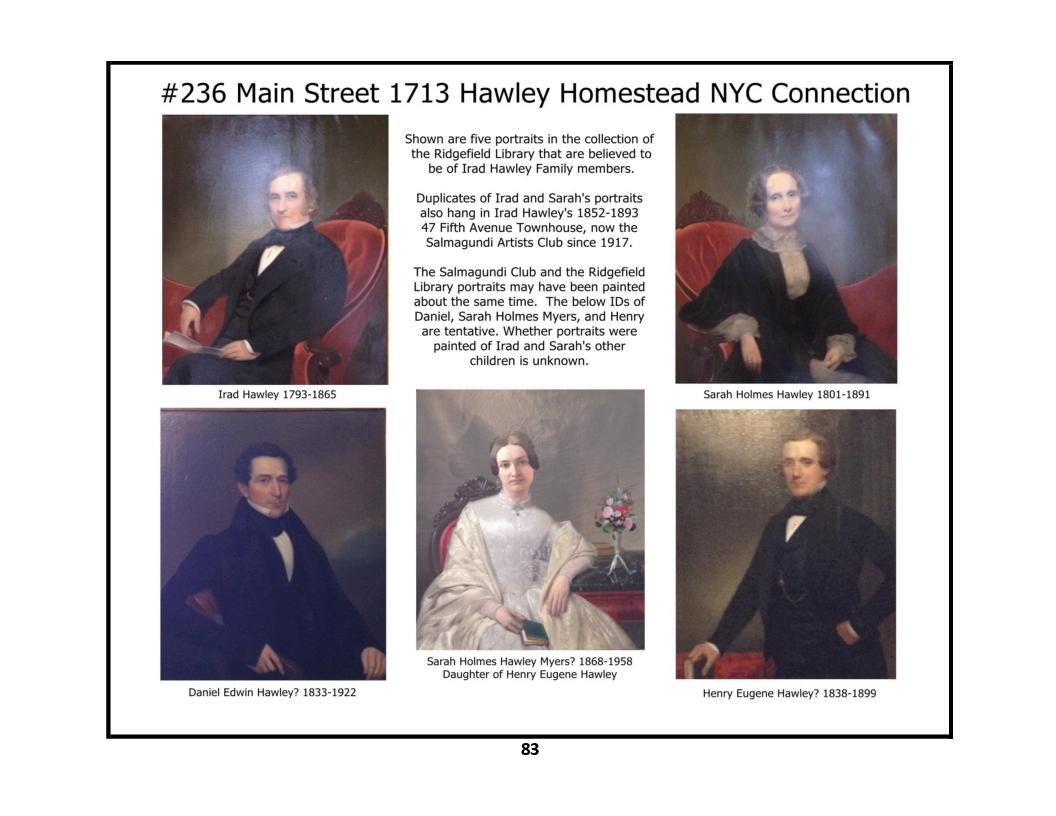
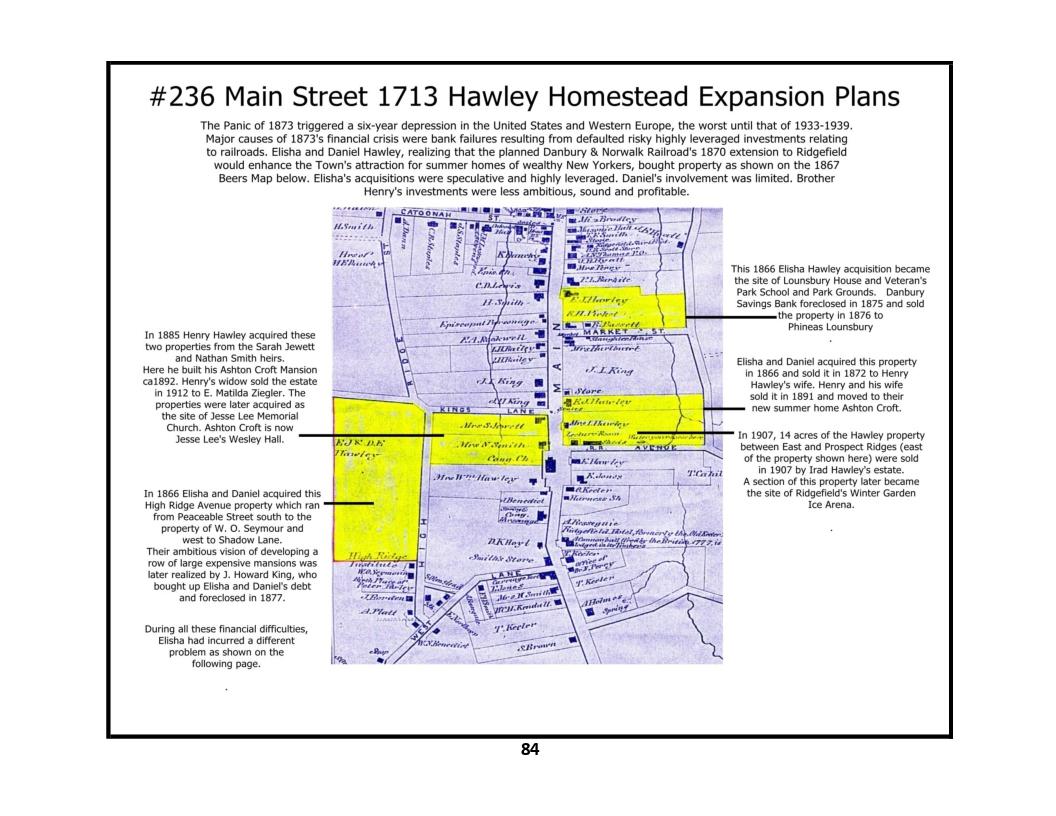
236 Main Street - photos 1, 2, 3, 4, 5, 6, 7, 8, 9, 10
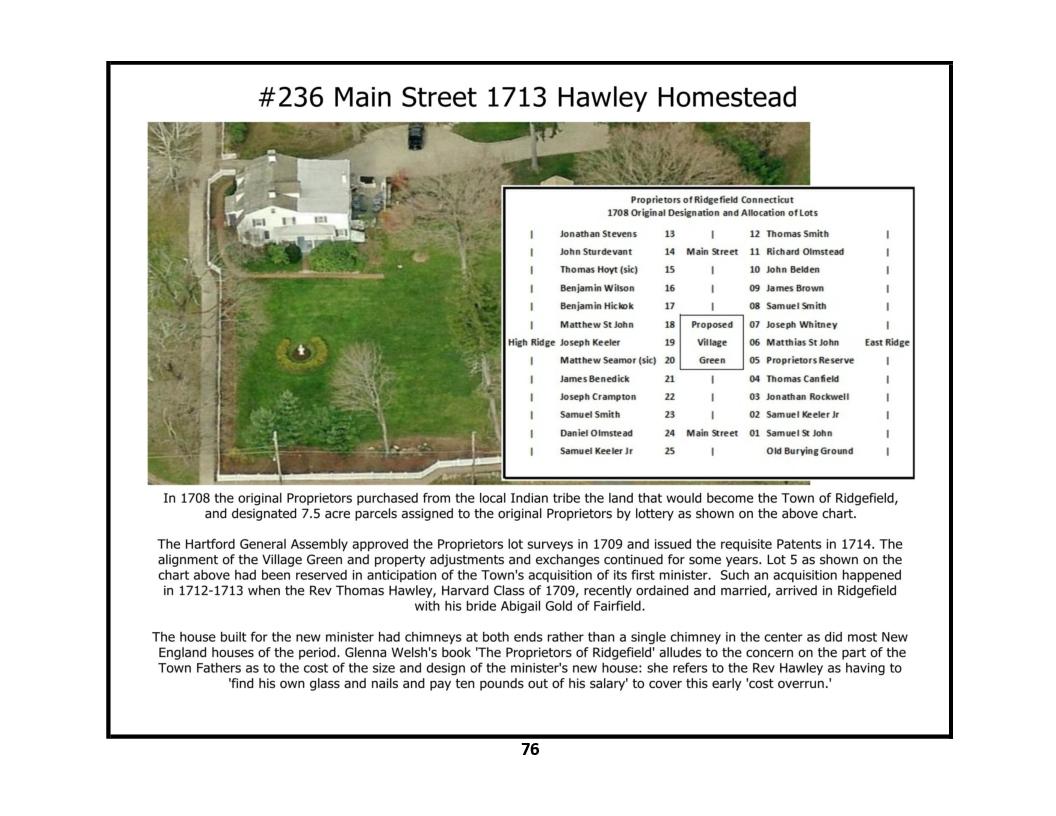
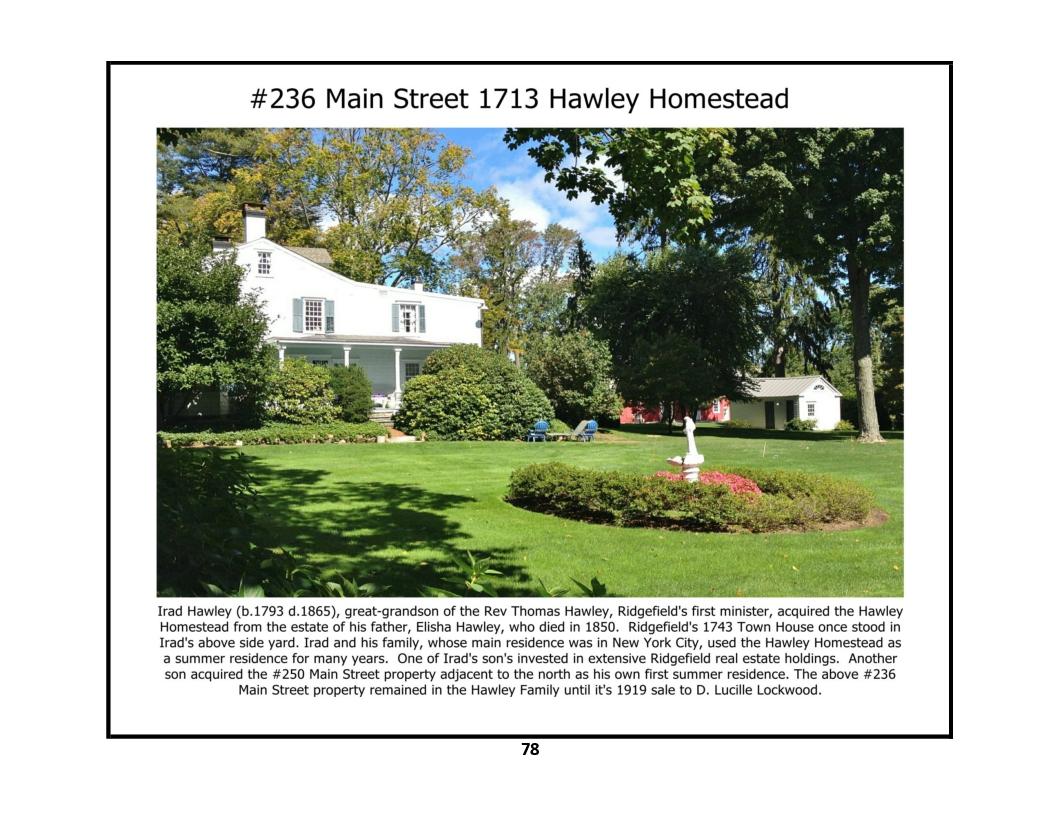
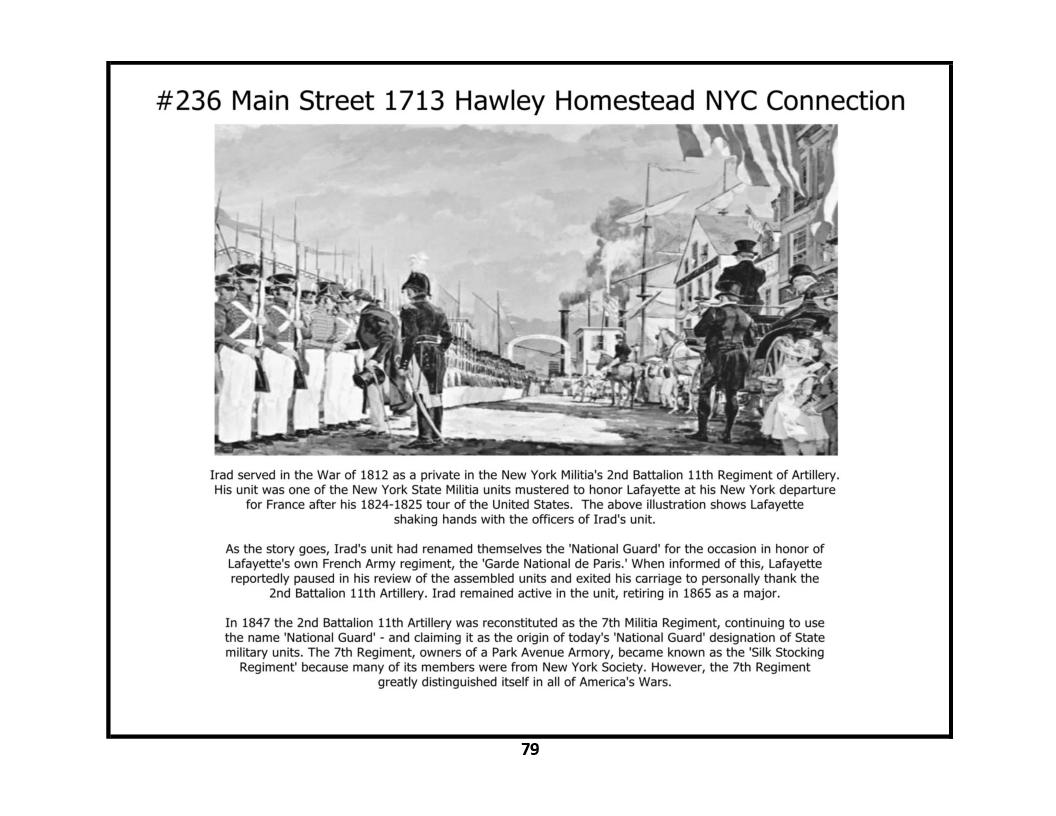
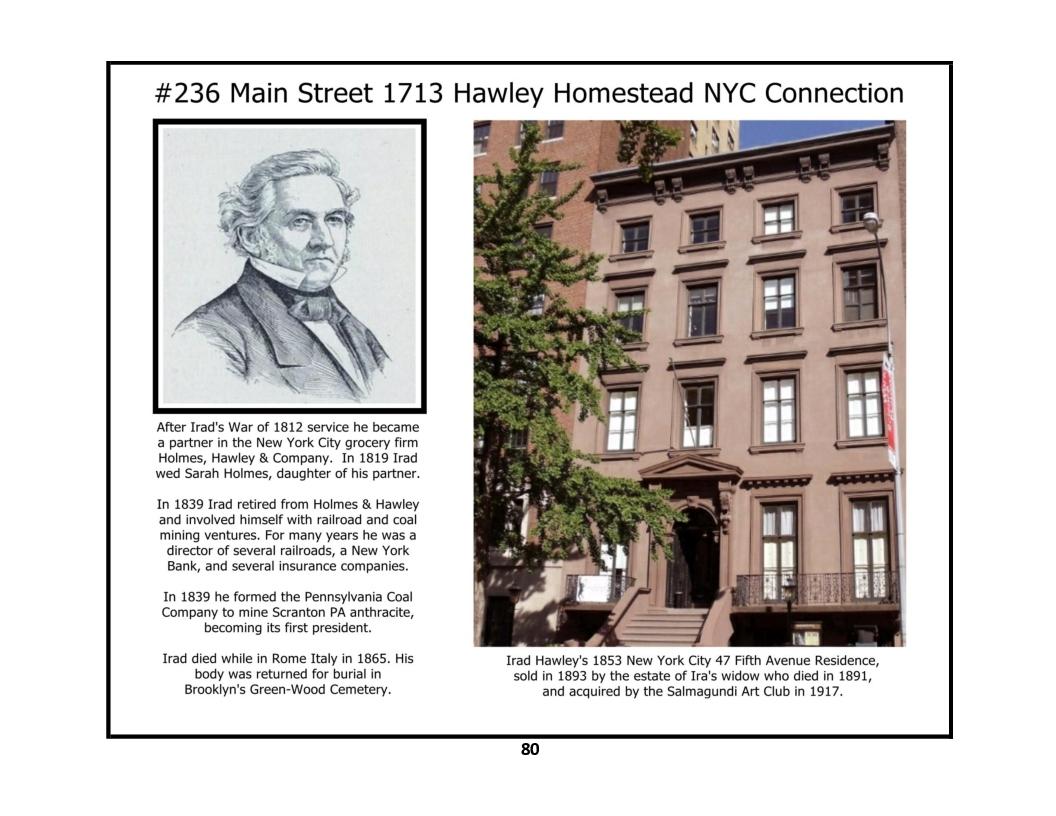
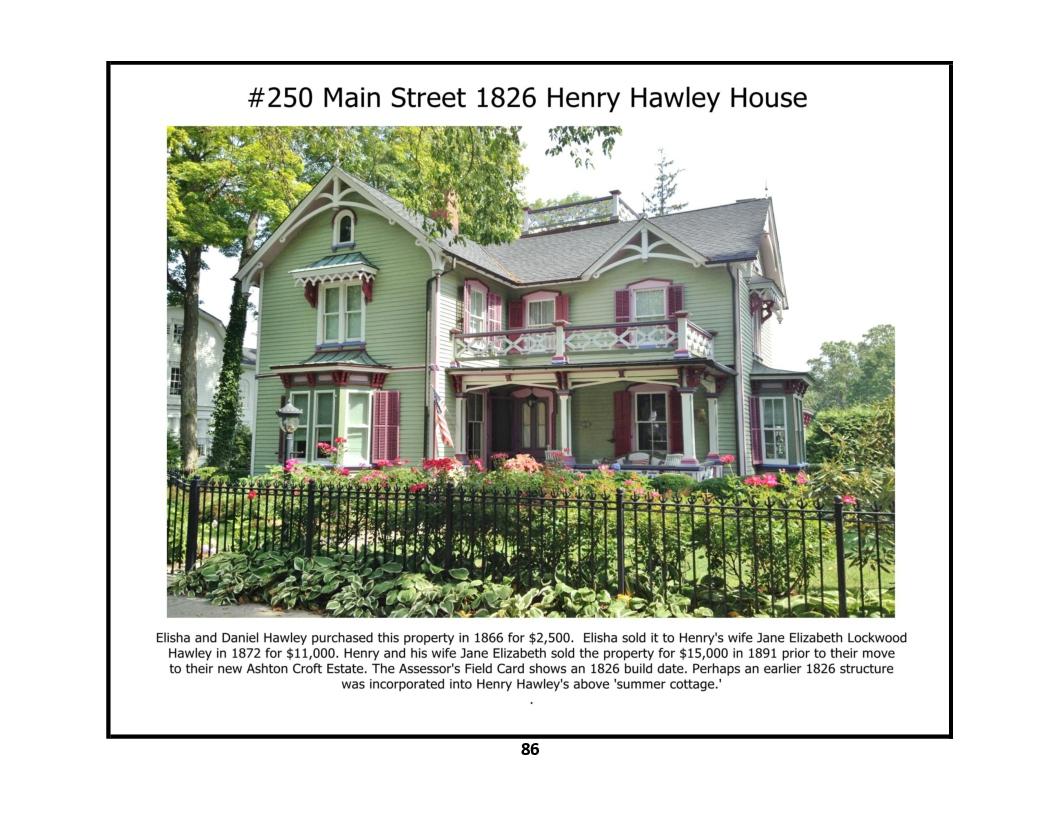
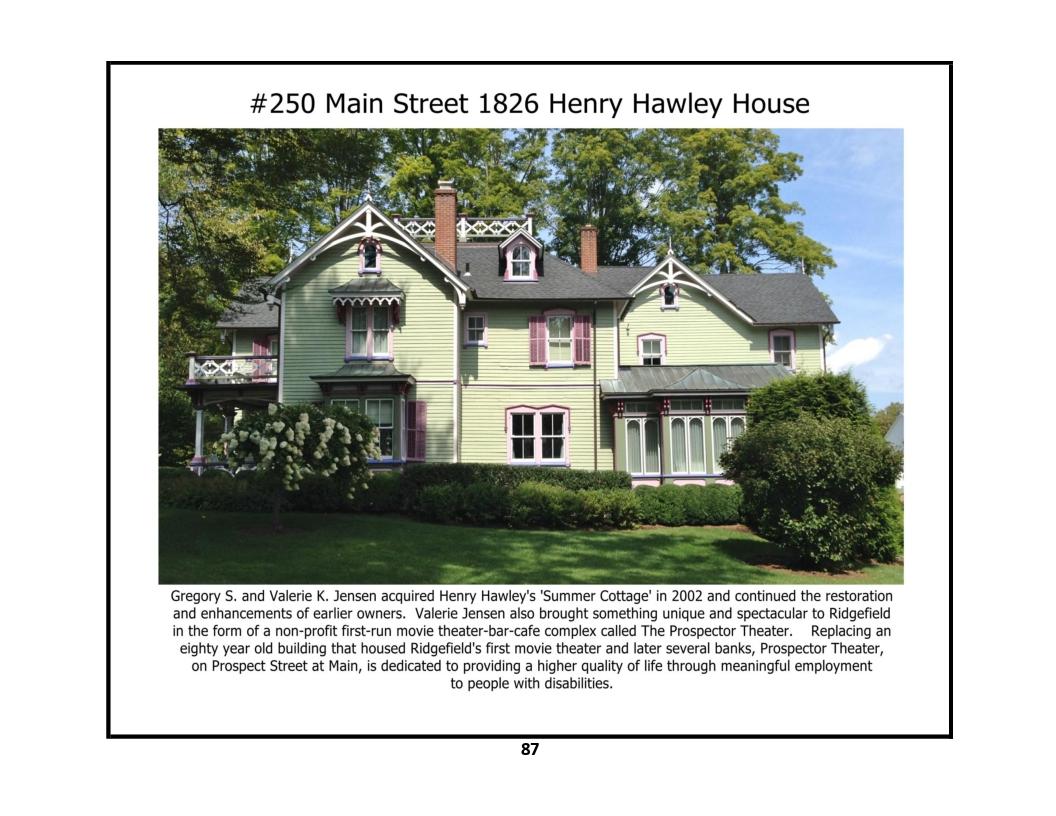
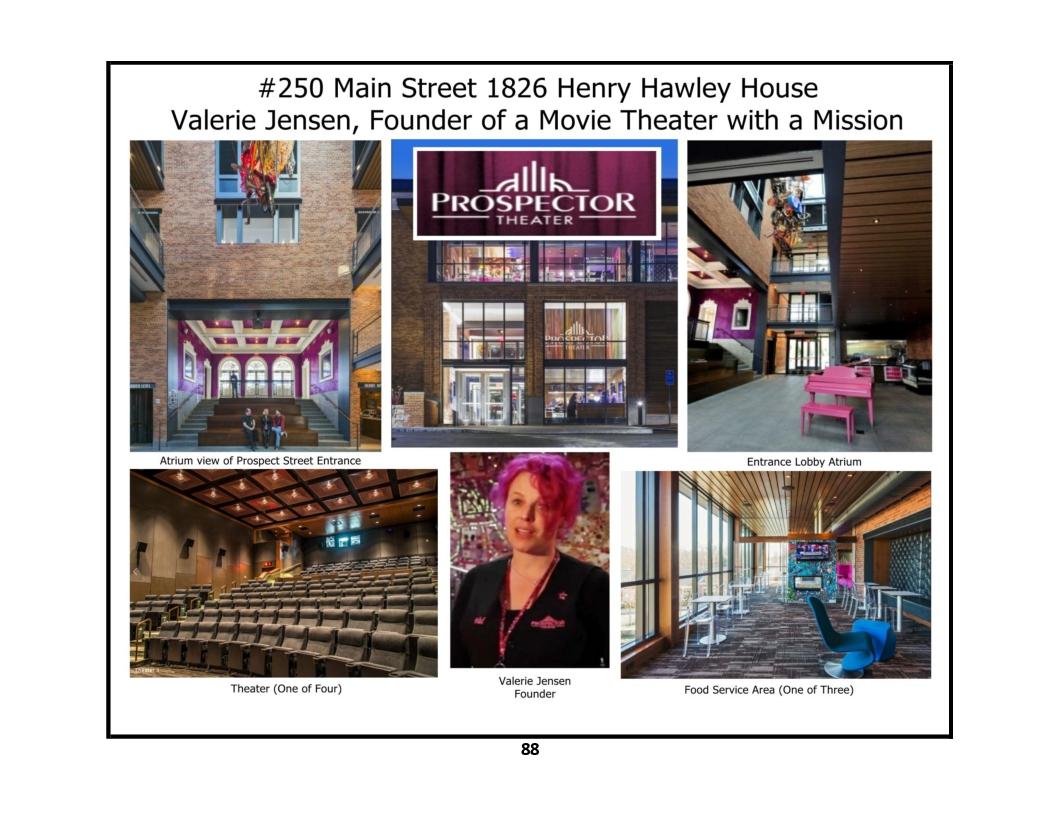
250 Main Street - photos 1, 2, 3
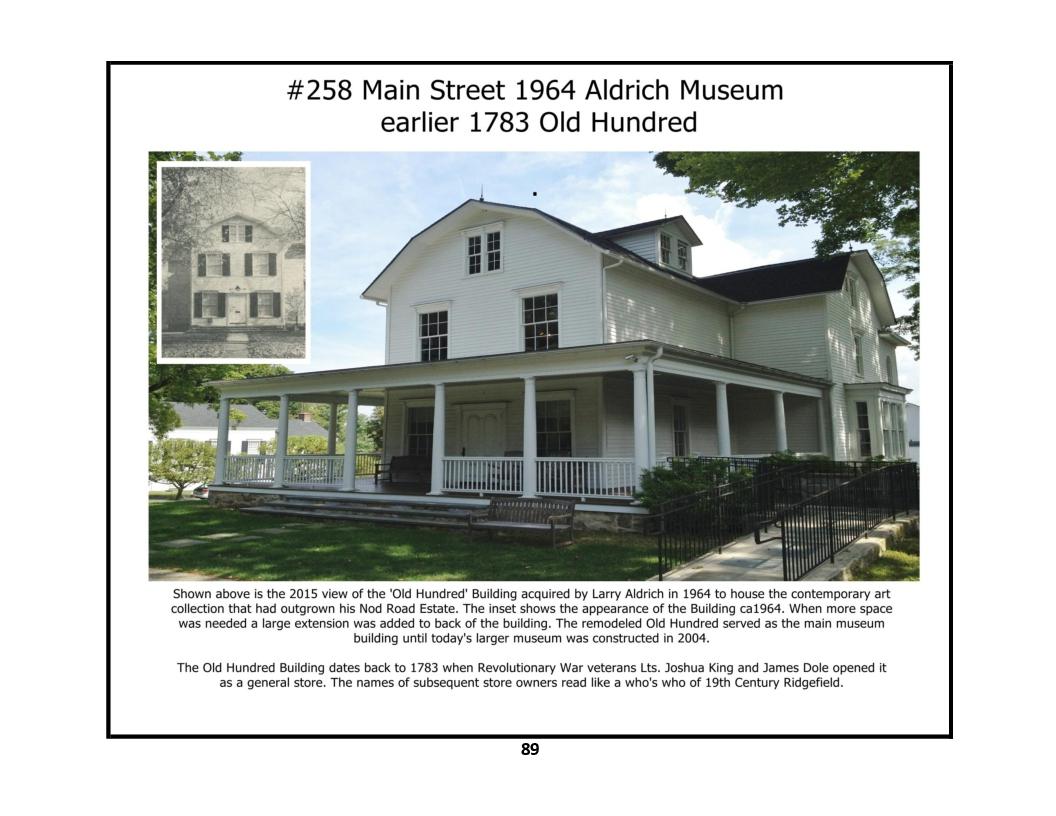
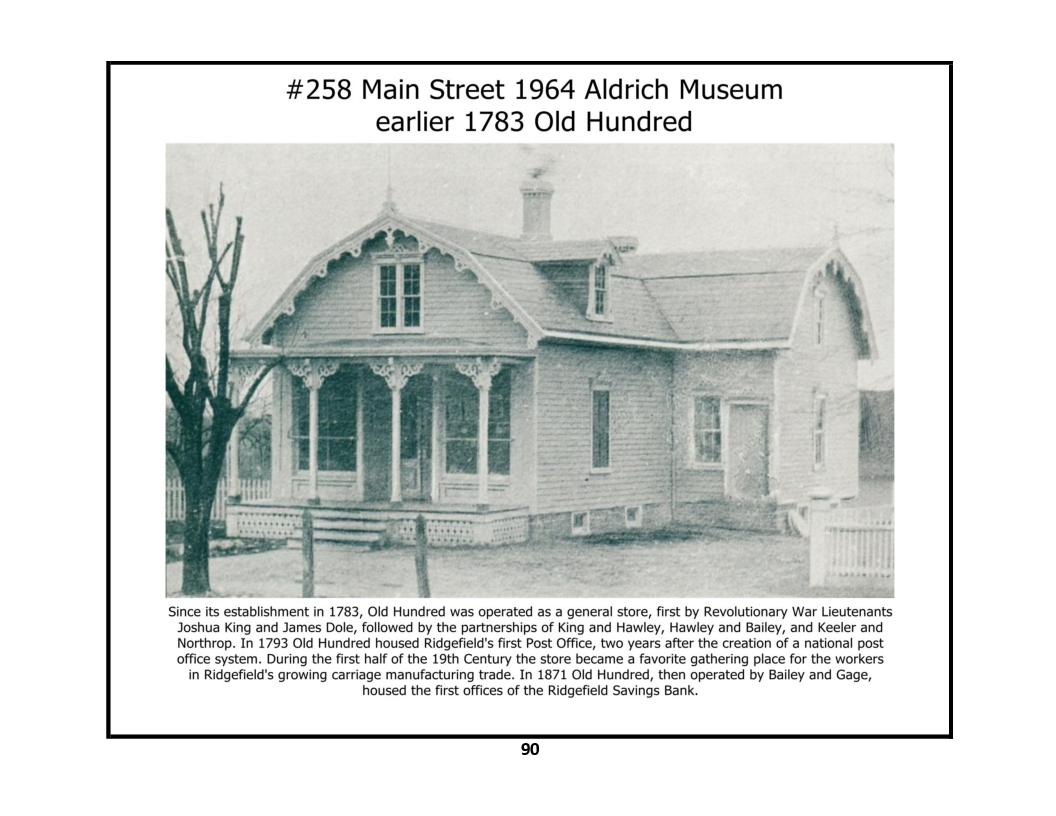
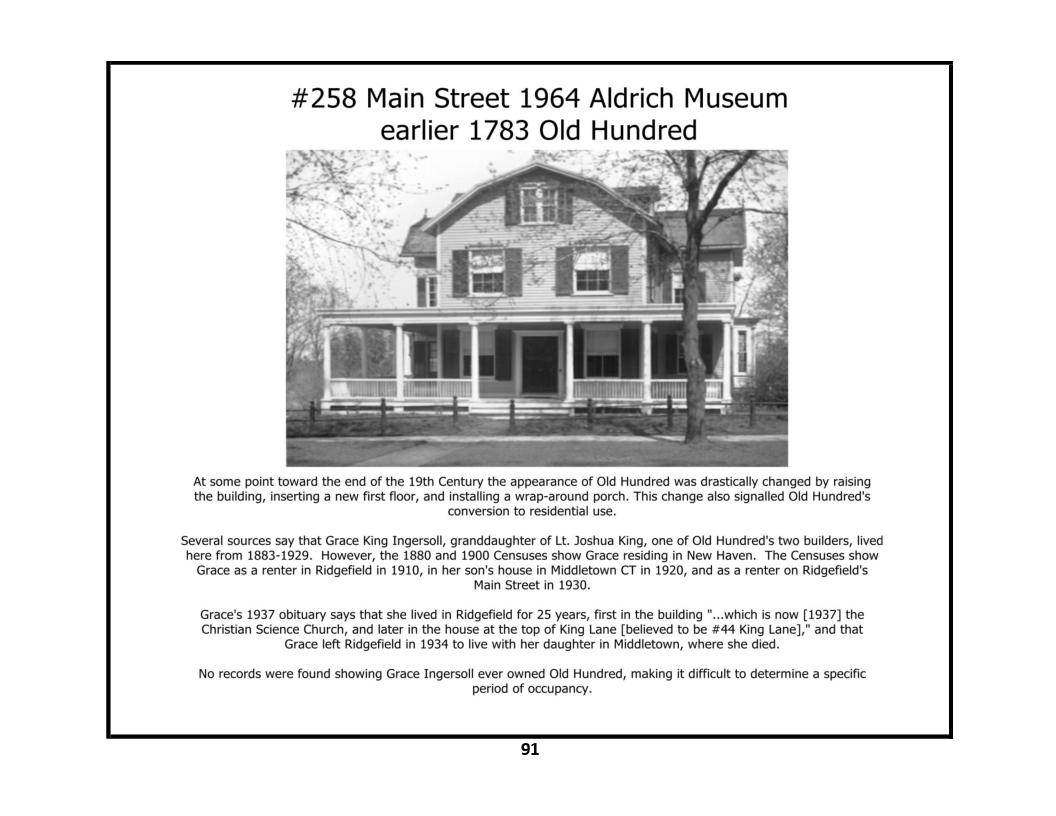
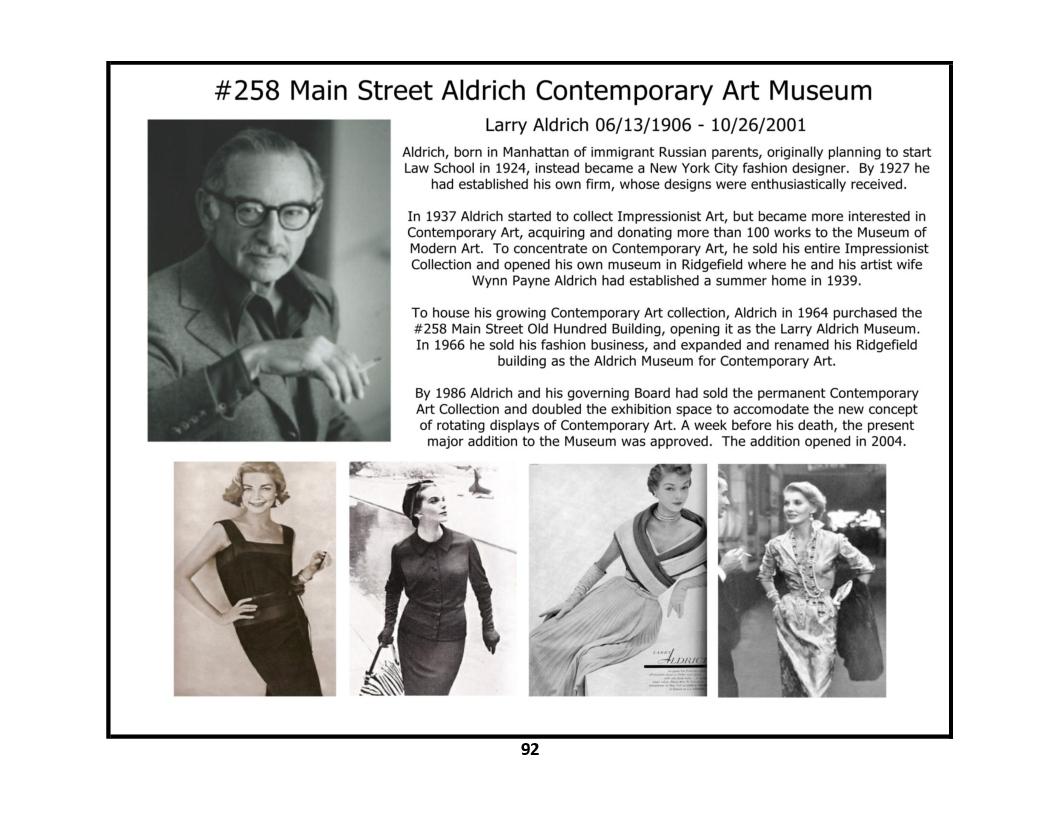
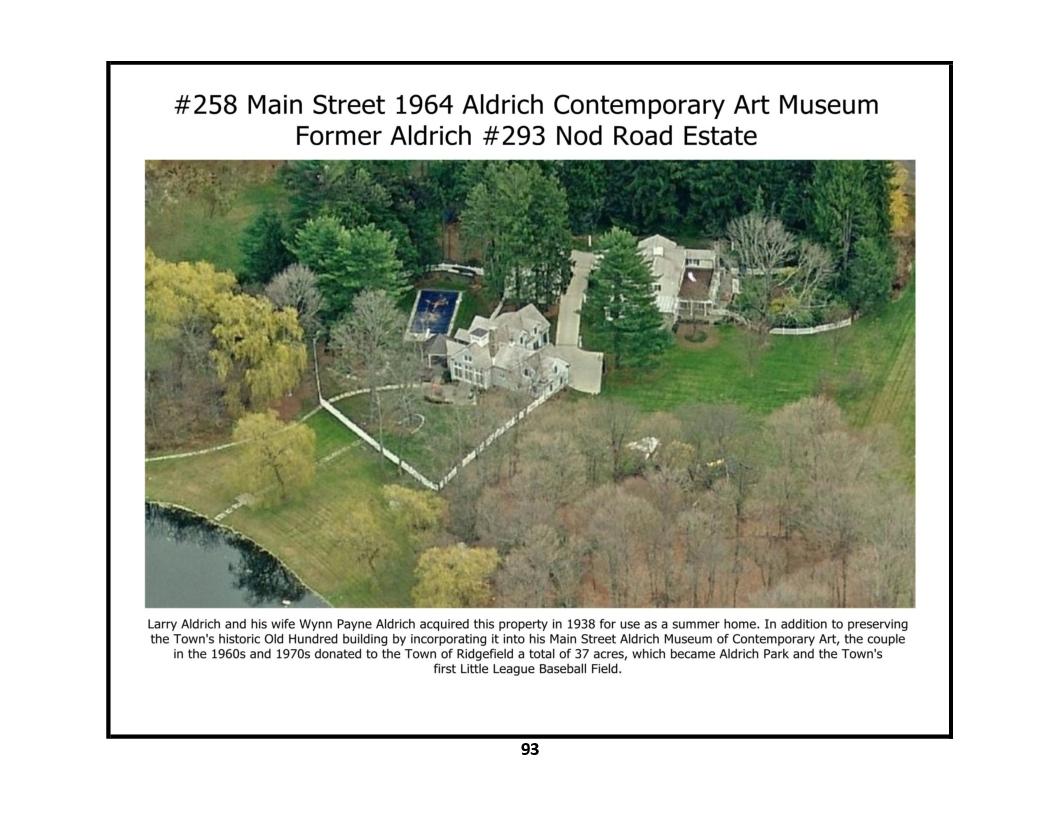
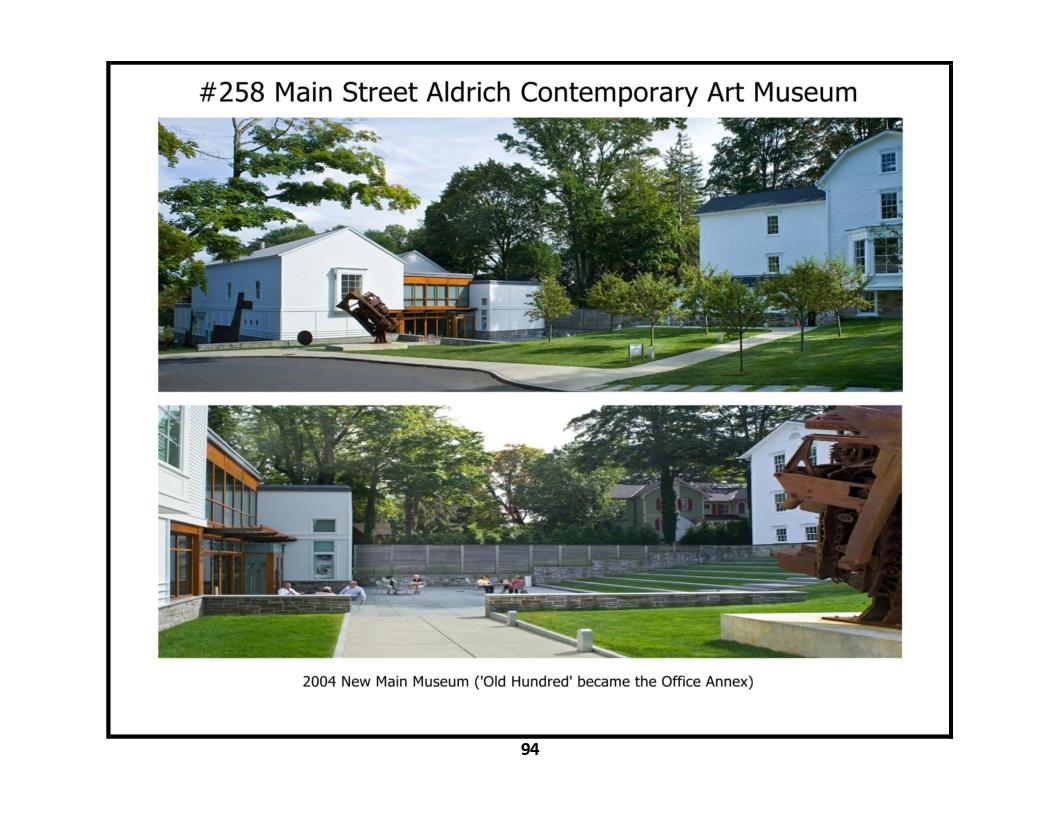
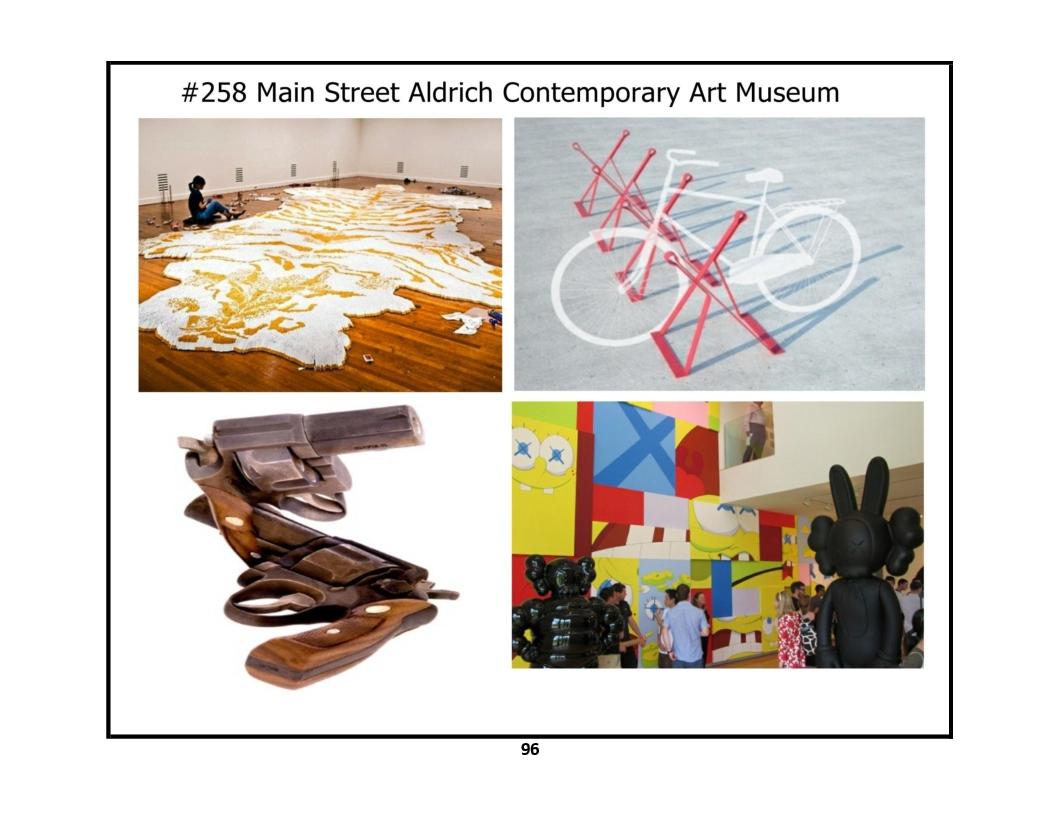
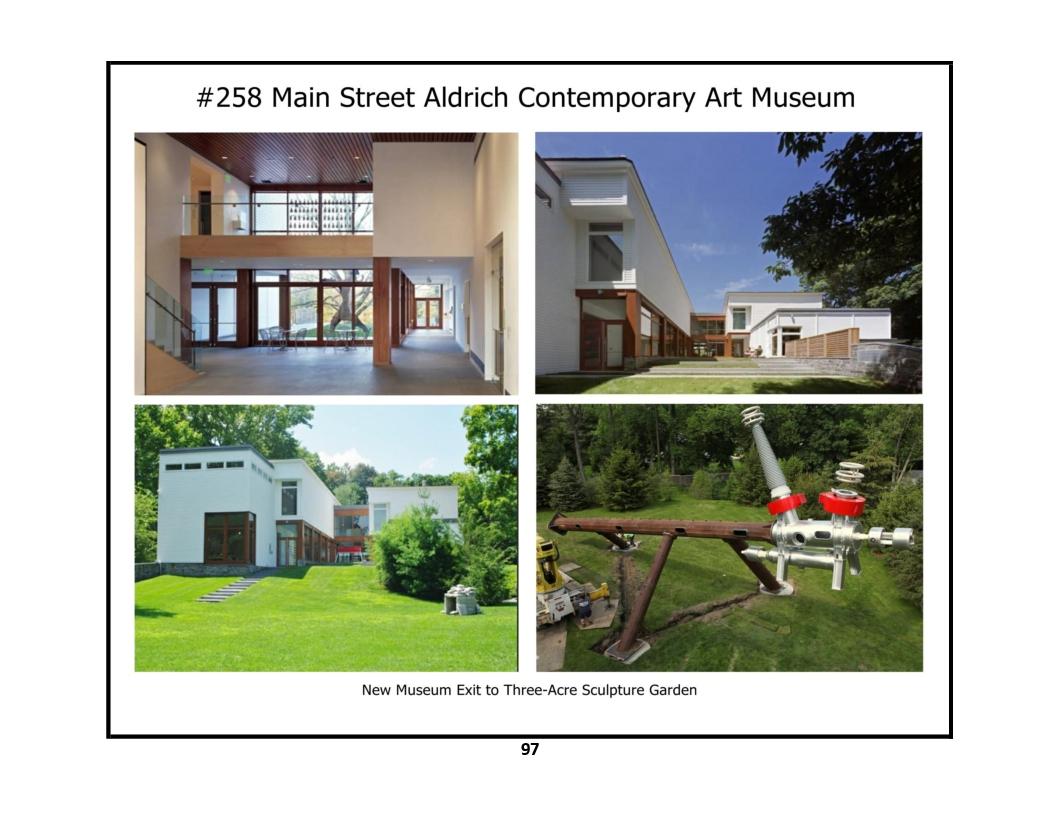
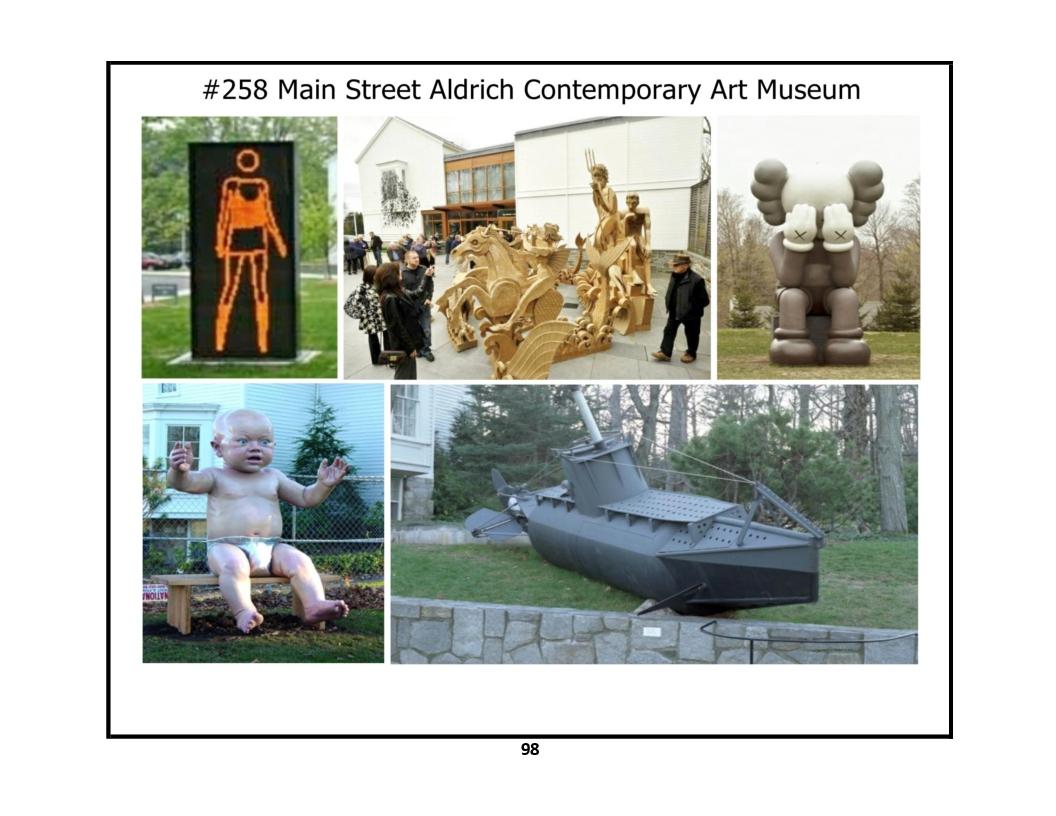
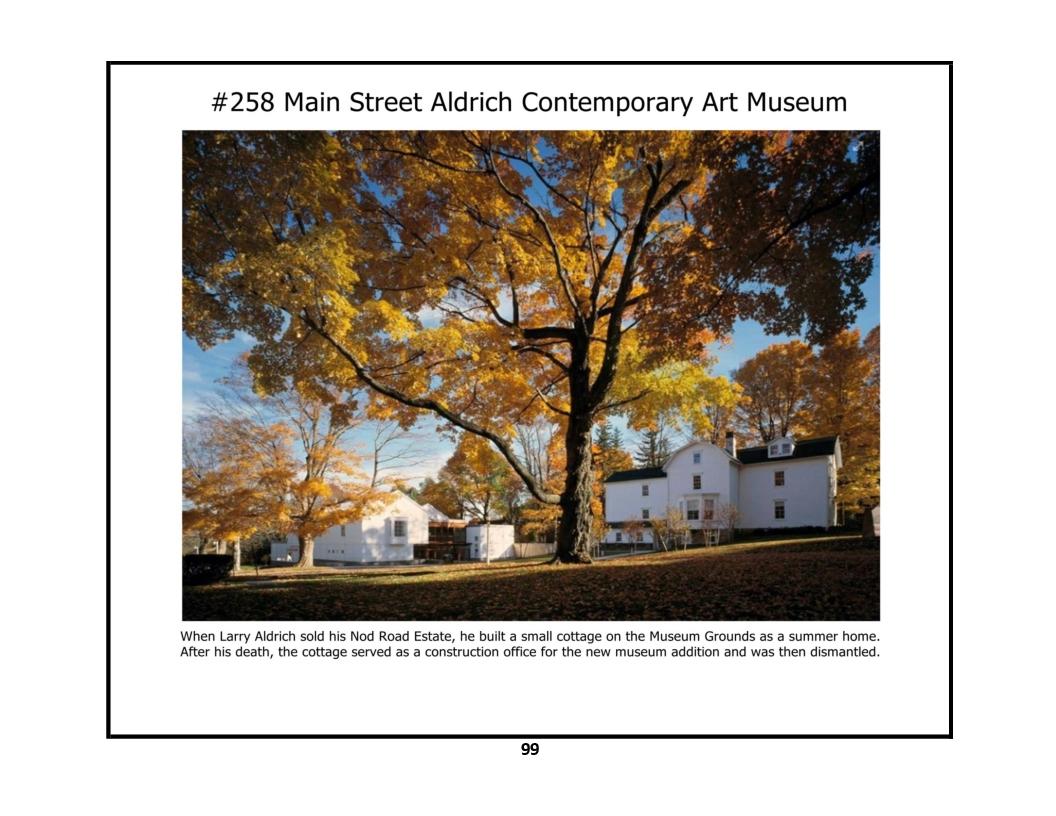
258 Main Street - photos 1, 2, 3, 4, 5, 6, 7, 8, 9, 10, 11
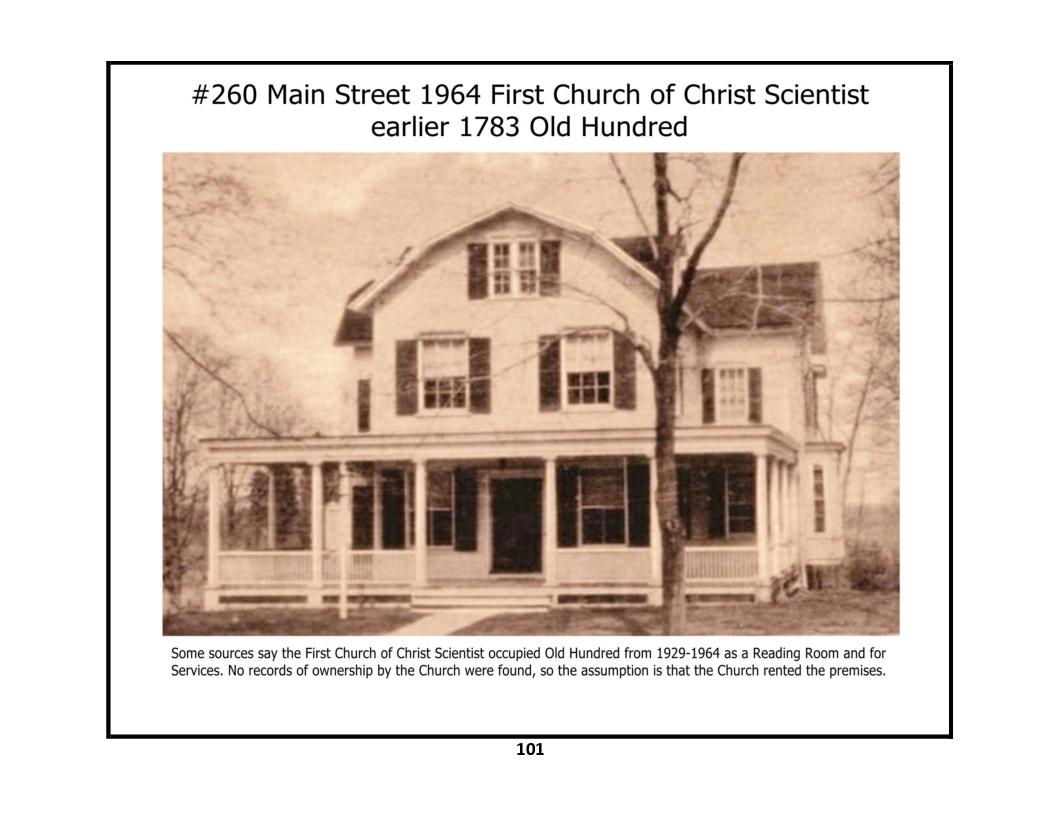
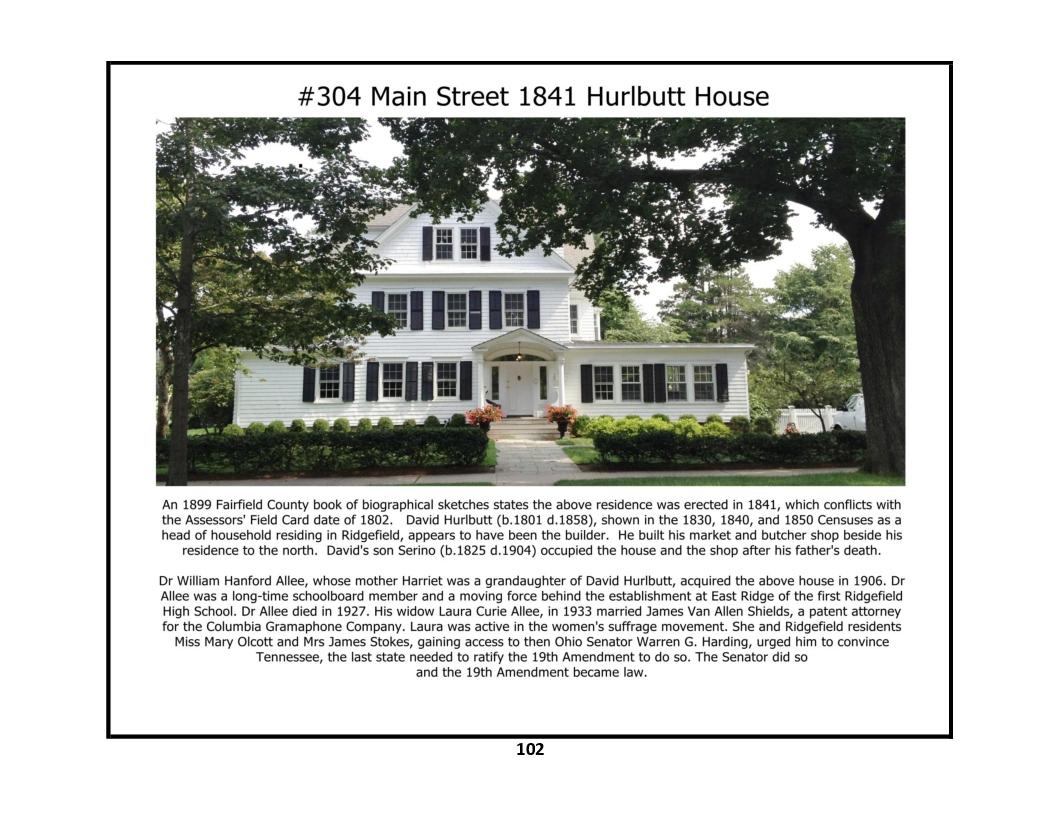
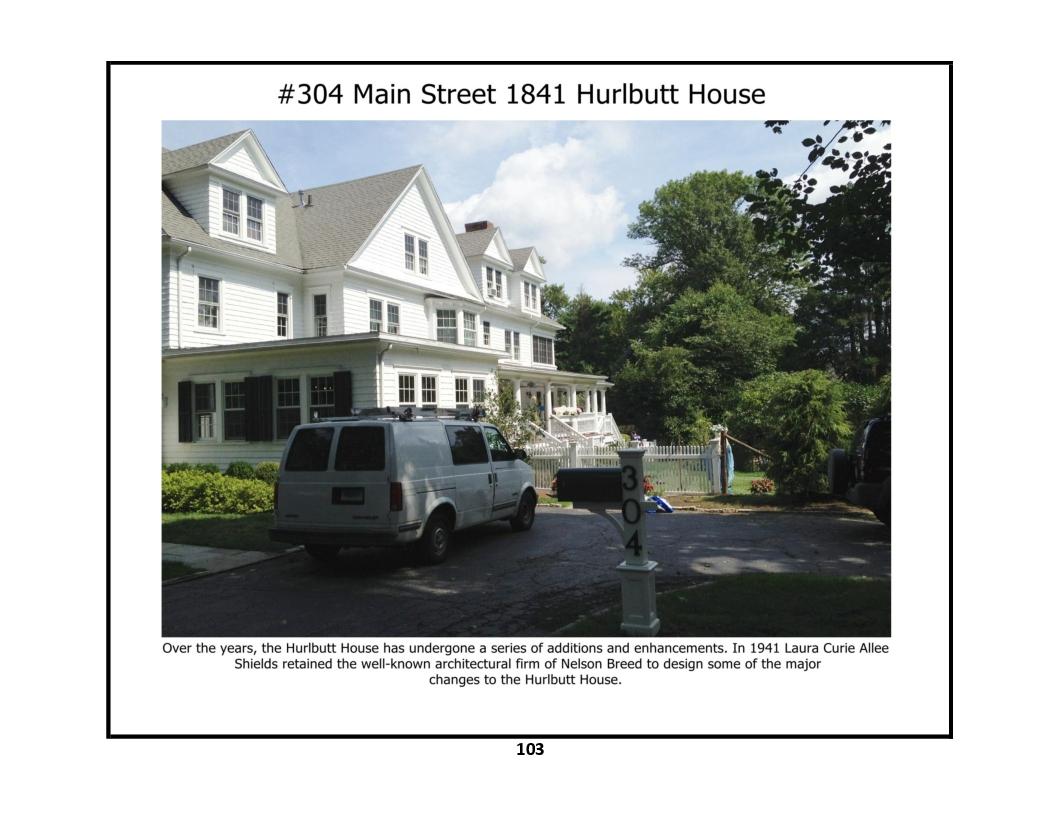
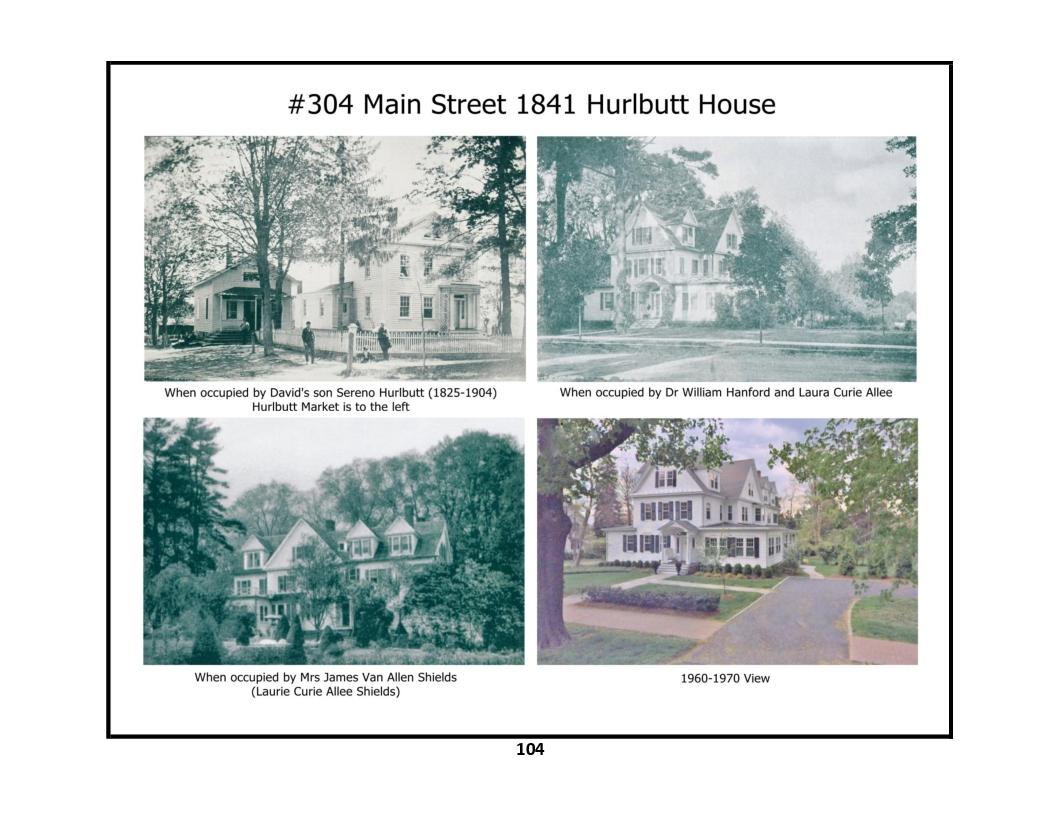
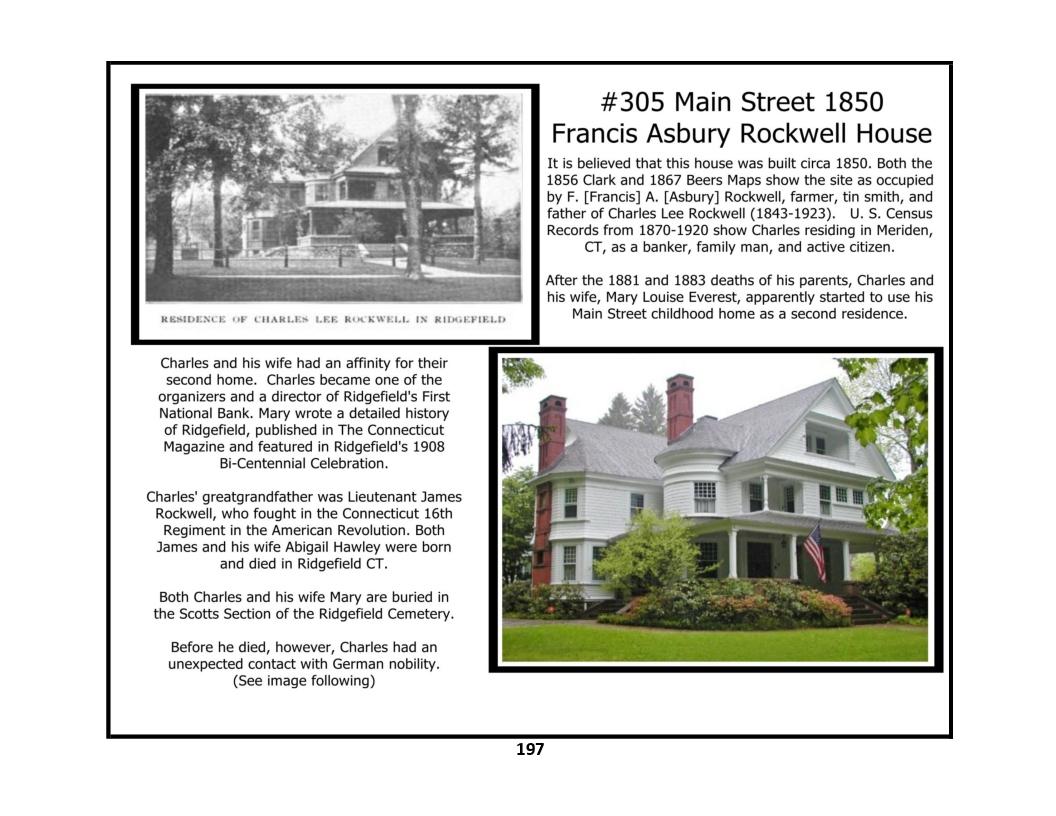
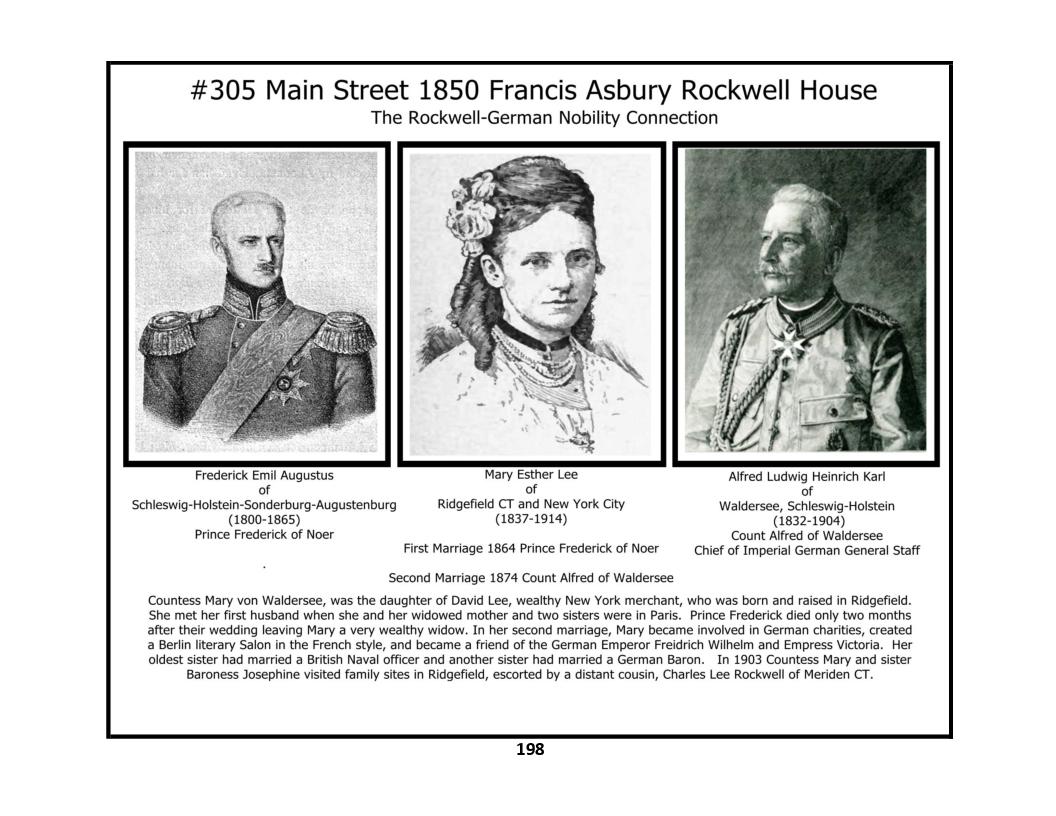
304 Main Street - photos 1, 2, 3
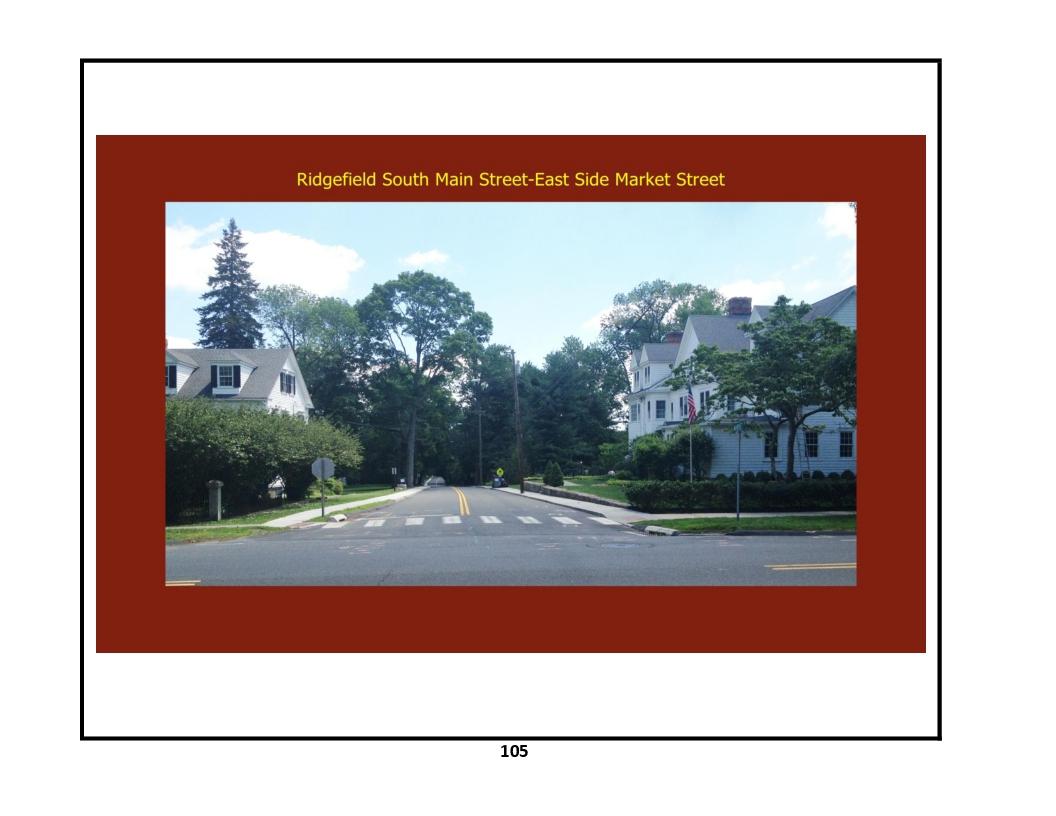
Street Level Views: South Main Street - East Side - Market Street
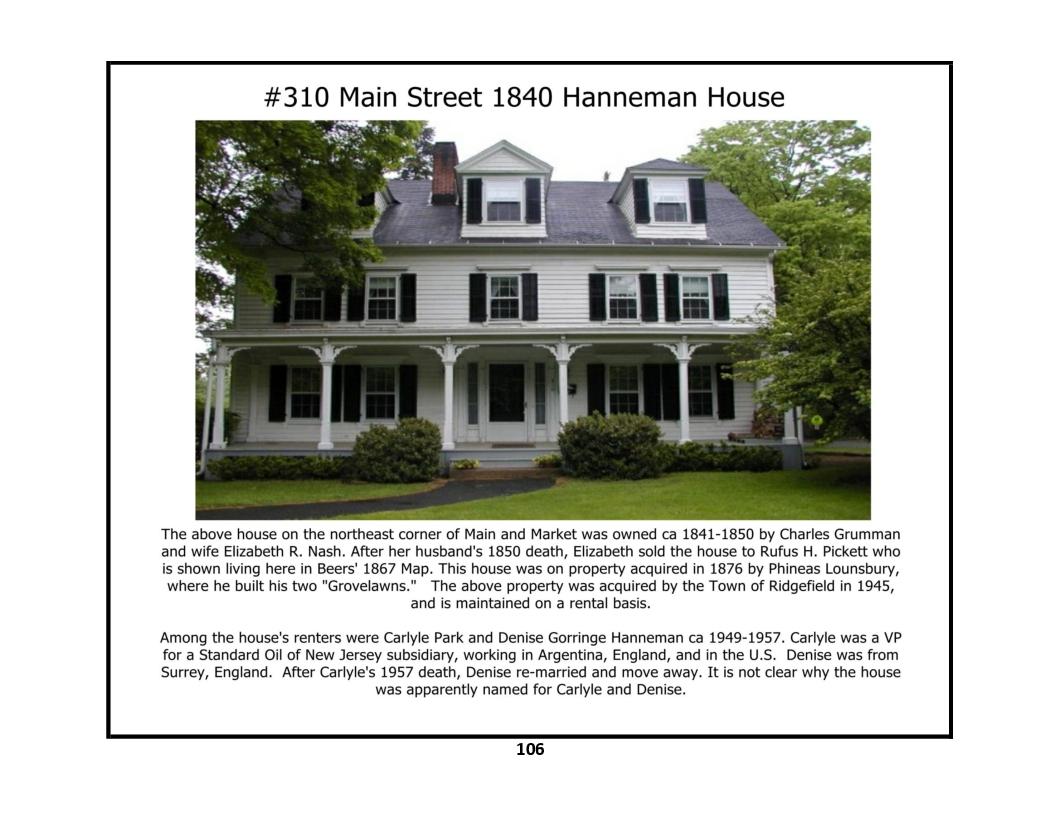
310 Main Street - photo 1
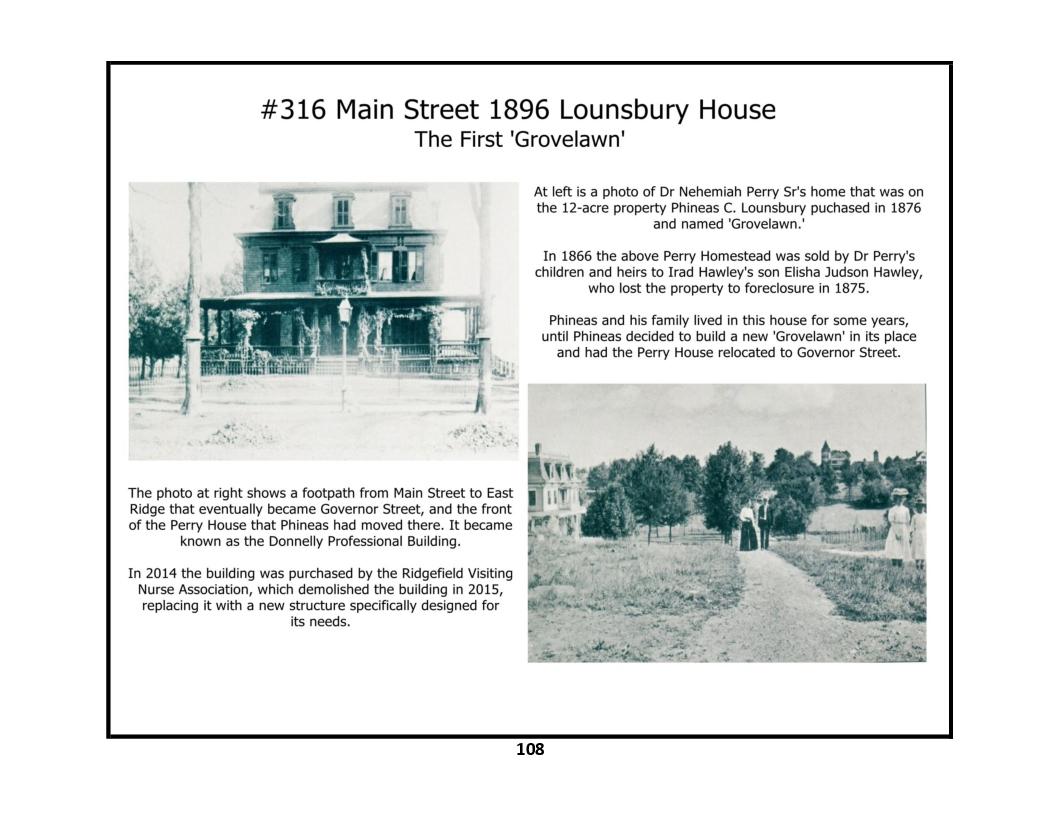
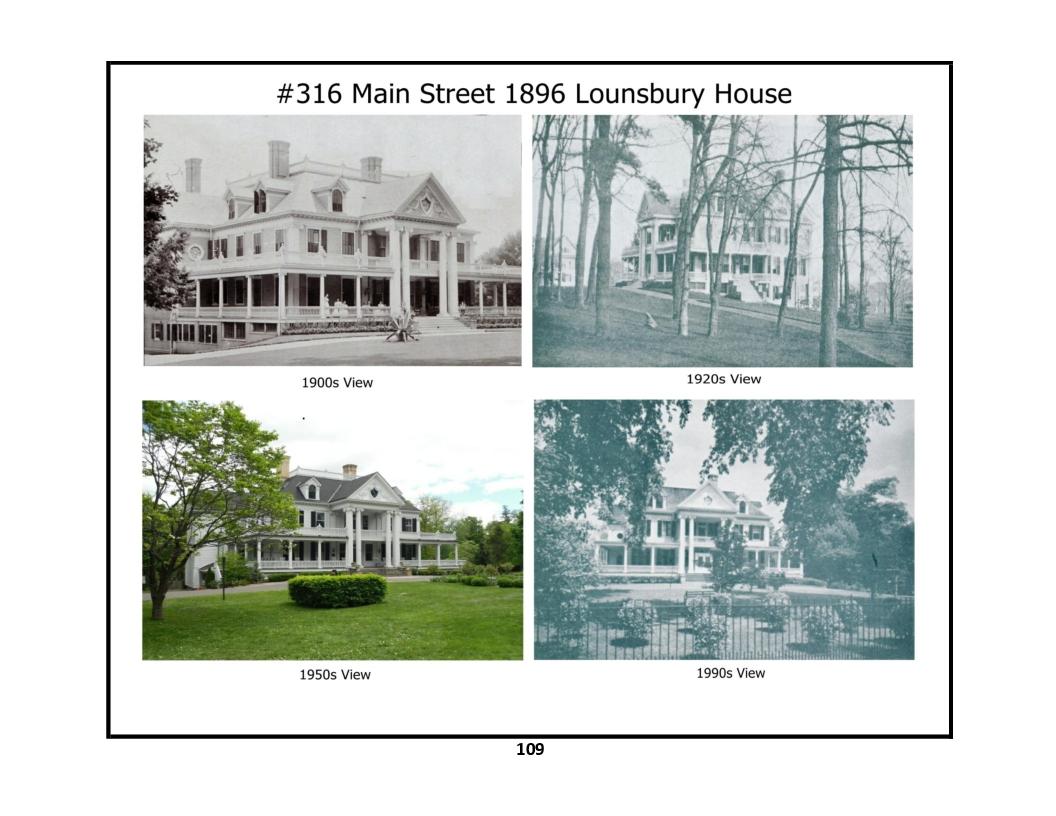
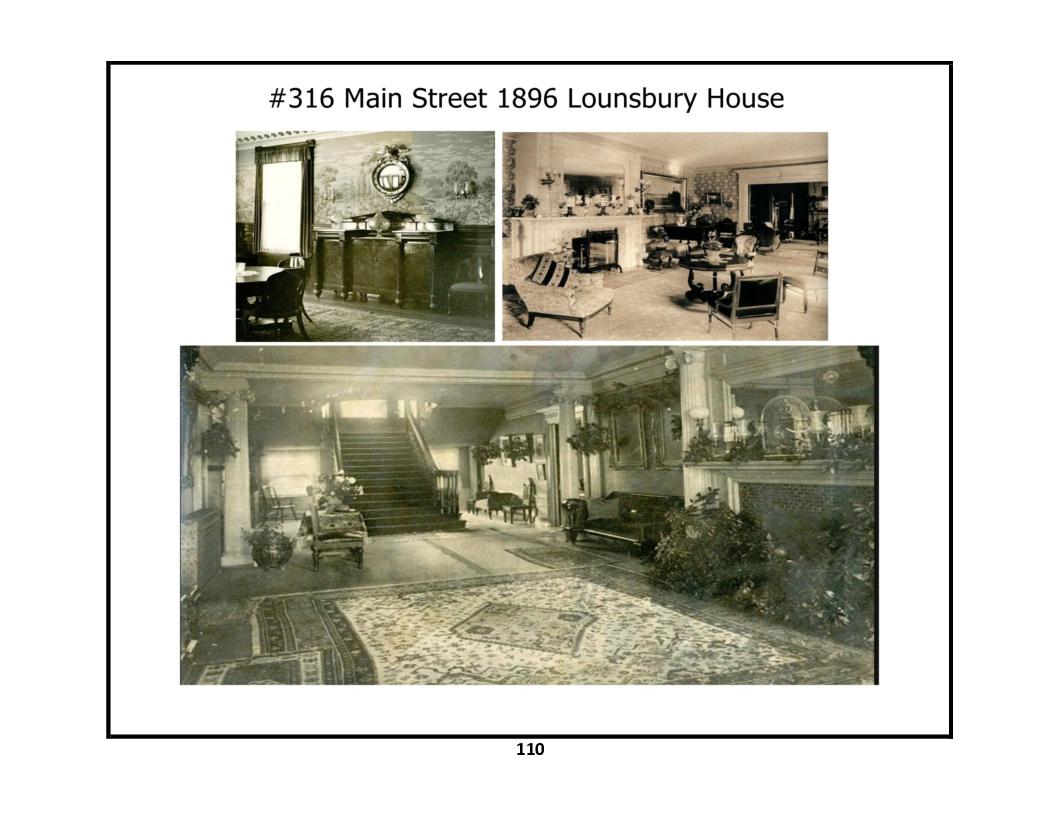
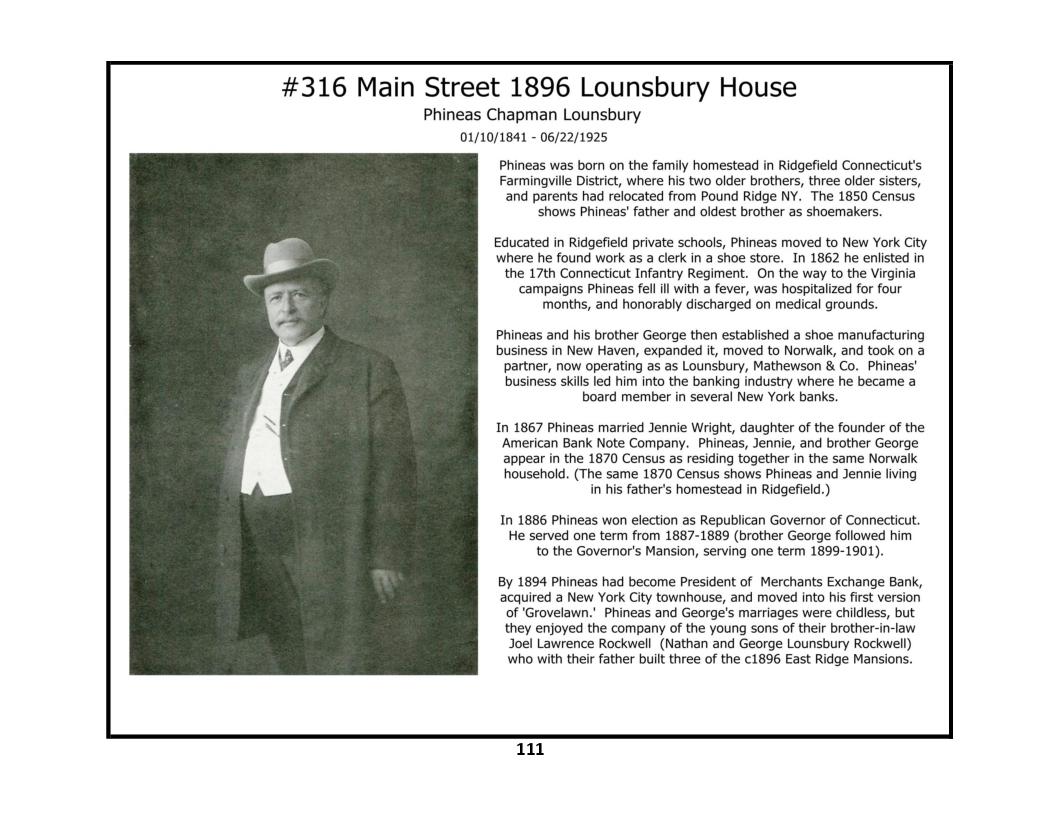
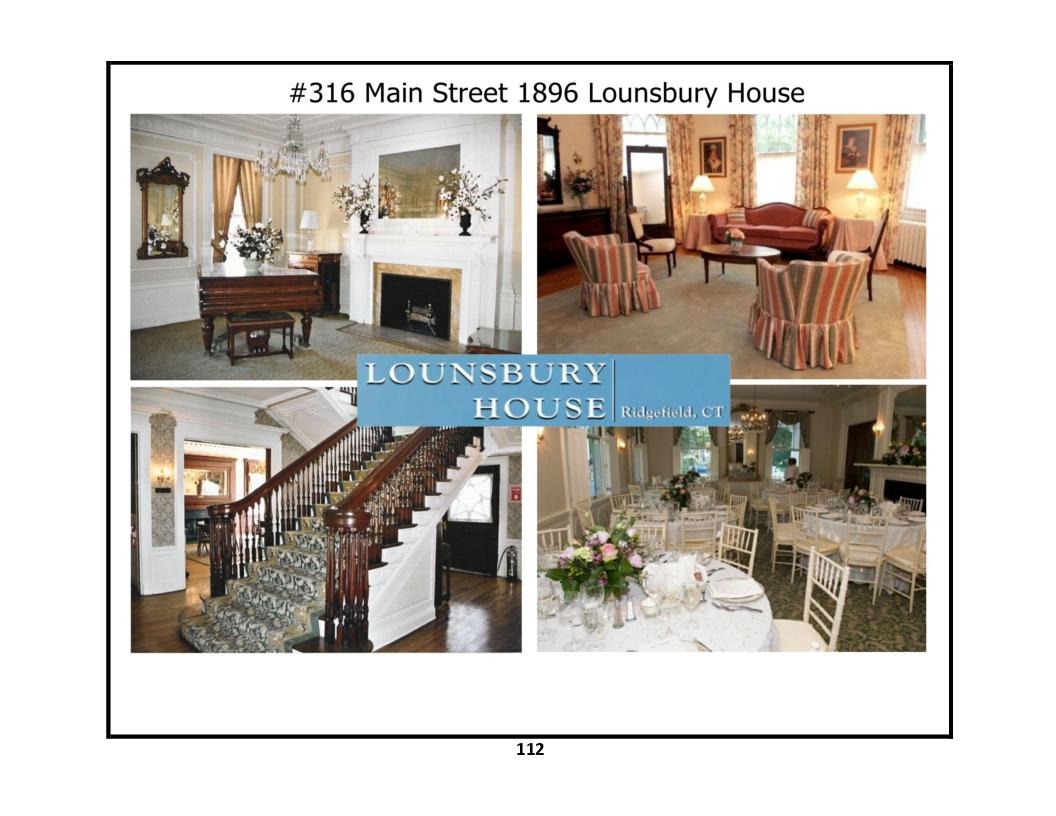
316 Main Street - photos 1, 2, 3, 4, 5, 6
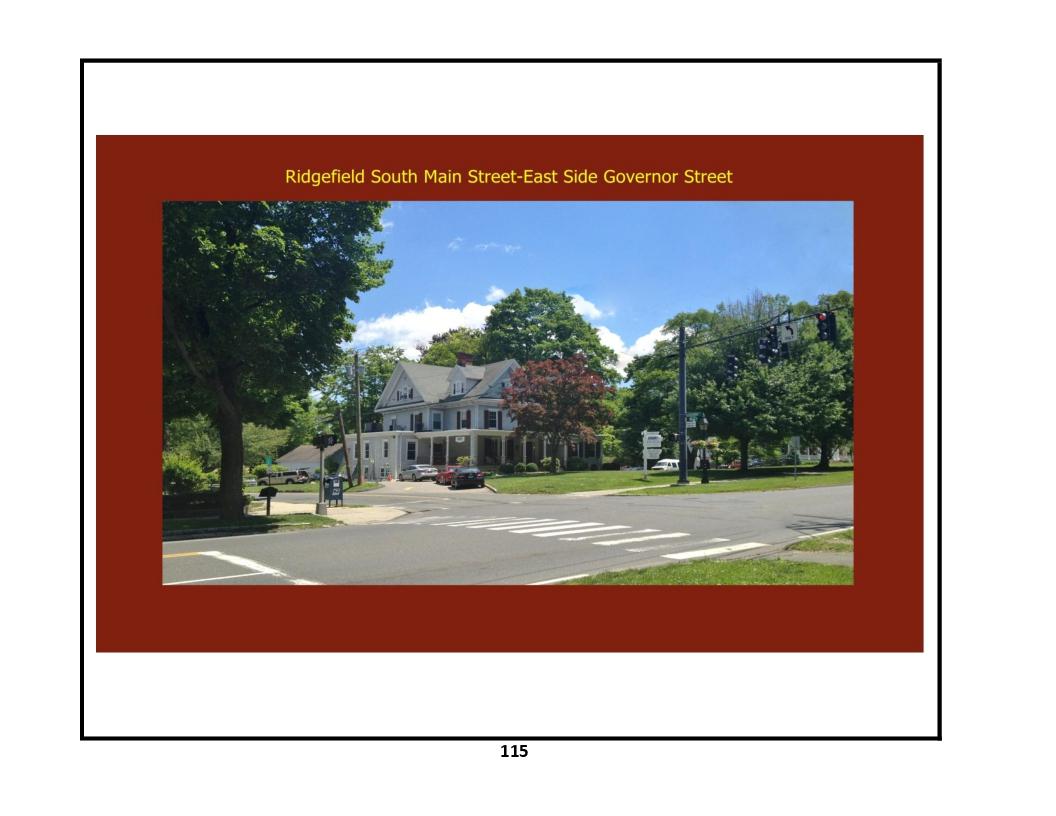
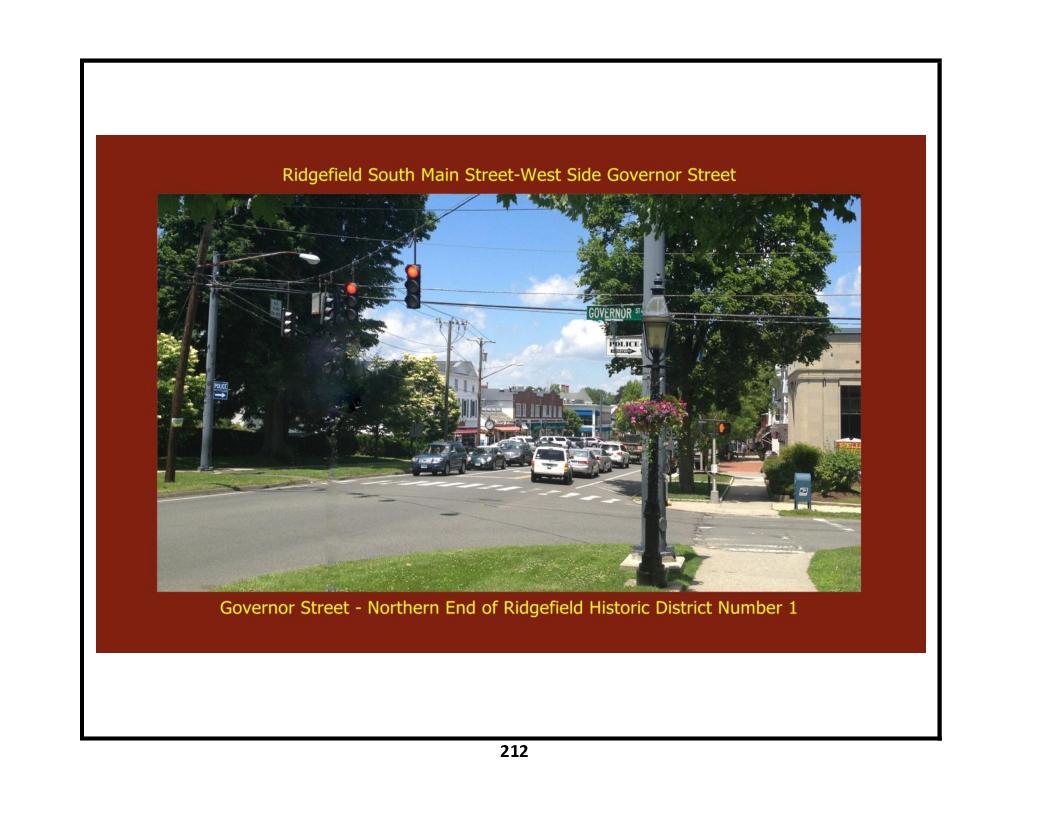
Street Level Views: South Main Street - East Side - Governor Street
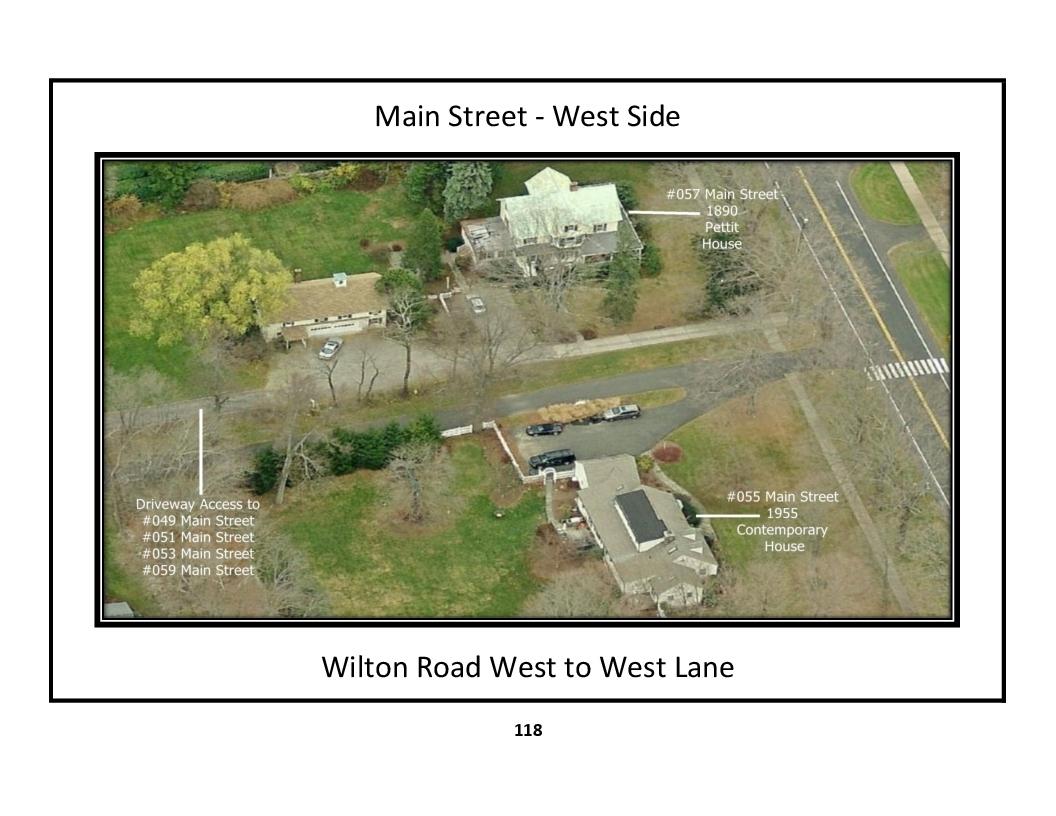
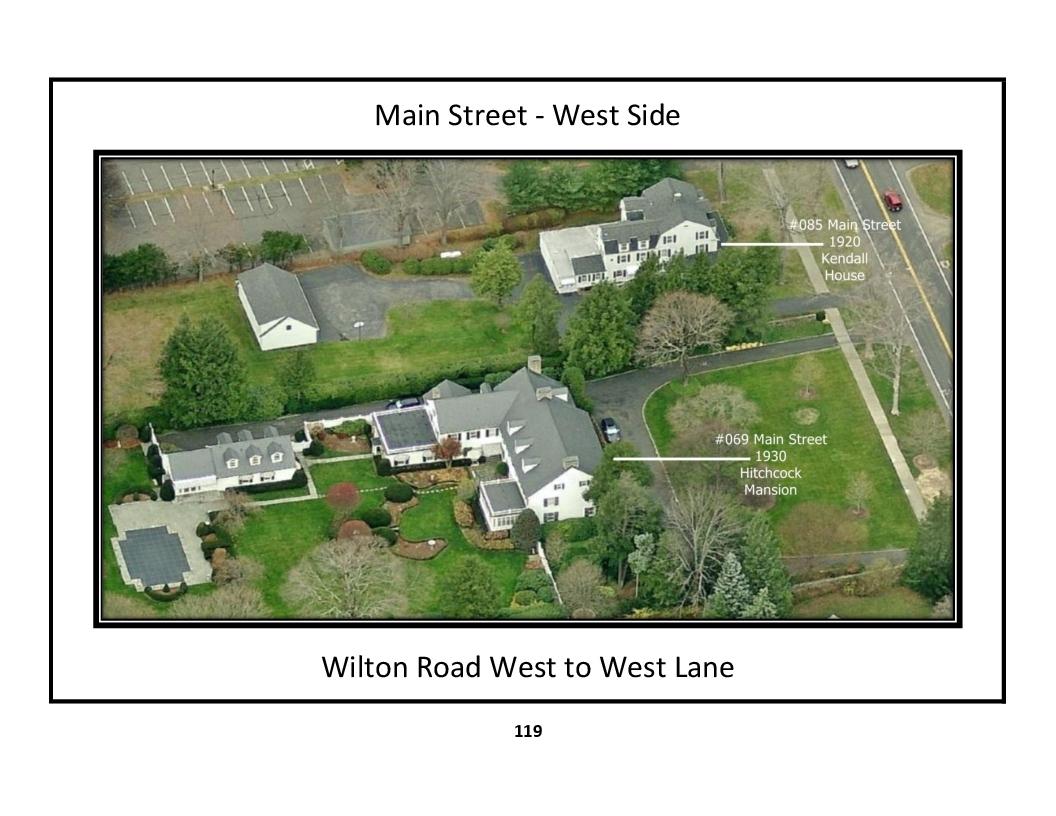
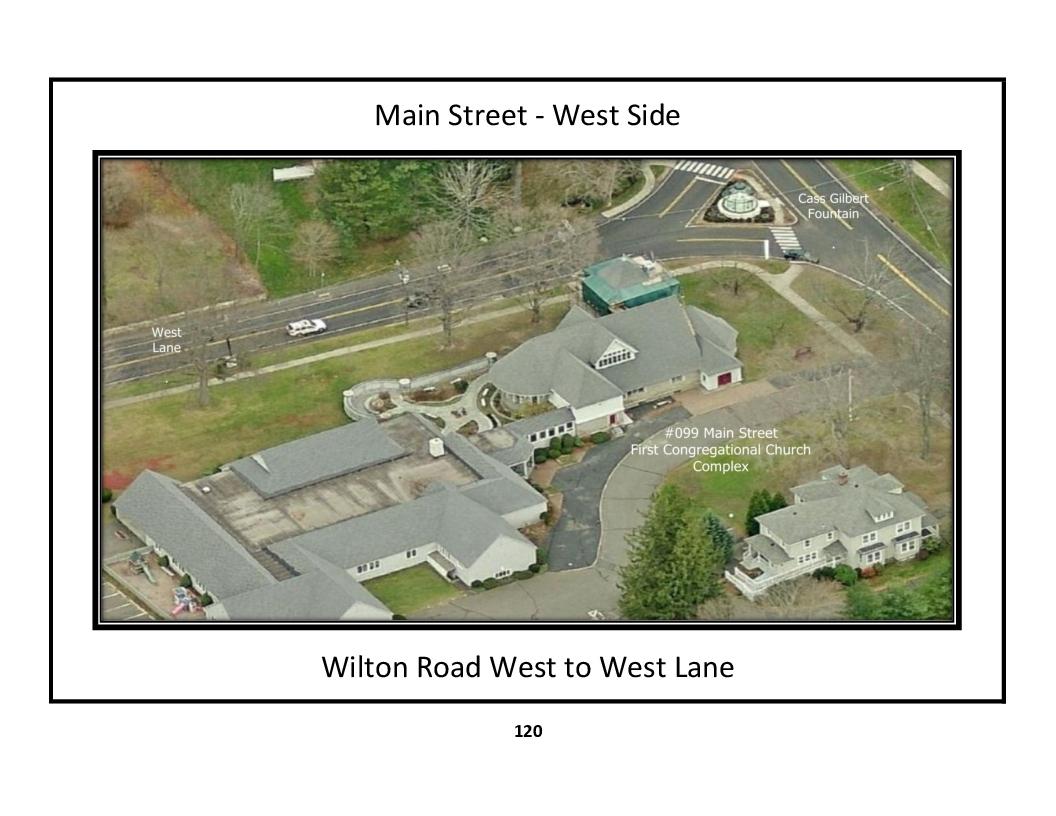
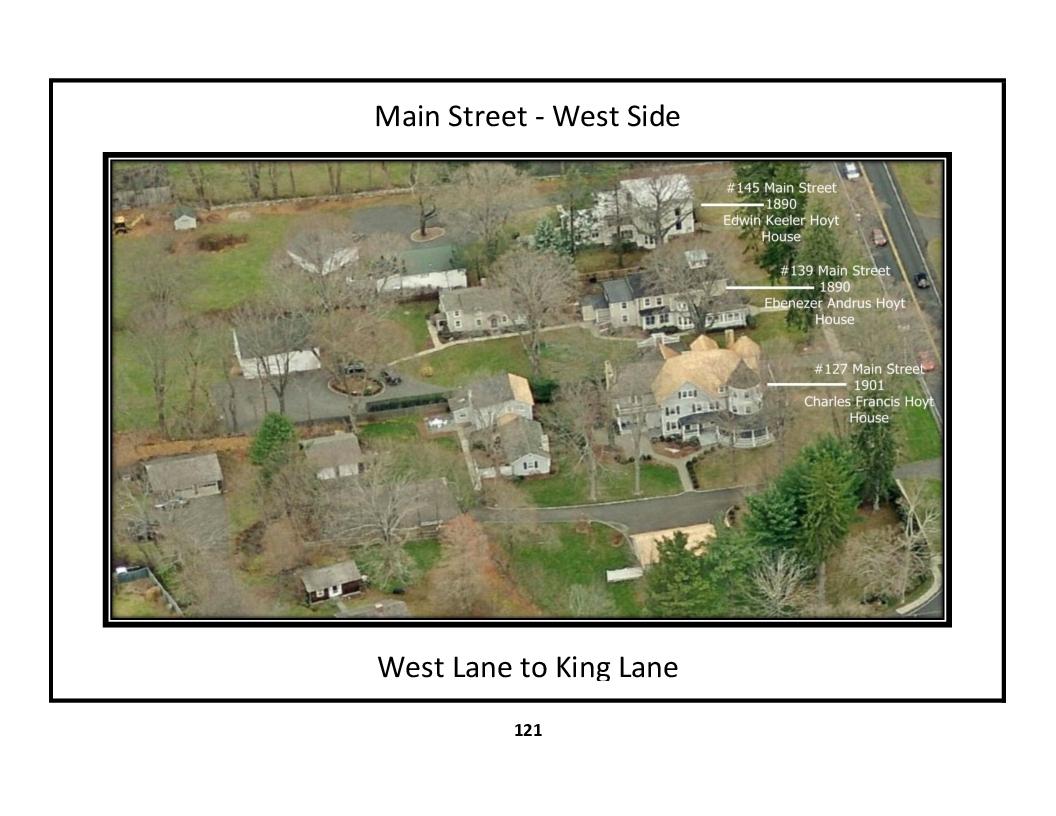
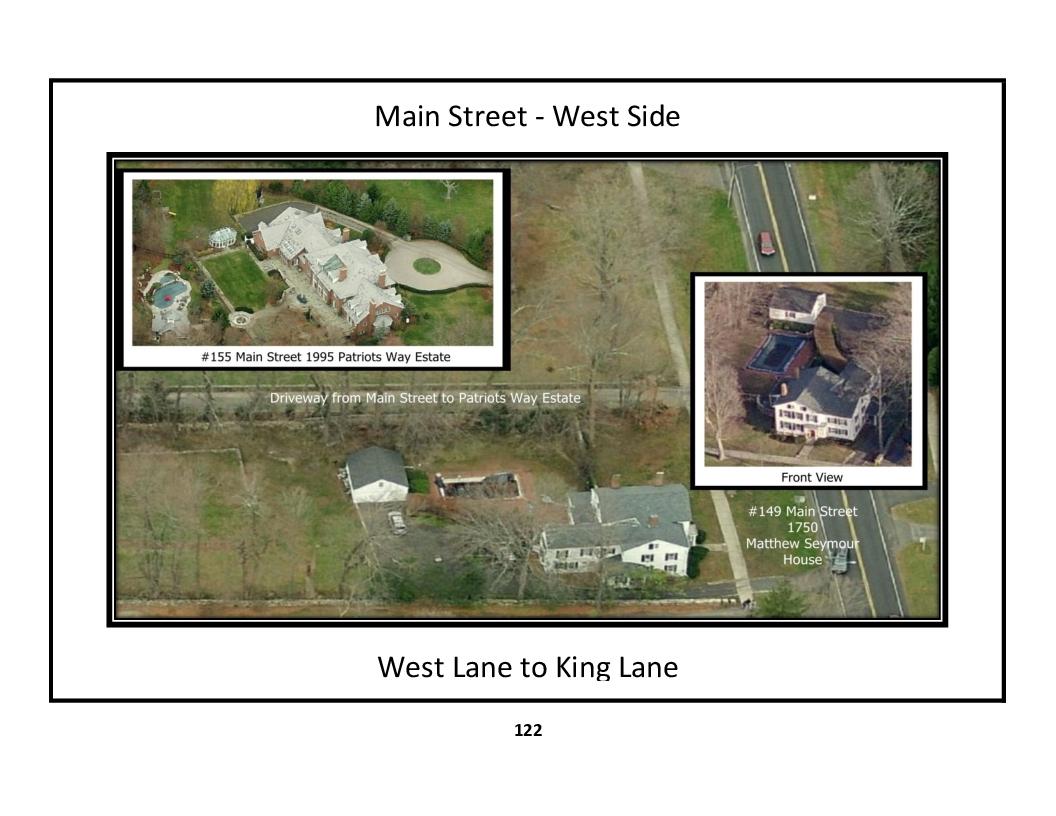
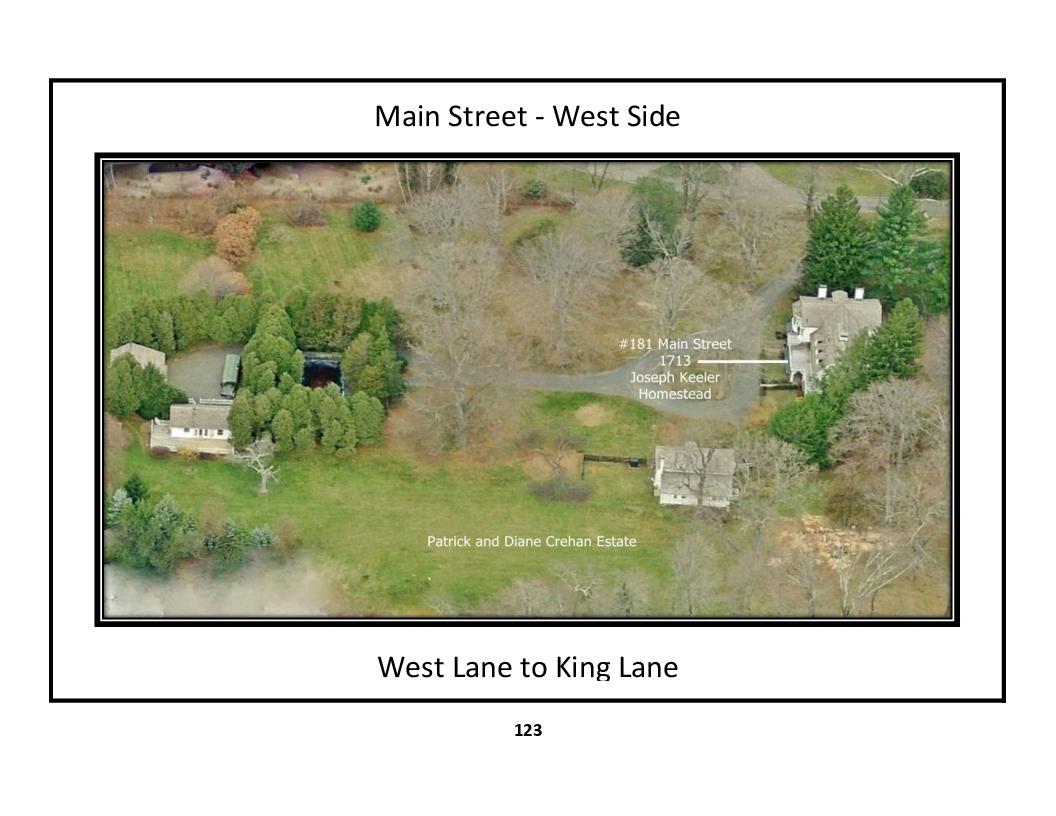
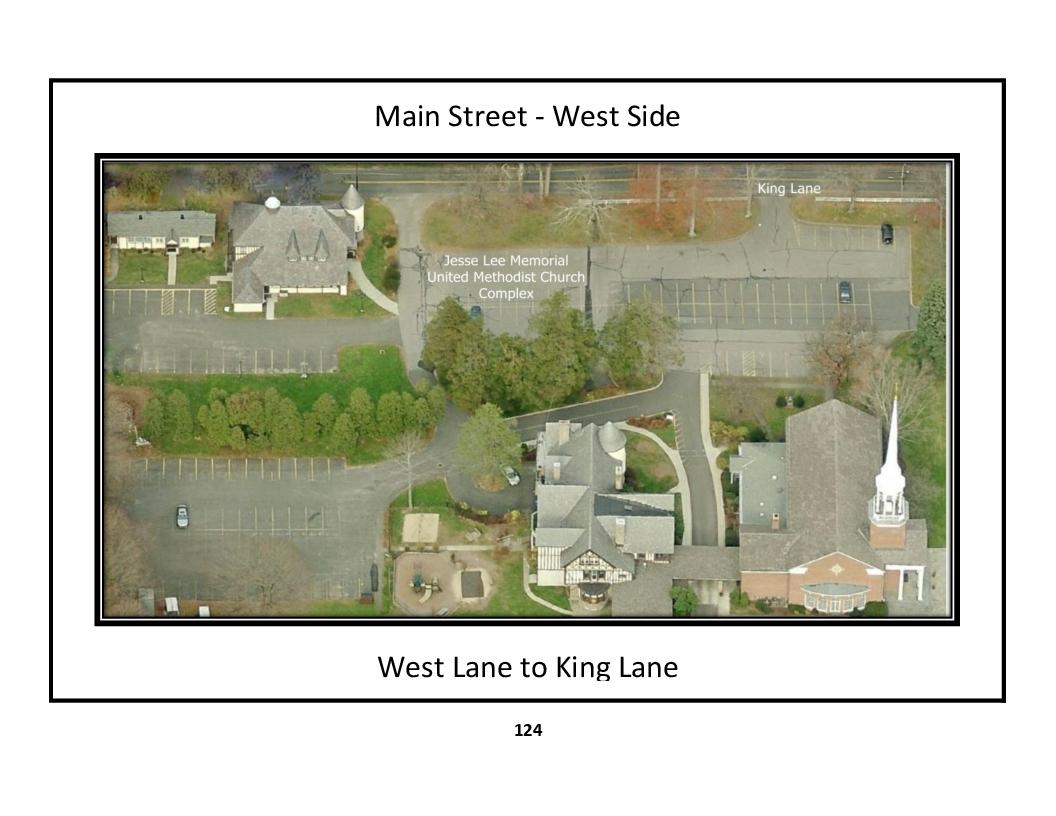
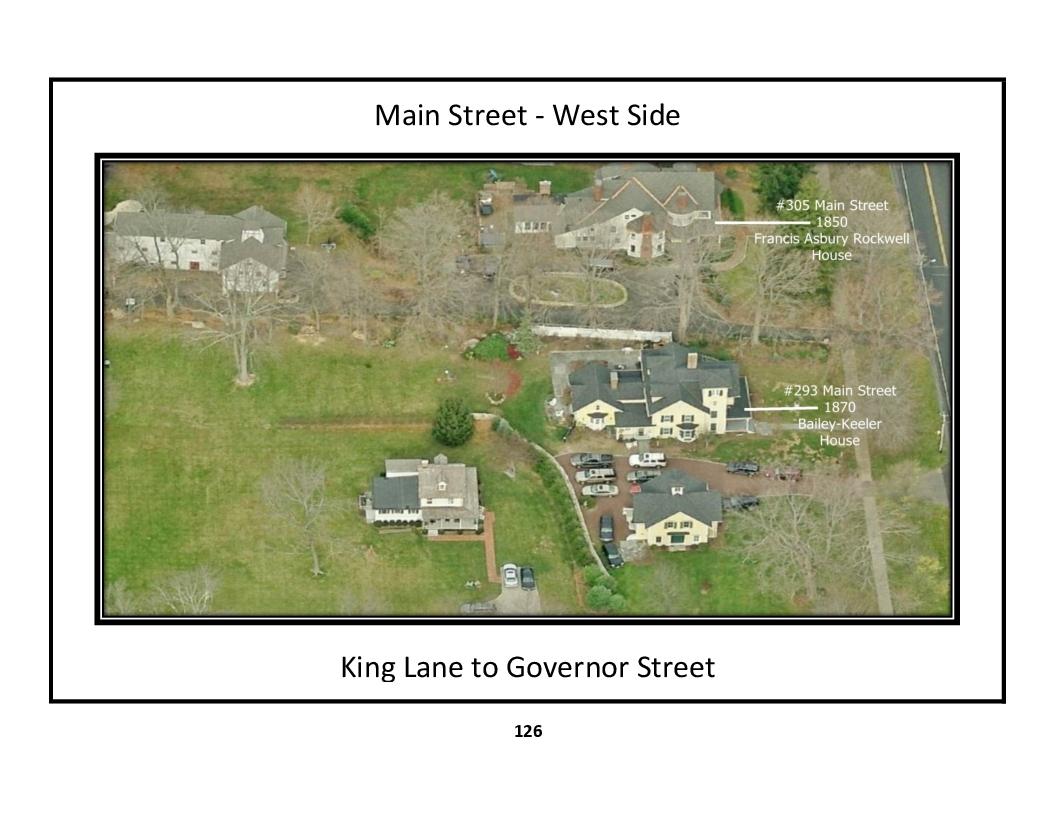
Aerial Views: Main Street - West Side - photos a, b, c, d, e, f, g, h, i, j, k, l
Street Level Views: Main Street - West Side
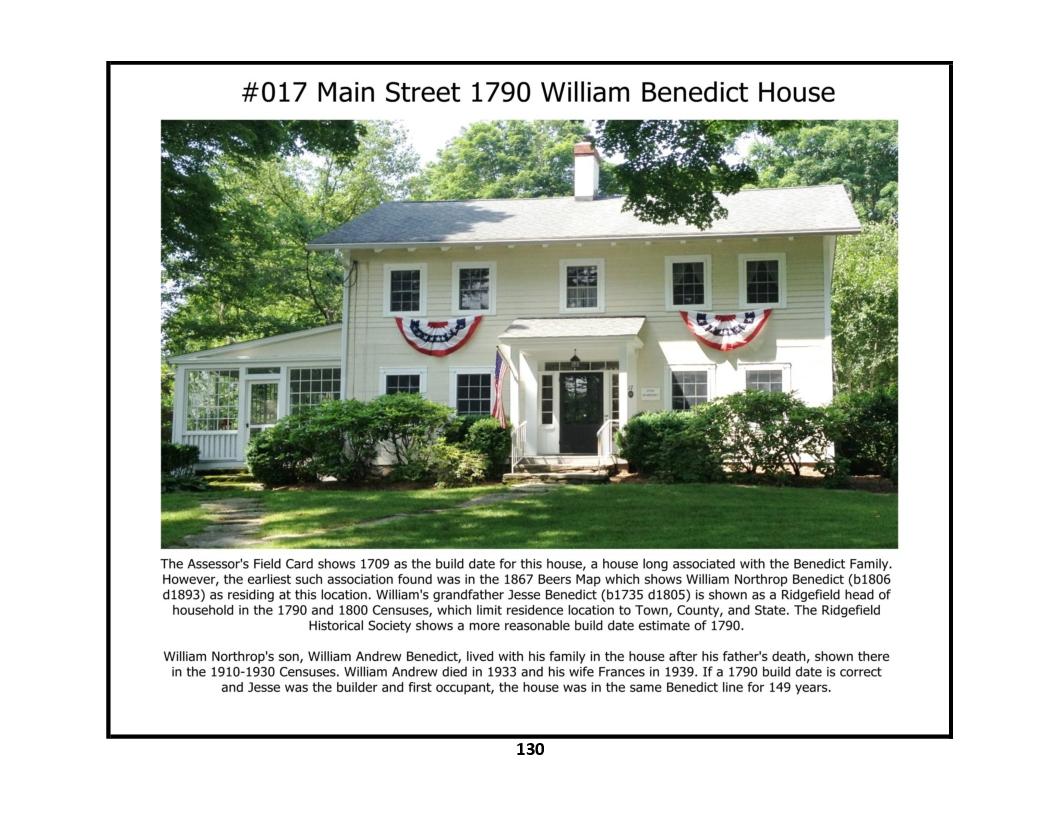
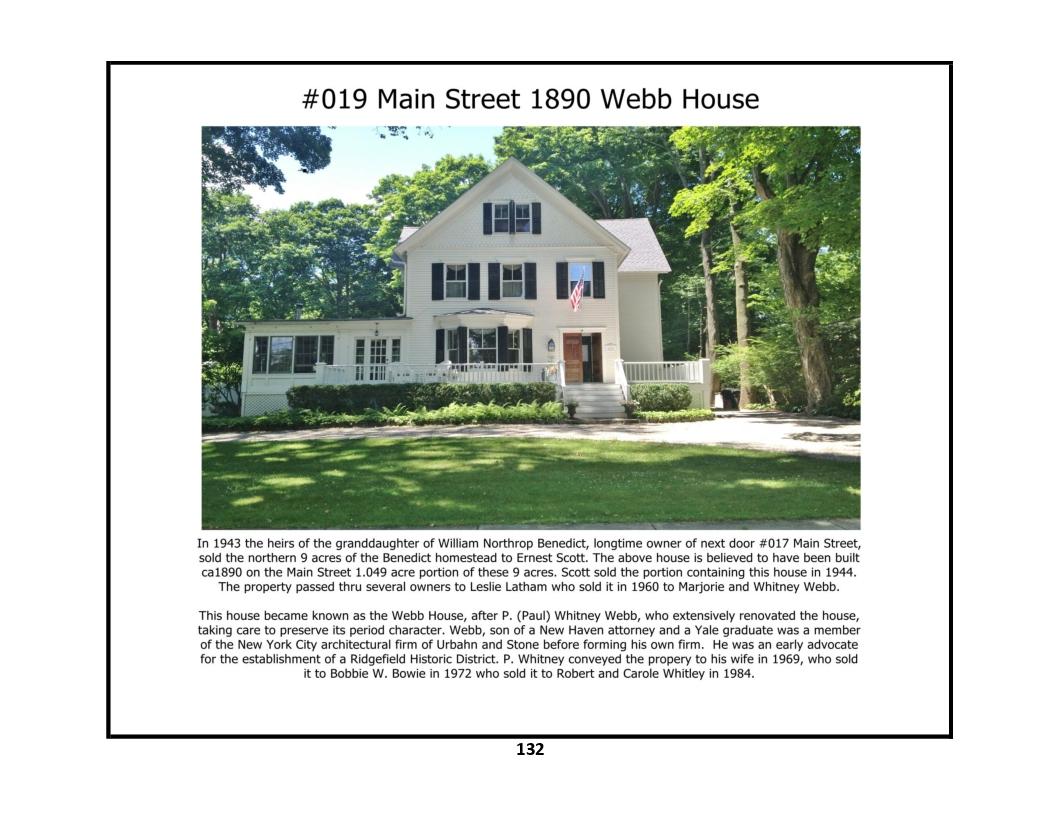
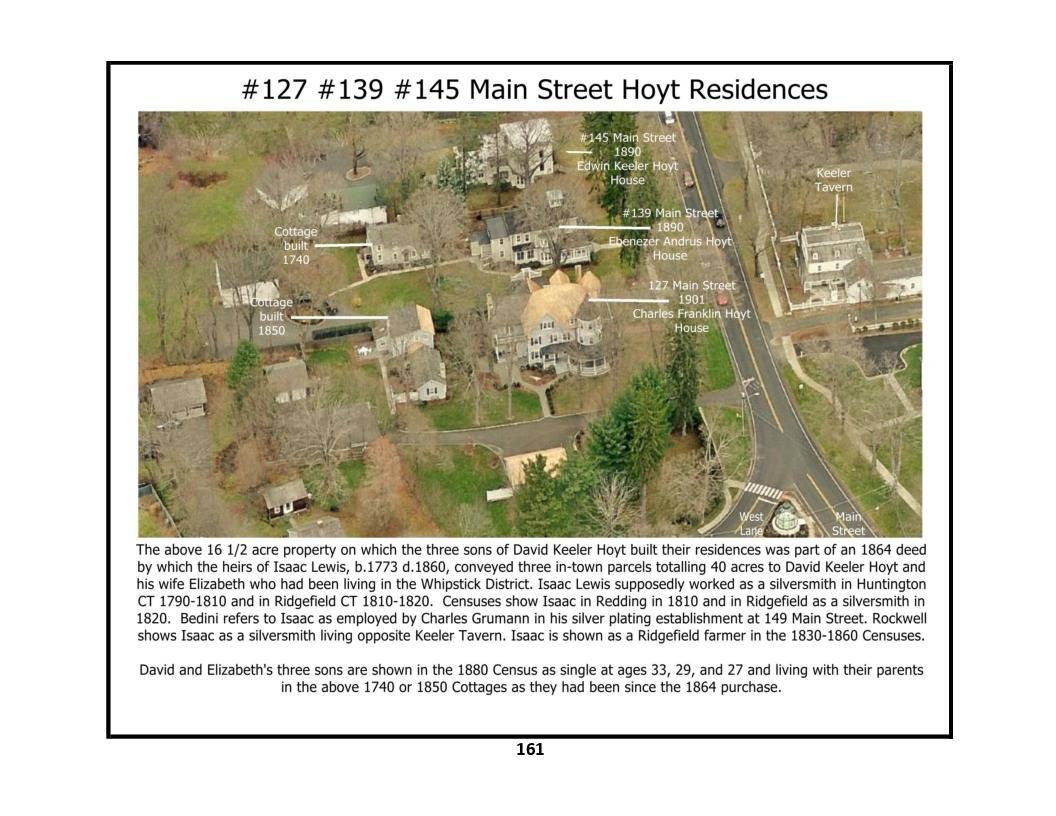
19 Main Street - photo 1
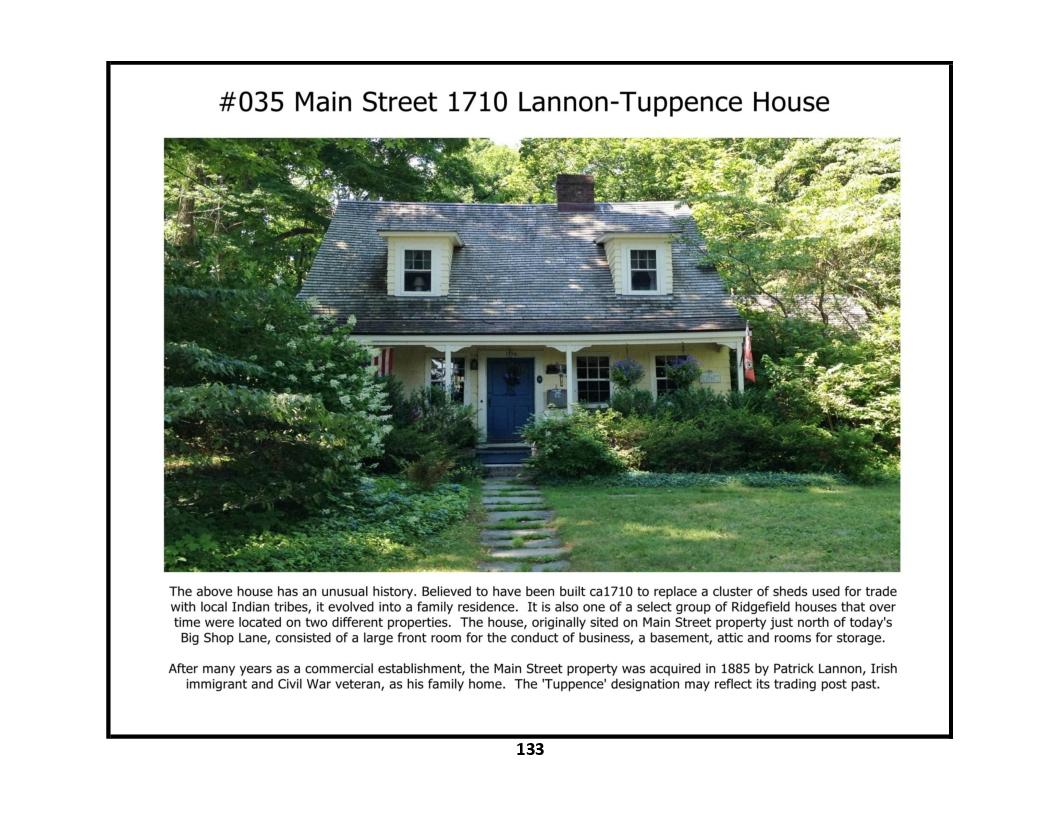
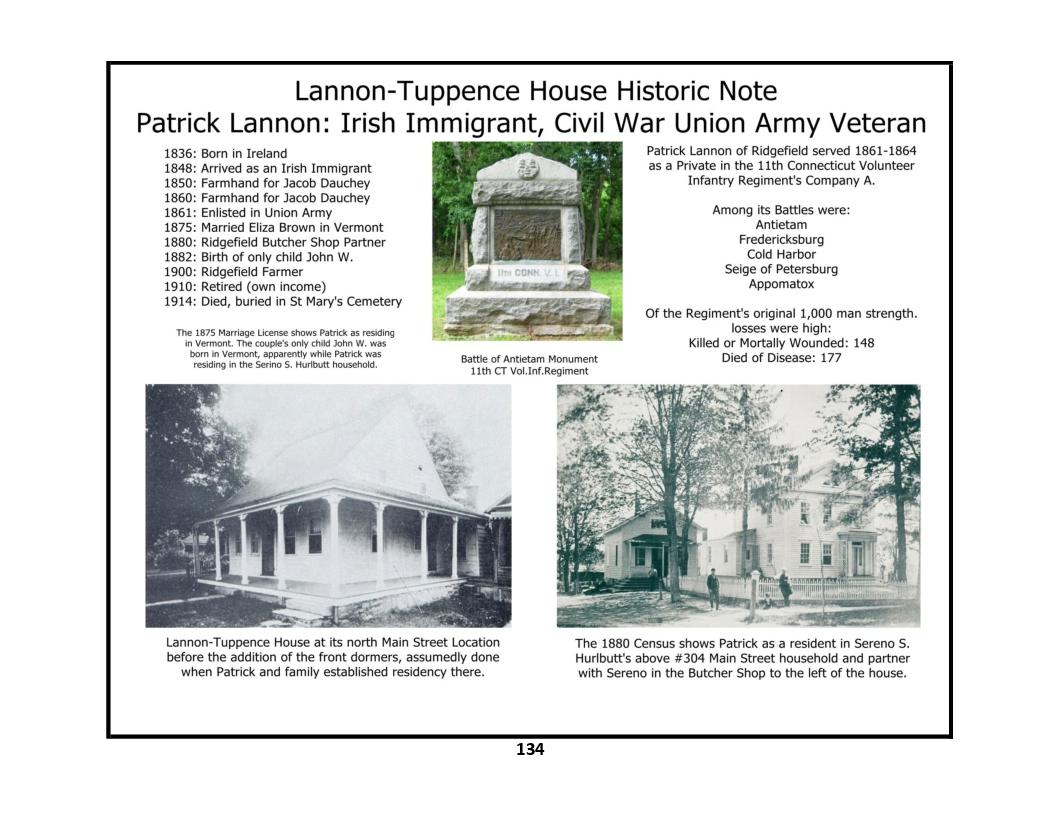
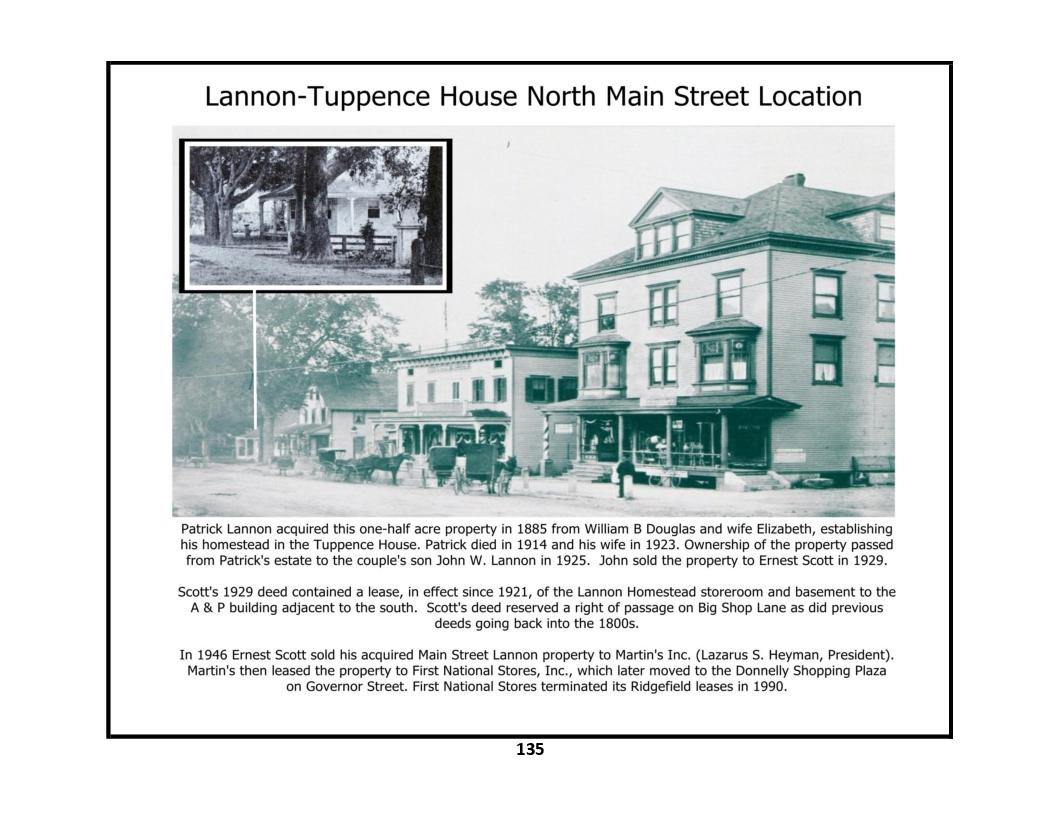
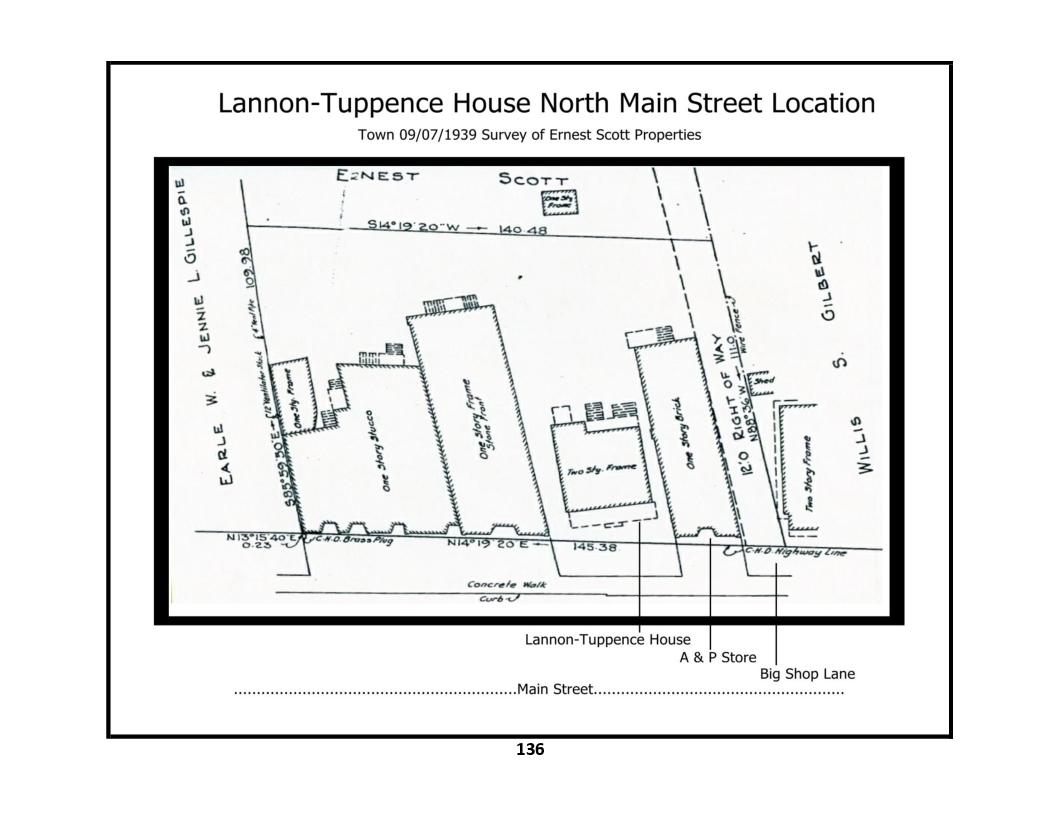
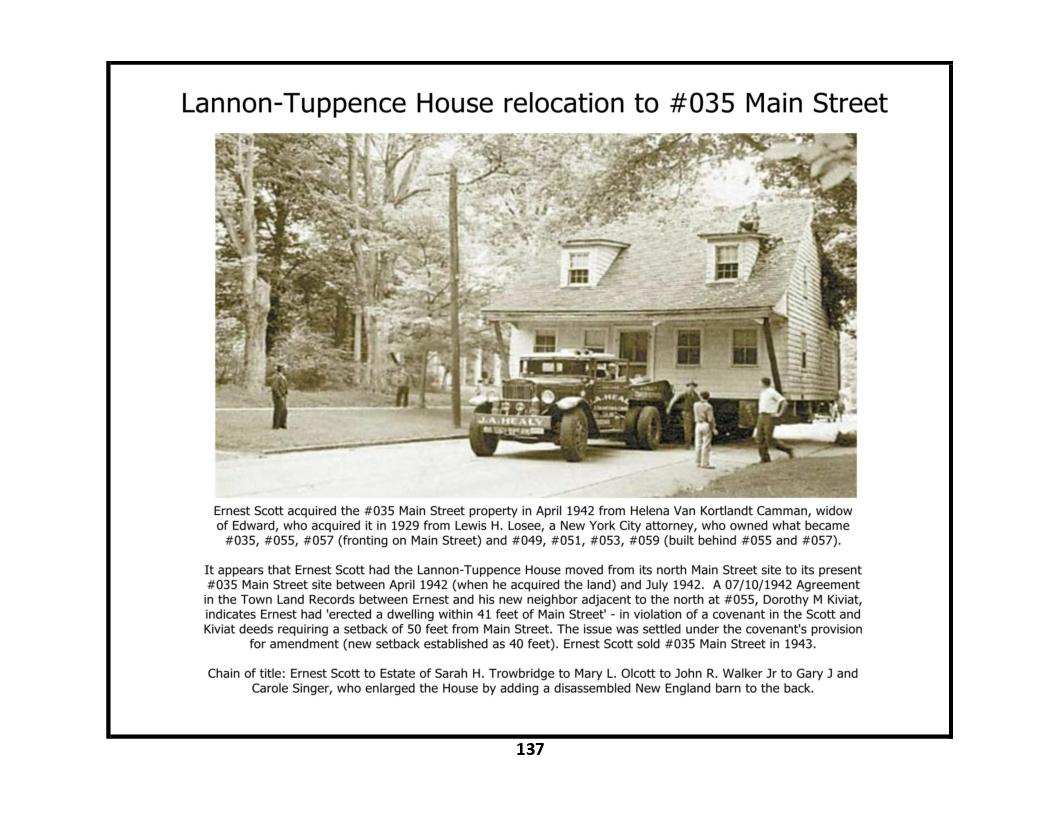
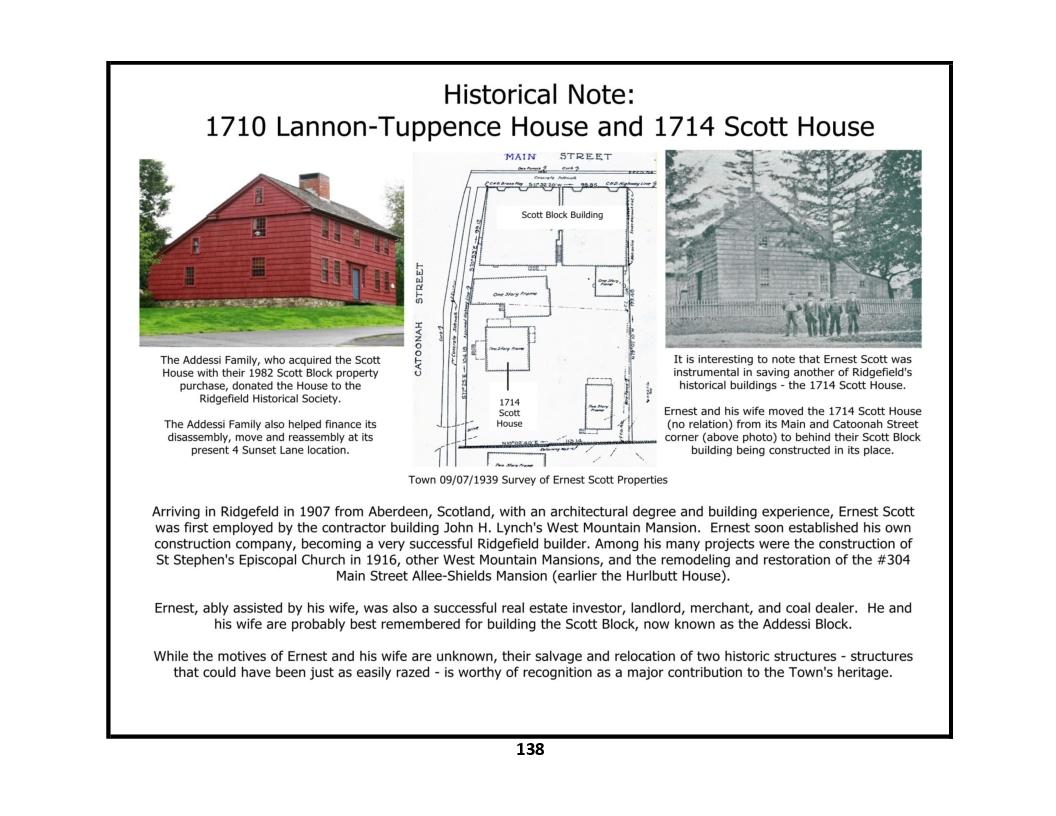
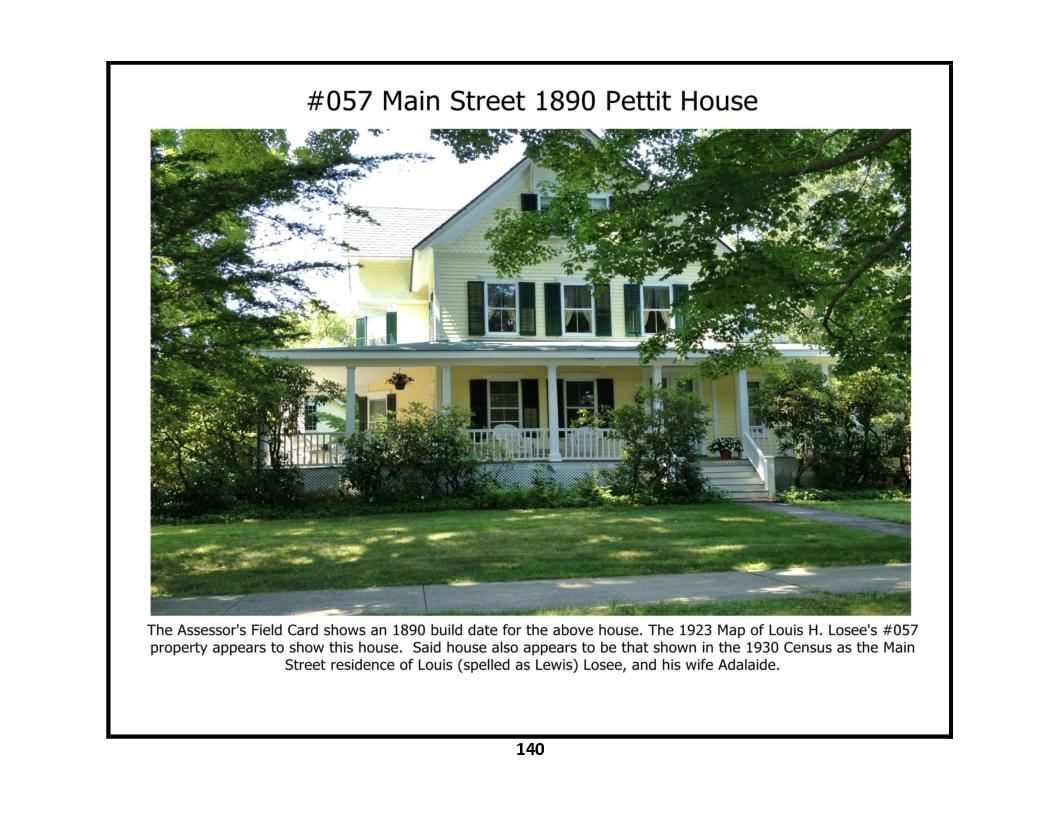
35 Main Street - photos 1, 2, 3, 4, 5, 6
55 Main Street - photo 1
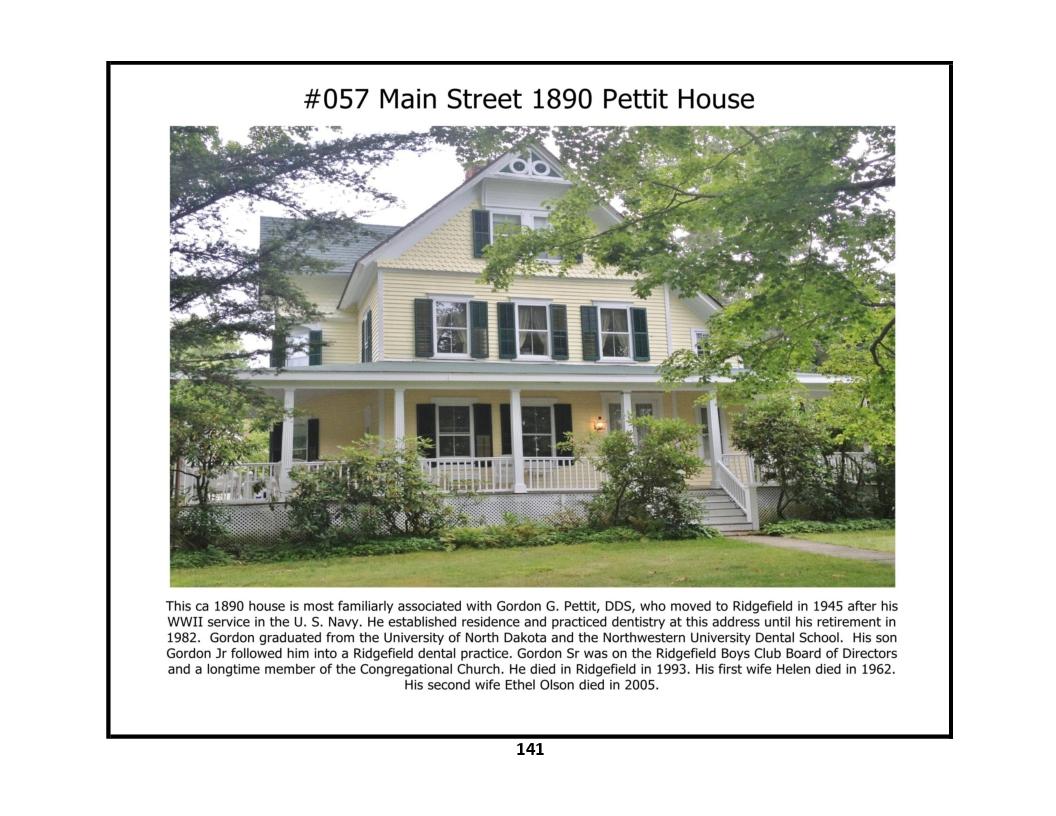
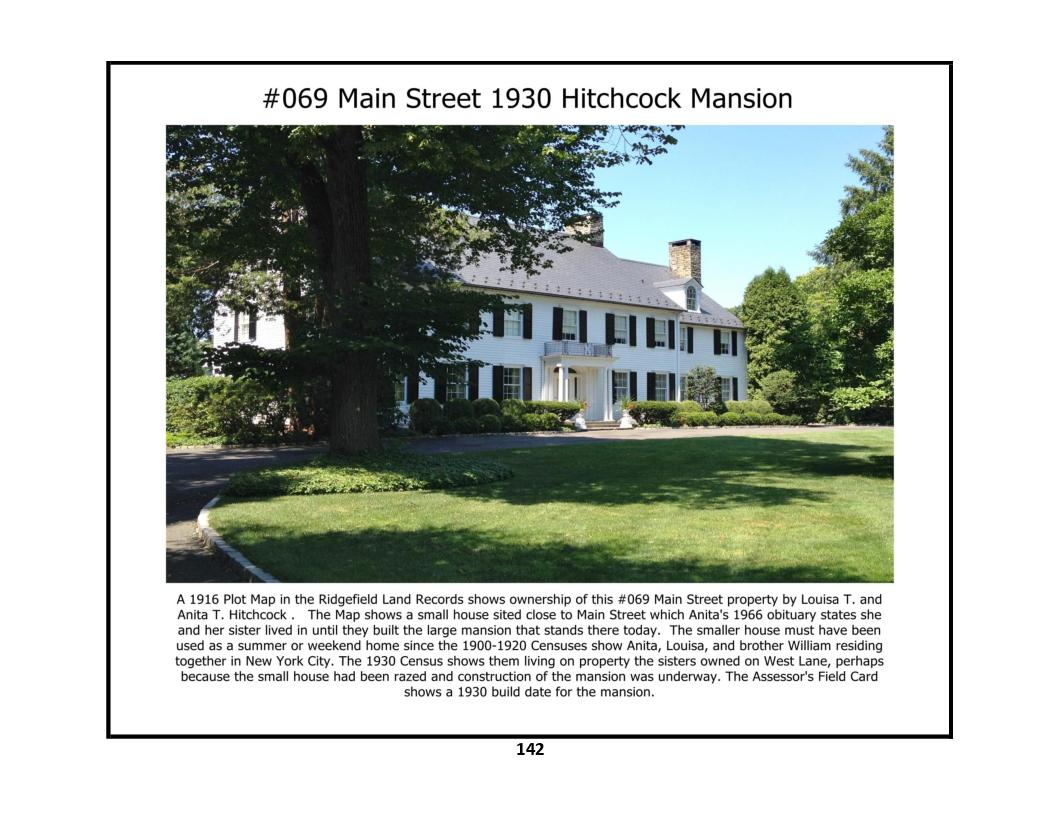
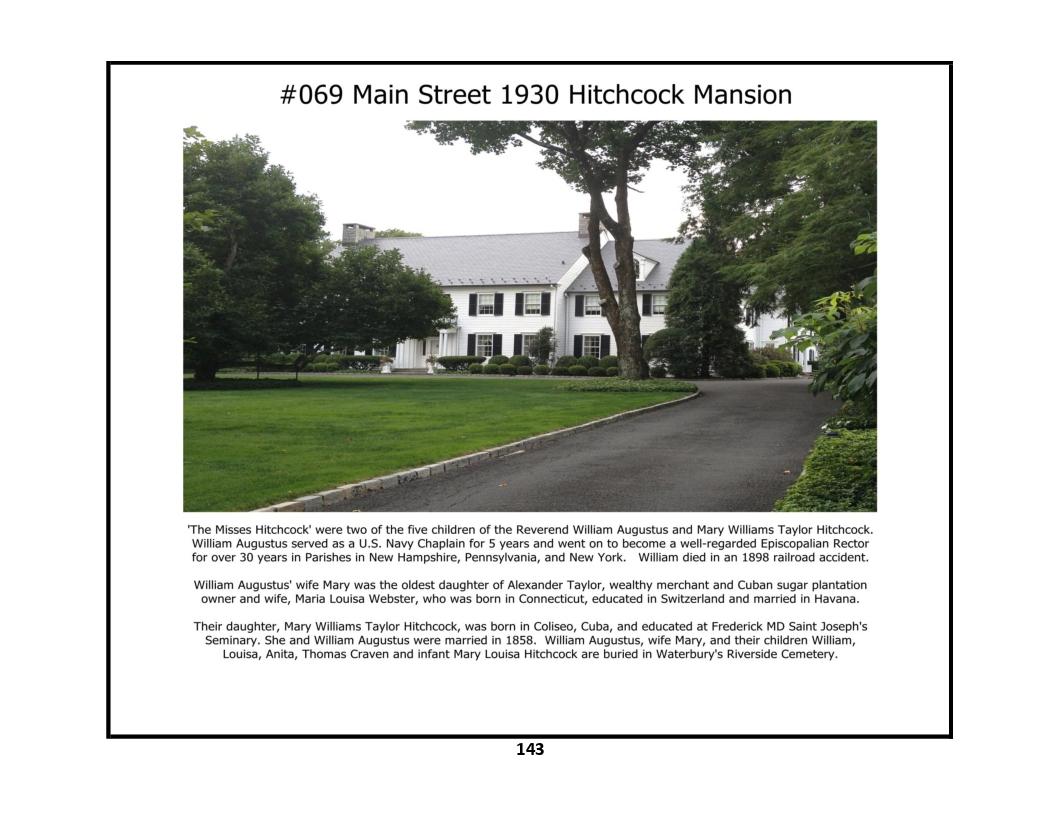
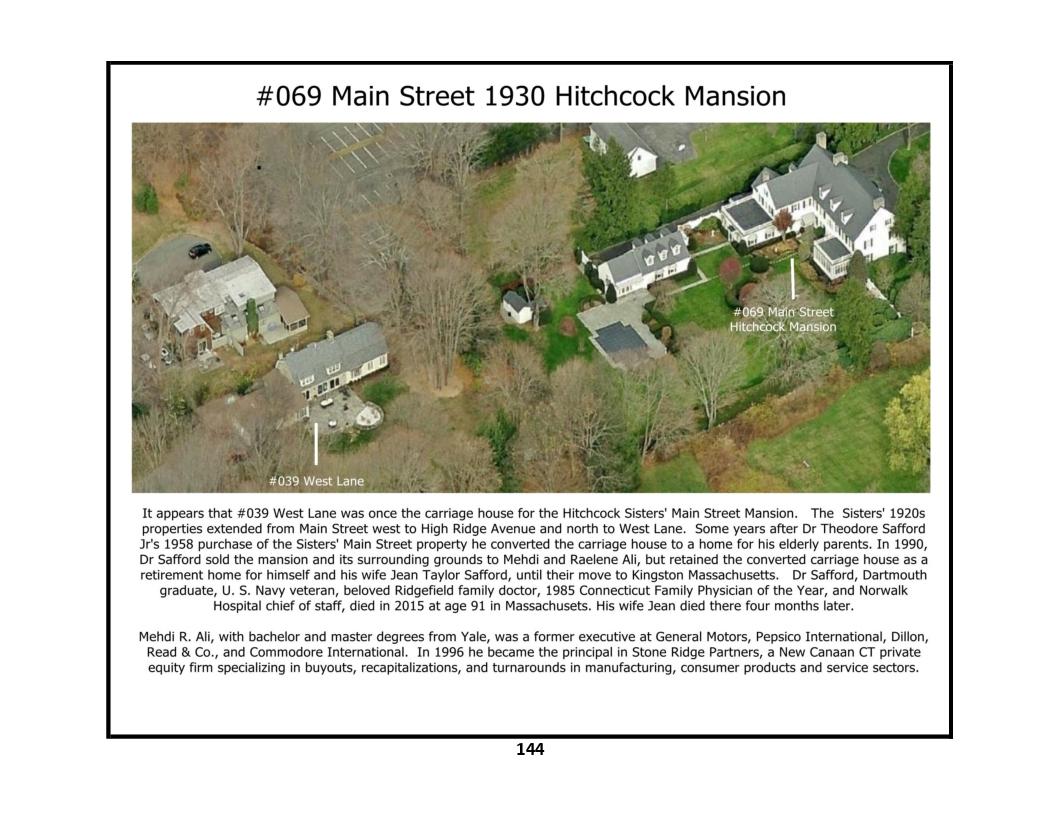
69 Main Street - photos 1, 2, 3
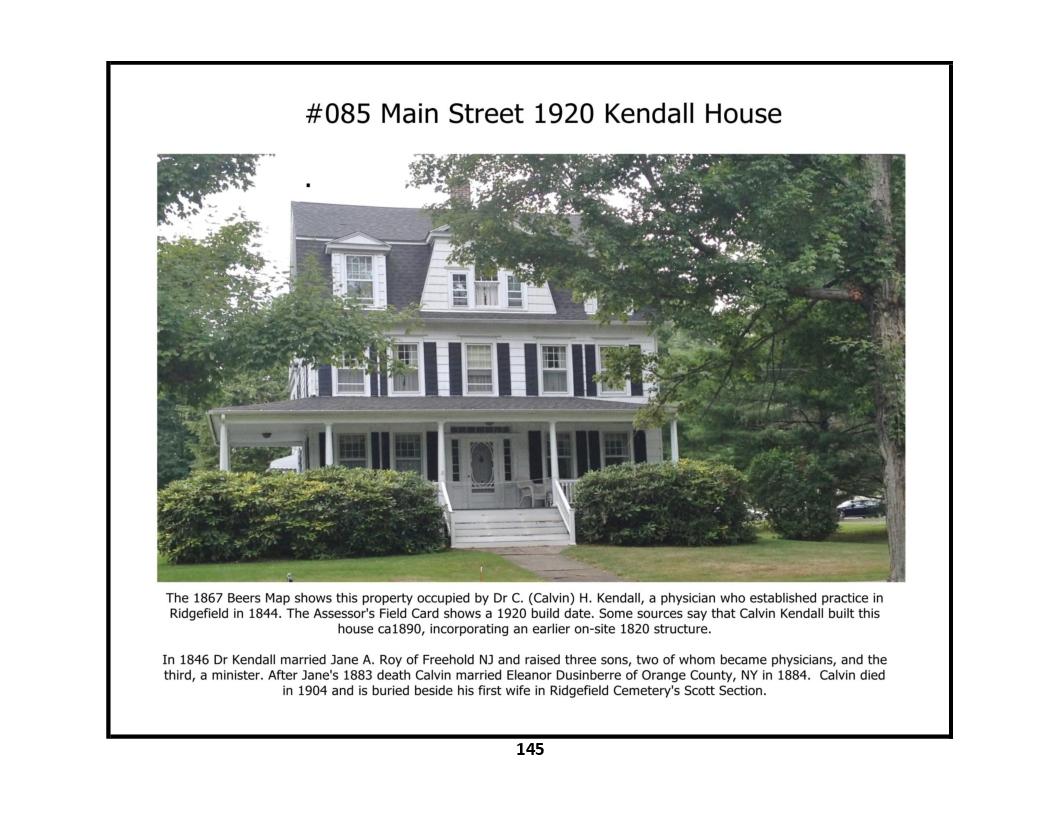
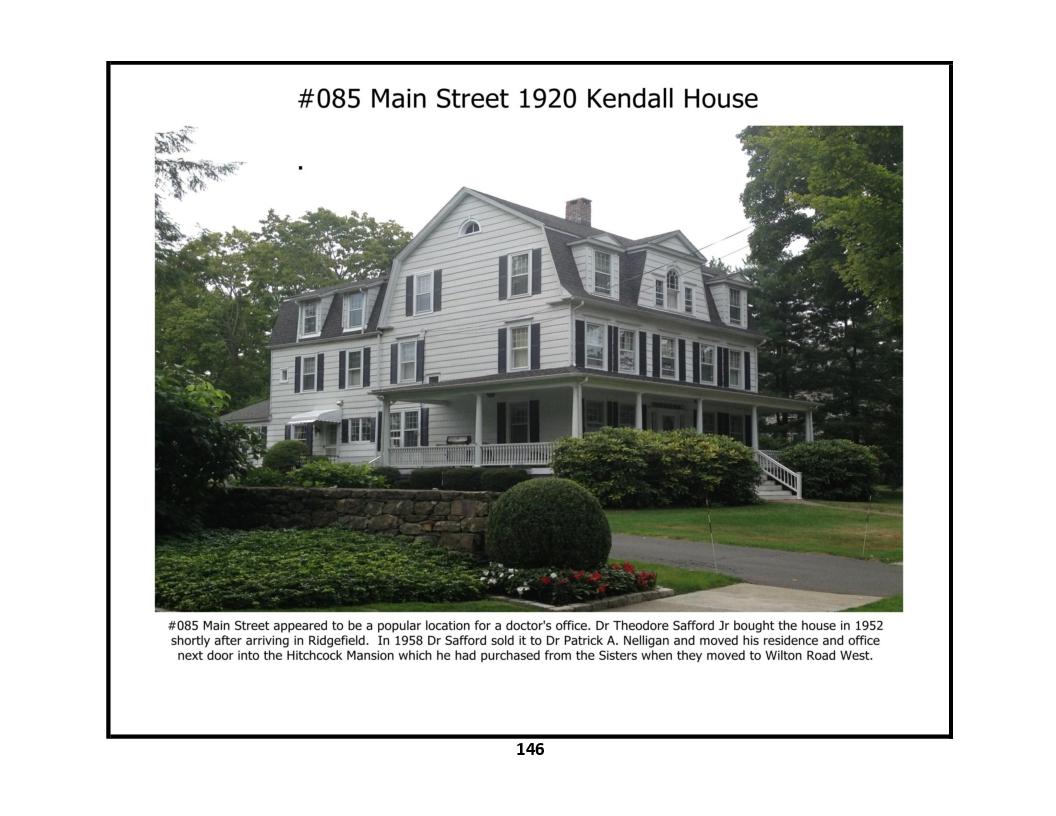
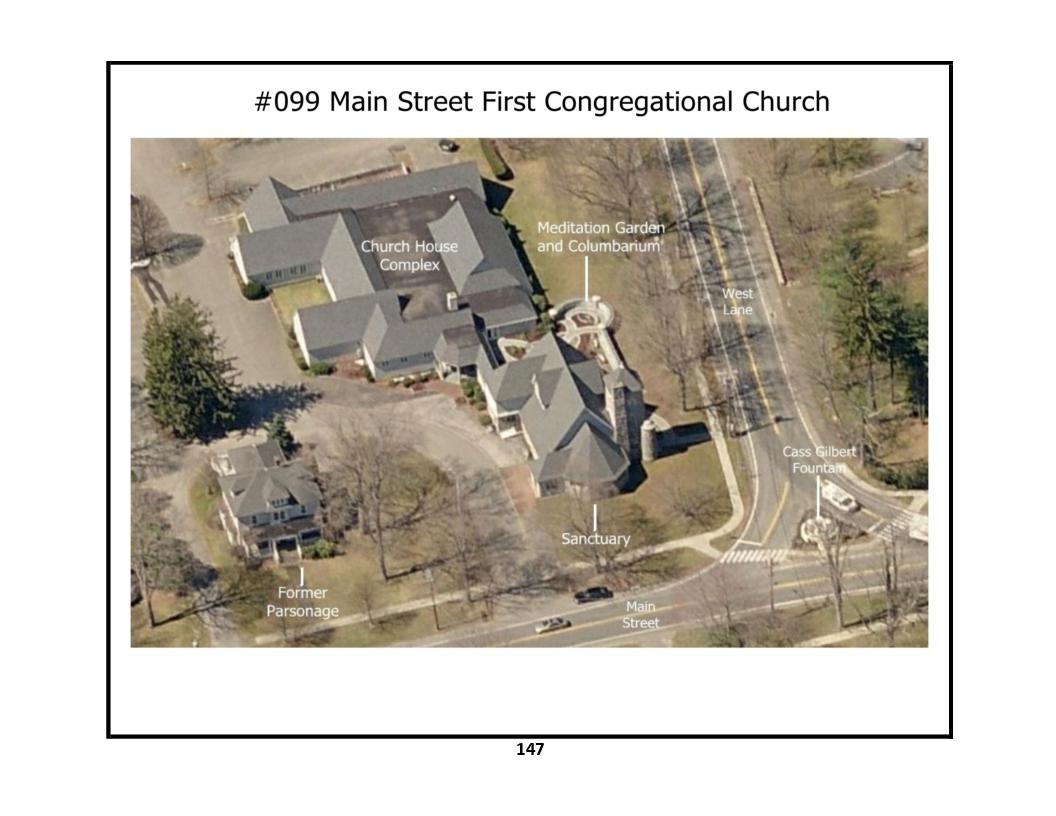
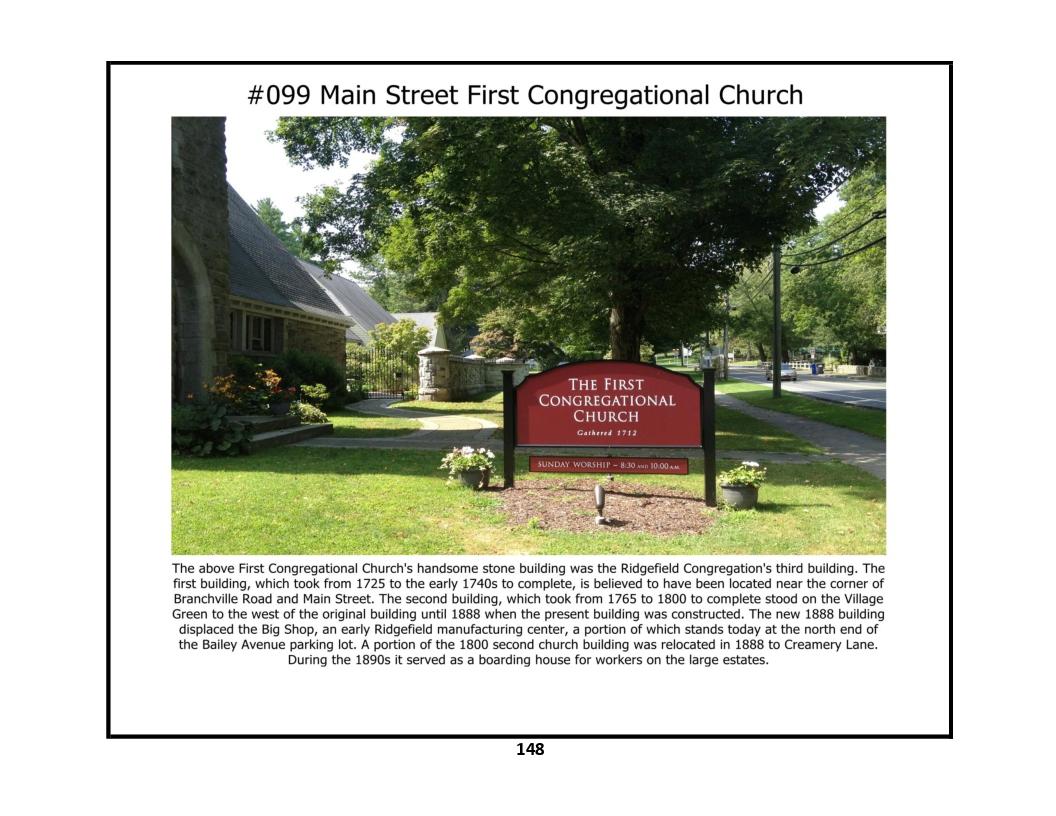
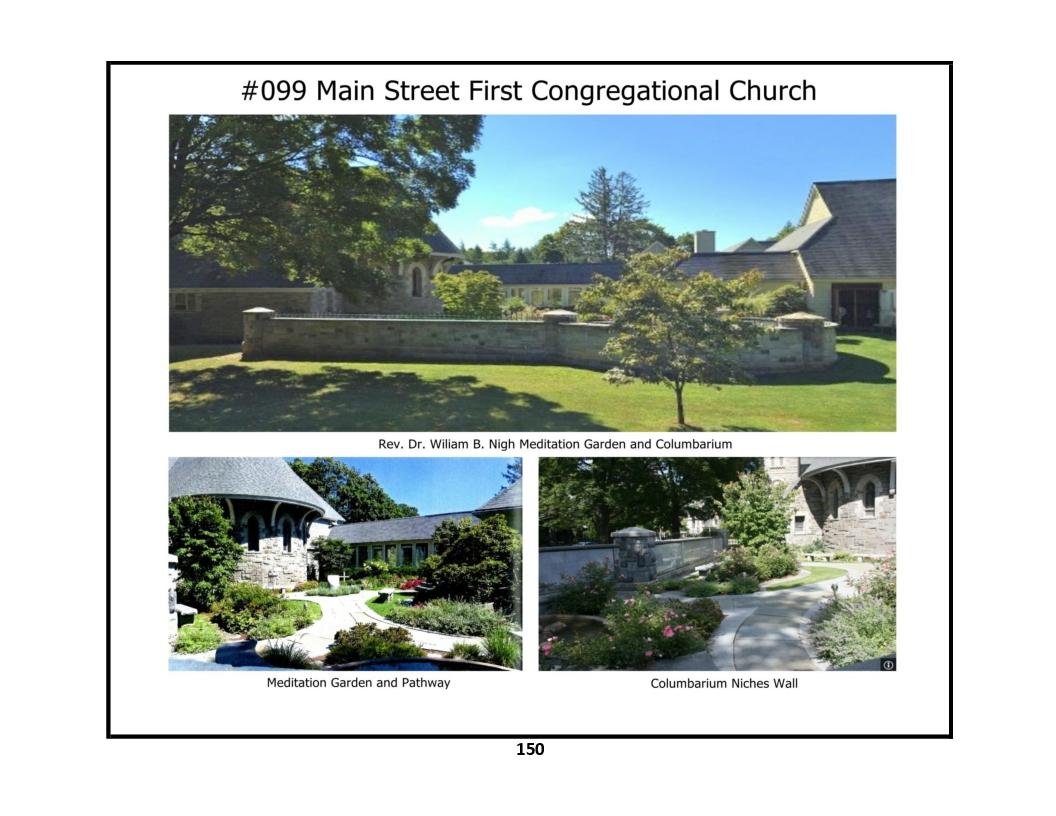
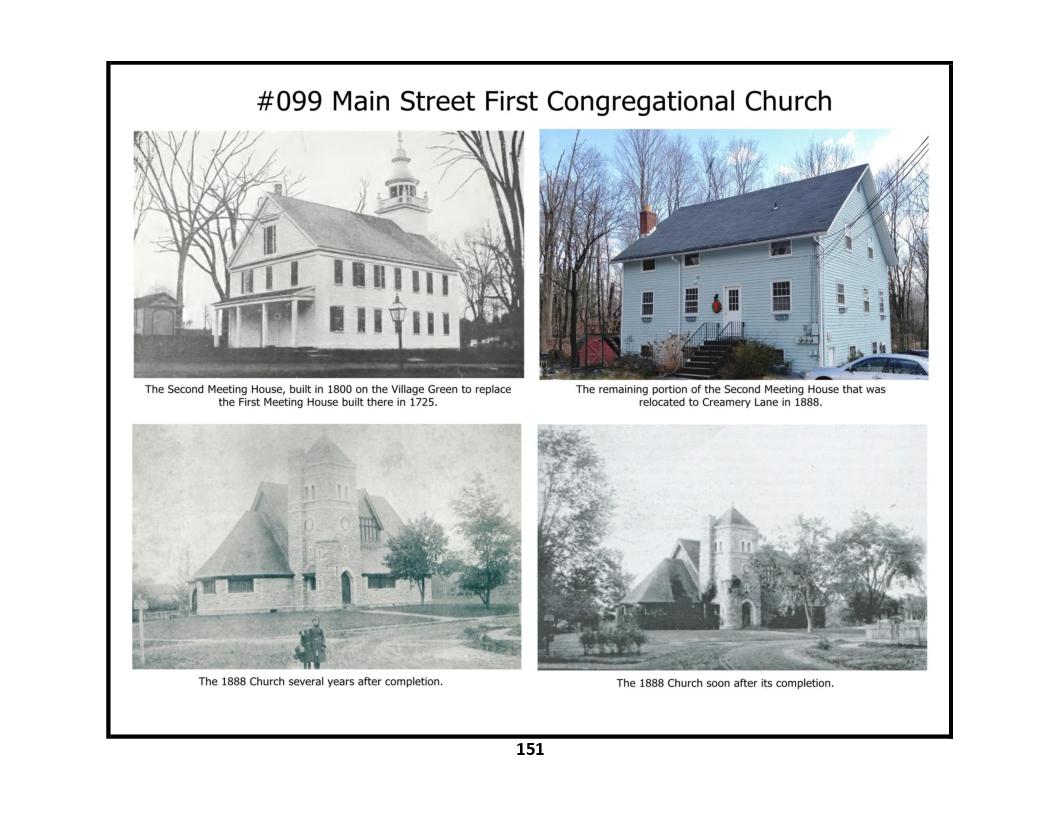
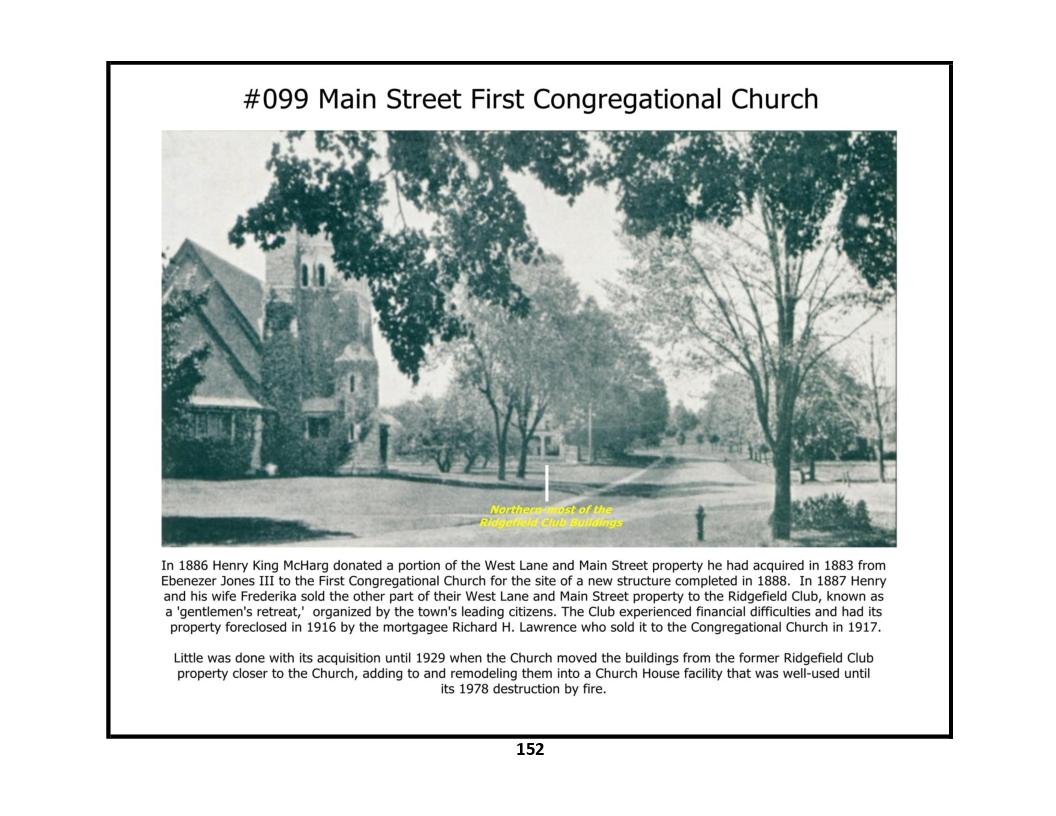
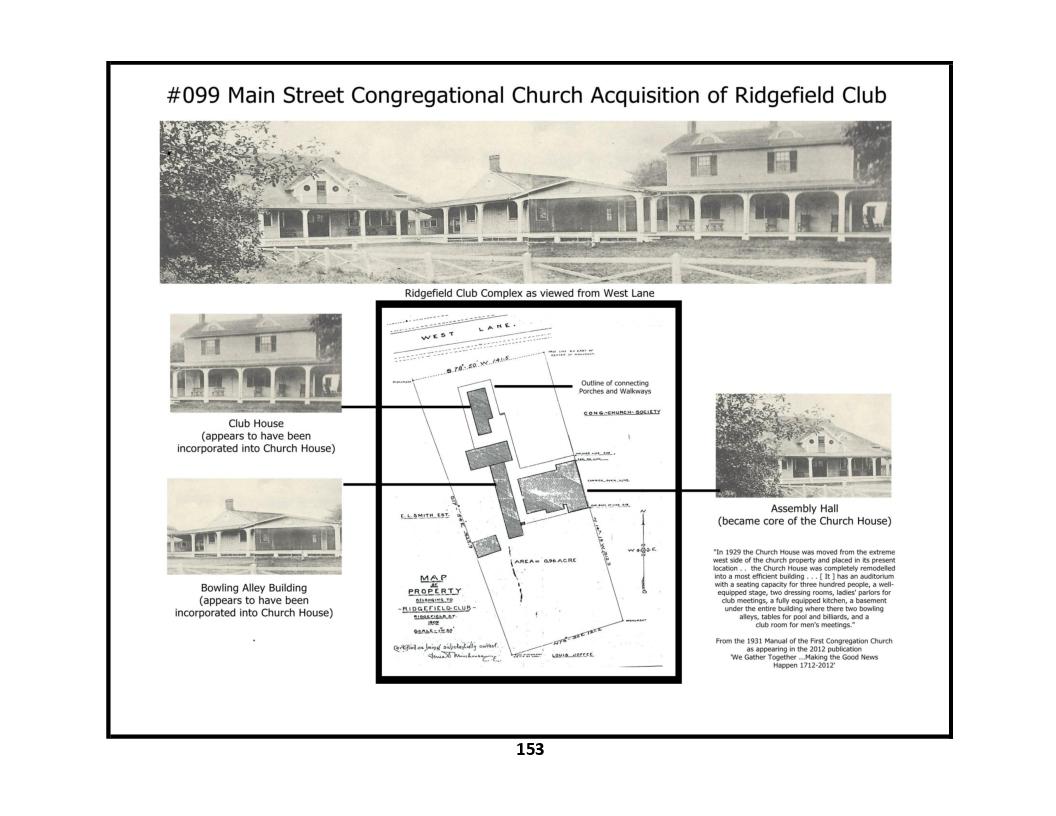
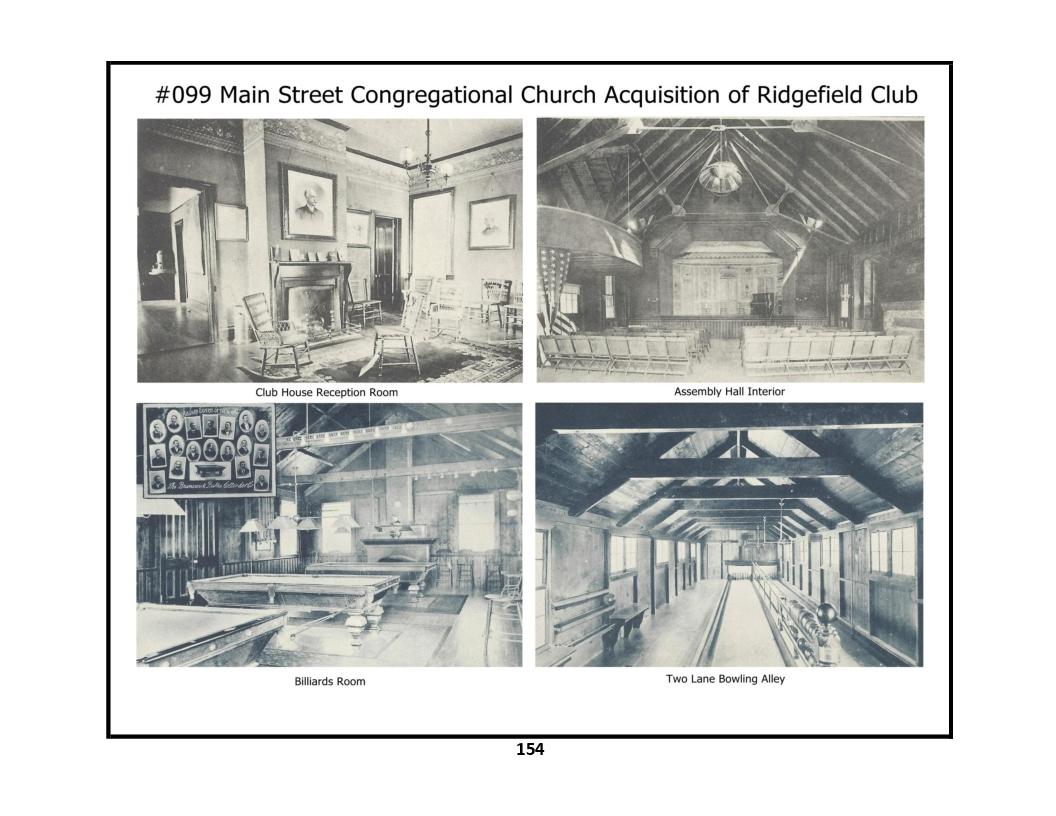
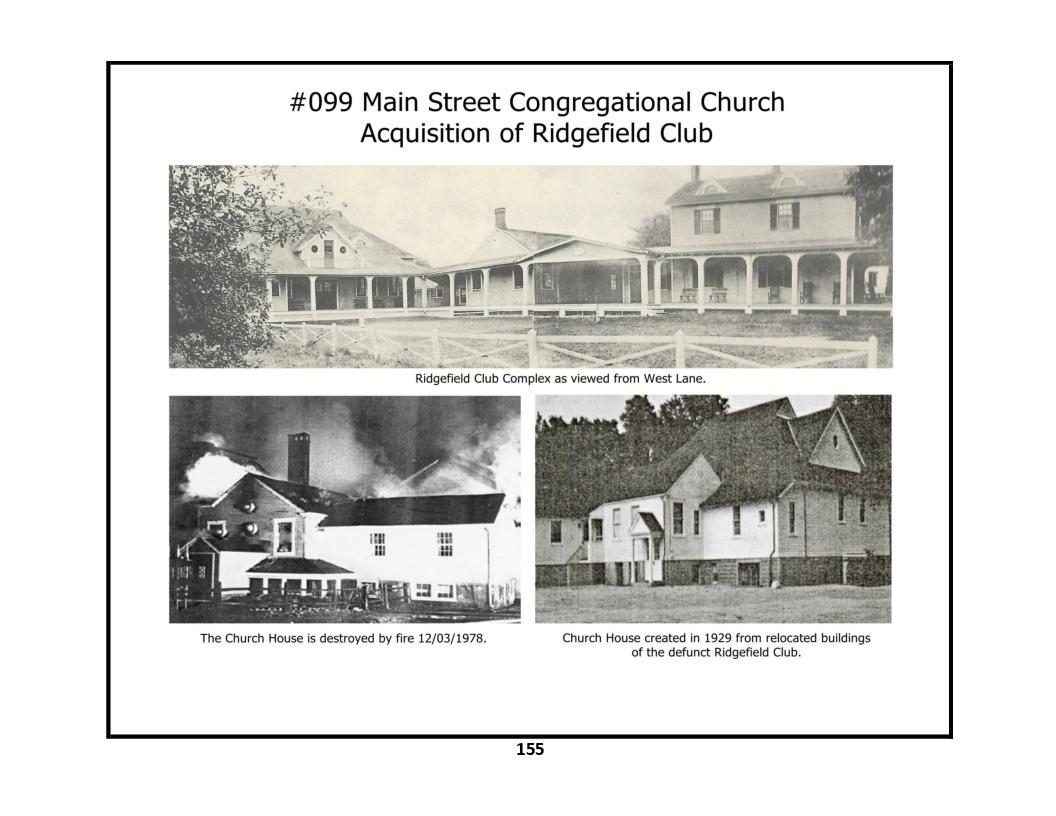
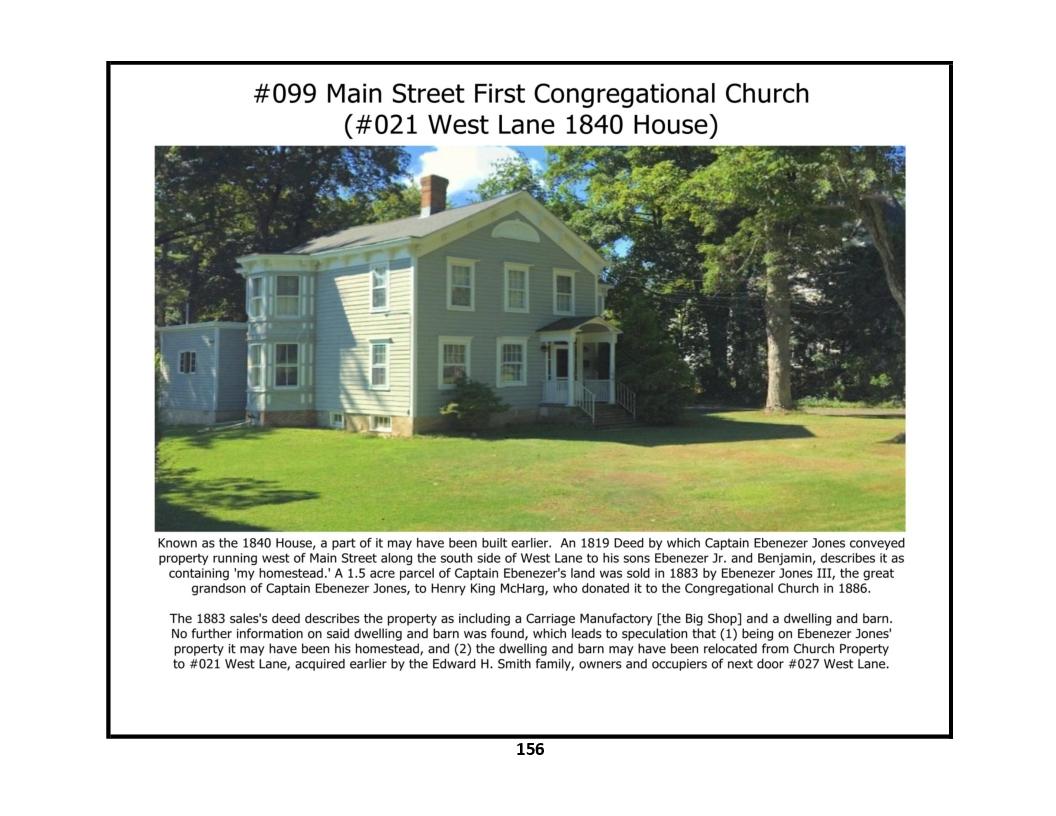
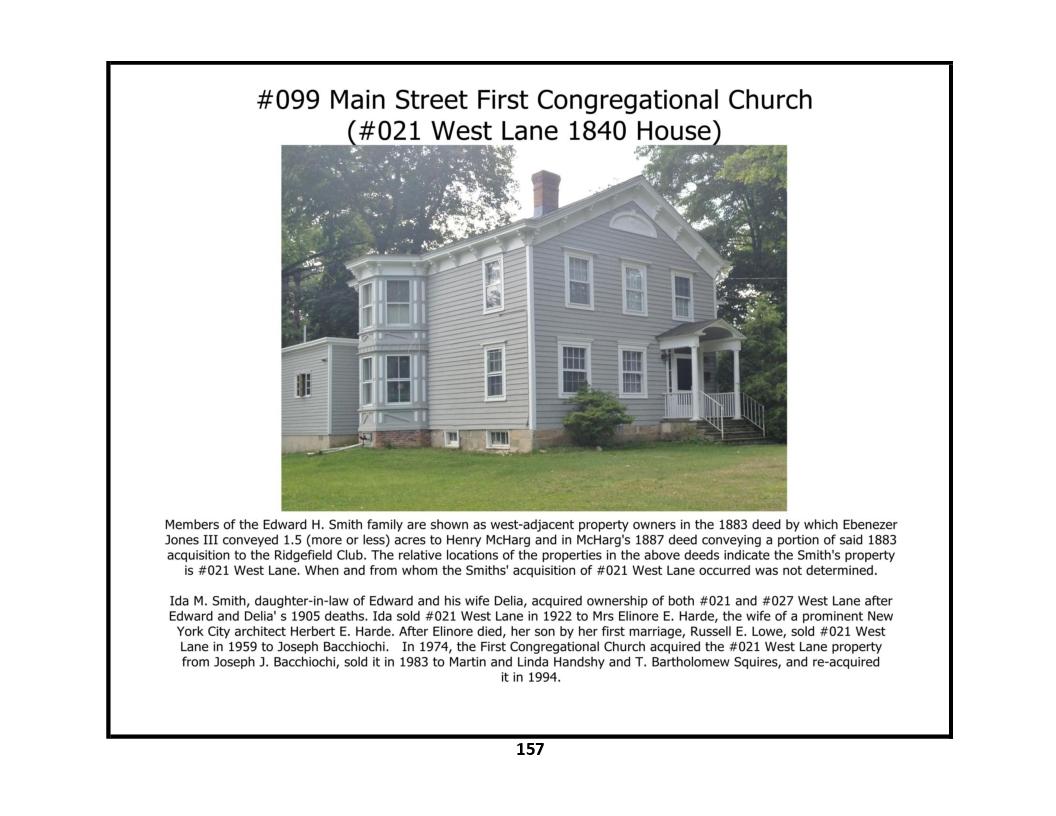
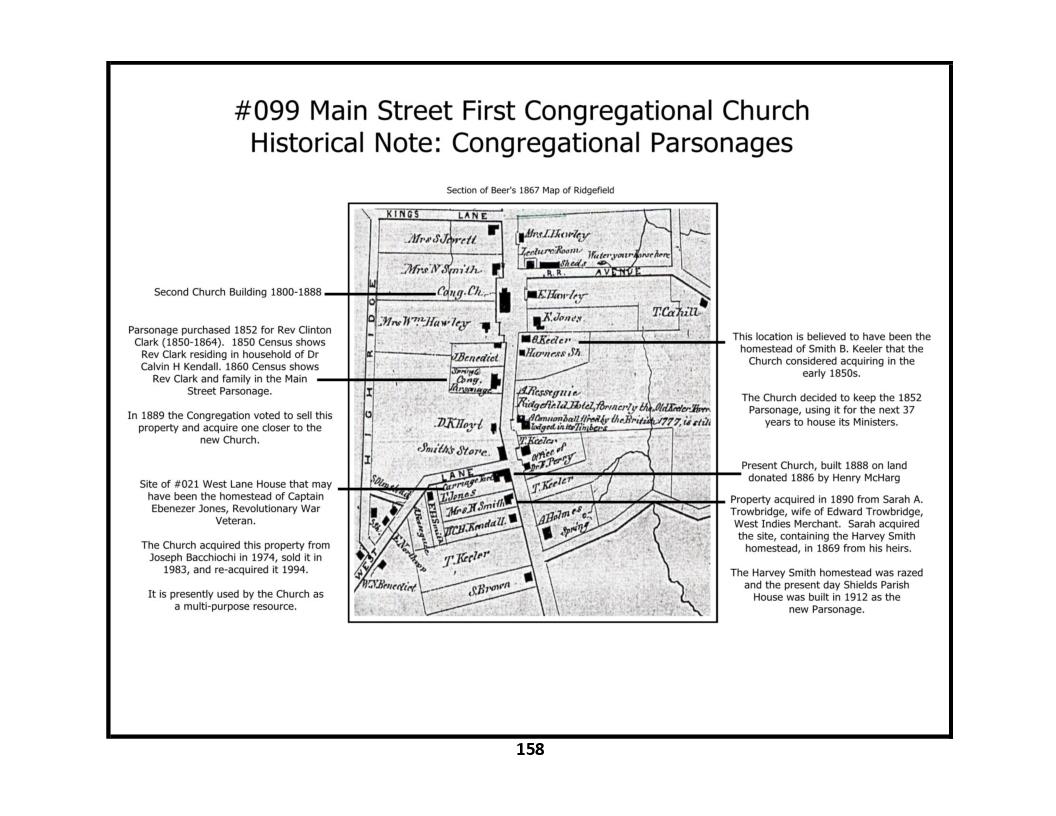
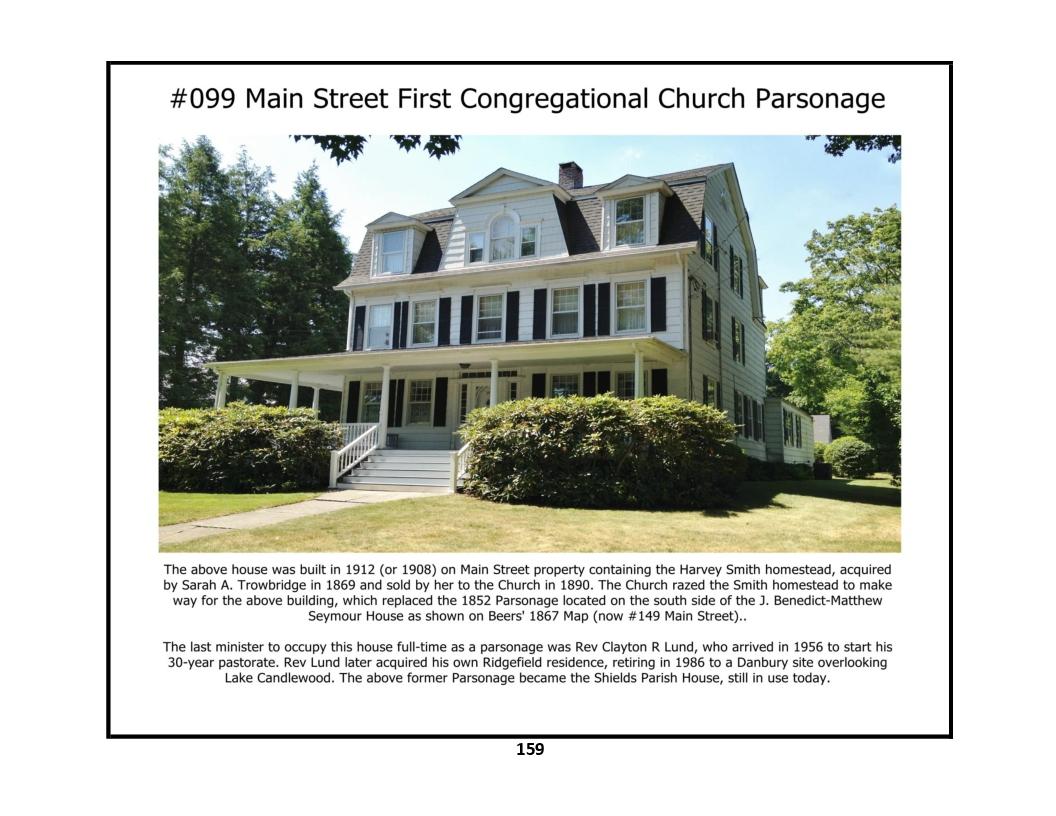
99 Main Street - photos 1, 2, 3, 4, 5, 6, 7, 8, 9, 10, 11, 12, 13
Street Level Views: South Main Street - West Side - West Lane
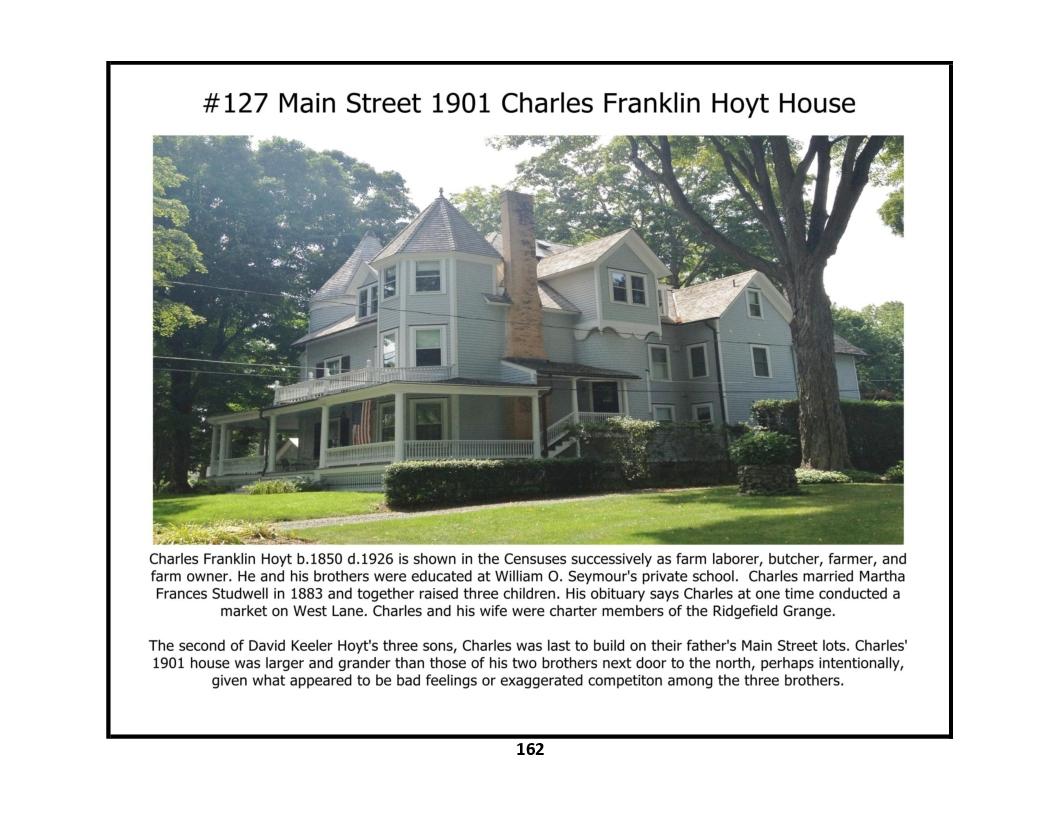
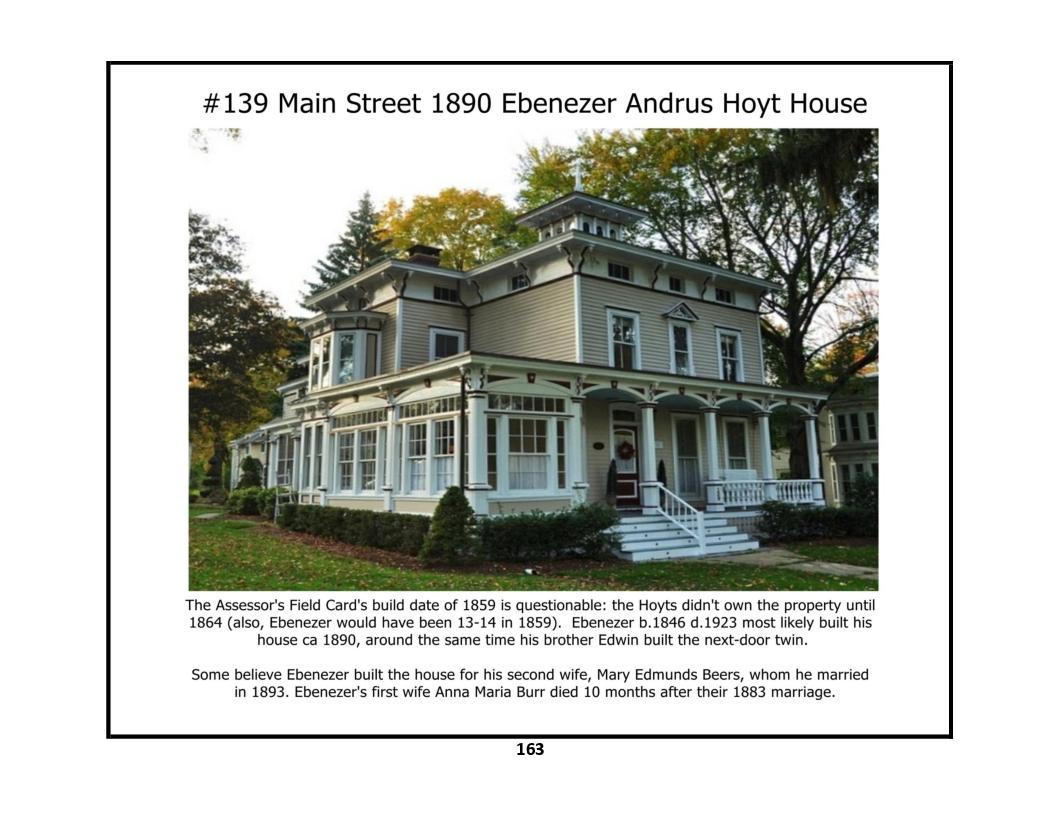
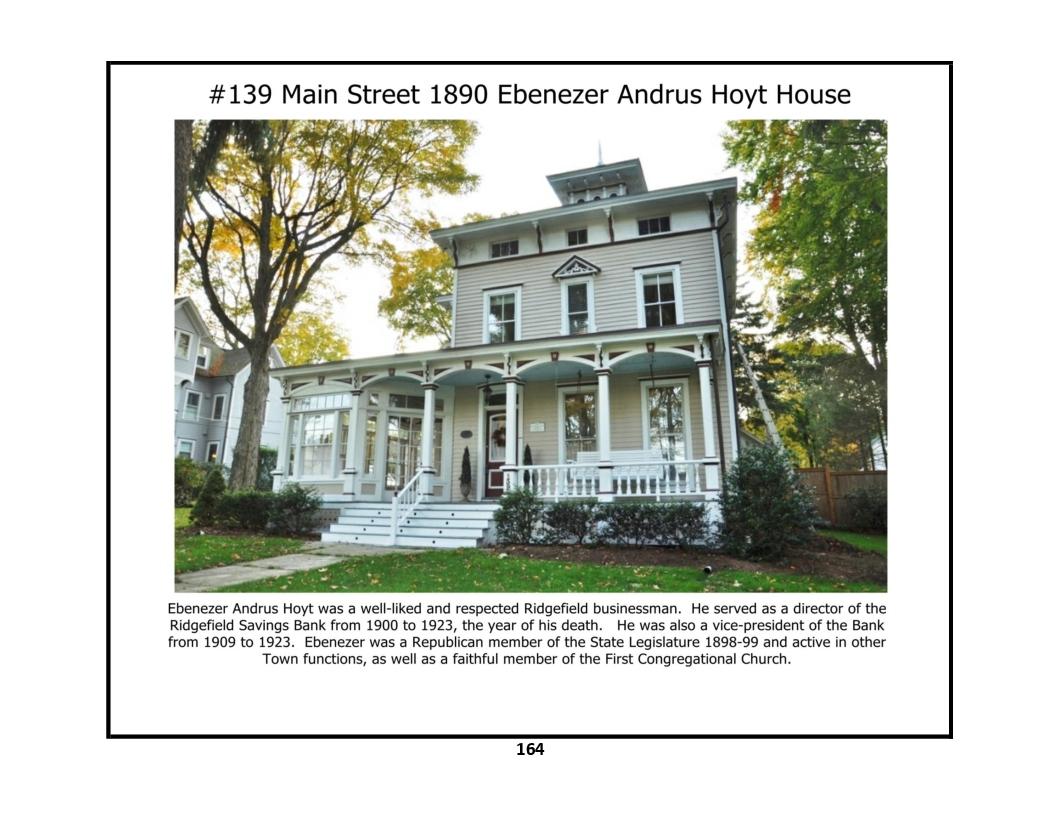
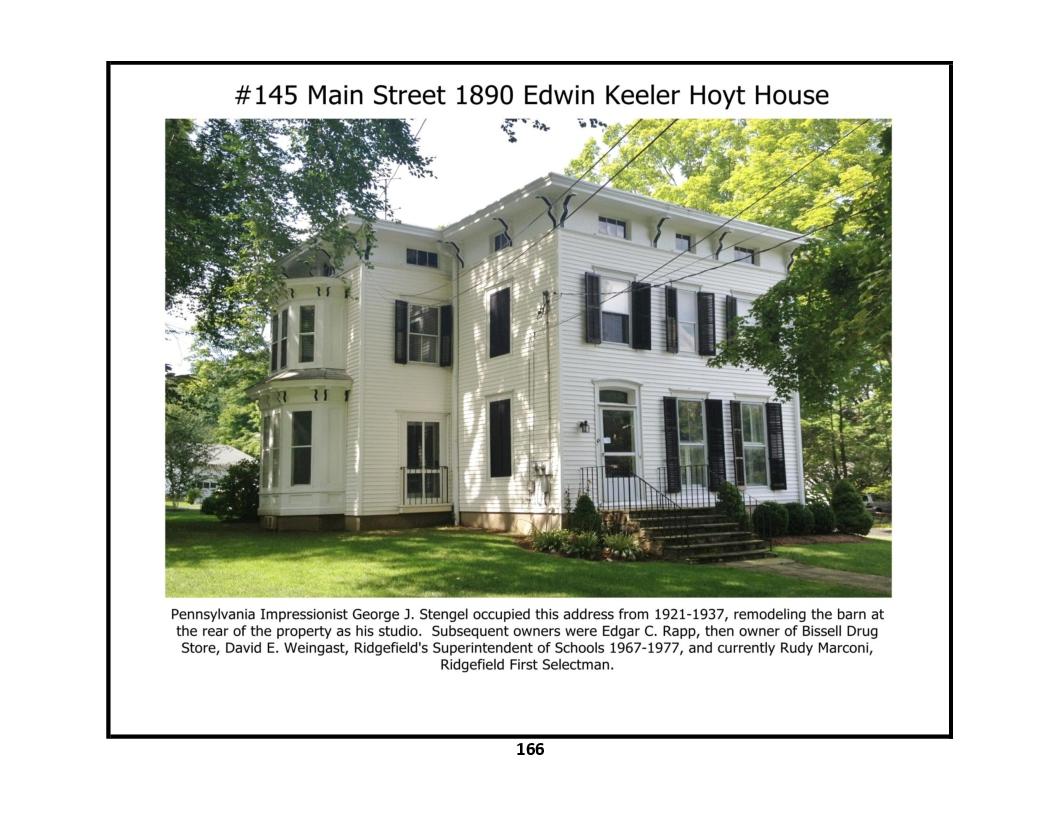
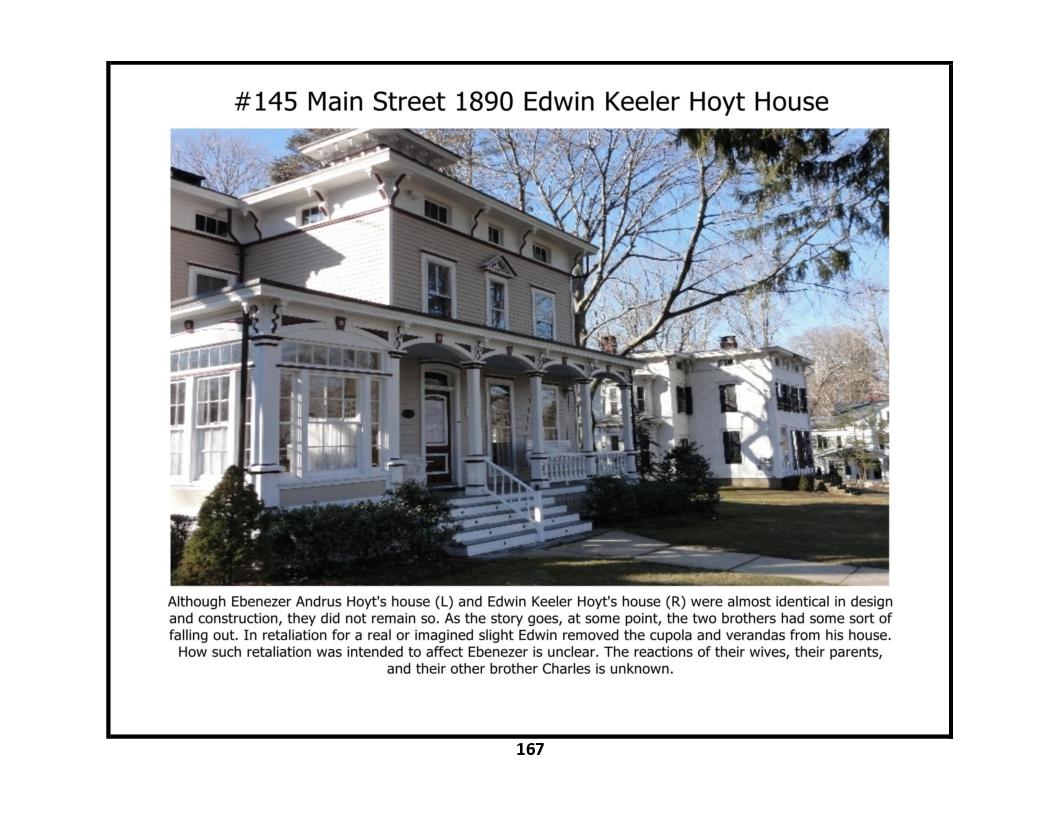
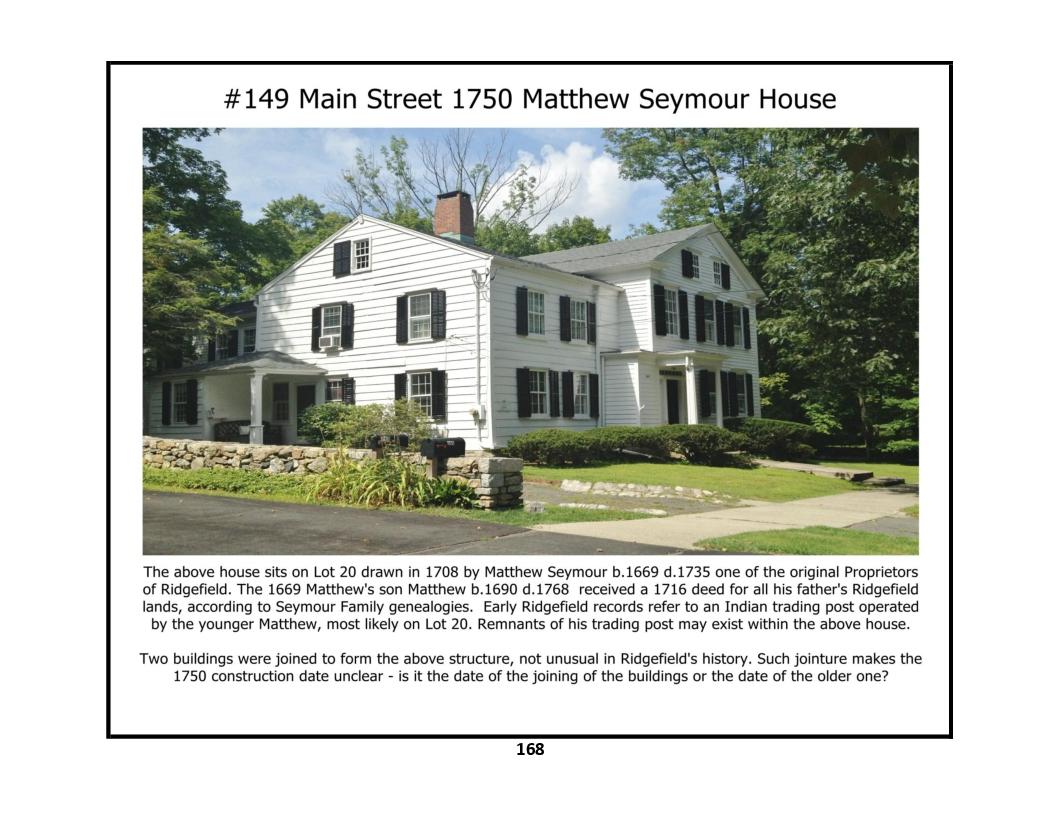
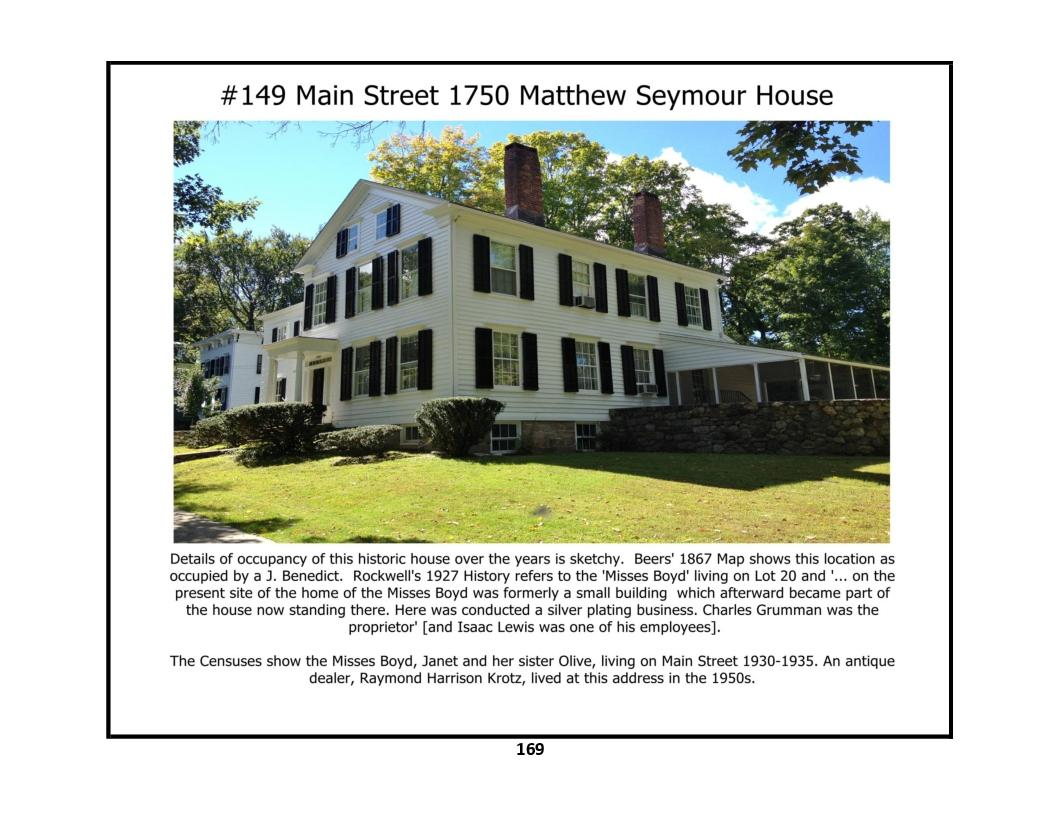
145 Main Street - photos 1, 2, 3
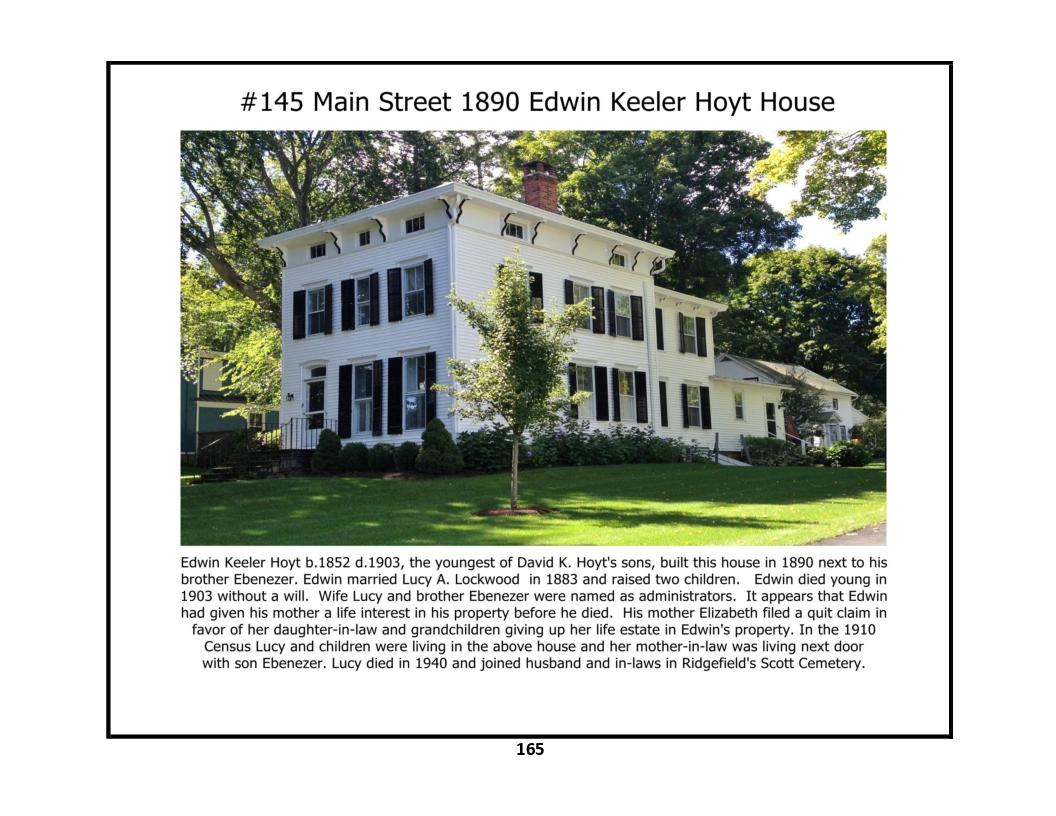
155 Main Street - photo 1
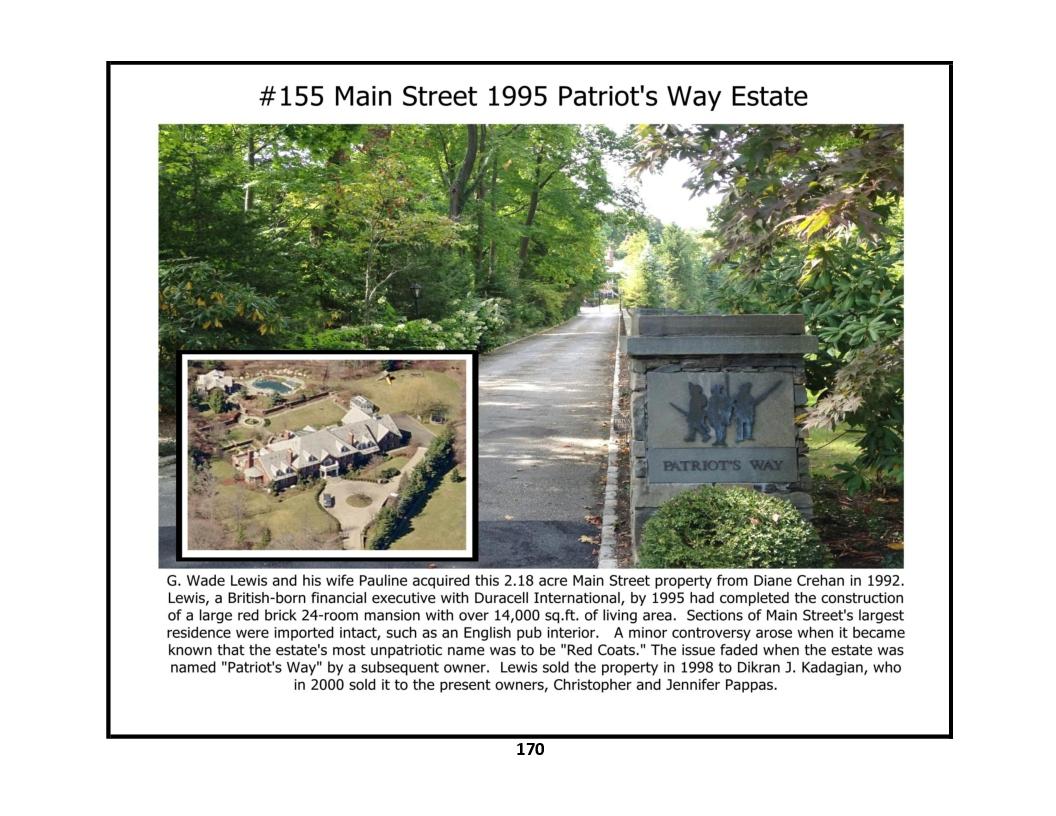
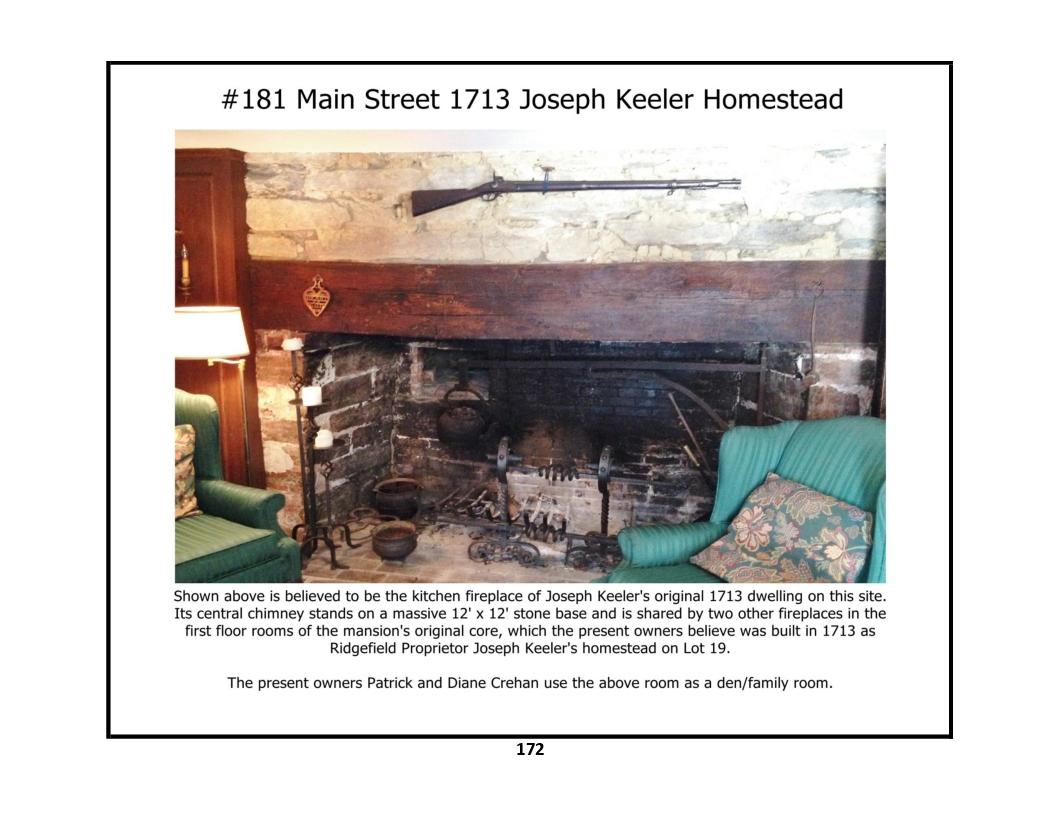
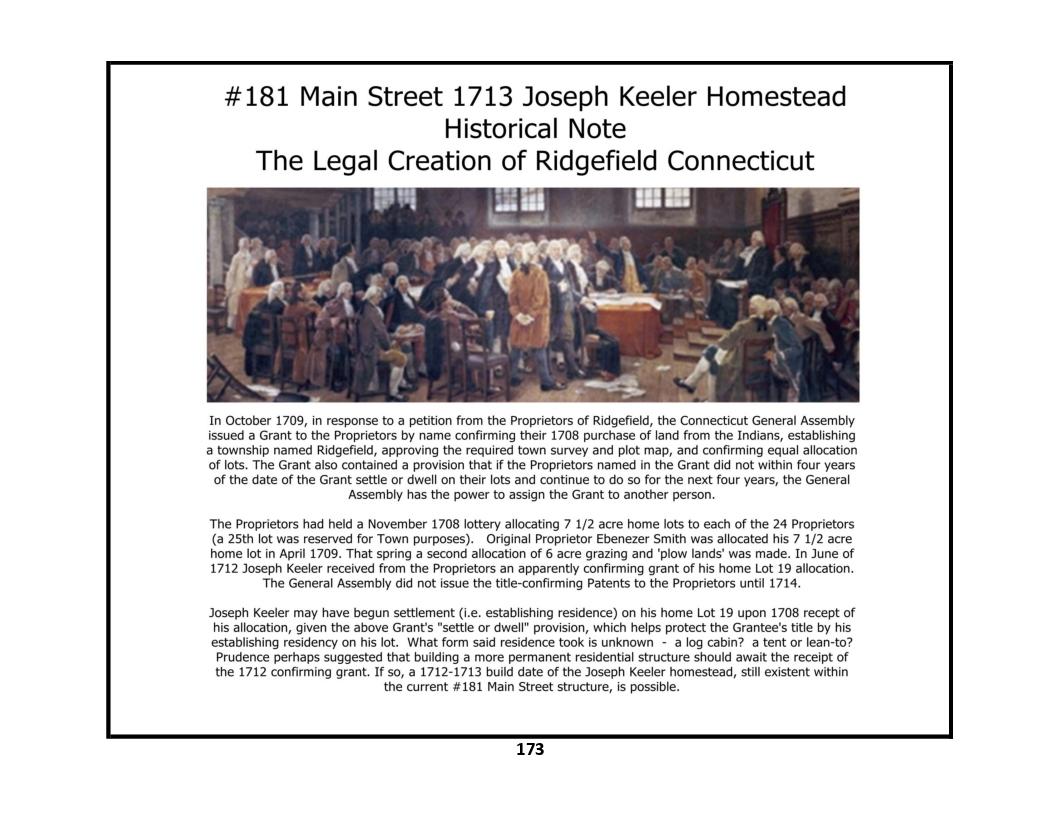
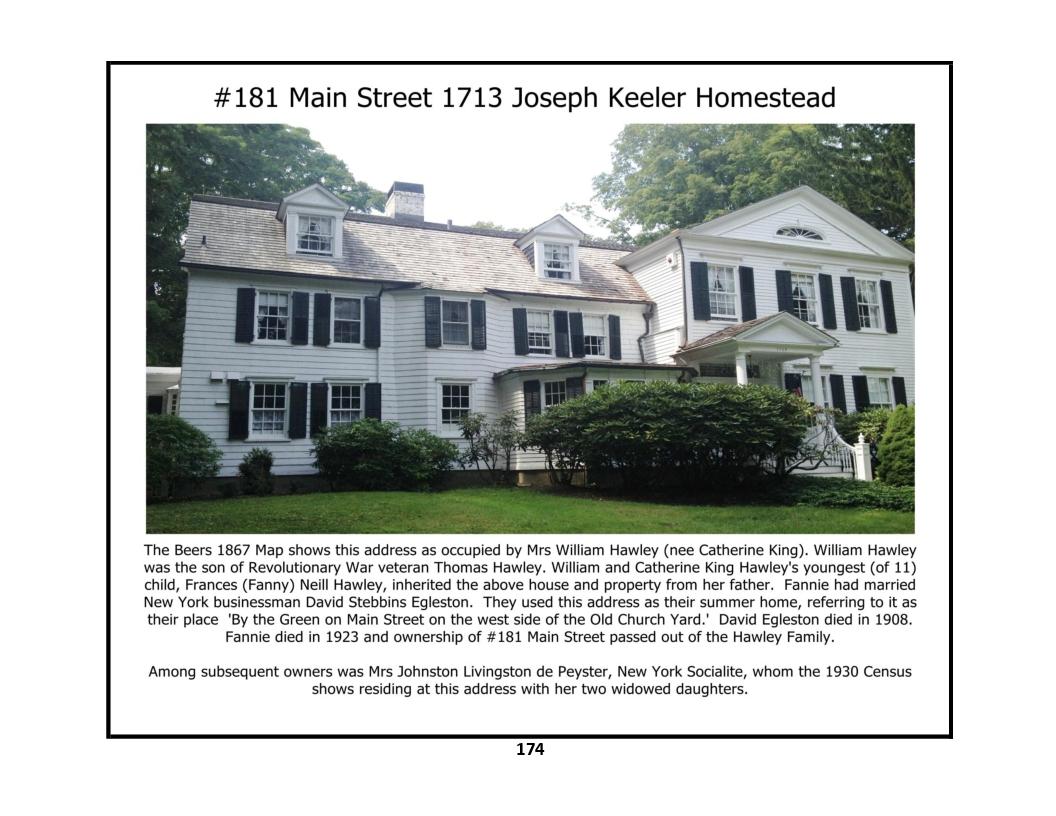
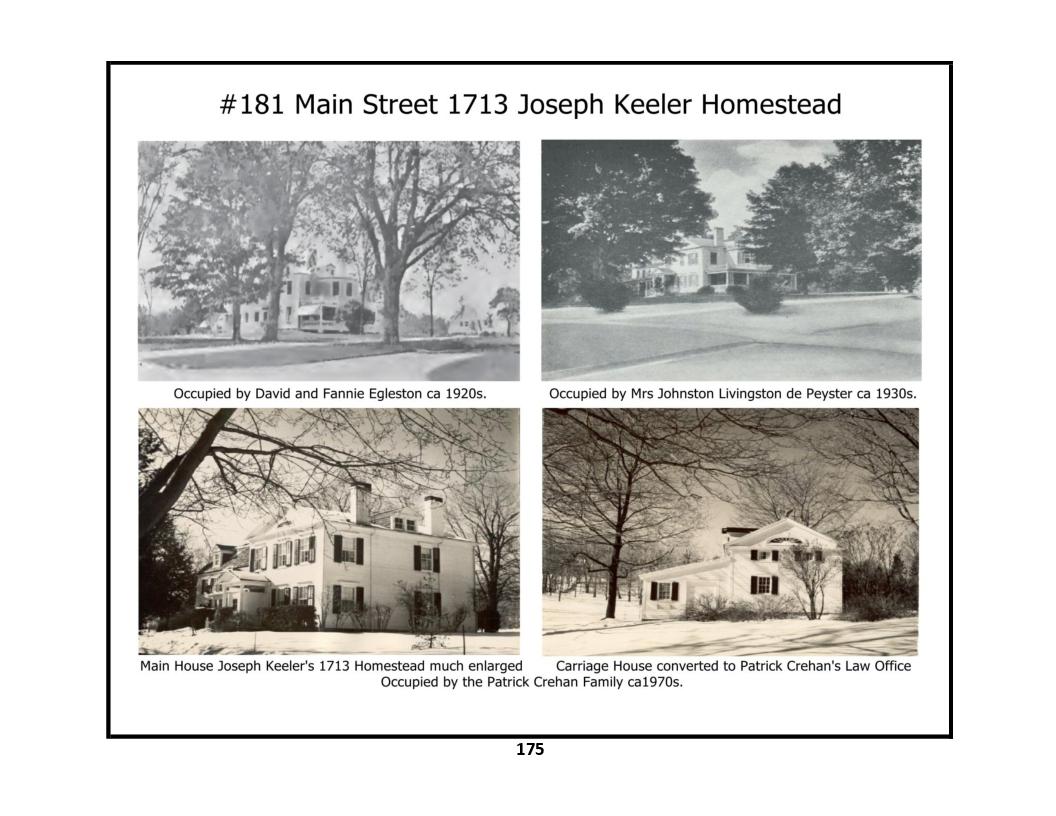
181 Main Street - photos 1, 2, 3, 4, 5
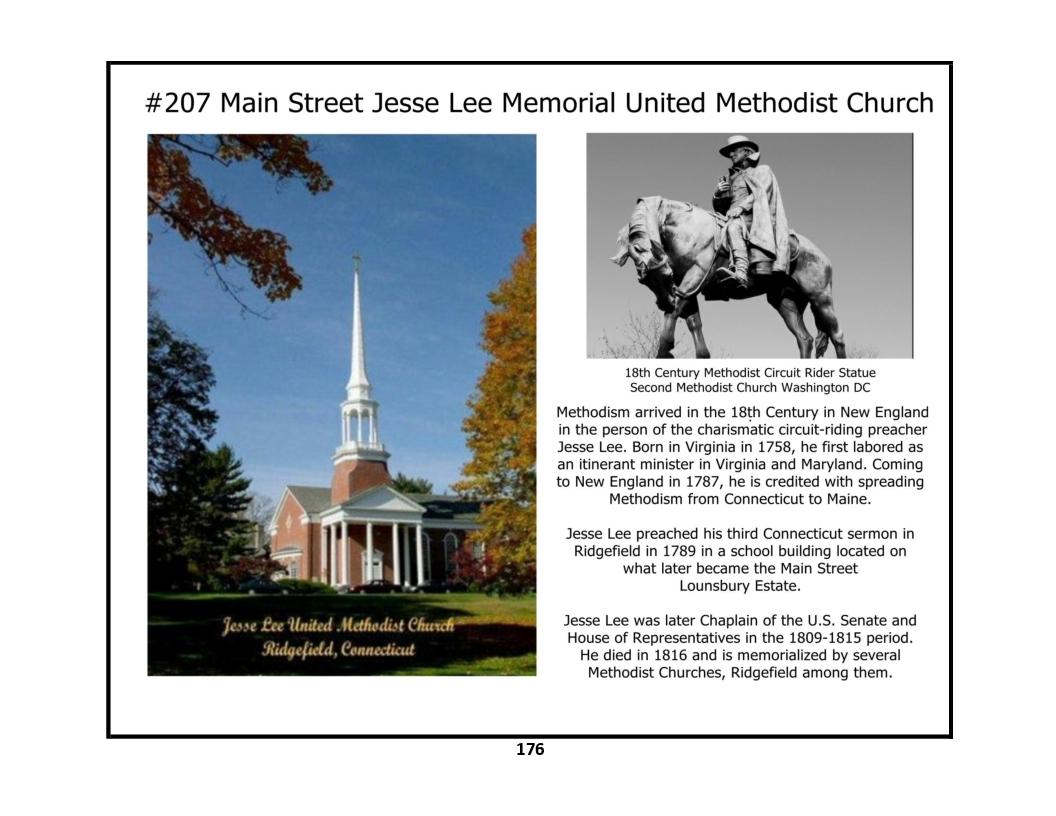
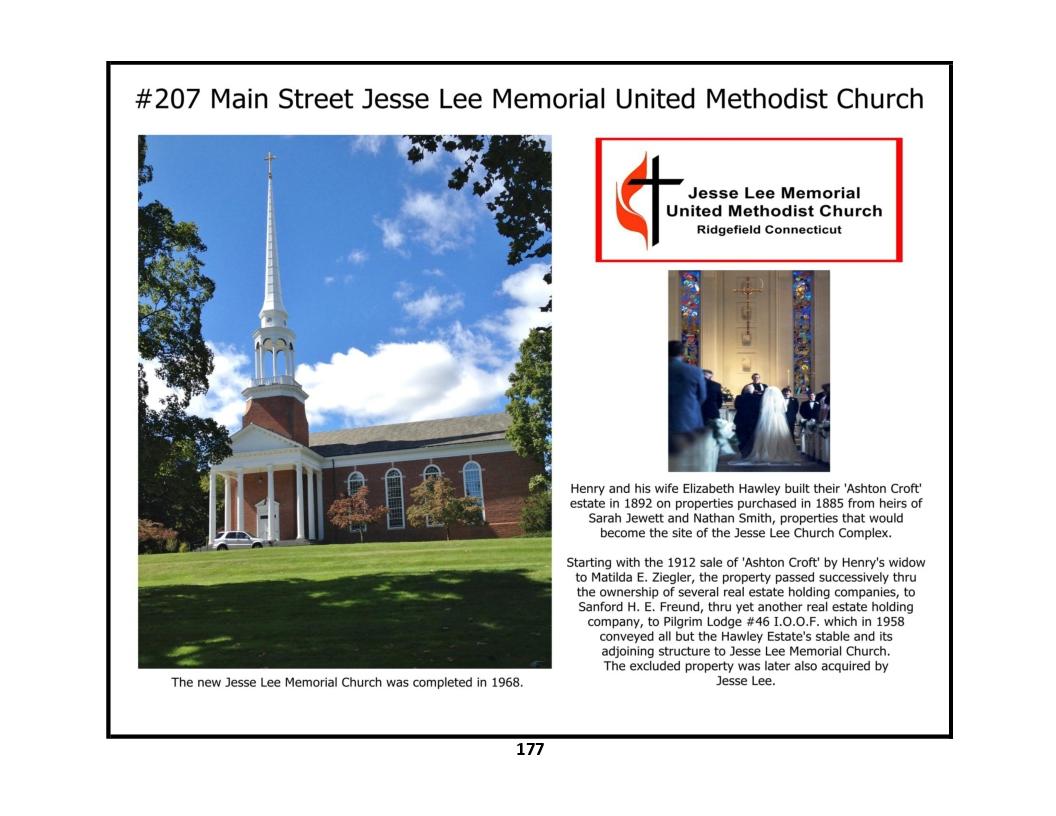
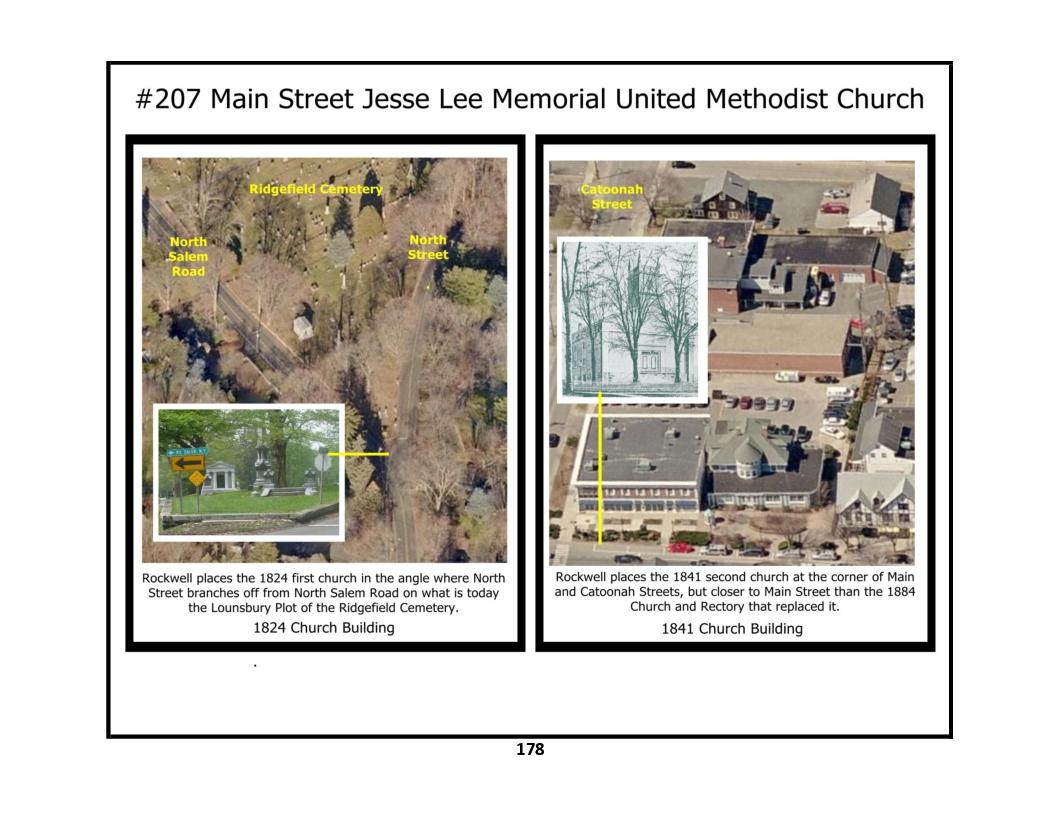
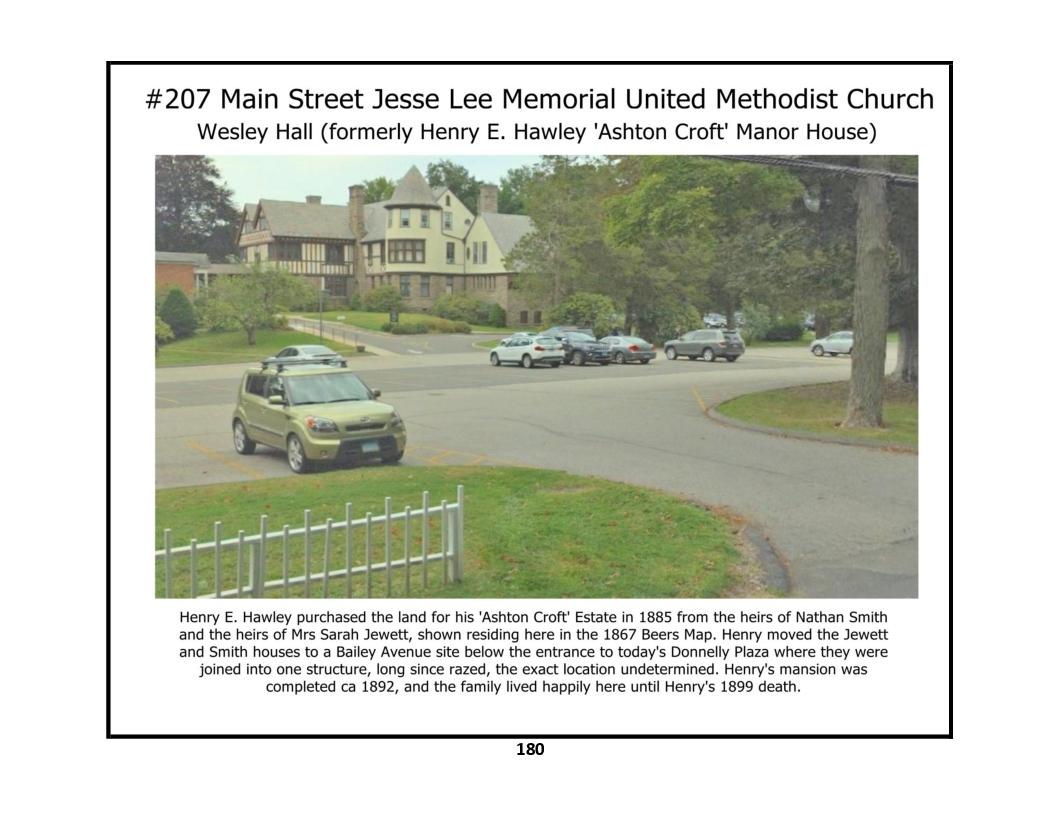
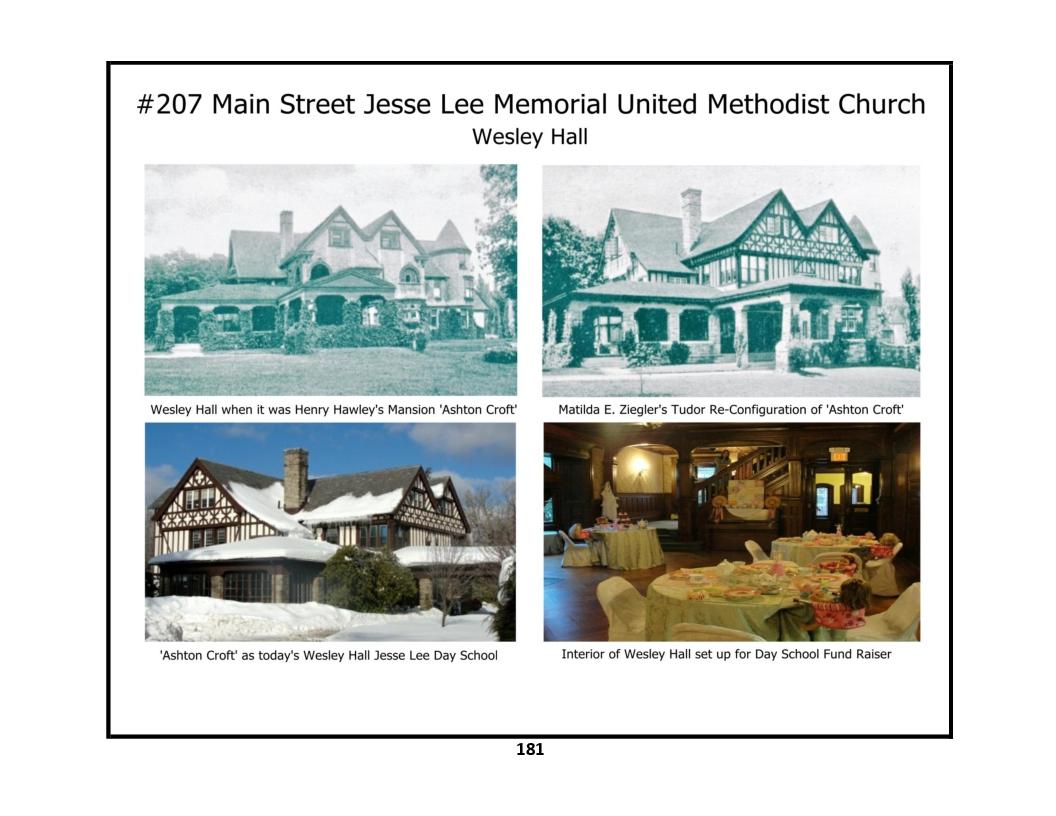
207 Main Street - photos 1, 2, 3, 4, 5, 6, 7
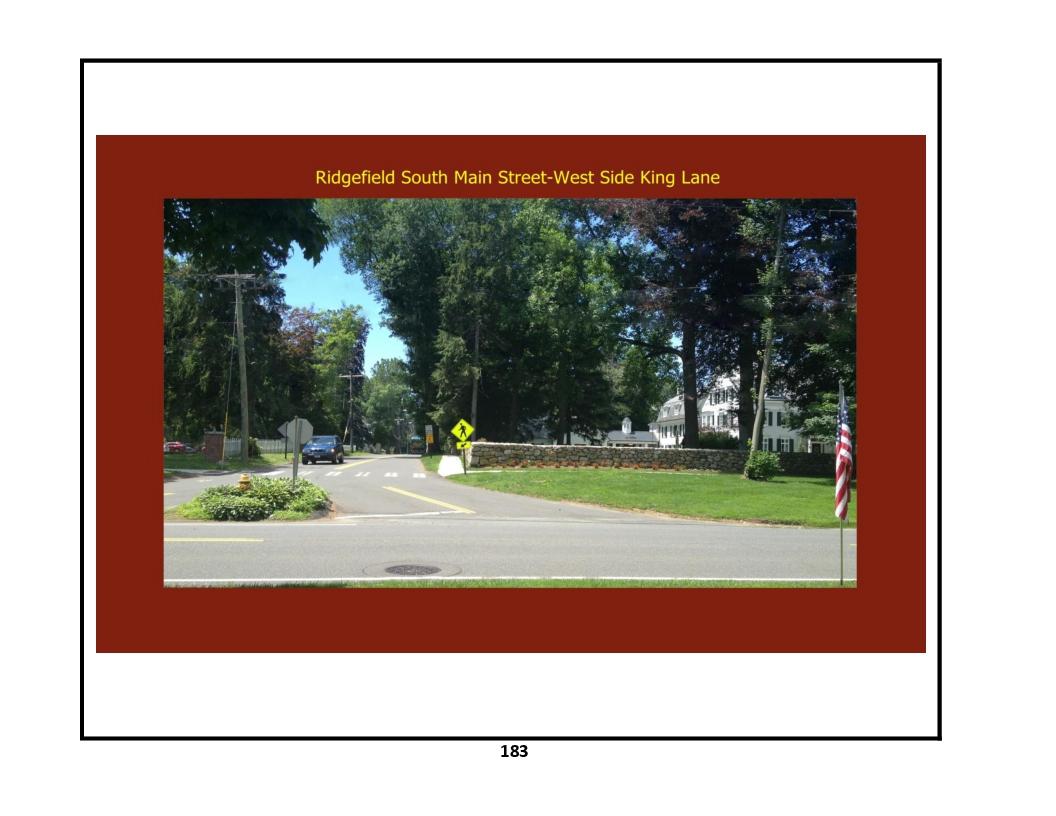
Street Level Views: South Main Street - West Side - King Lane
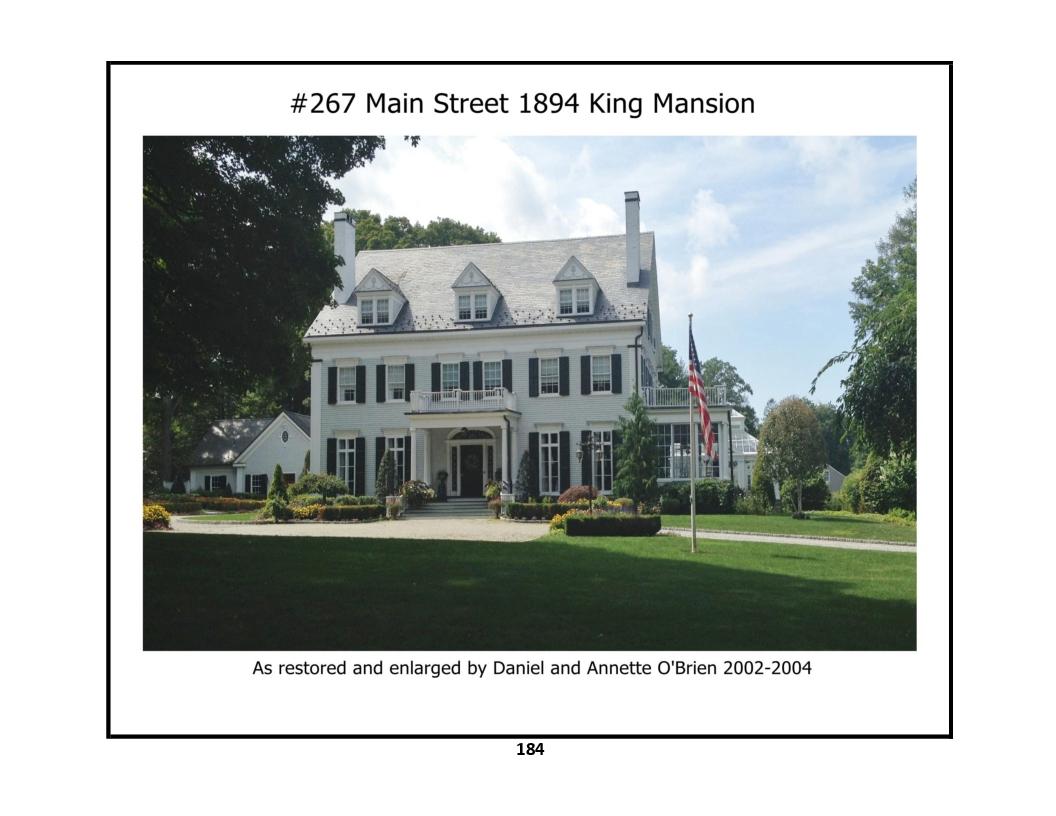
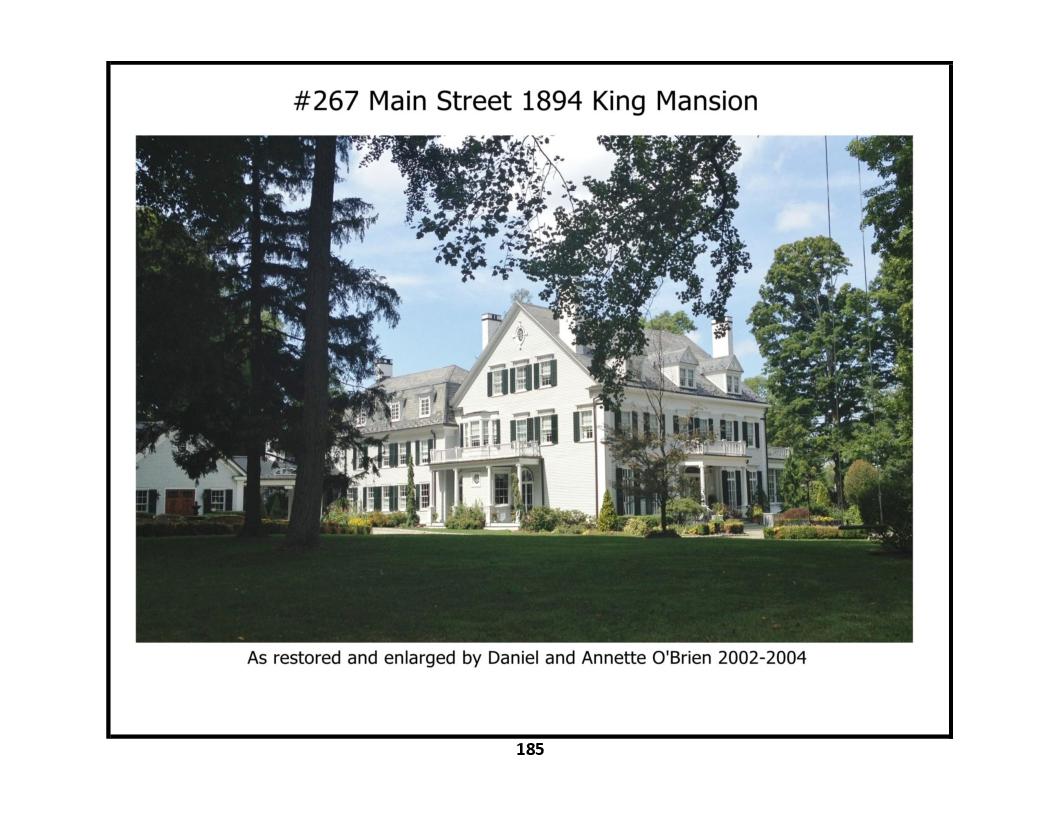
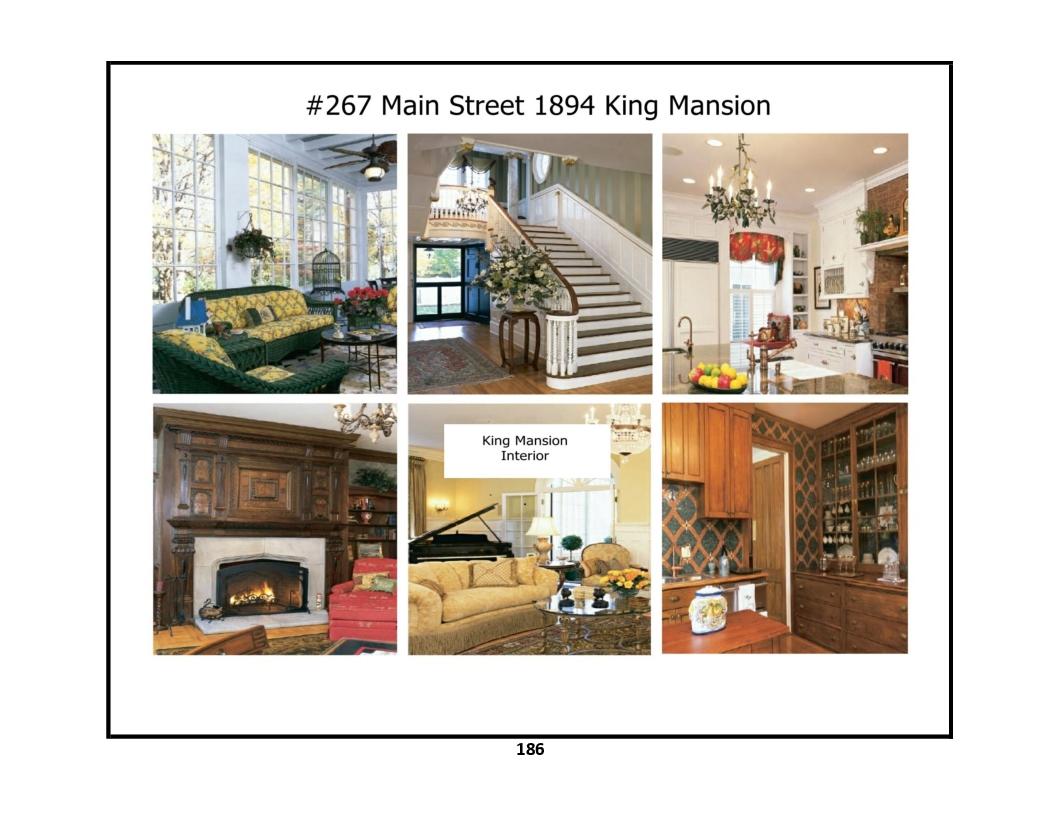
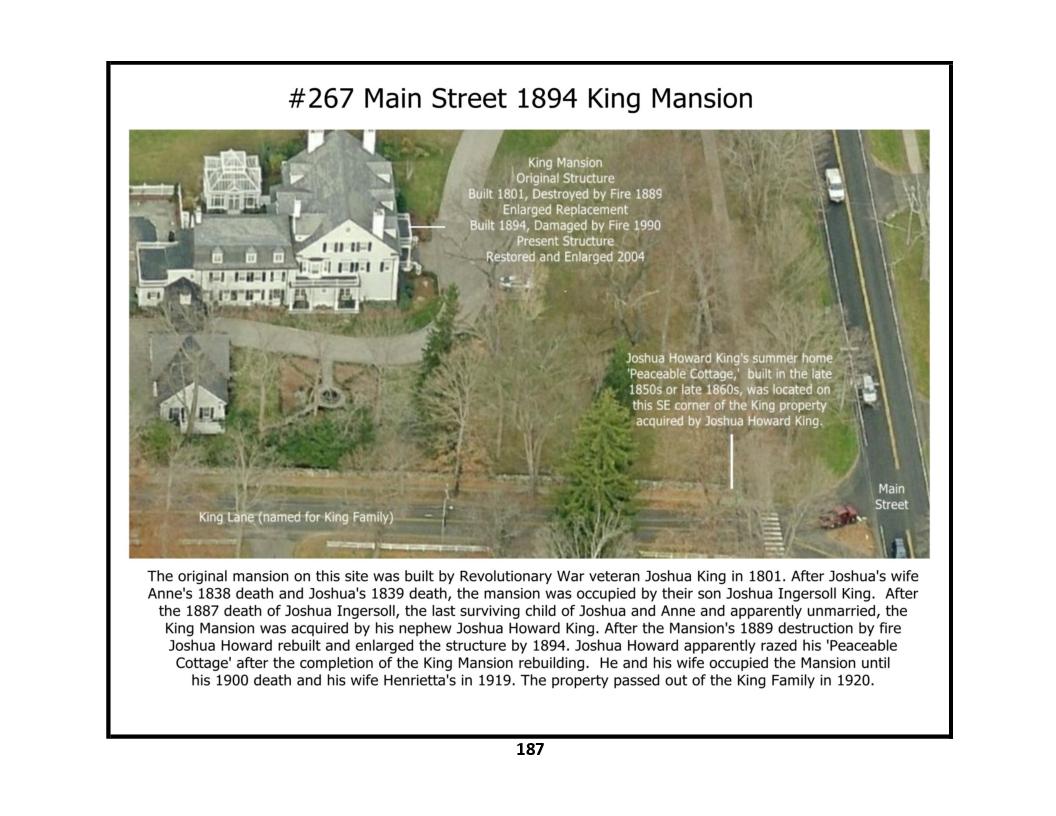
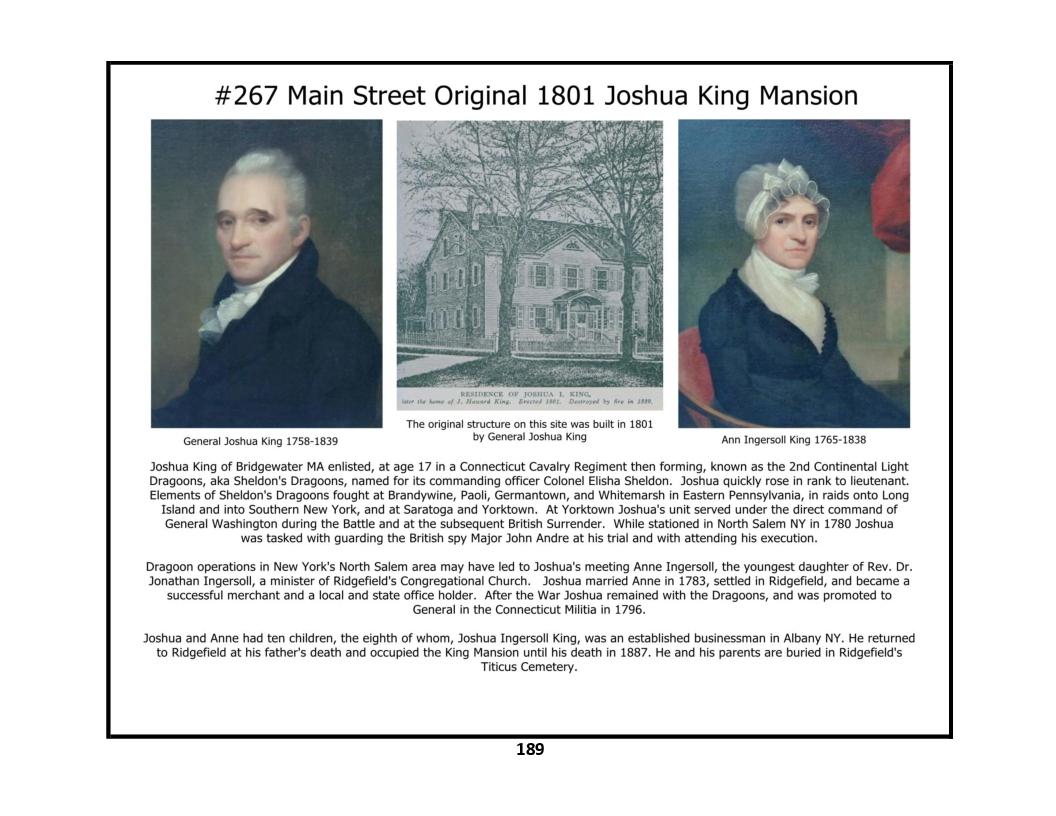
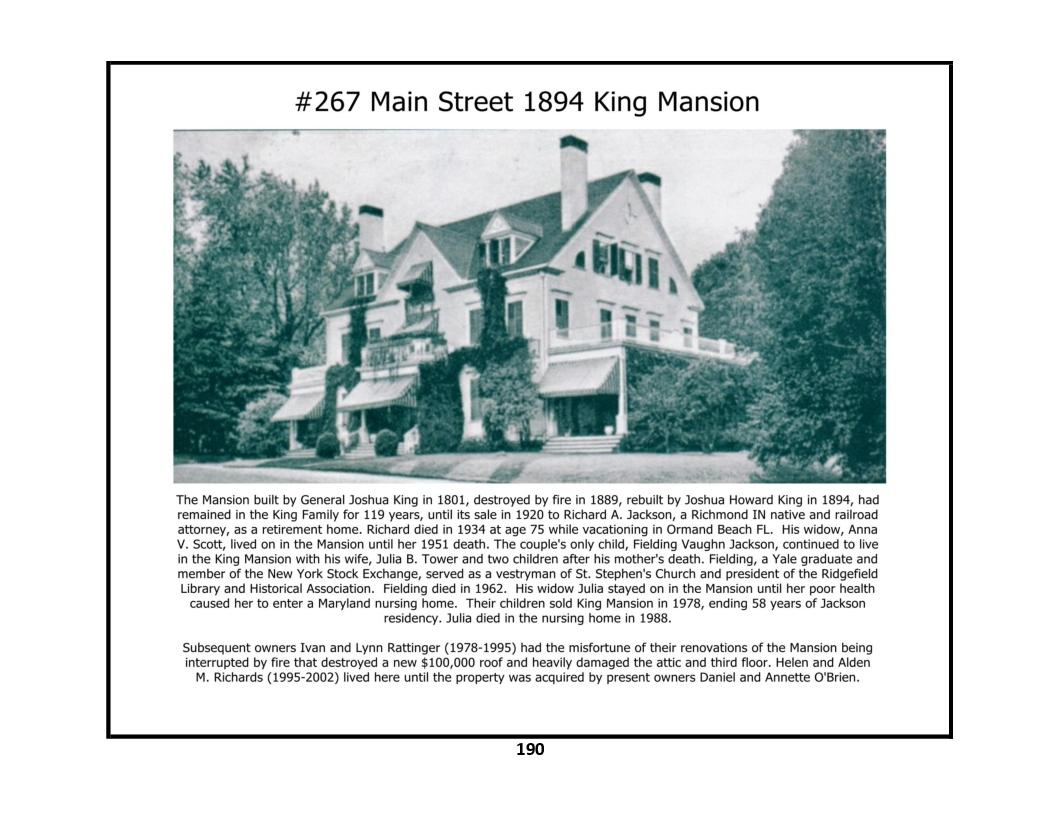
267 Main Street - photos 1, 2, 3, 4, 5, 6, 7
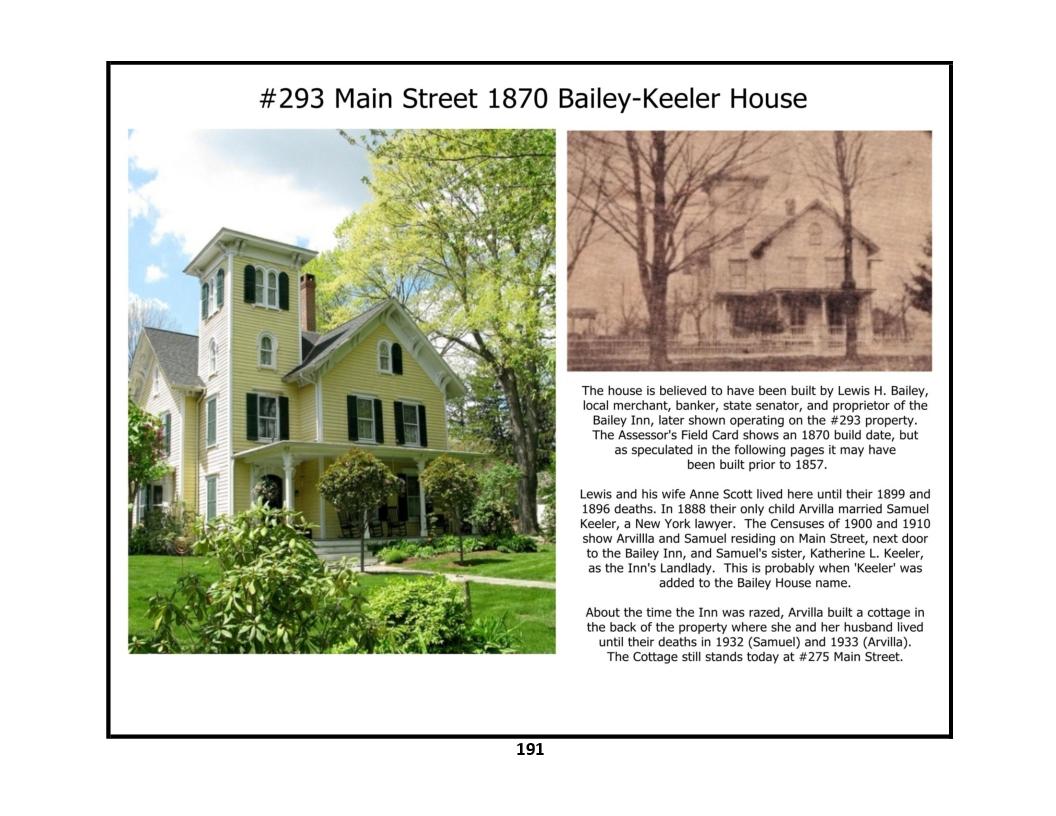
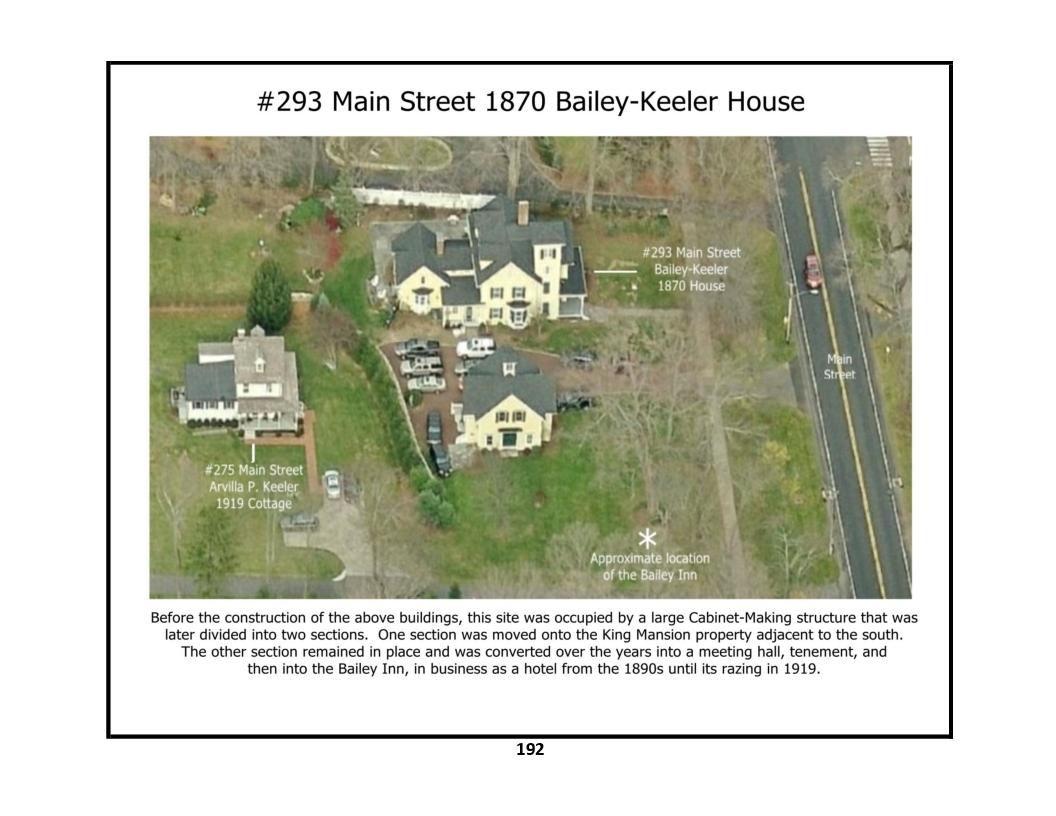
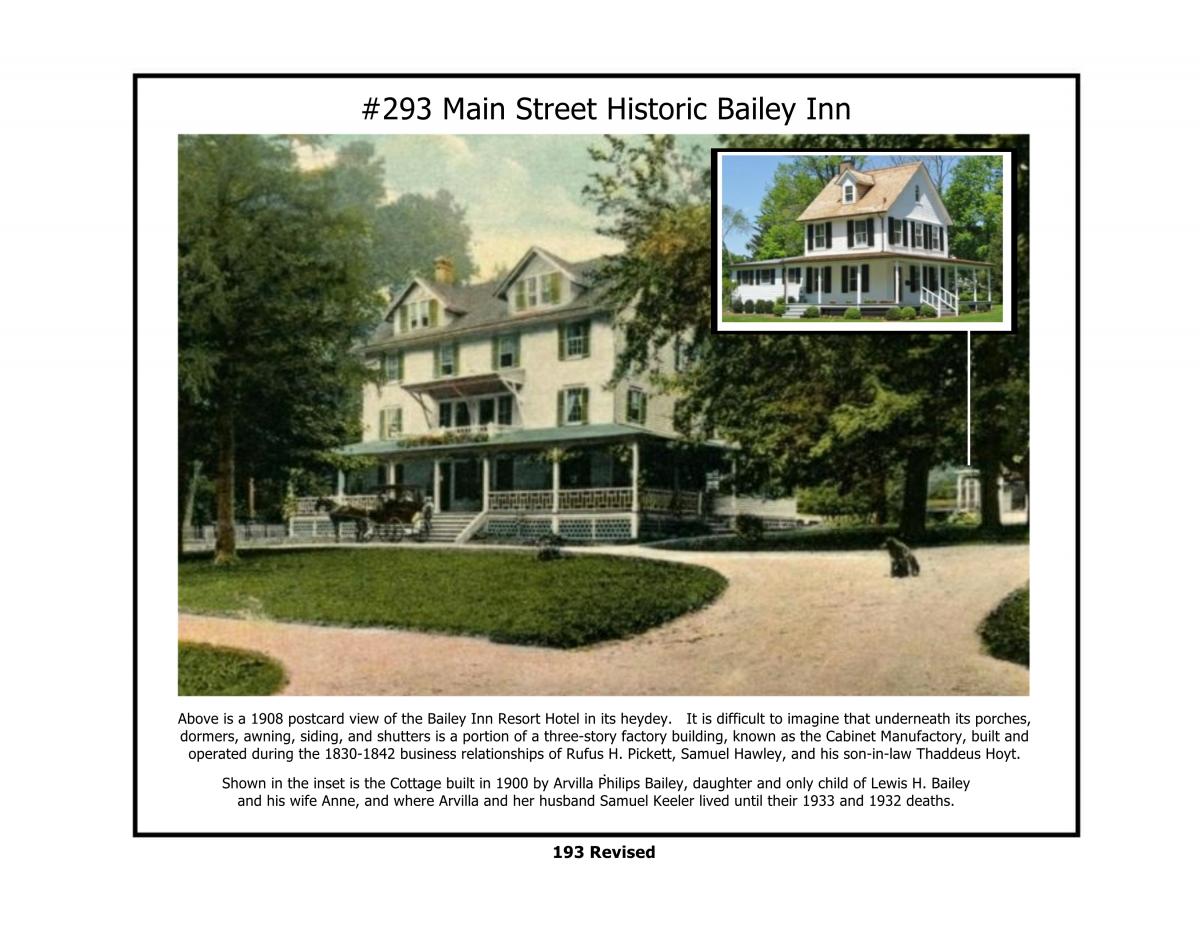
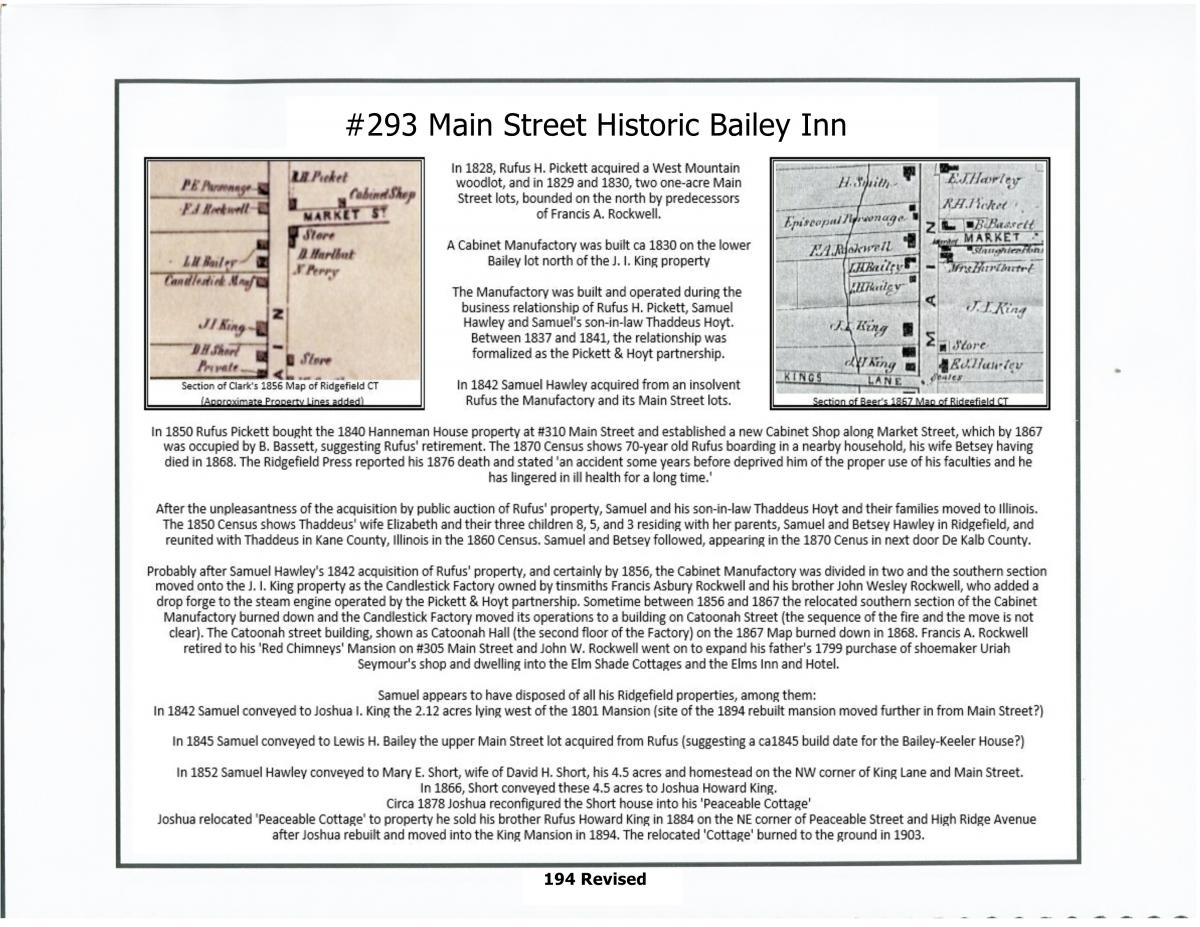
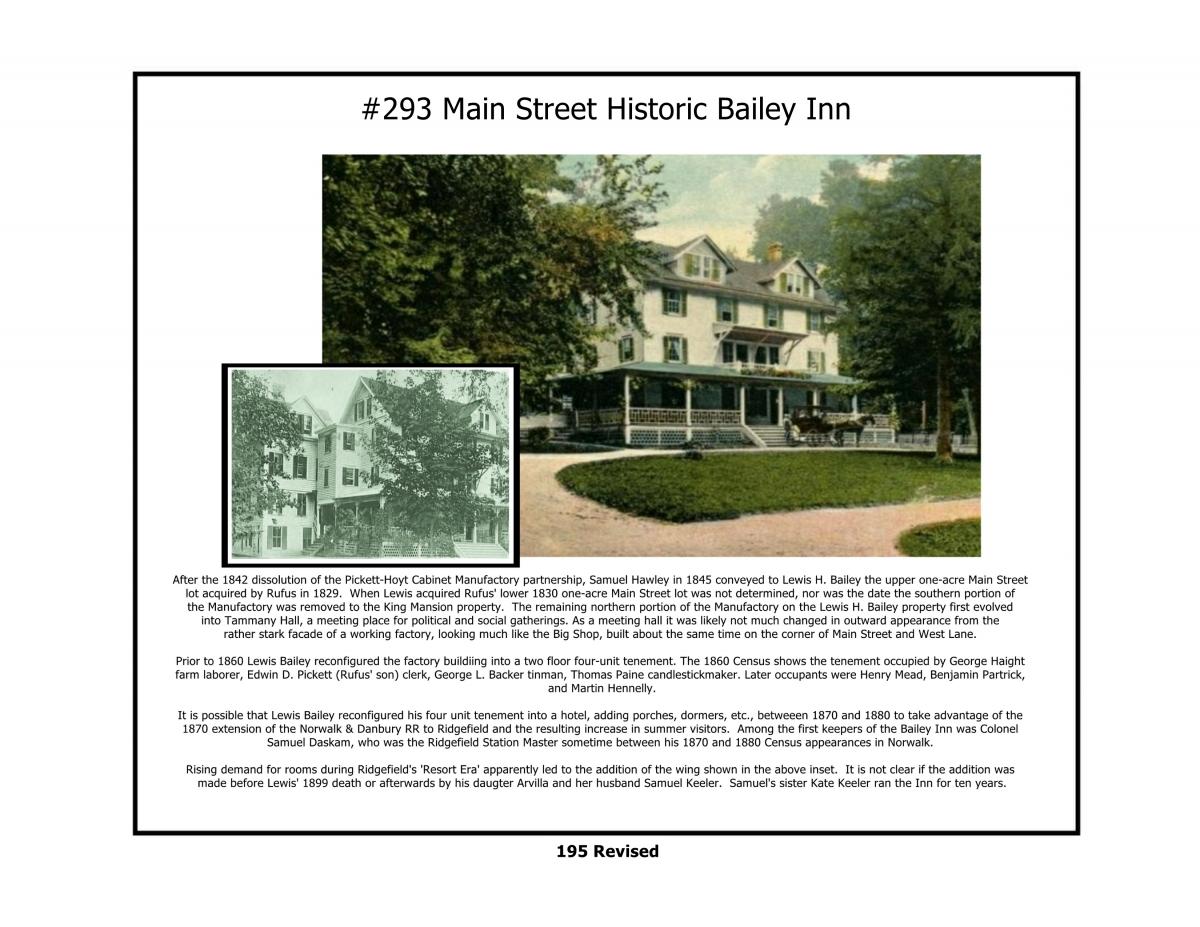
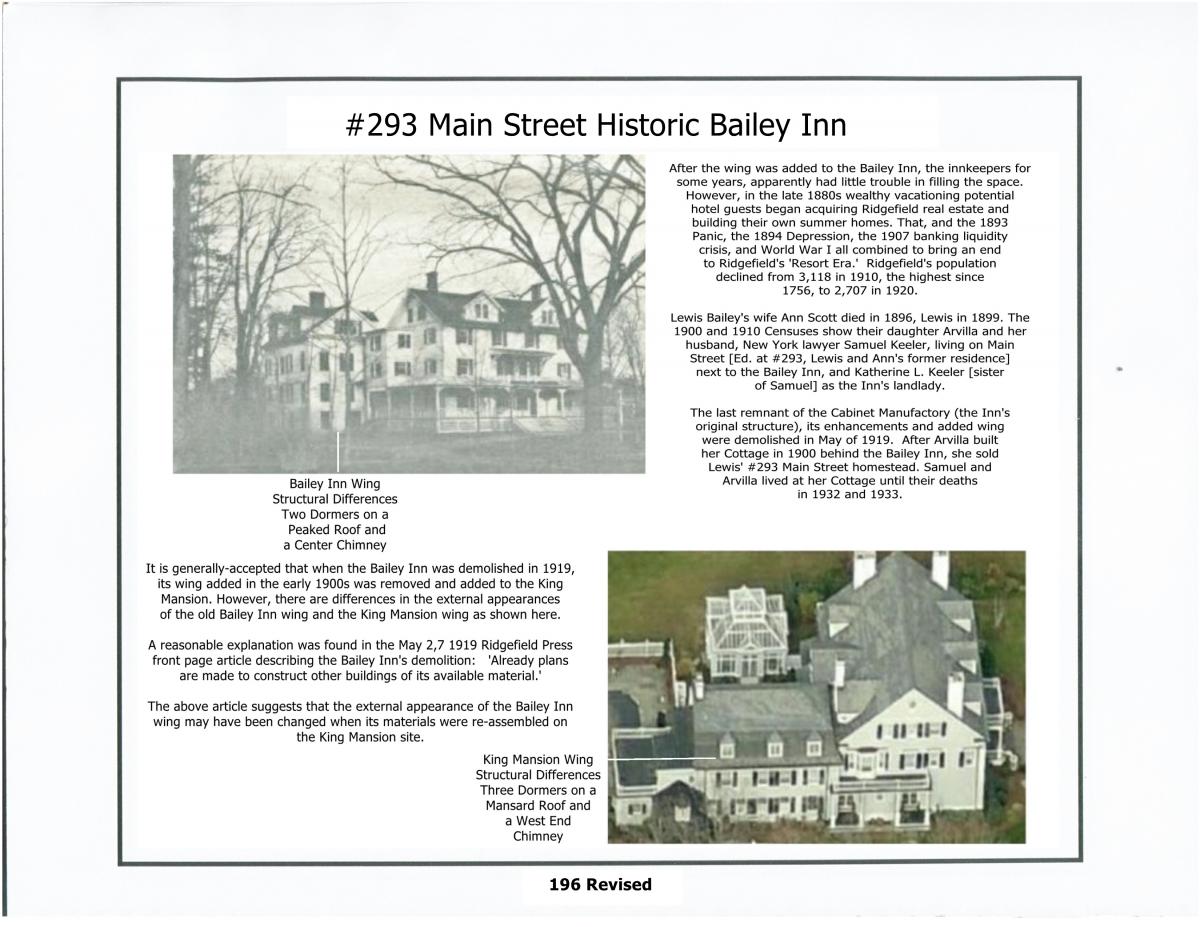
293 Main Street - photos 1, 2, 3, 4, 5, 6
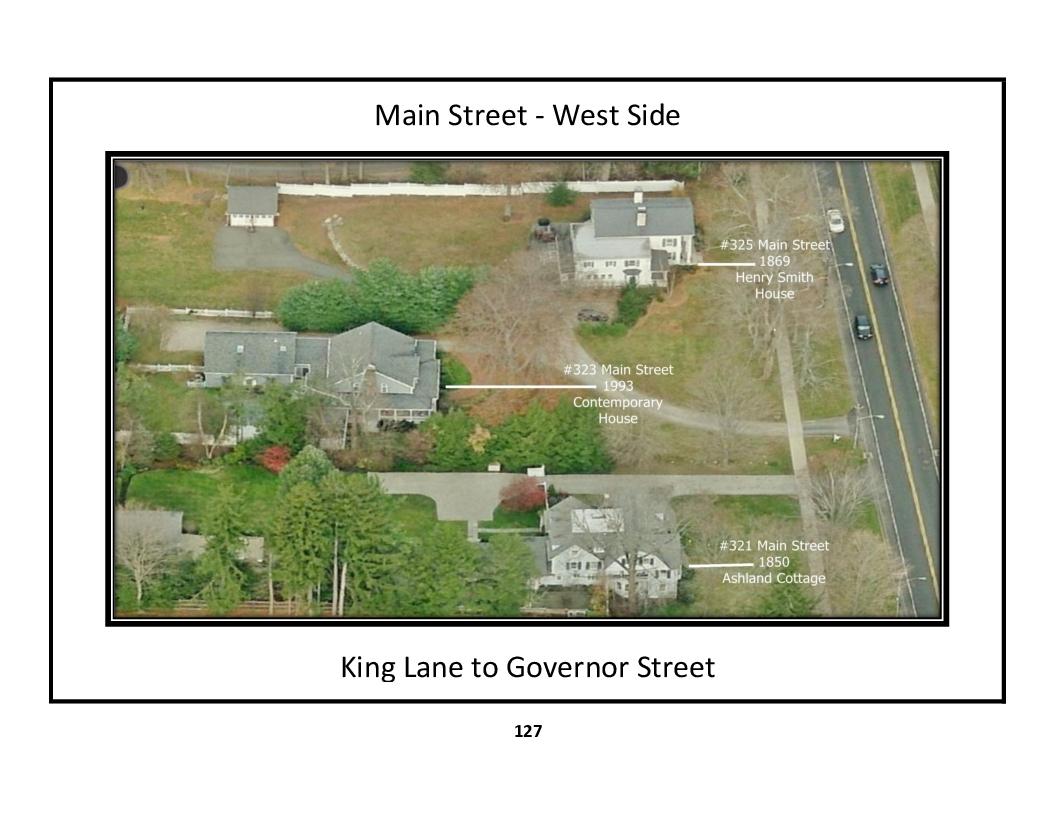
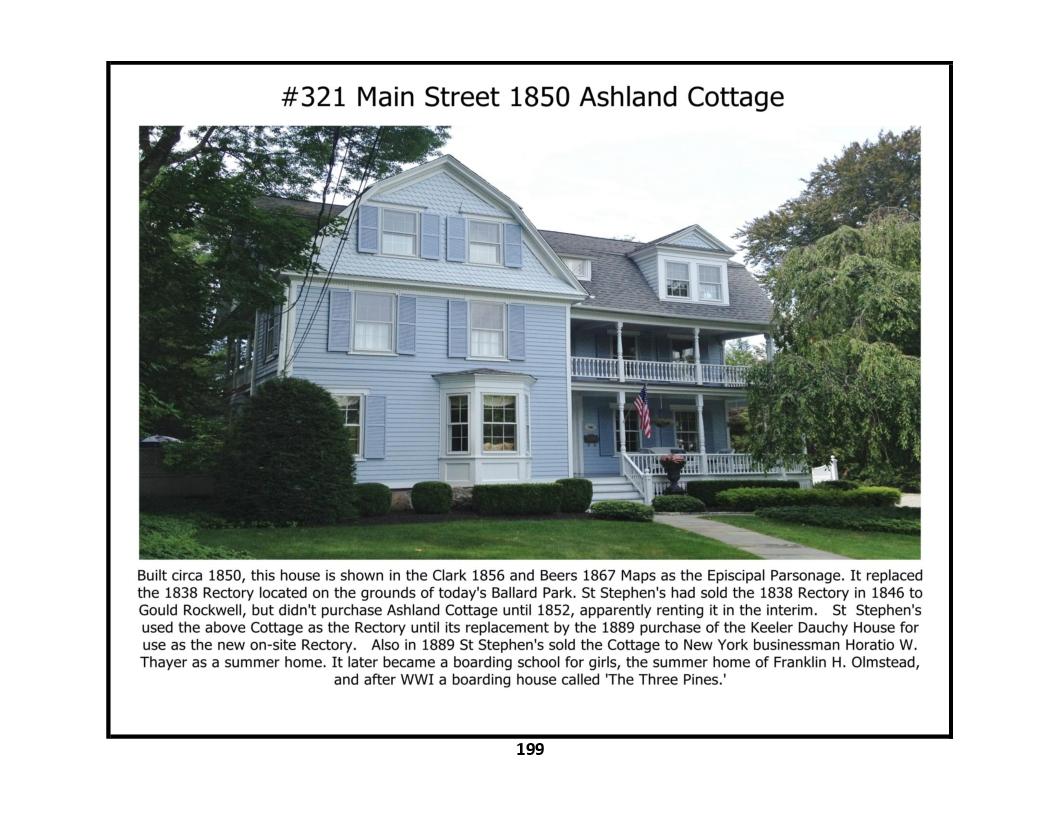
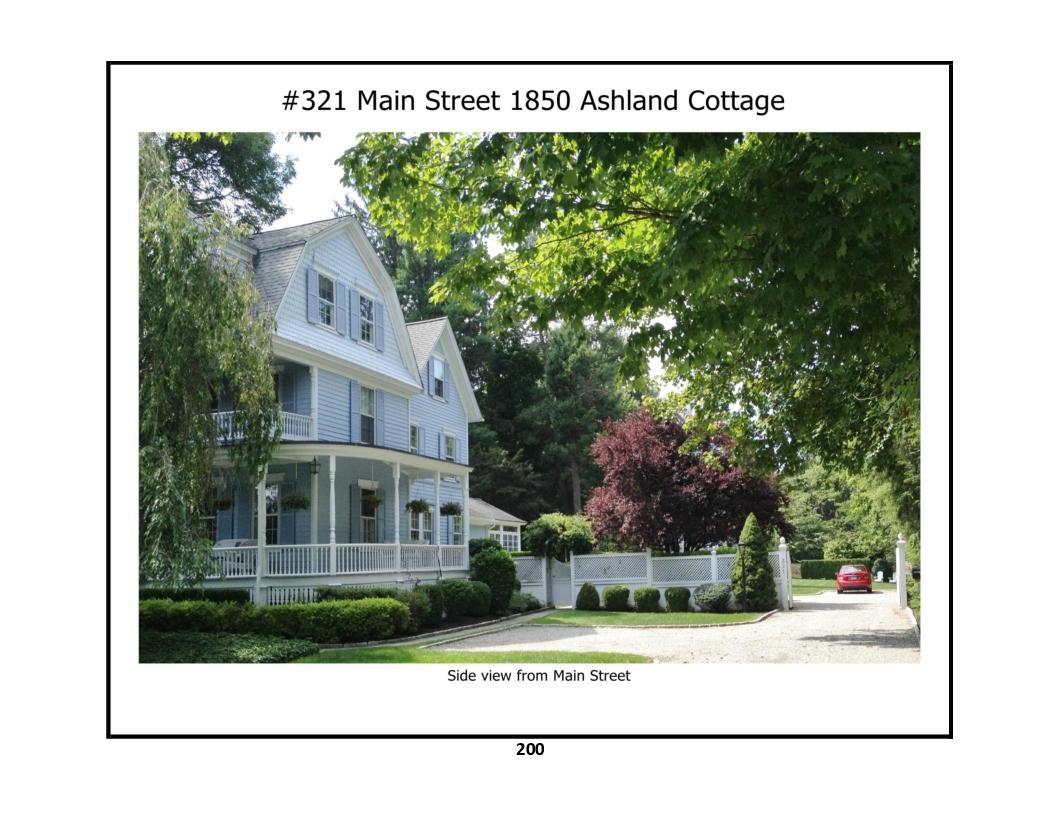
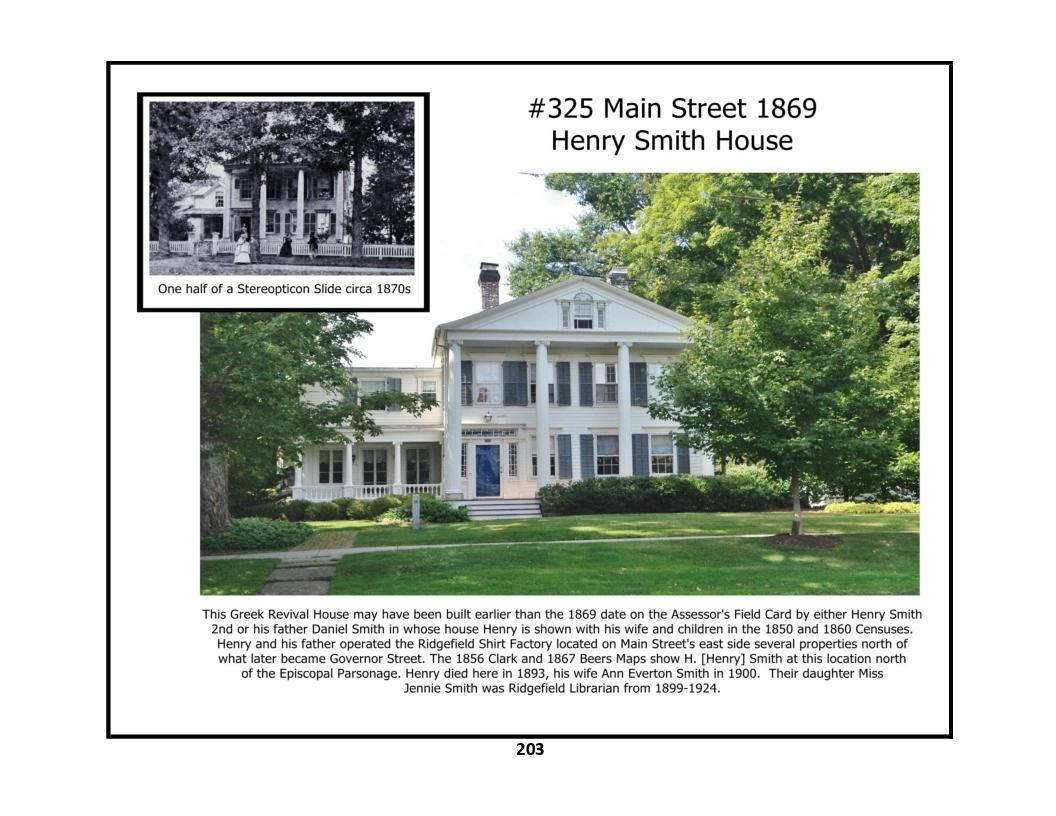
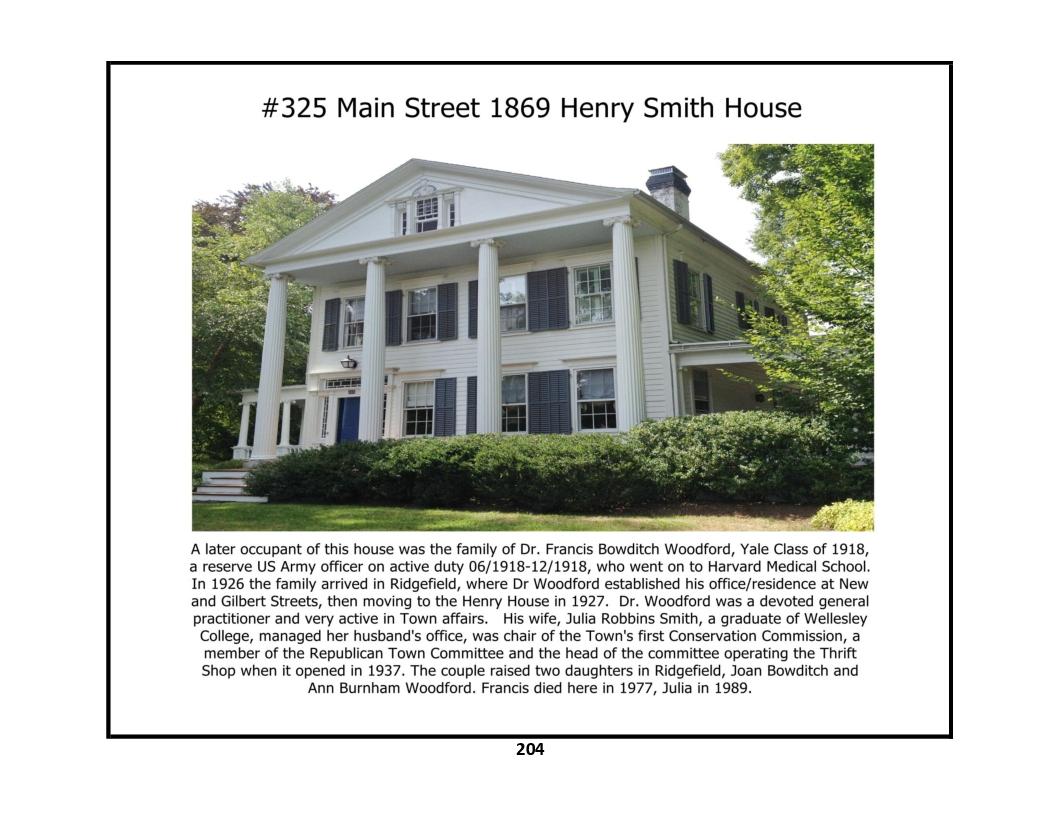
321 Main Street - photos 1, 2, 3
323 Main Street - photo 1
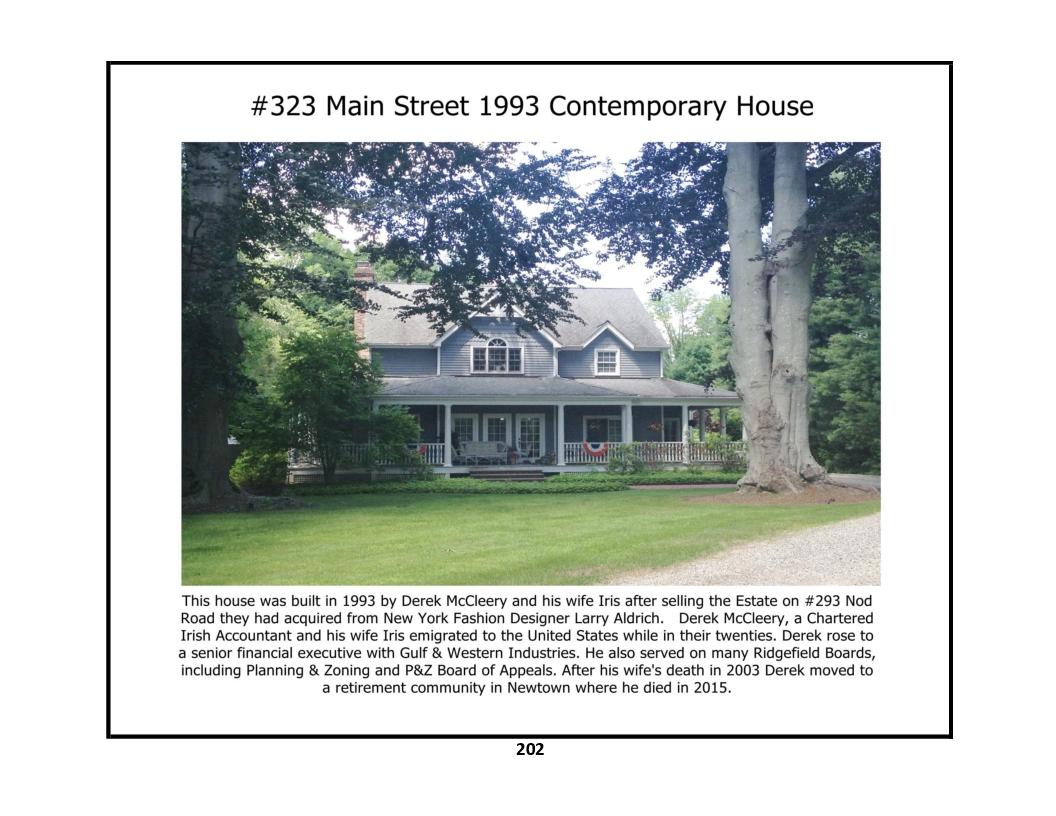
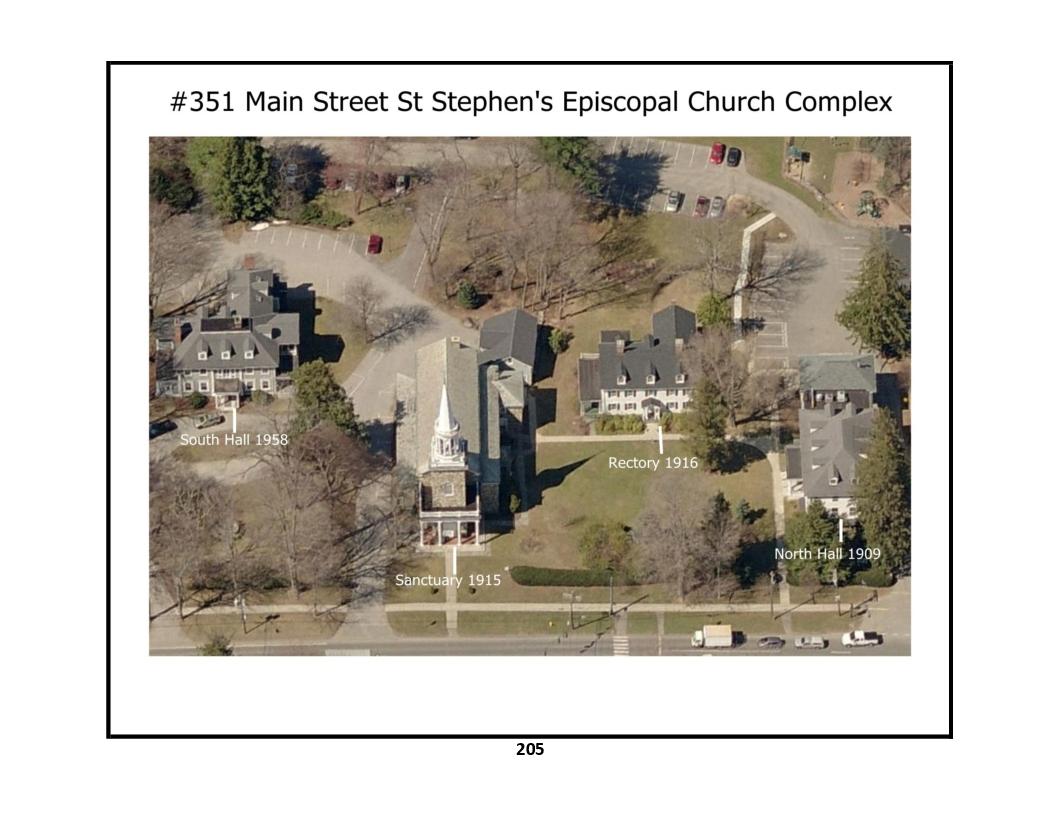
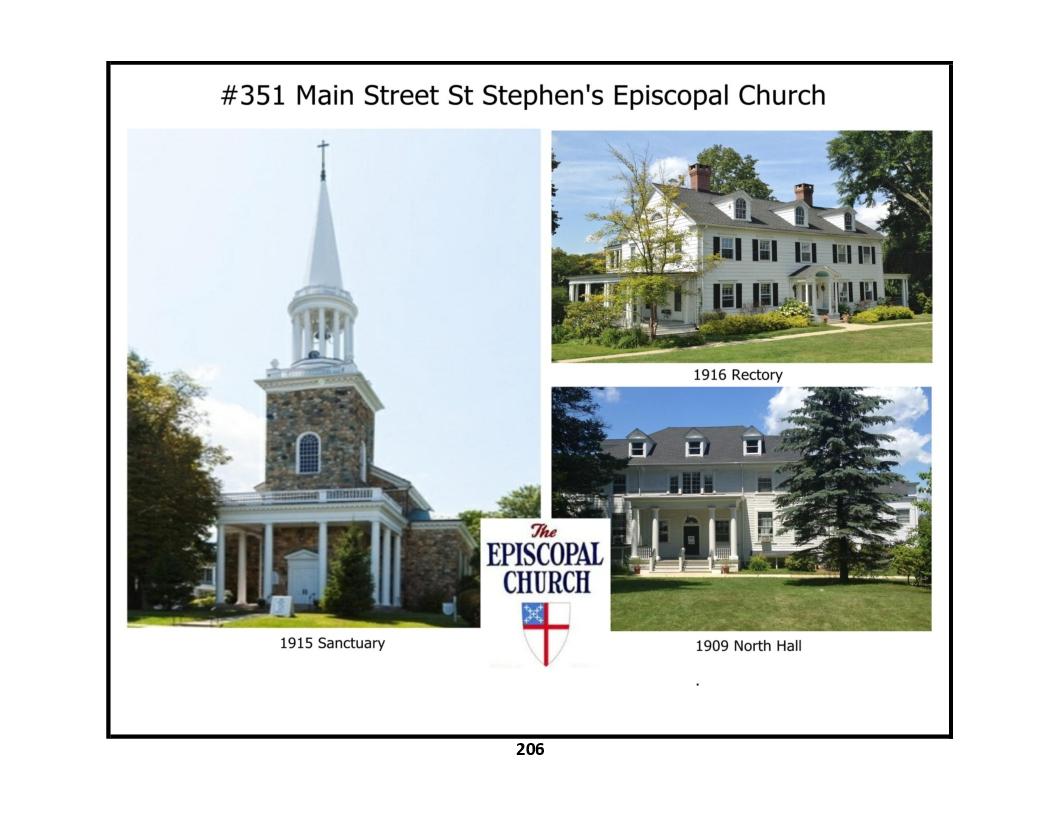
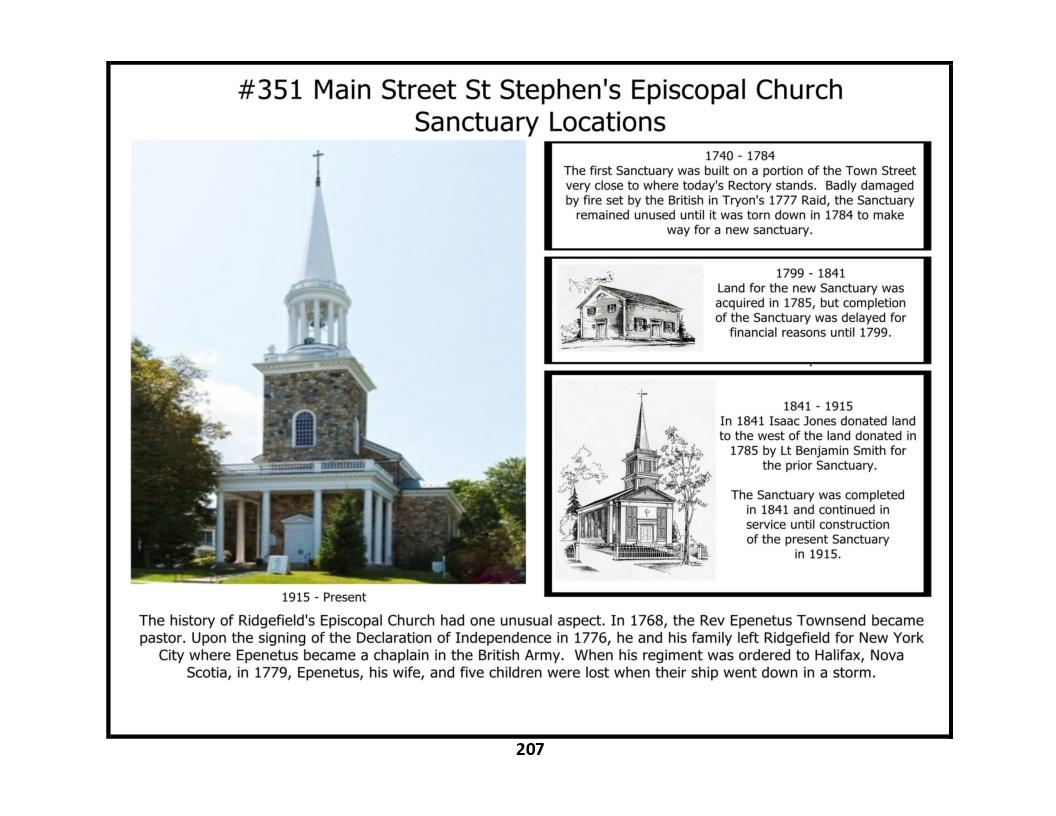
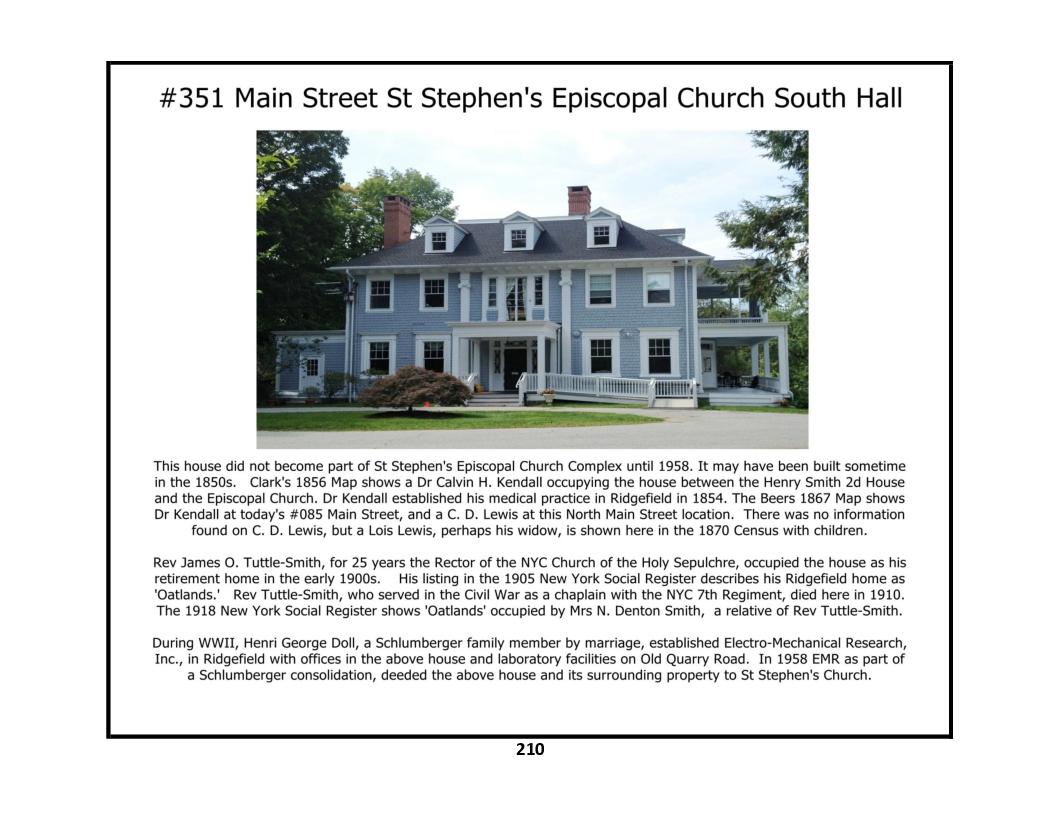
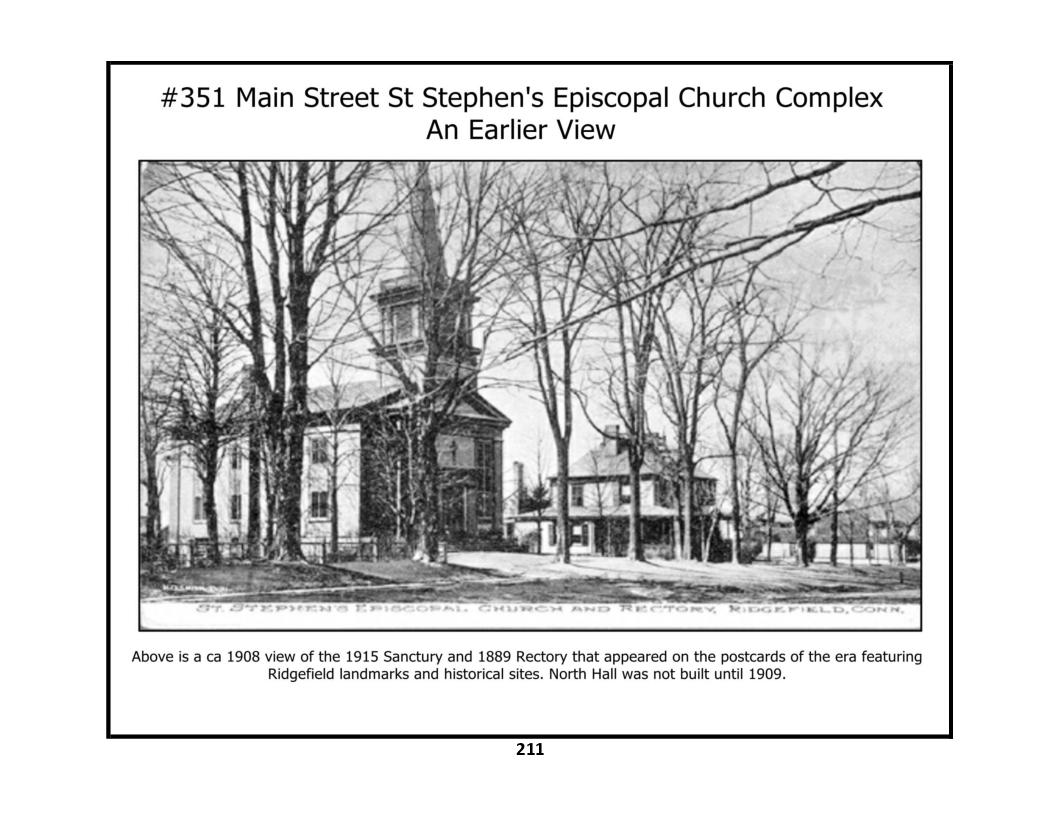
351 Main Street - photos 1, 2, 3, 4, 5, 6, 7
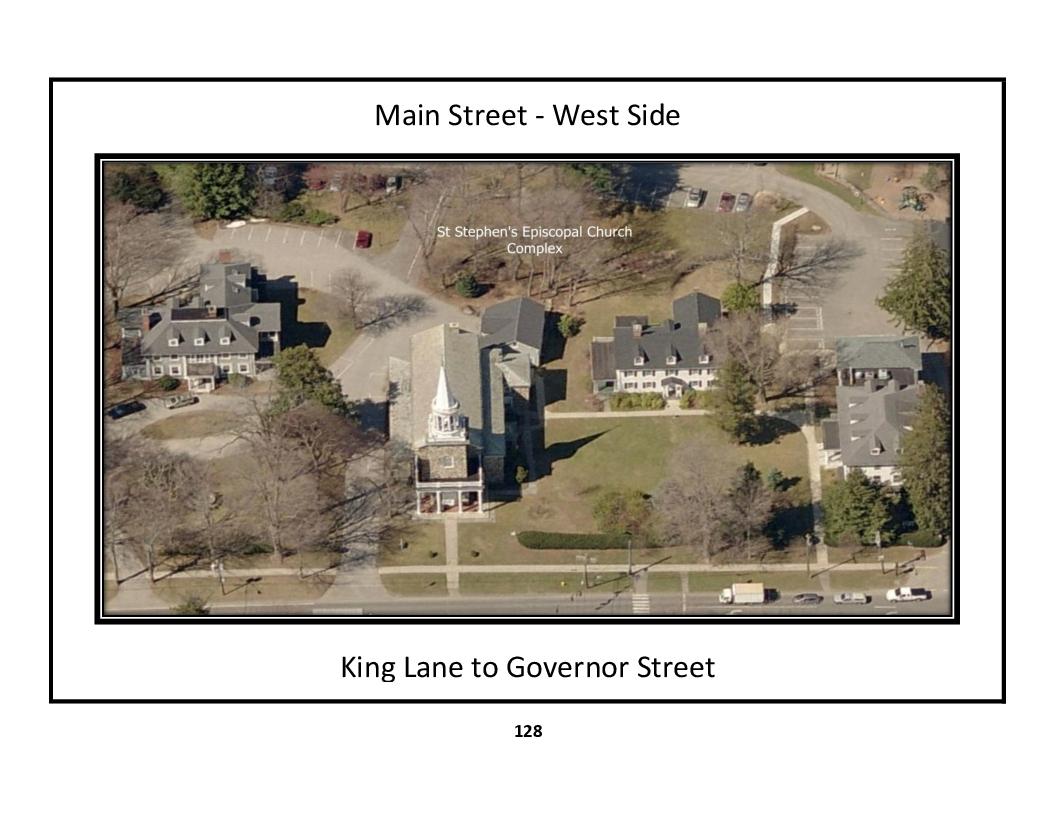
Street Level Views: South Main Street - West Side - Governor Street
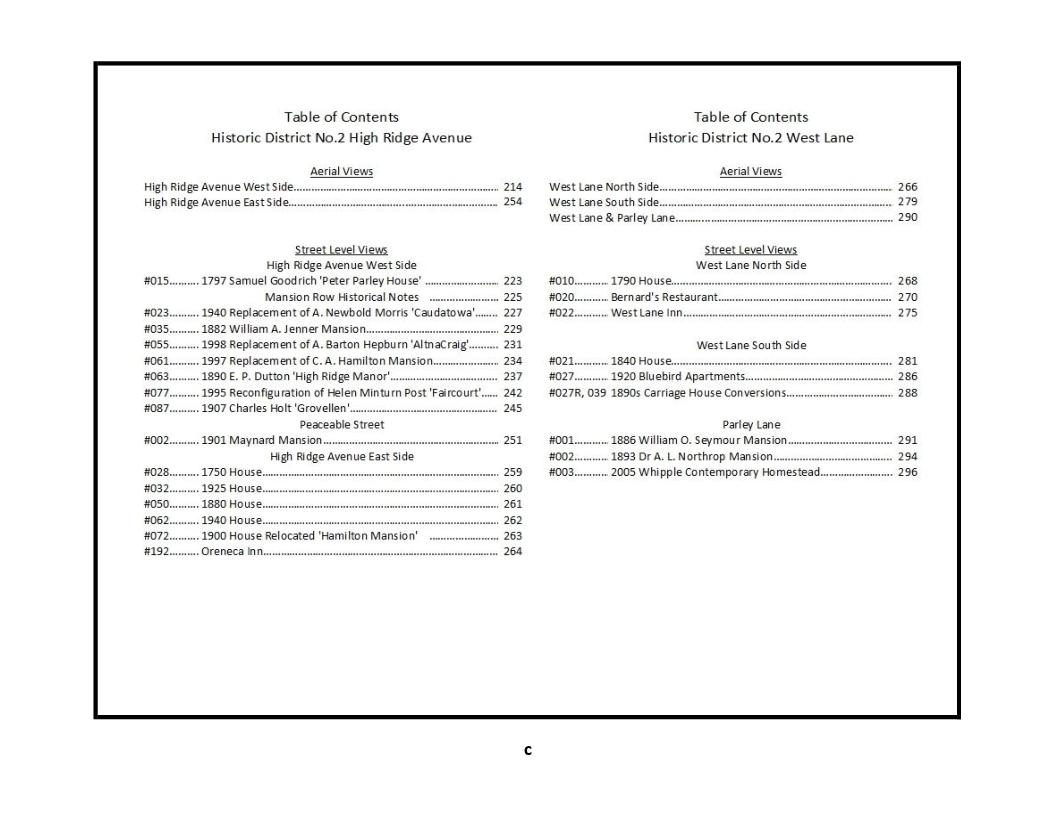
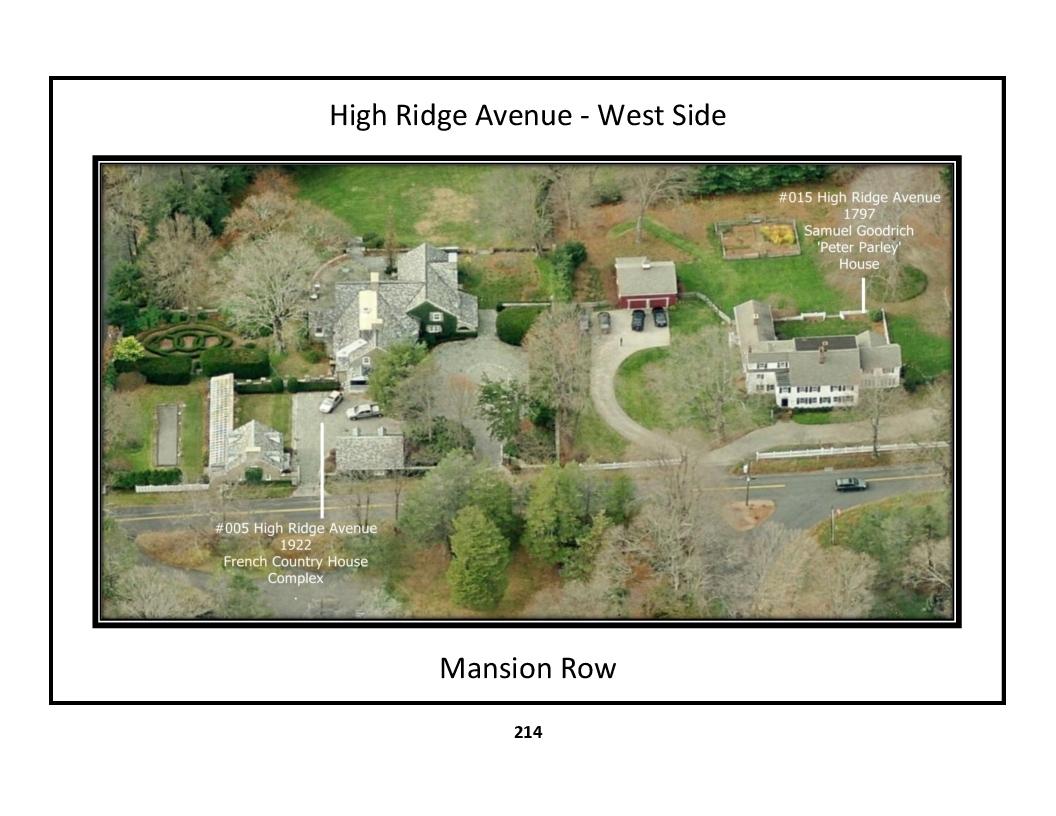
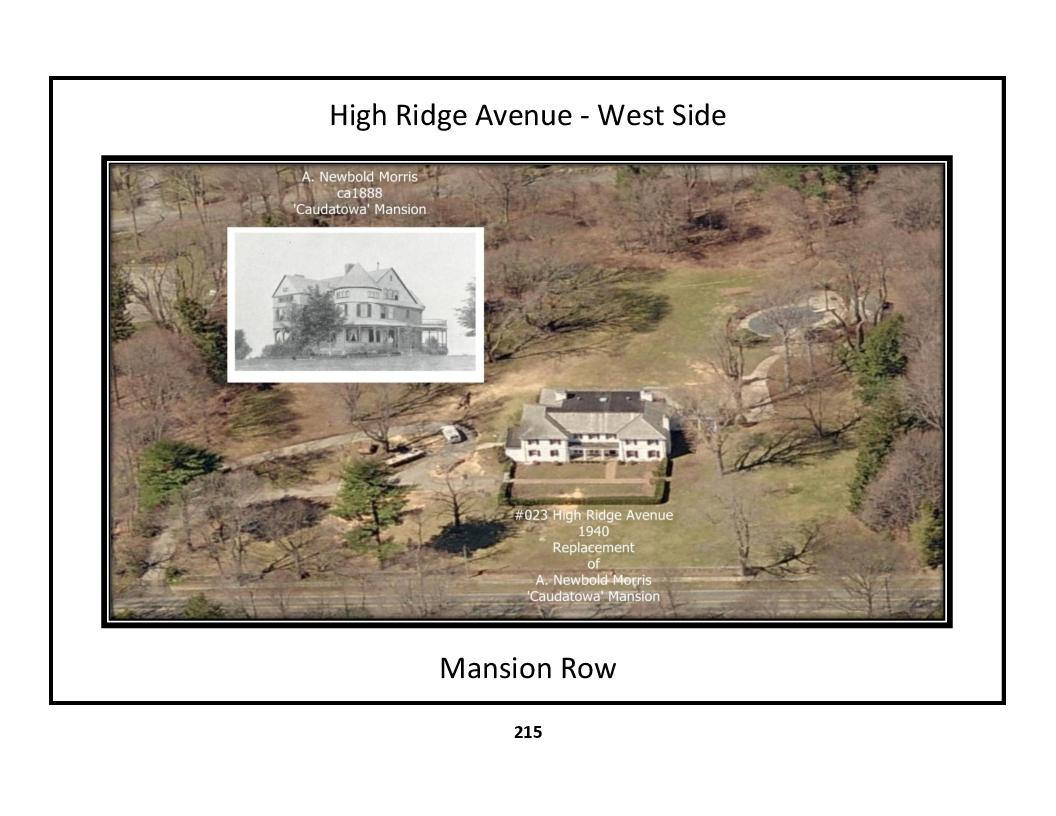
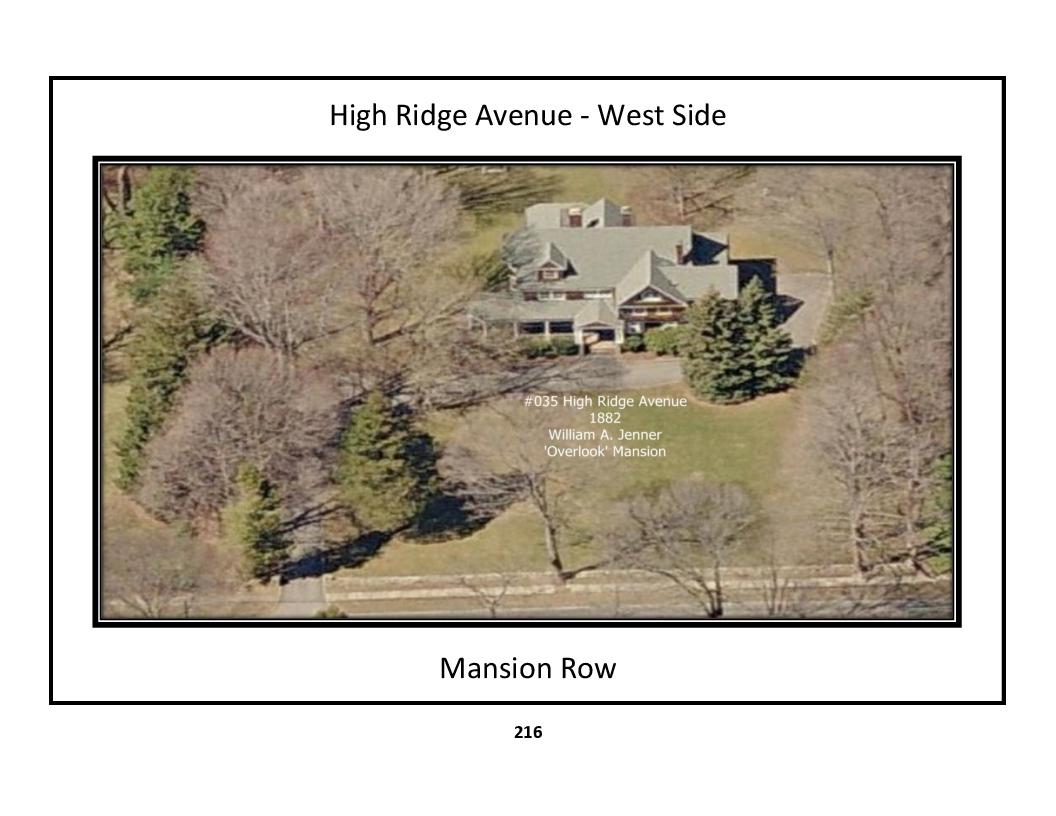
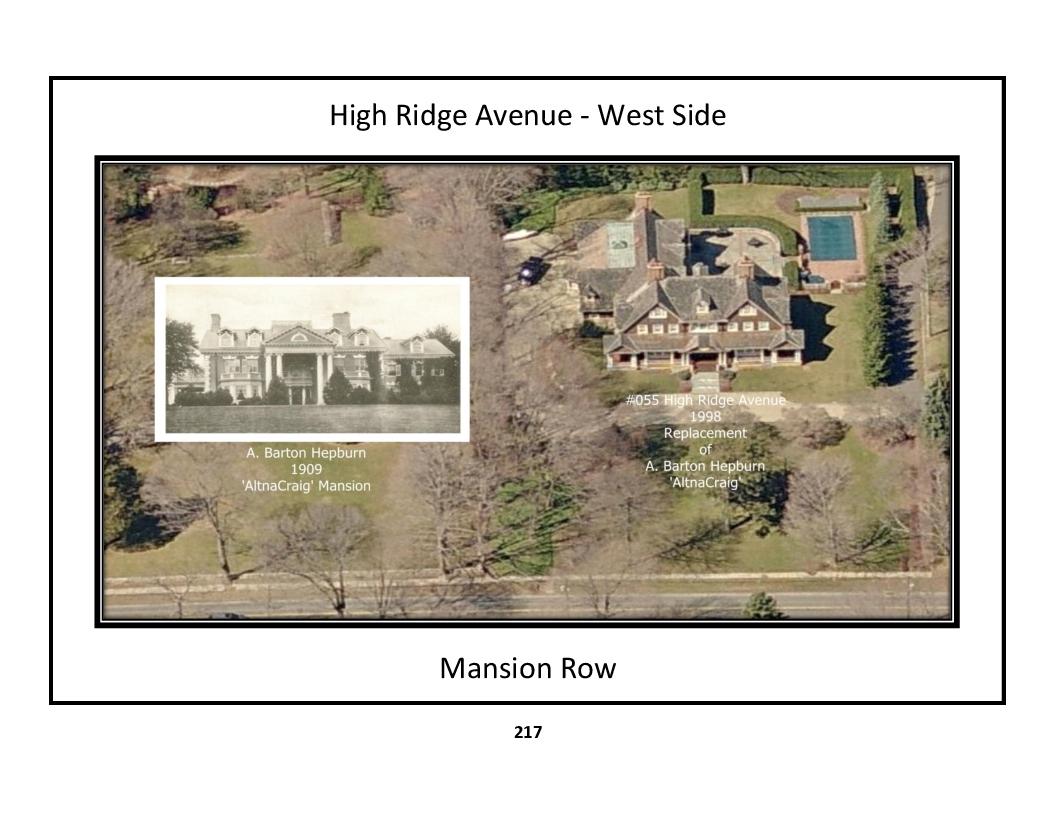
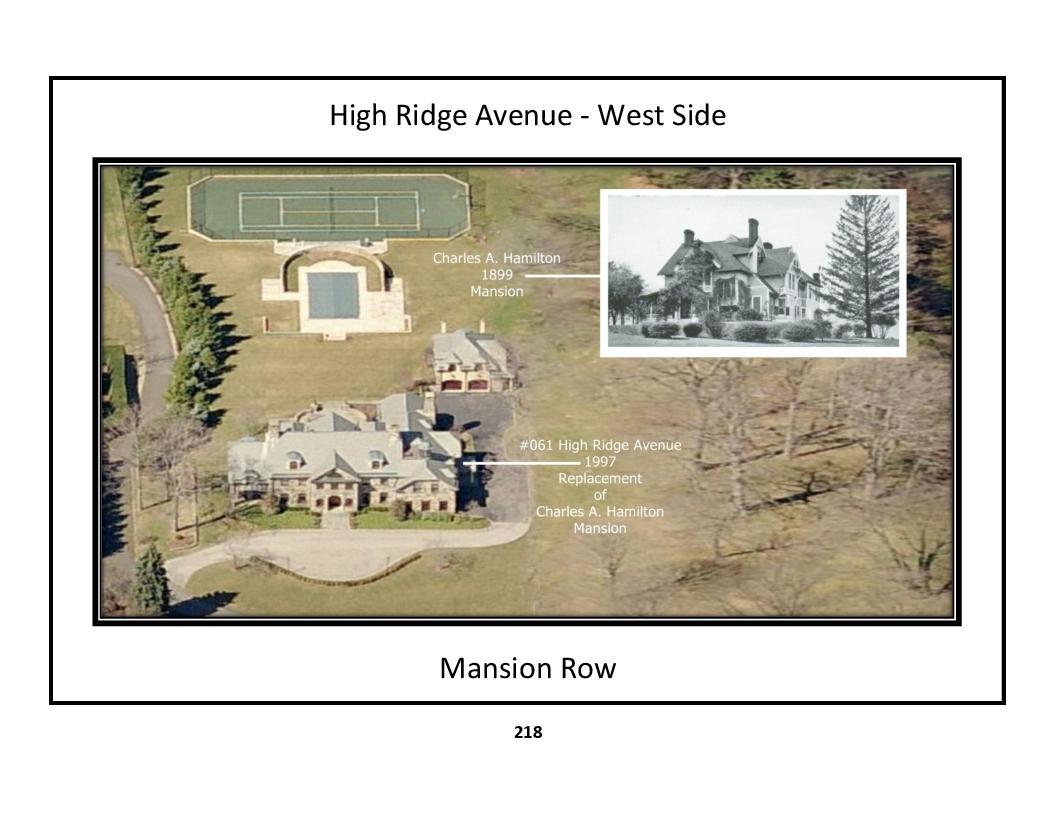
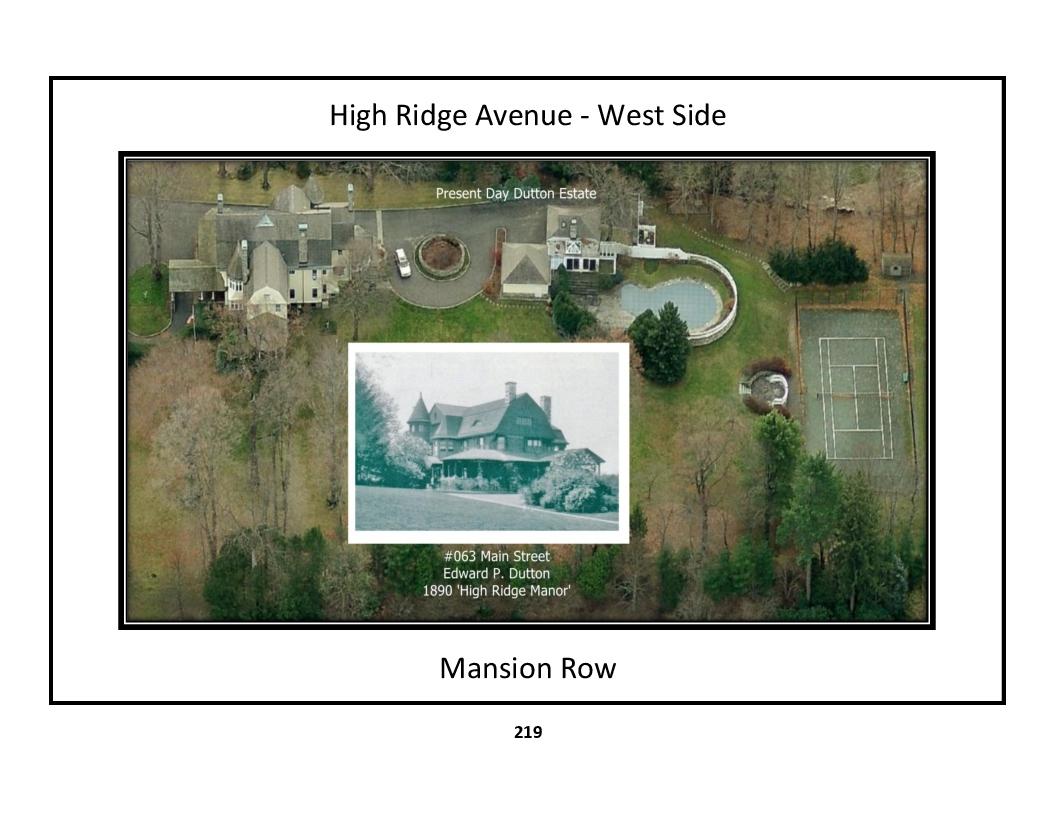
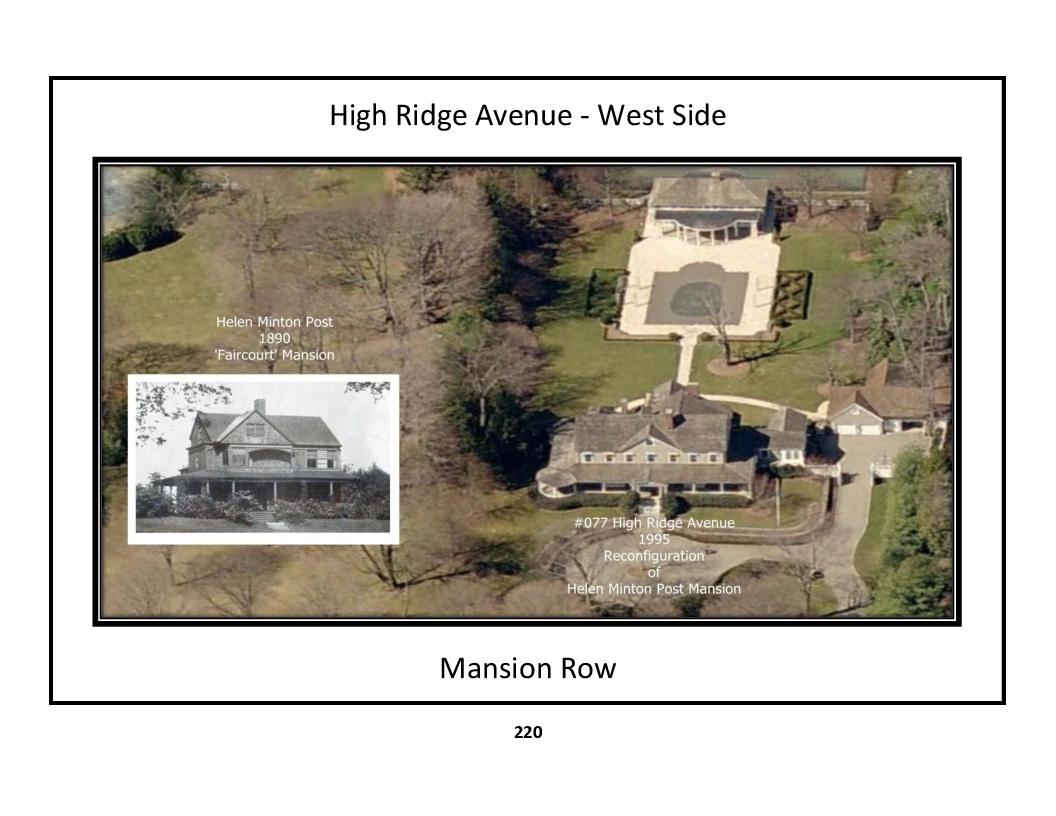
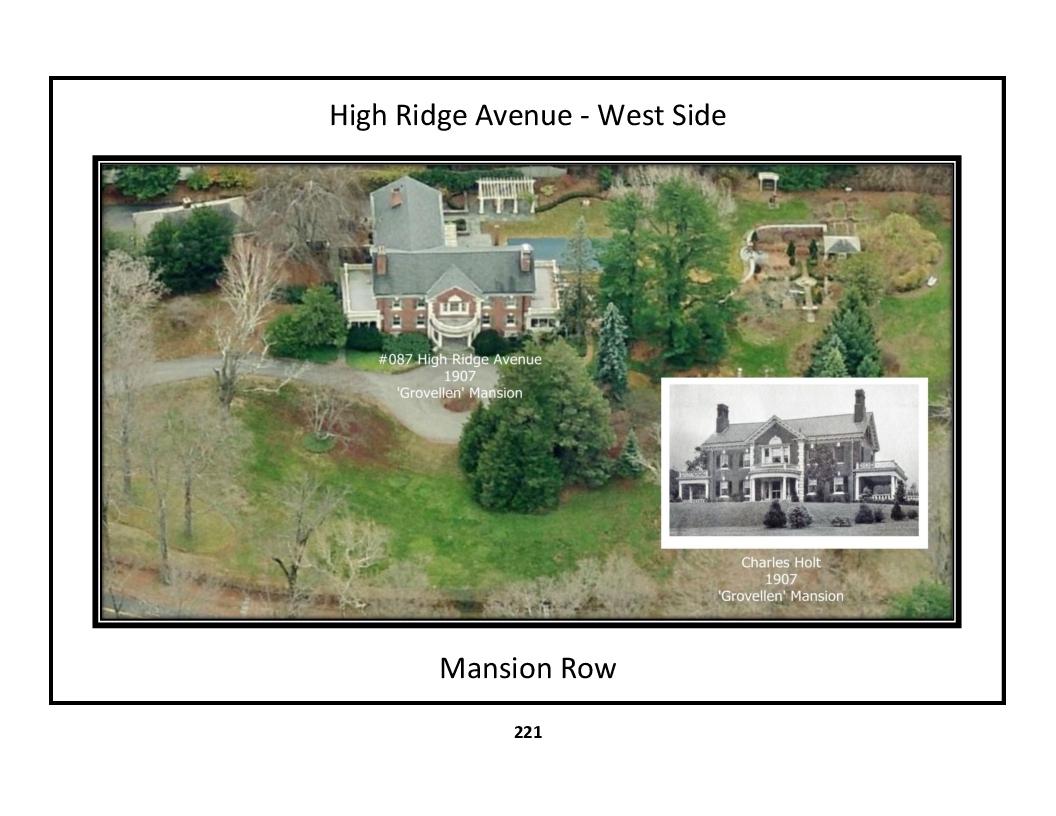
Aerial Views: High Ridge Avenue - West Side - photos a, b, c, d, e, f, g, h
Street Level Views: High Ridge Avenue - West Side
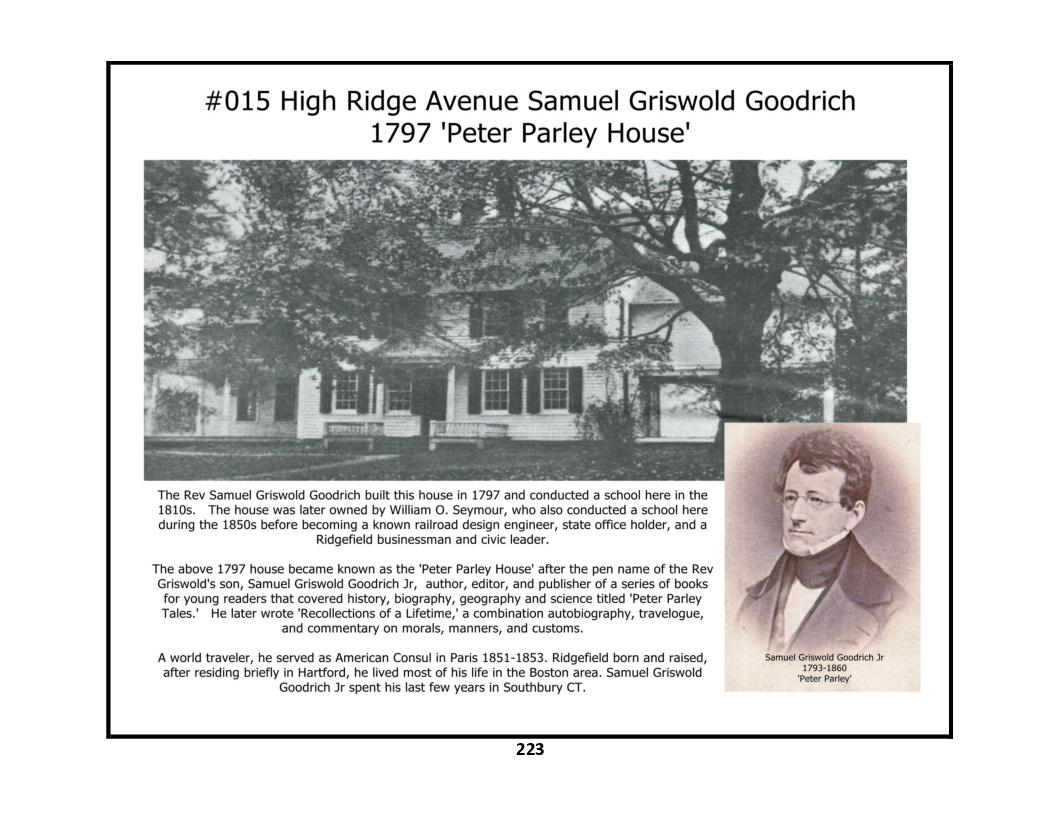
15 High Ridge Avenue - photos 1, 2
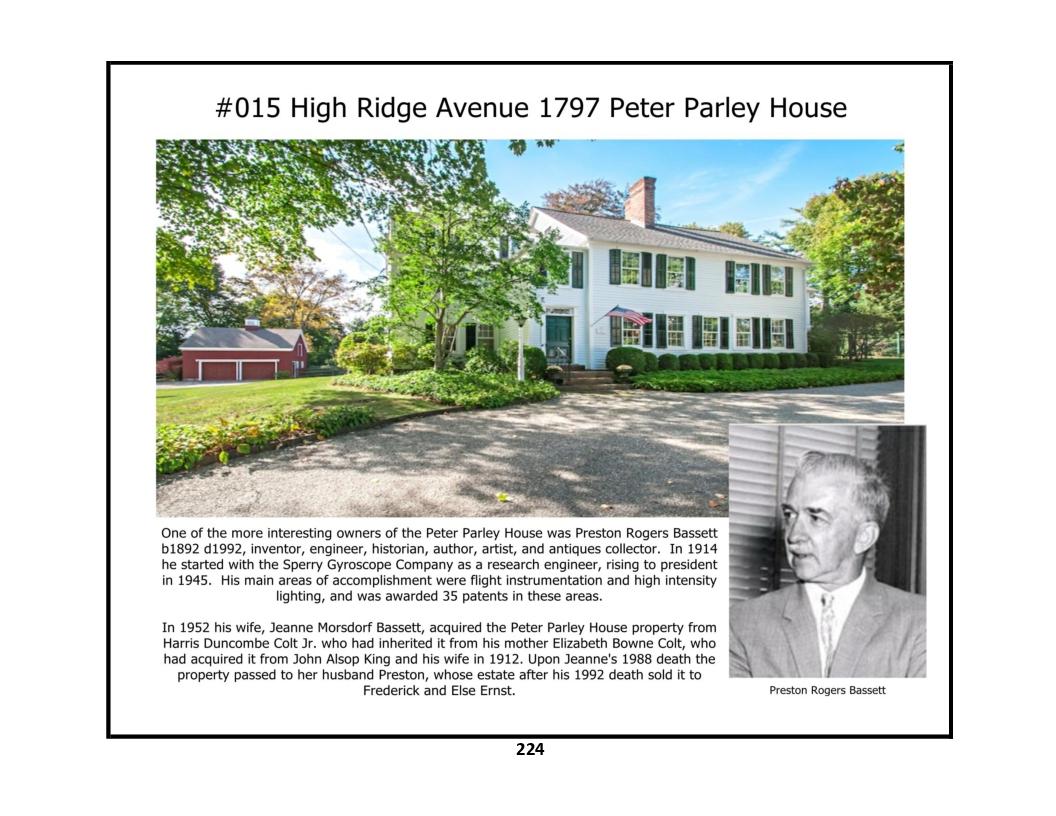
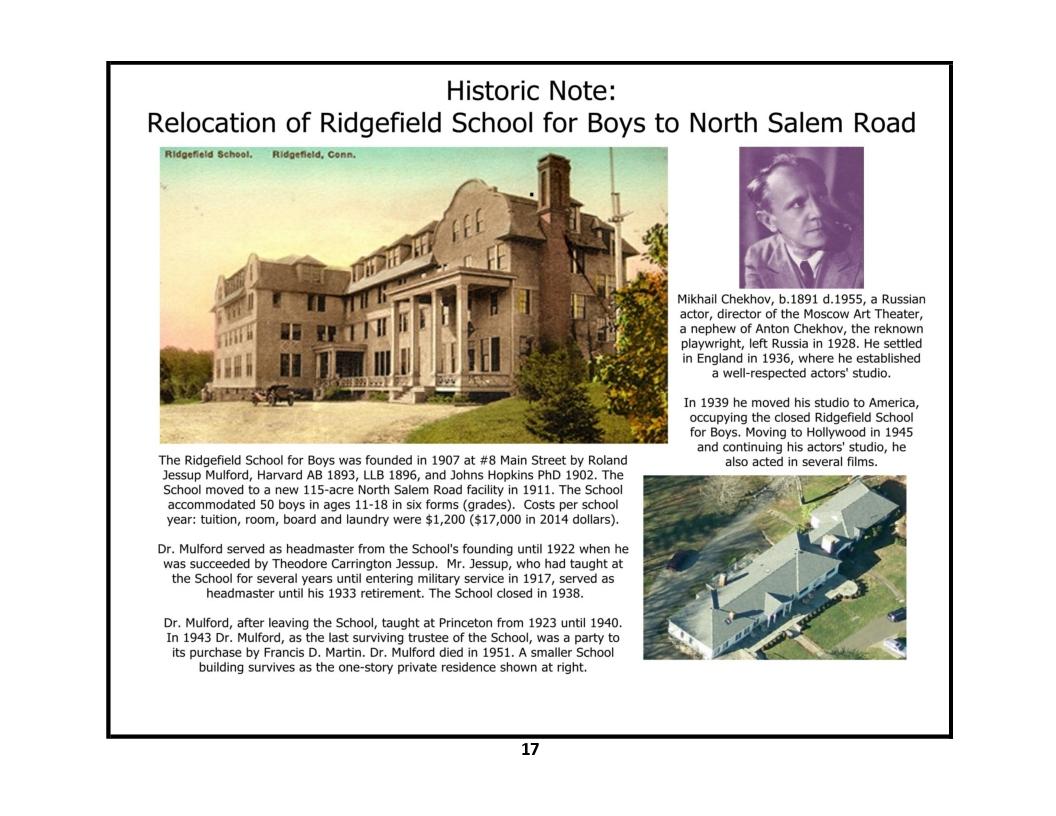
High Ridge Avenue - Historical Notes - a, b
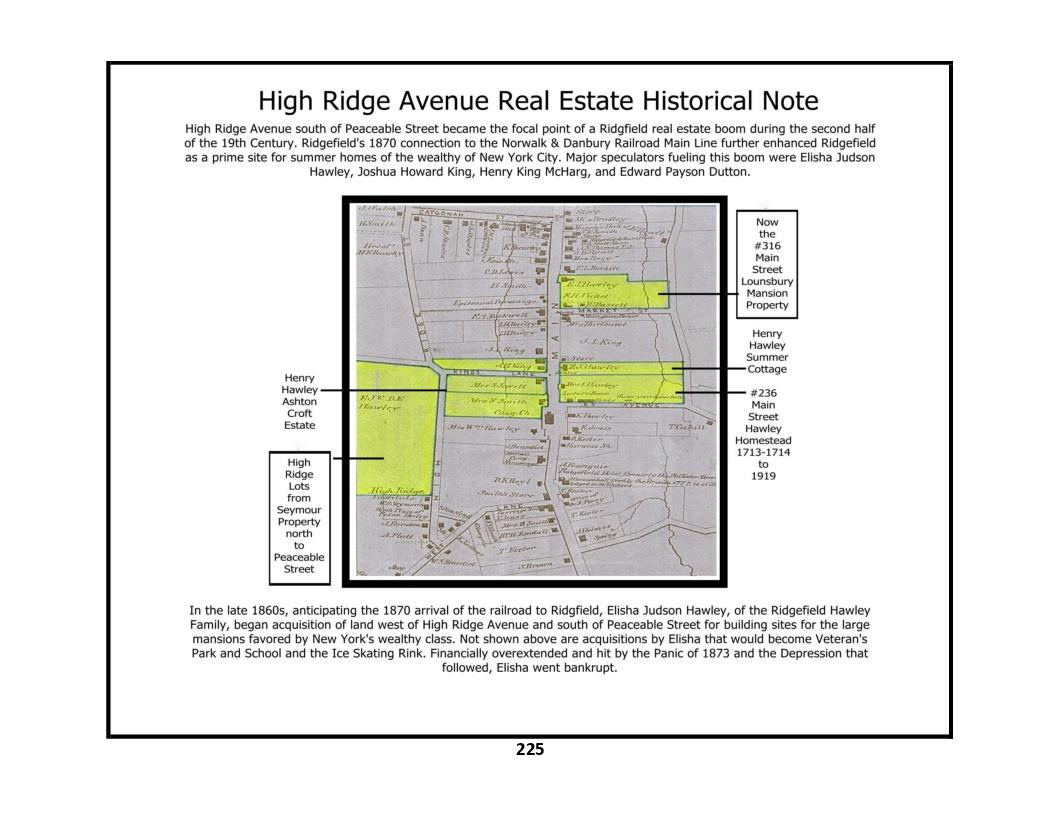
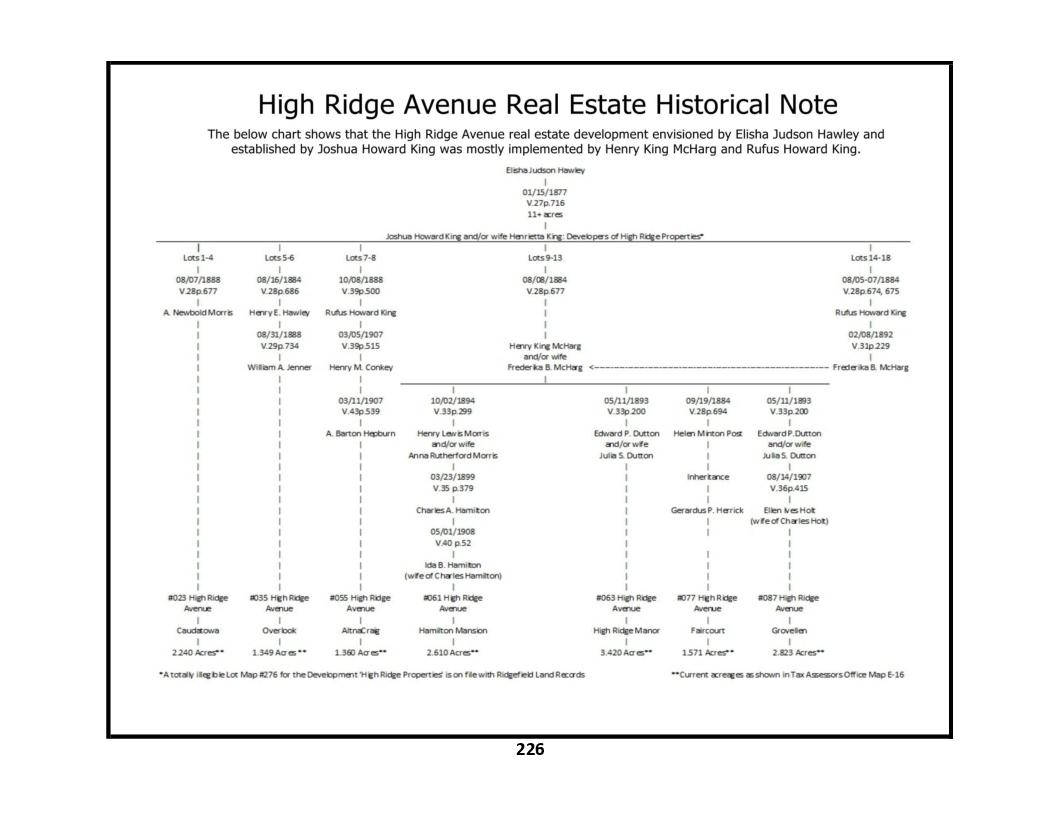
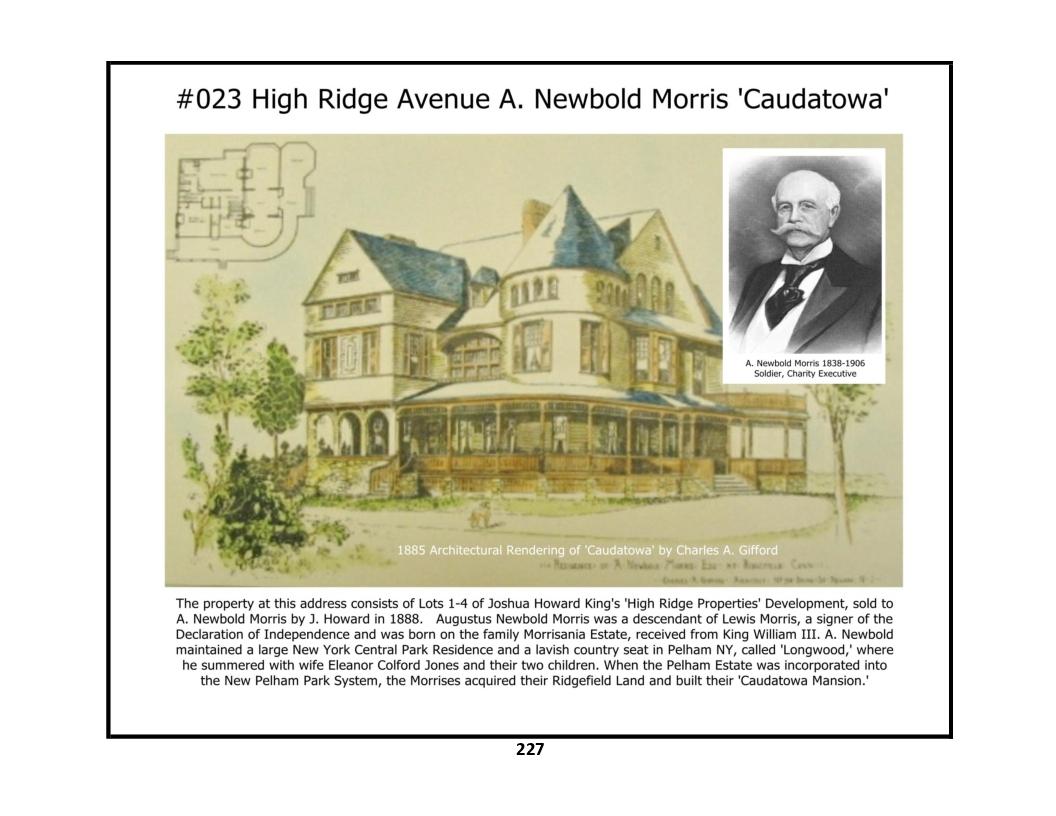
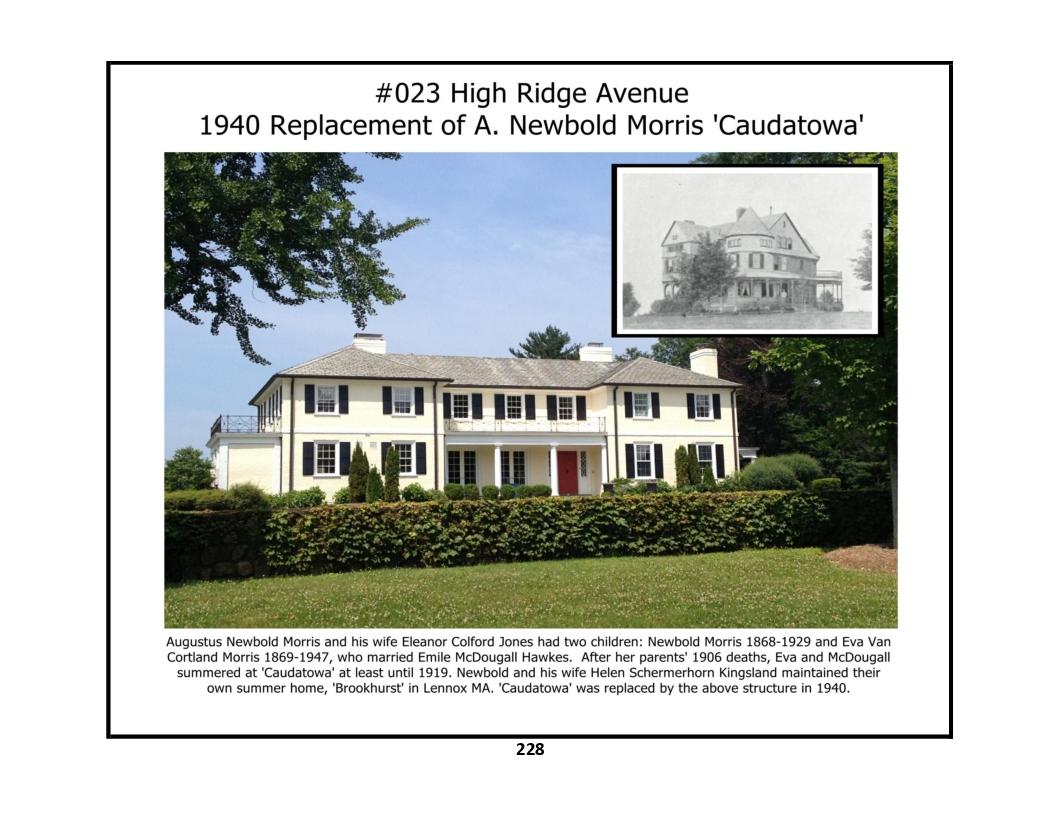
23 High Ridge Avenue - photos 1, 2
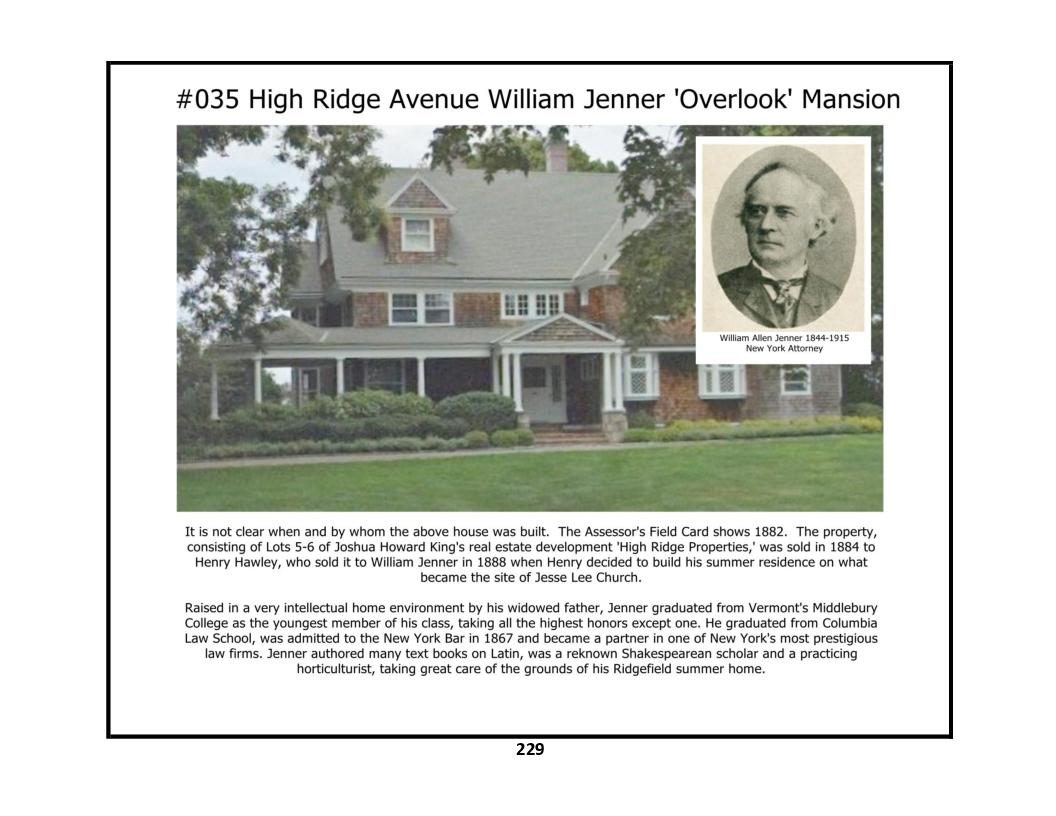
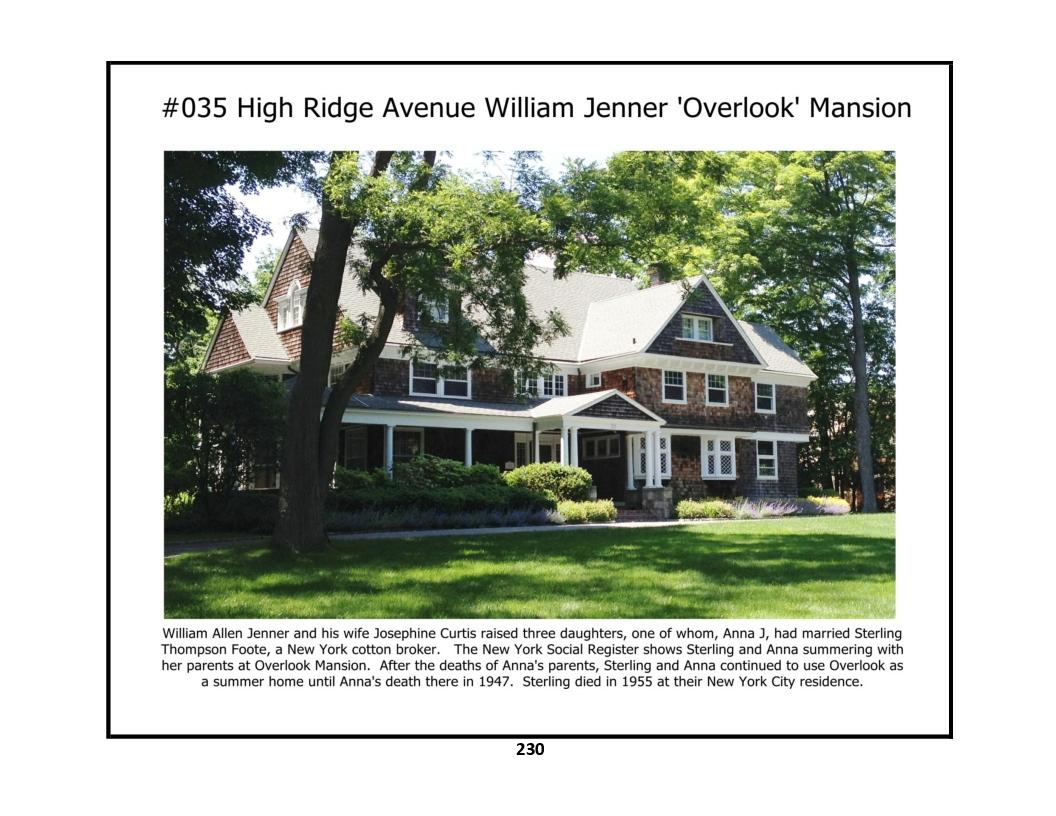
35 High Ridge Avenue - photos 1, 2
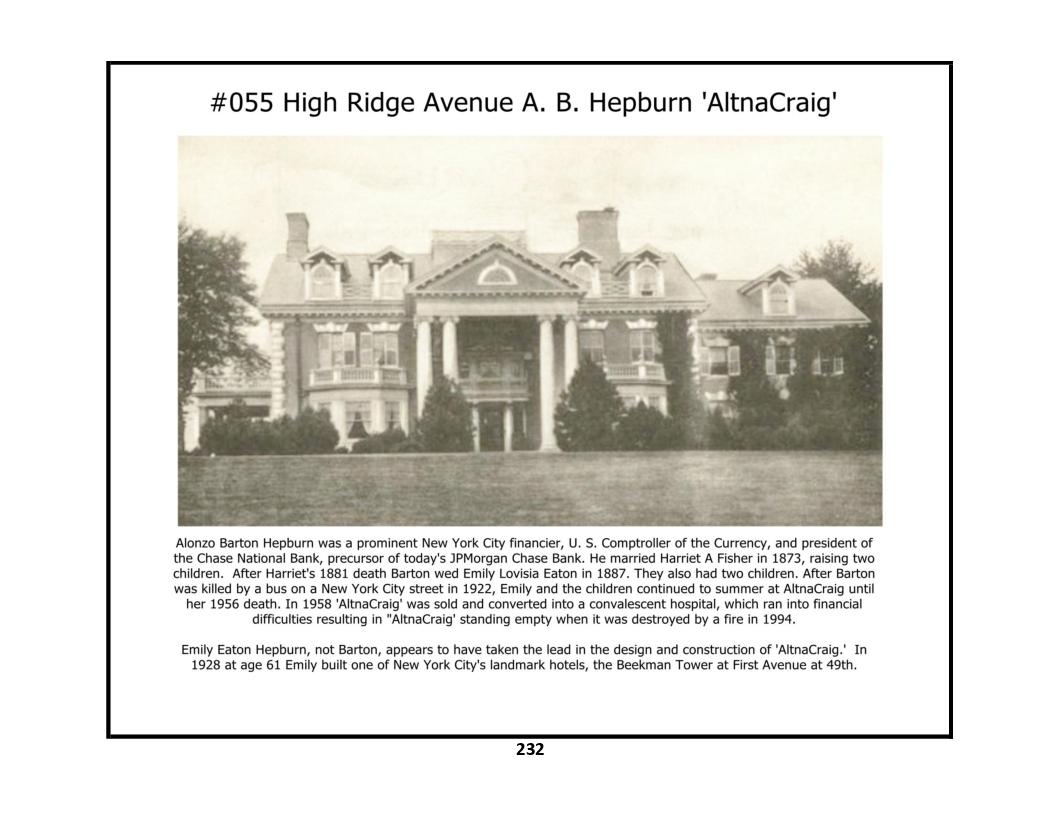
55 High Ridge Avenue - photos 1, 2, 3
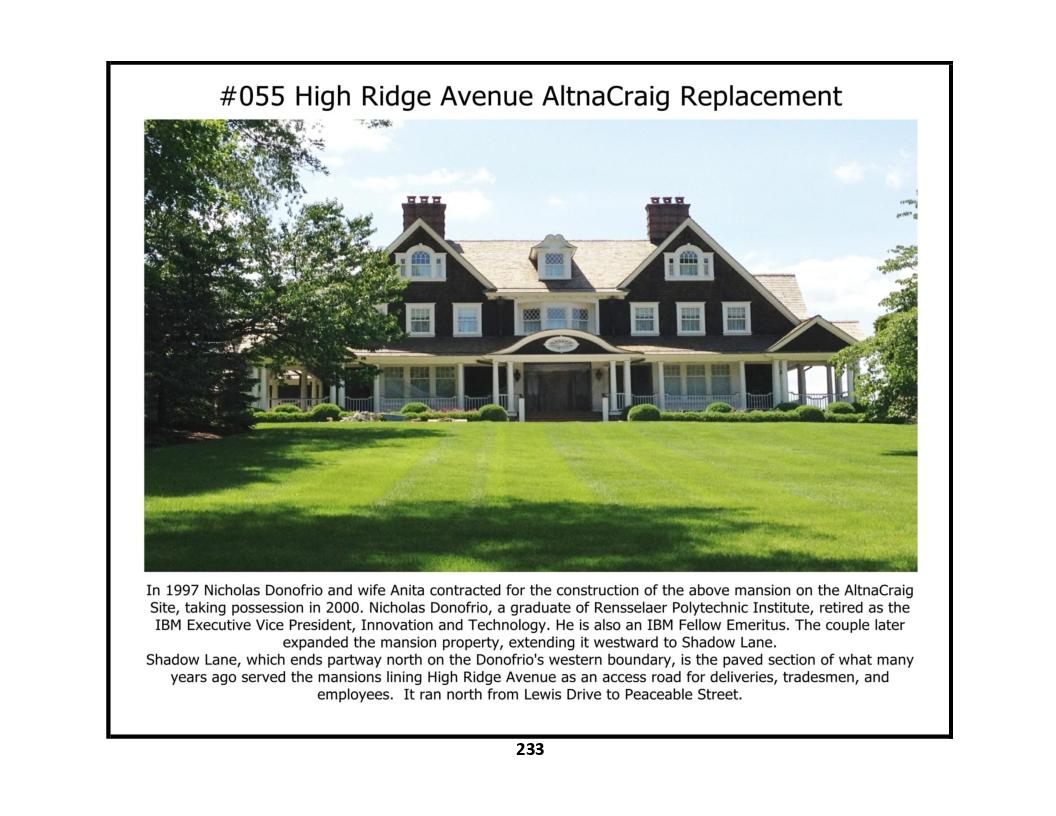
61 High Ridge Avenue - photos 1, 2, 3
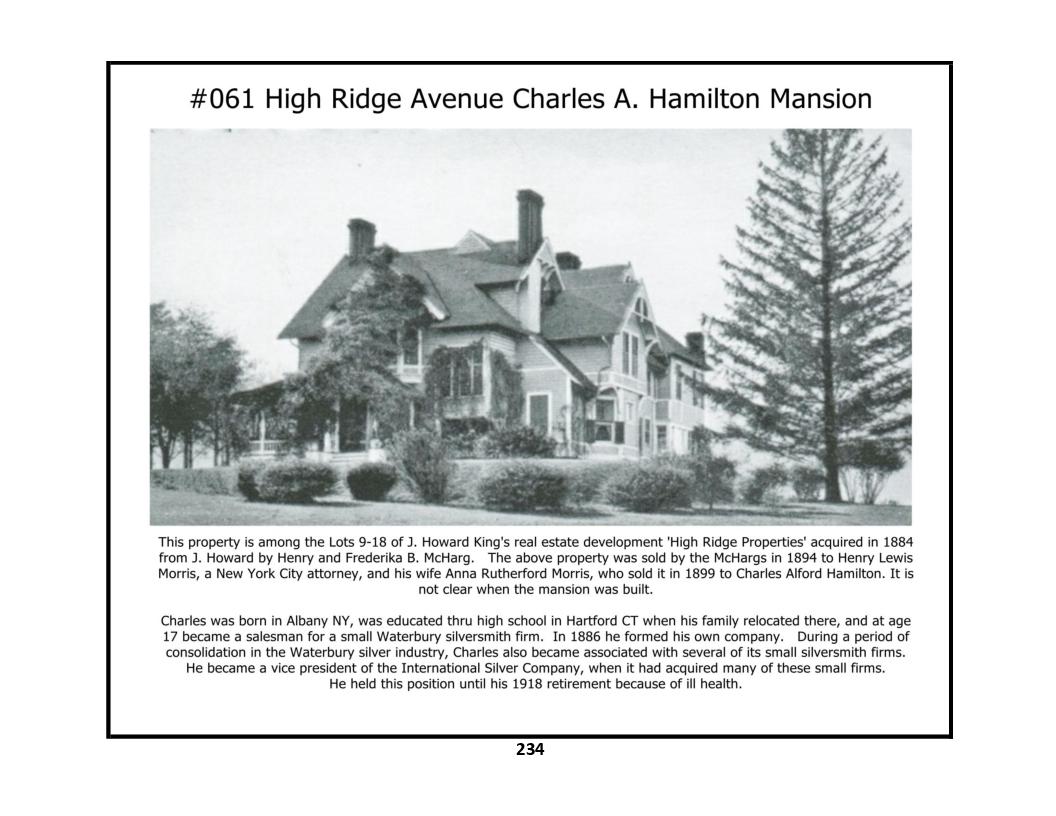
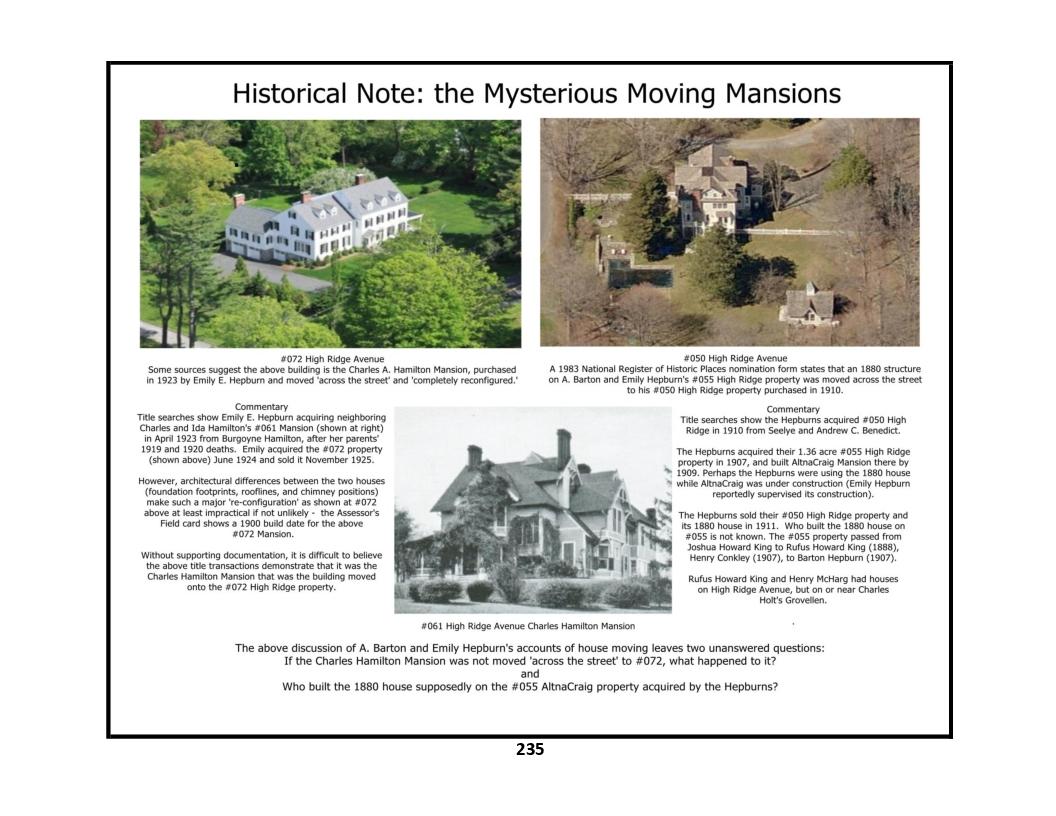
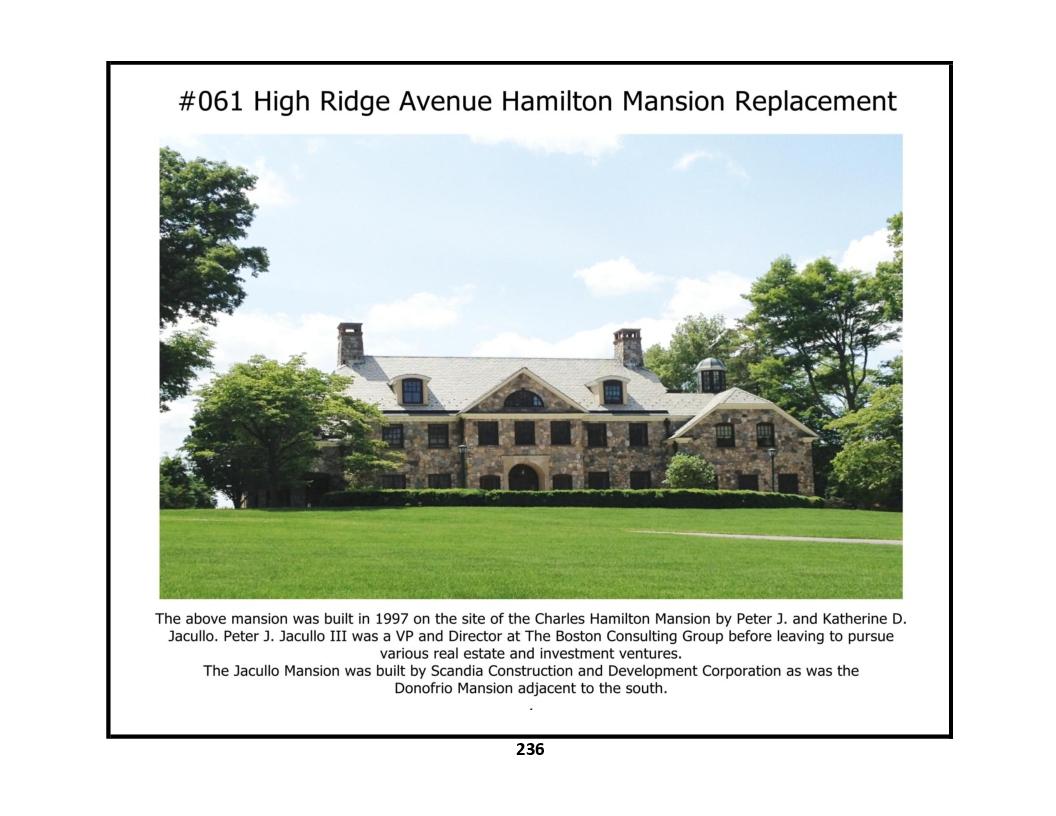
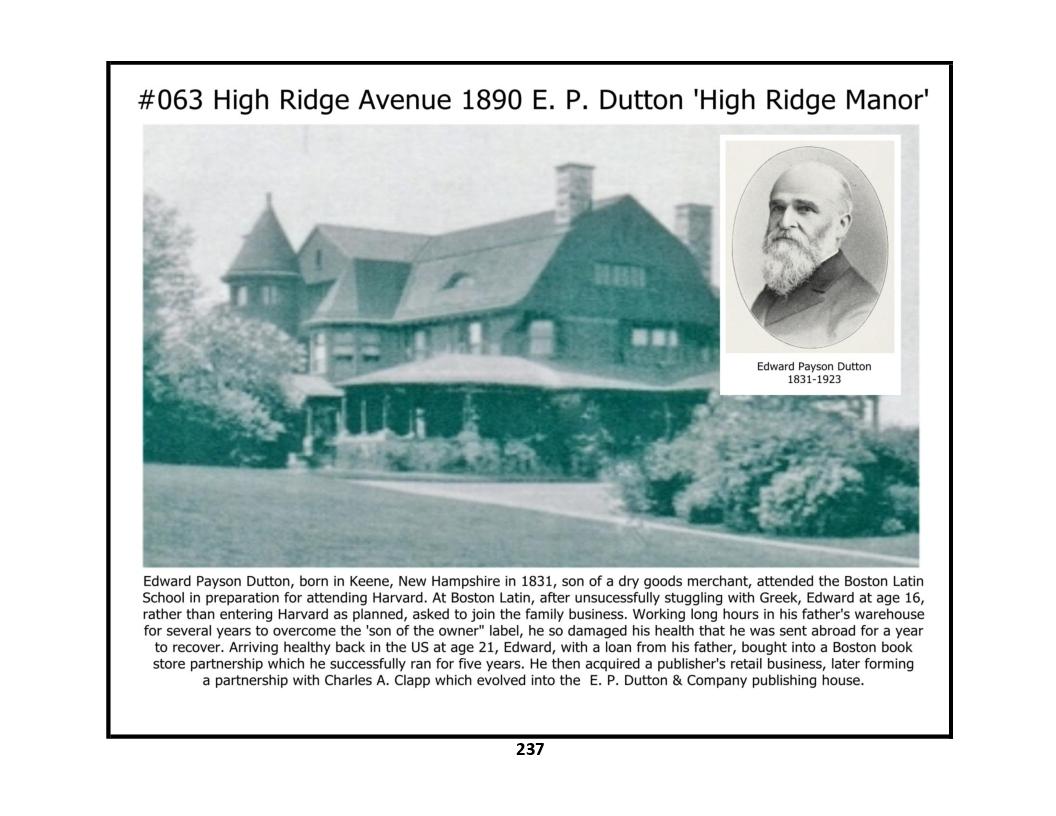
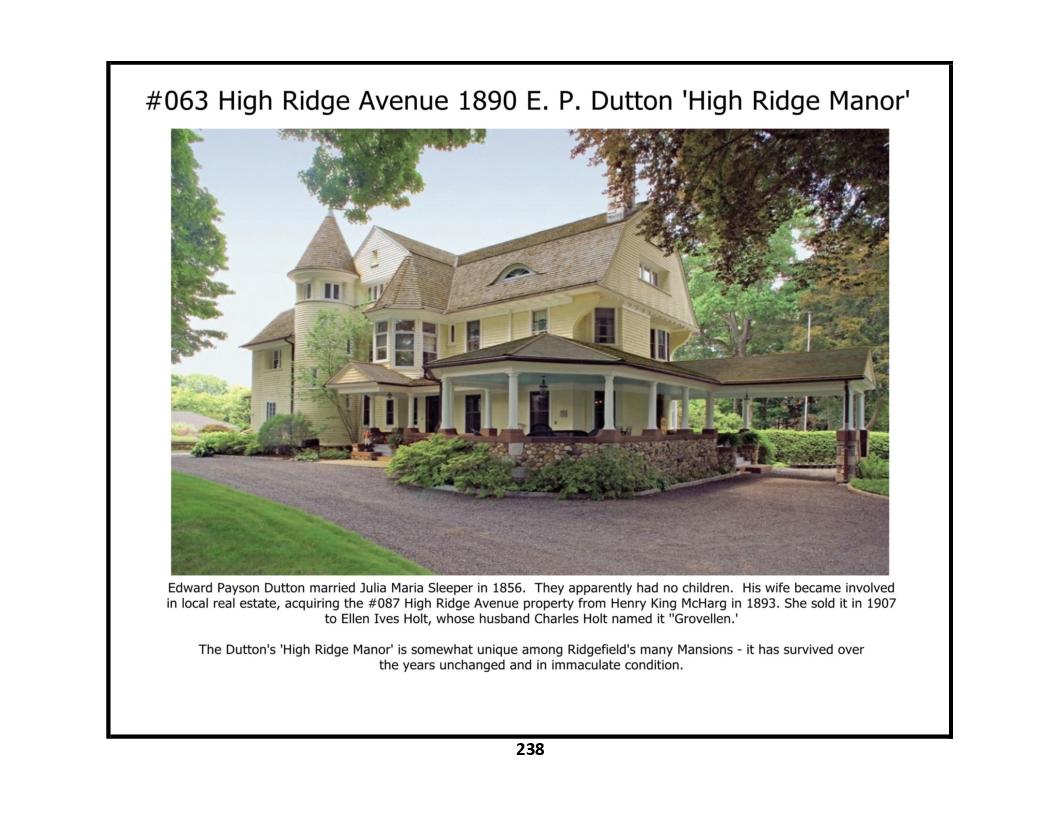
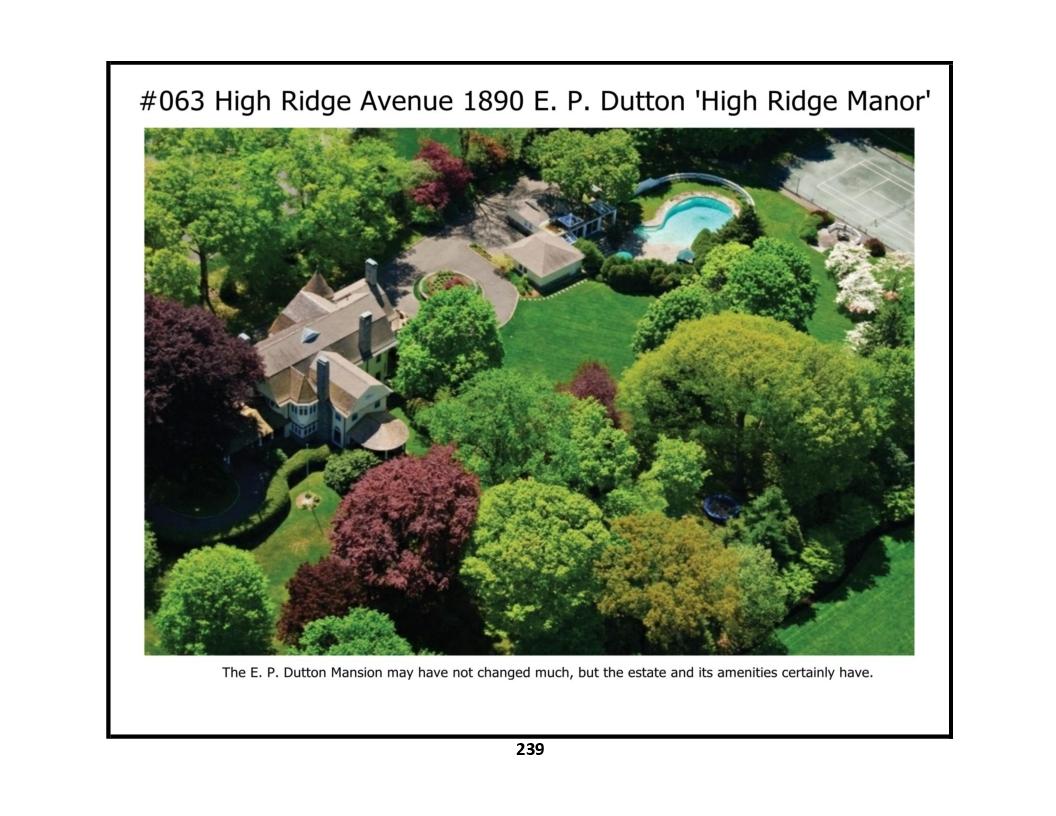
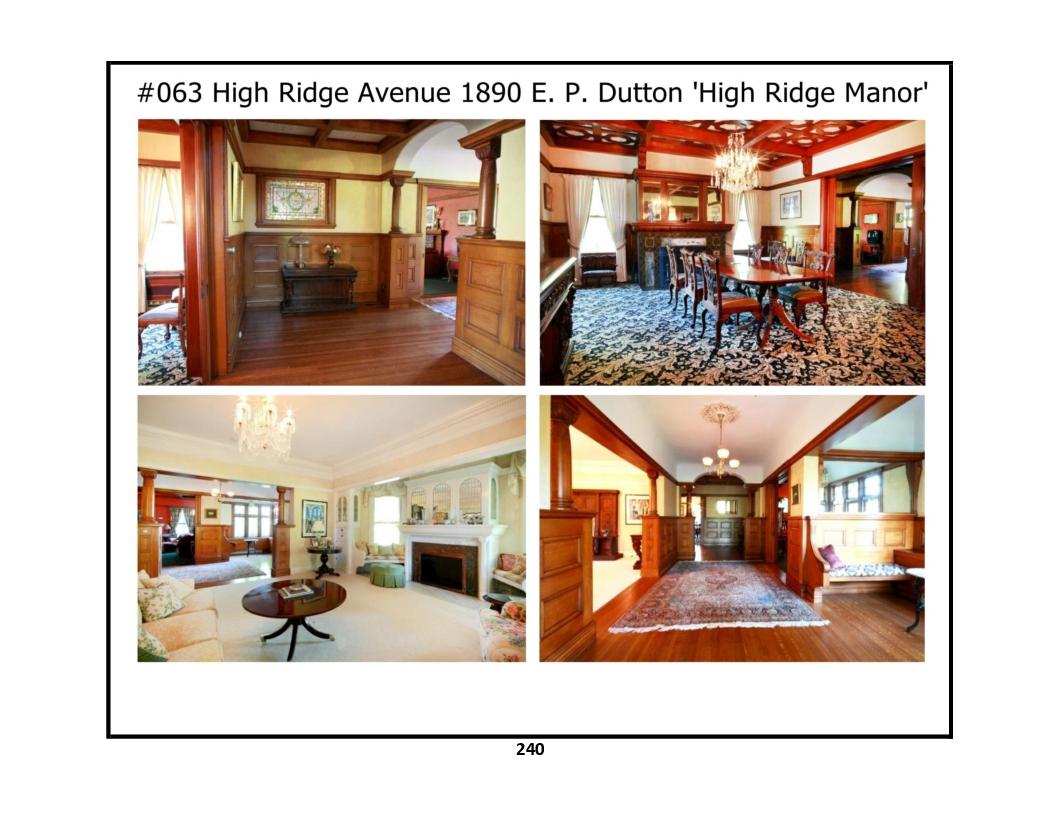
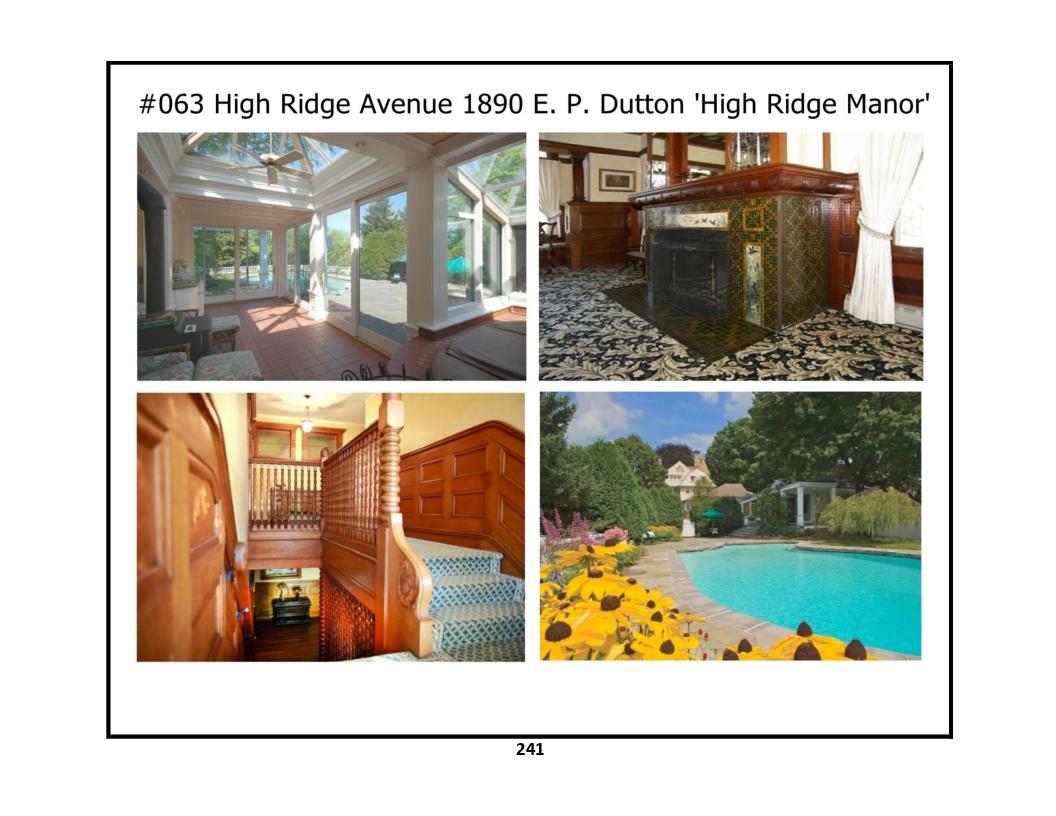
63 High Ridge Avenue - photos 1, 2, 3, 4, 5
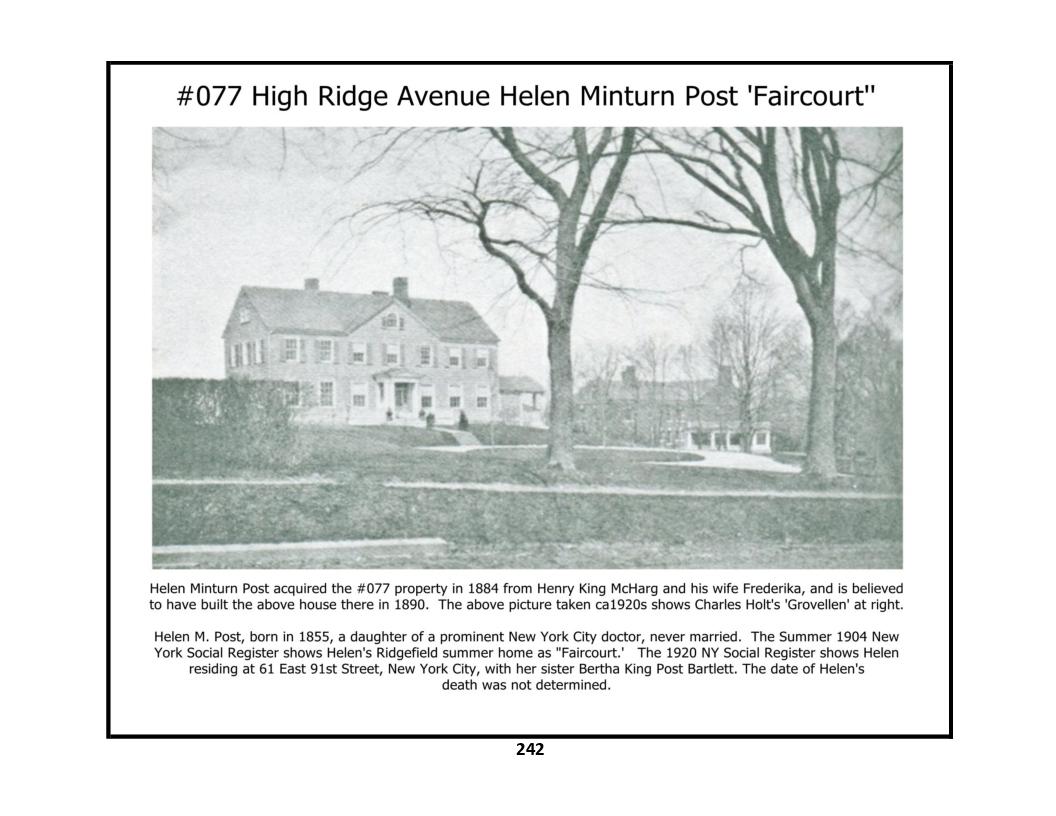
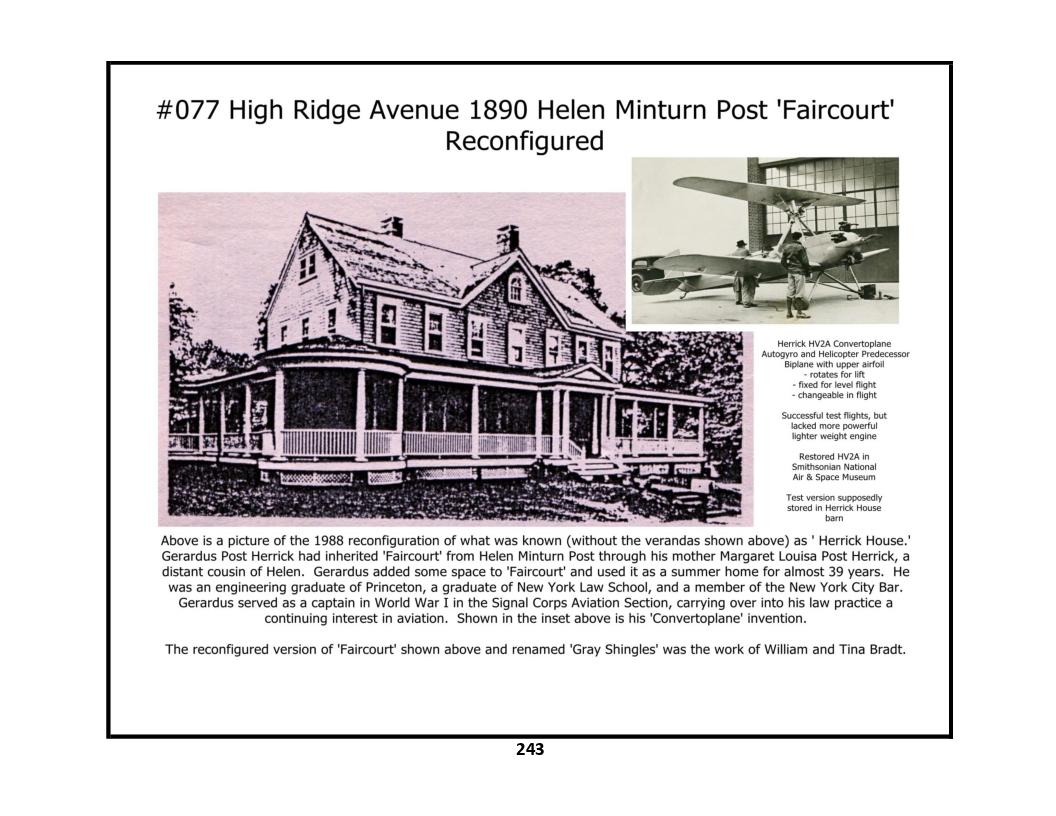
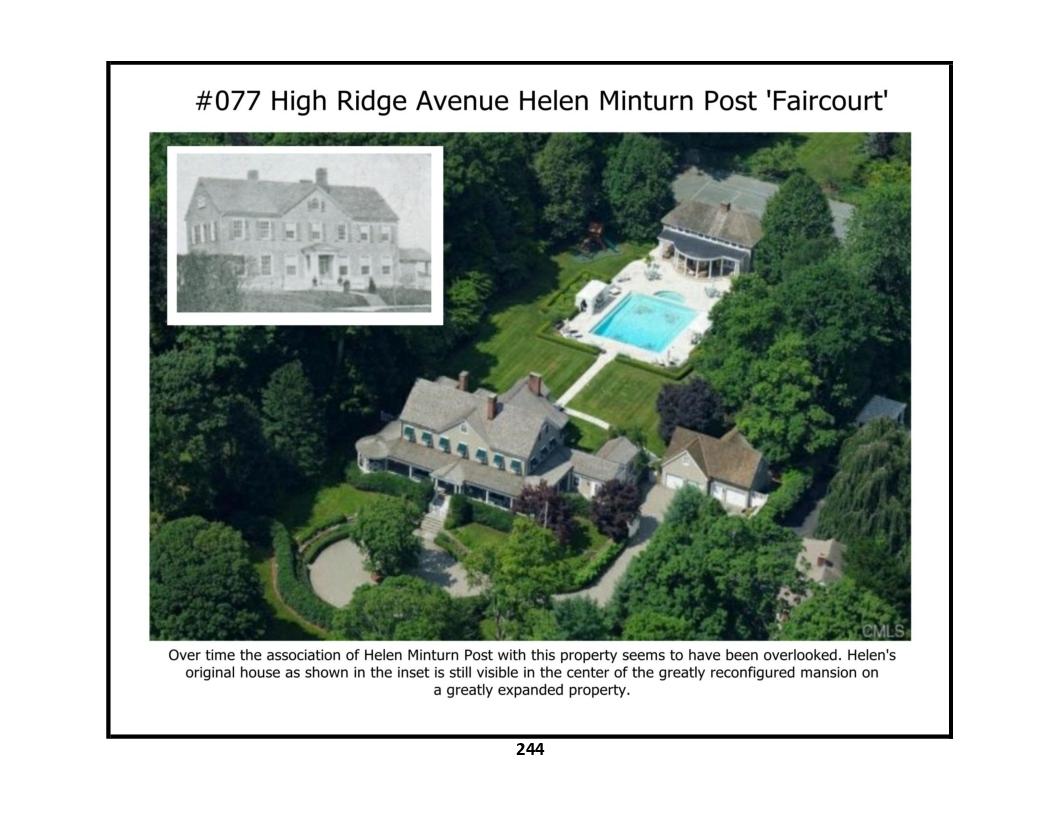
77 High Ridge Avenue - photos 1, 2, 3
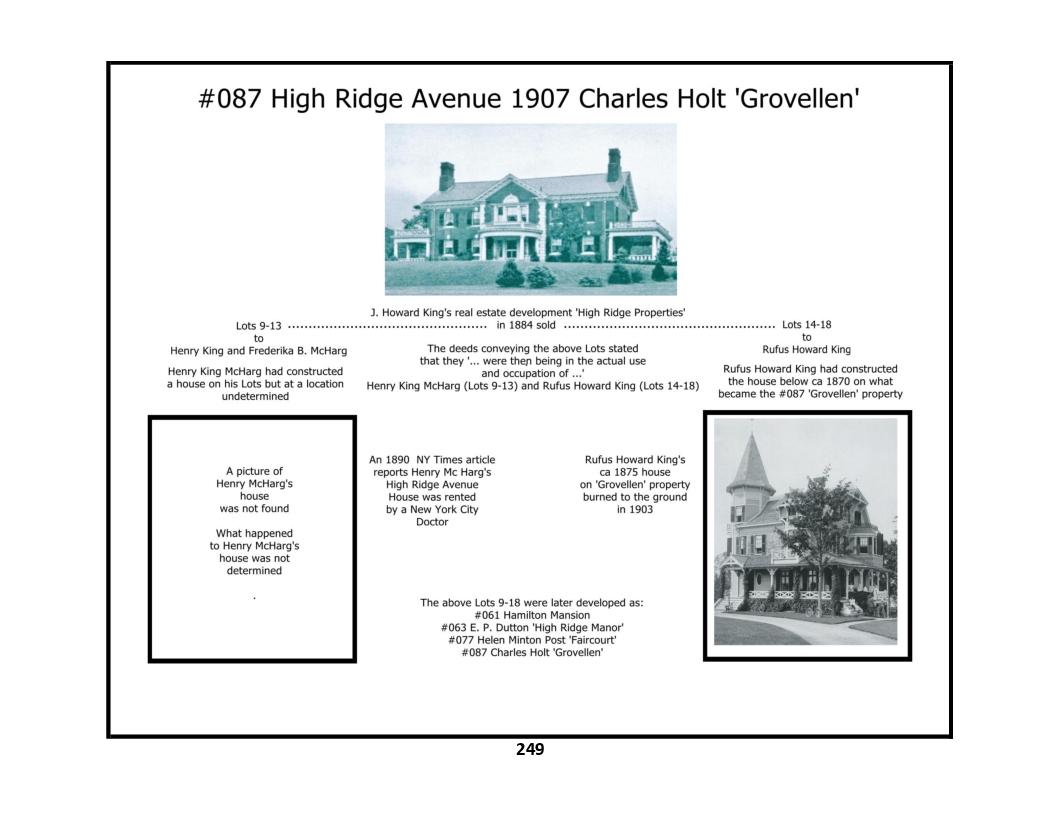
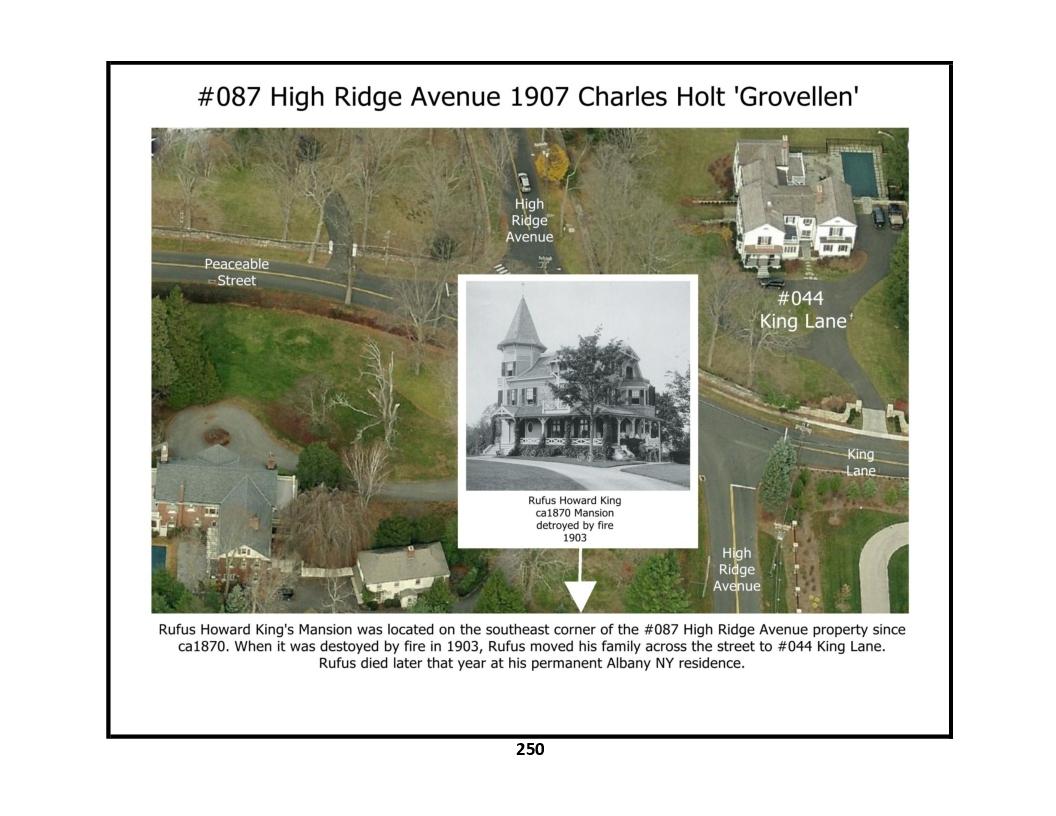
87 High Ridge Avenue - photos 1, 2, 3, 4, 5, 6
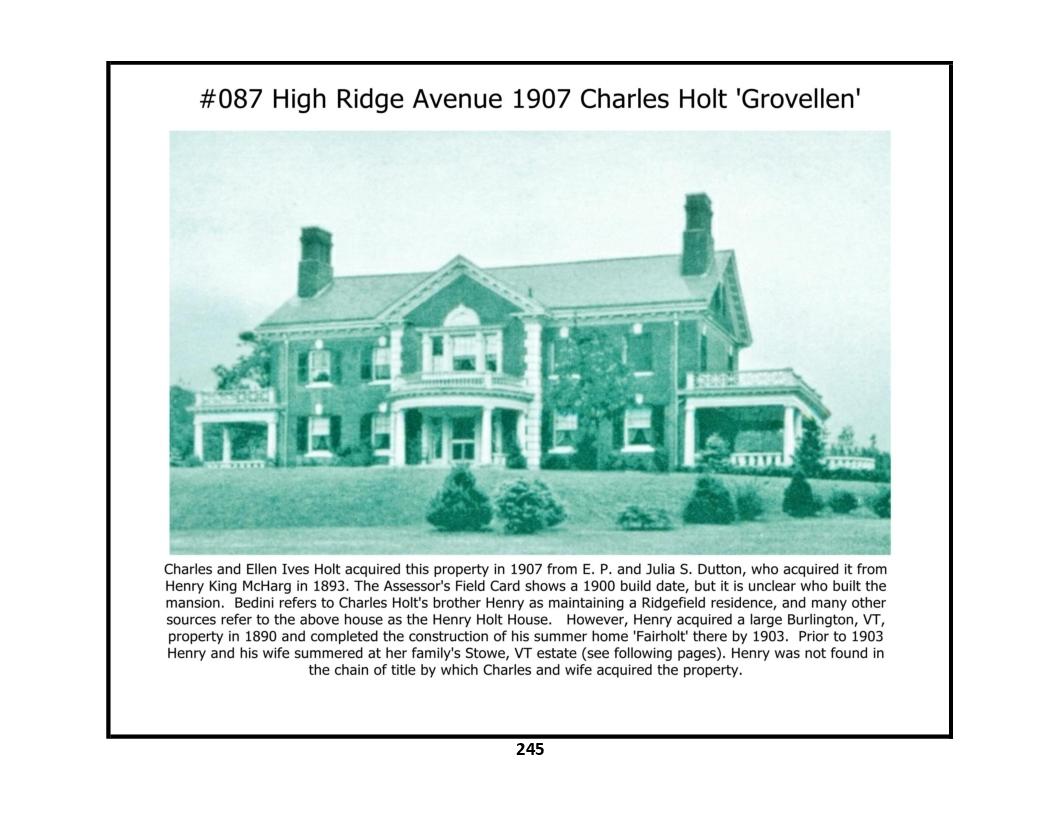
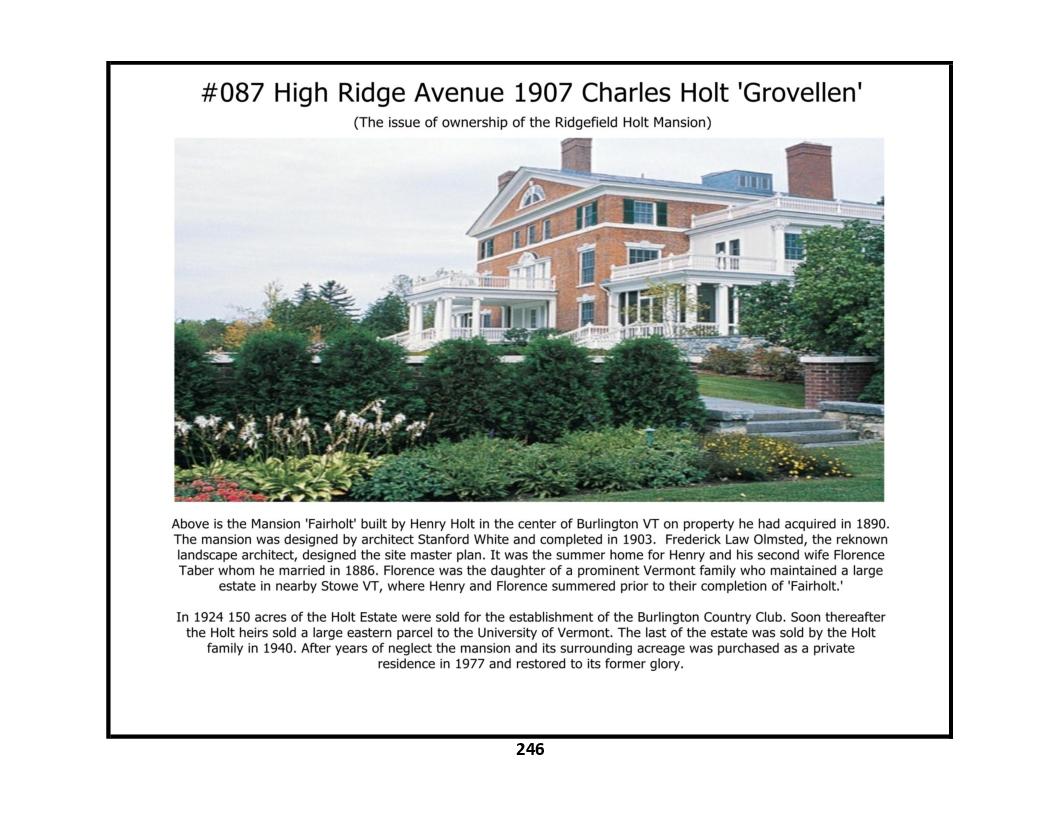
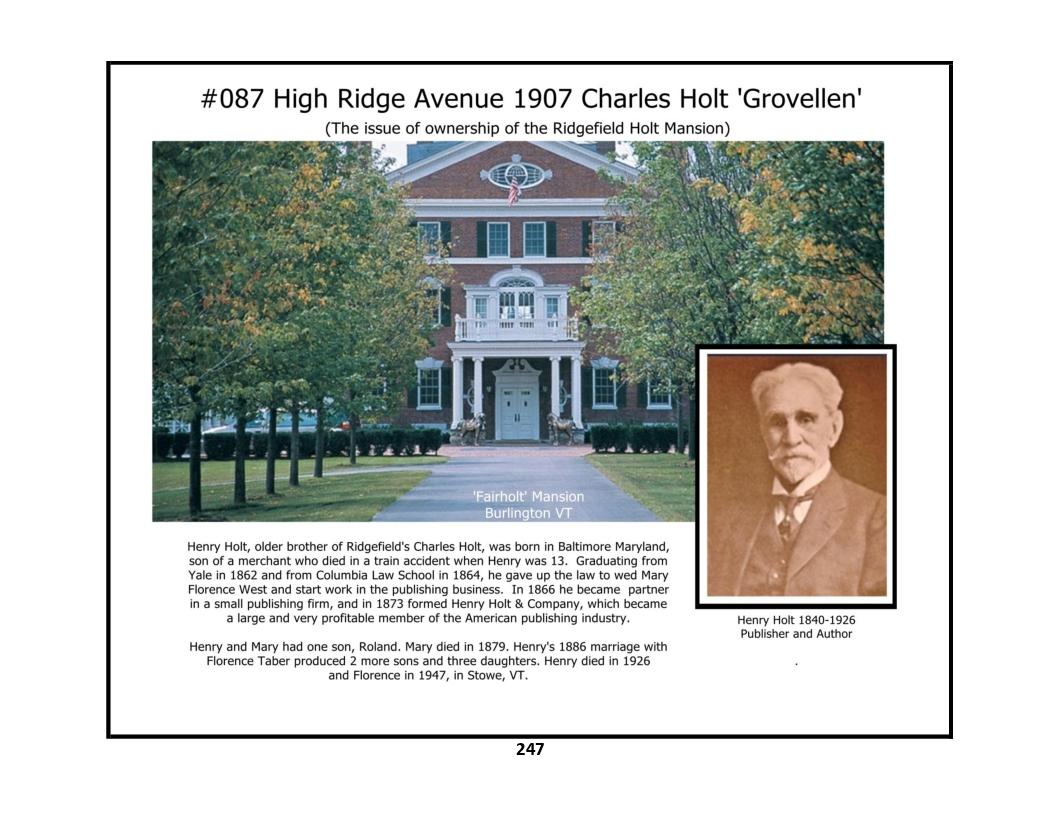
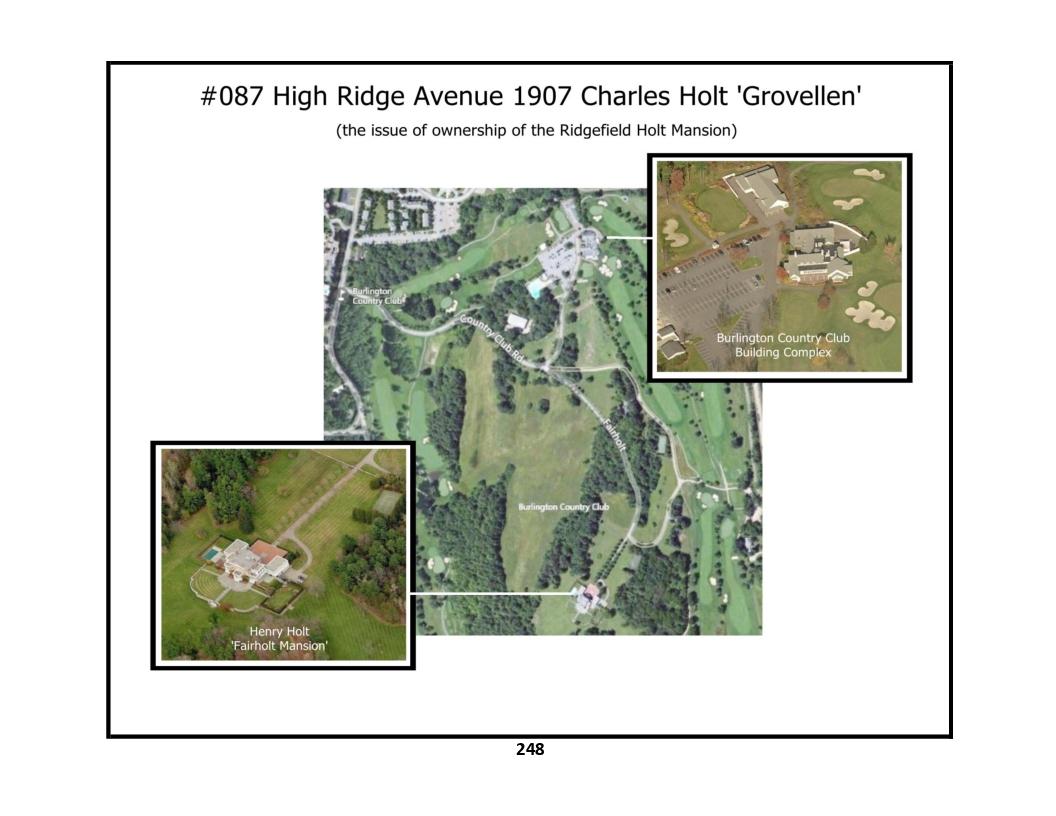
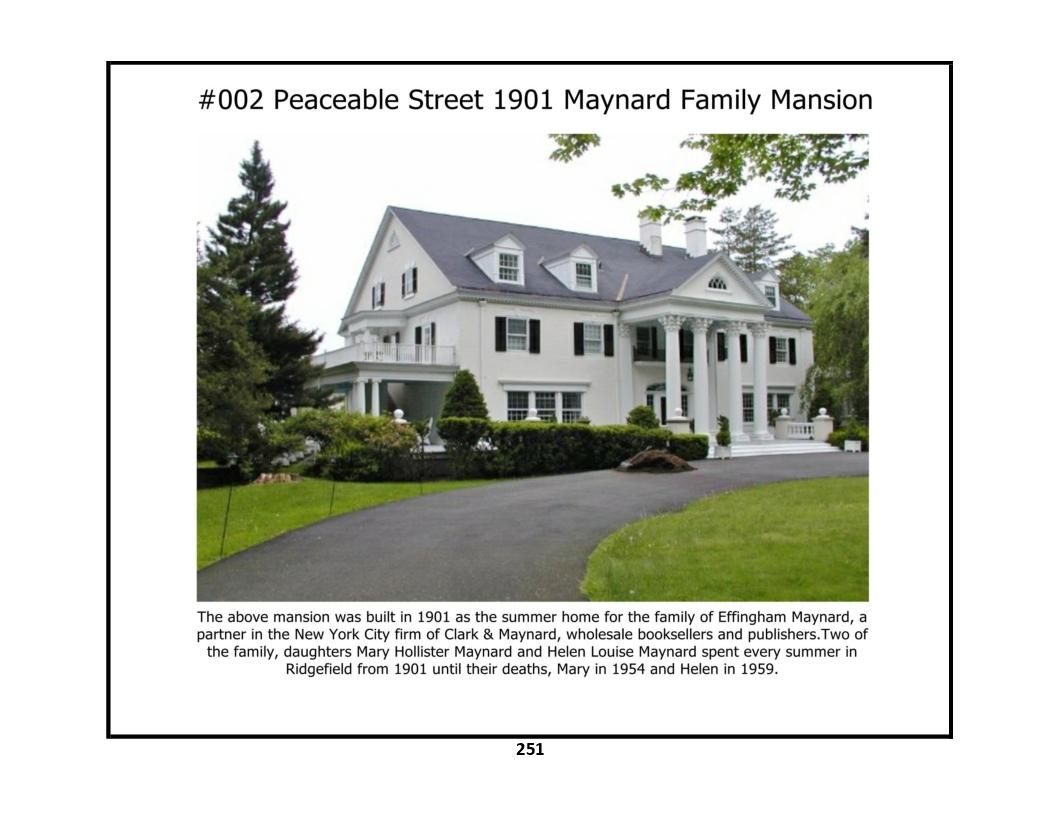
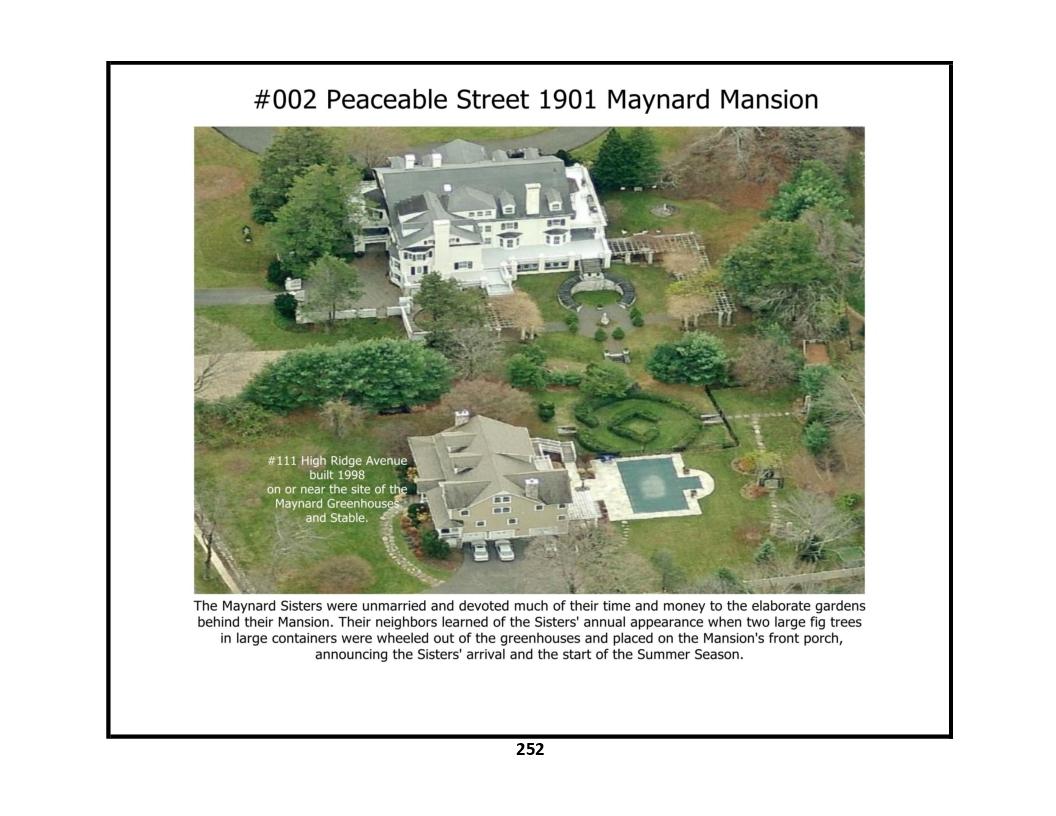
2 Peaceable Street - photos 1, 2
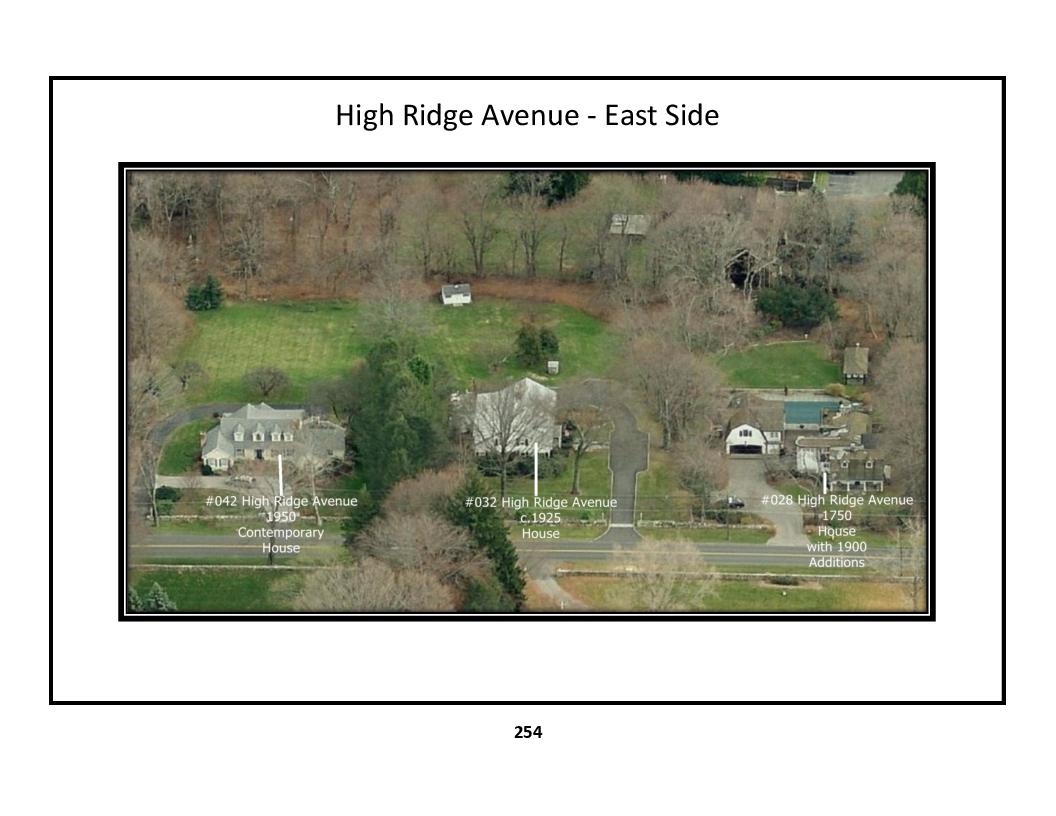
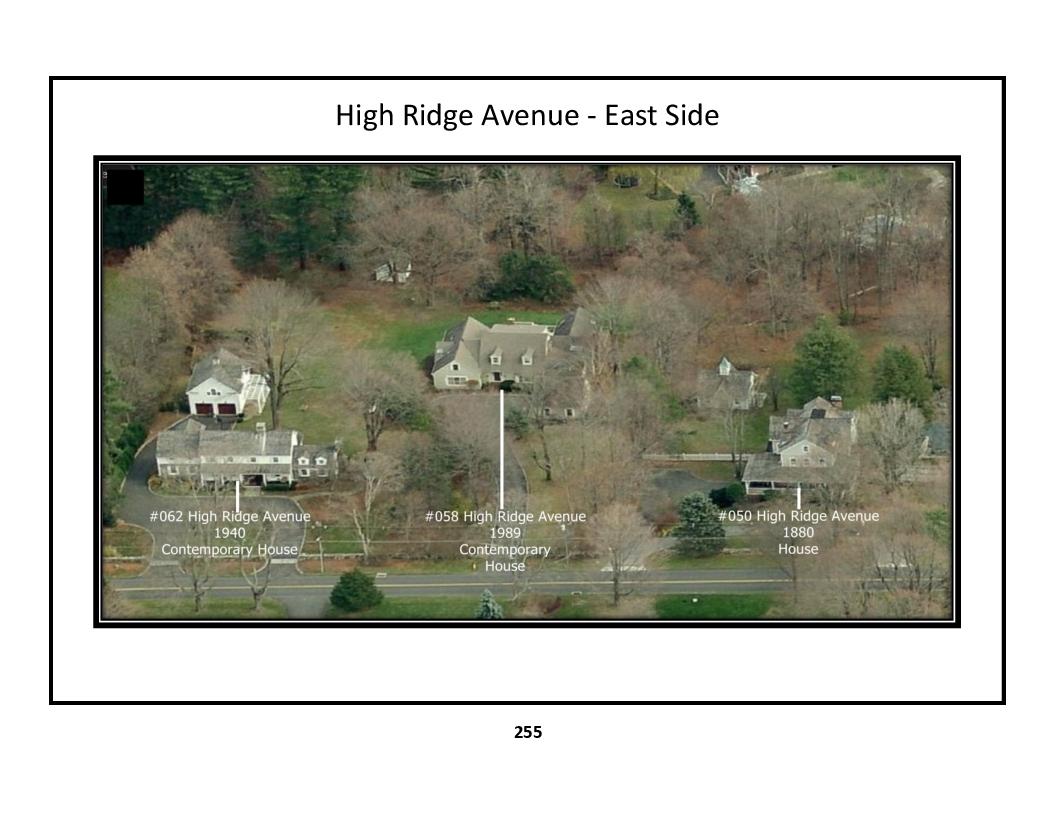
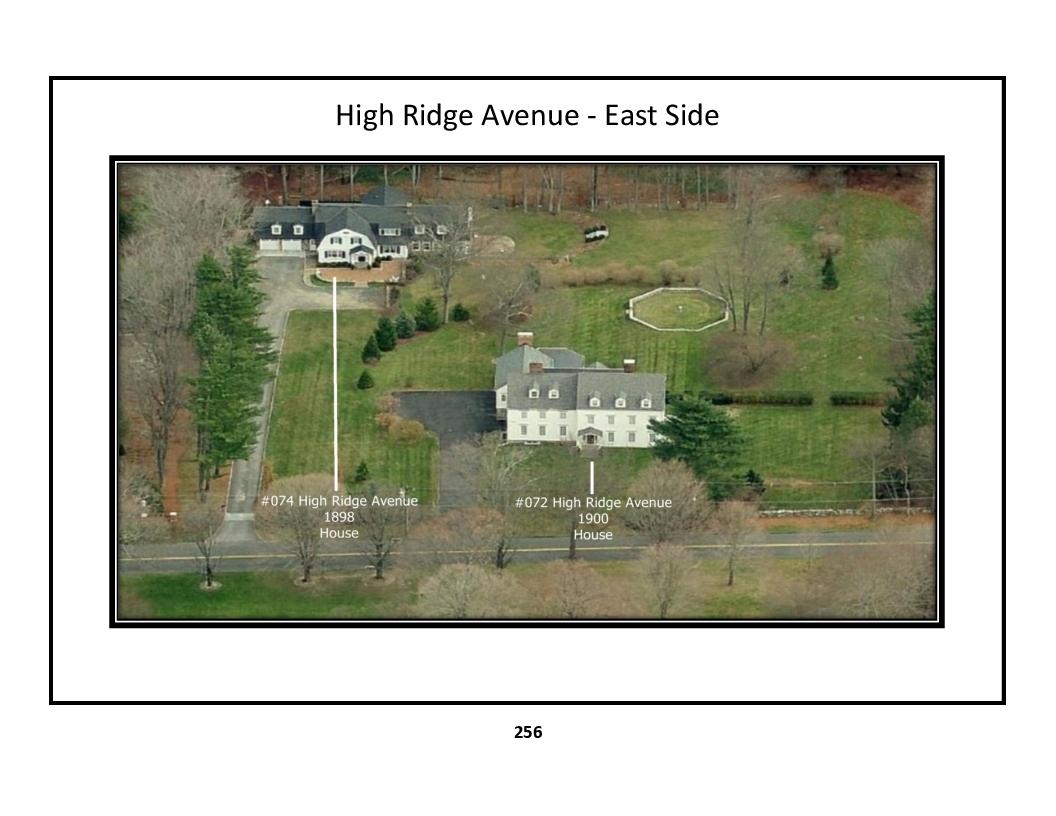
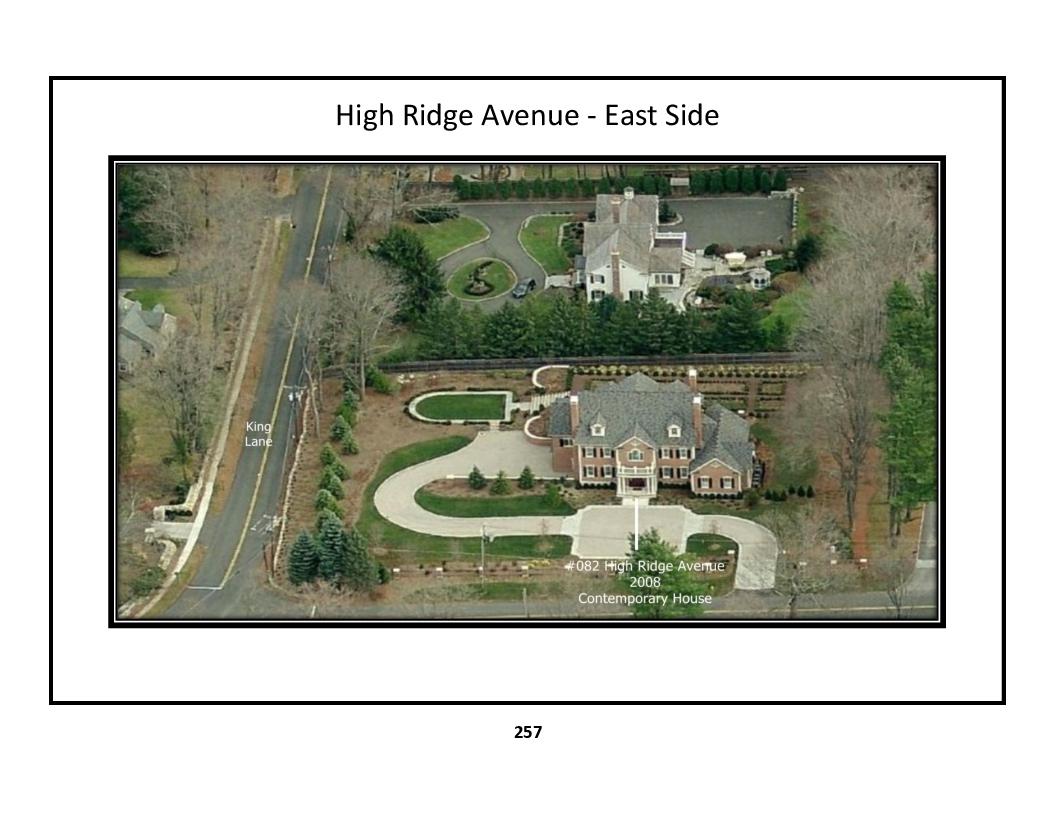
Aerial Views: High Ridge Avenue - East Side - photos a, b, c, d
Street Level Views: High Ridge Avenue - East Side
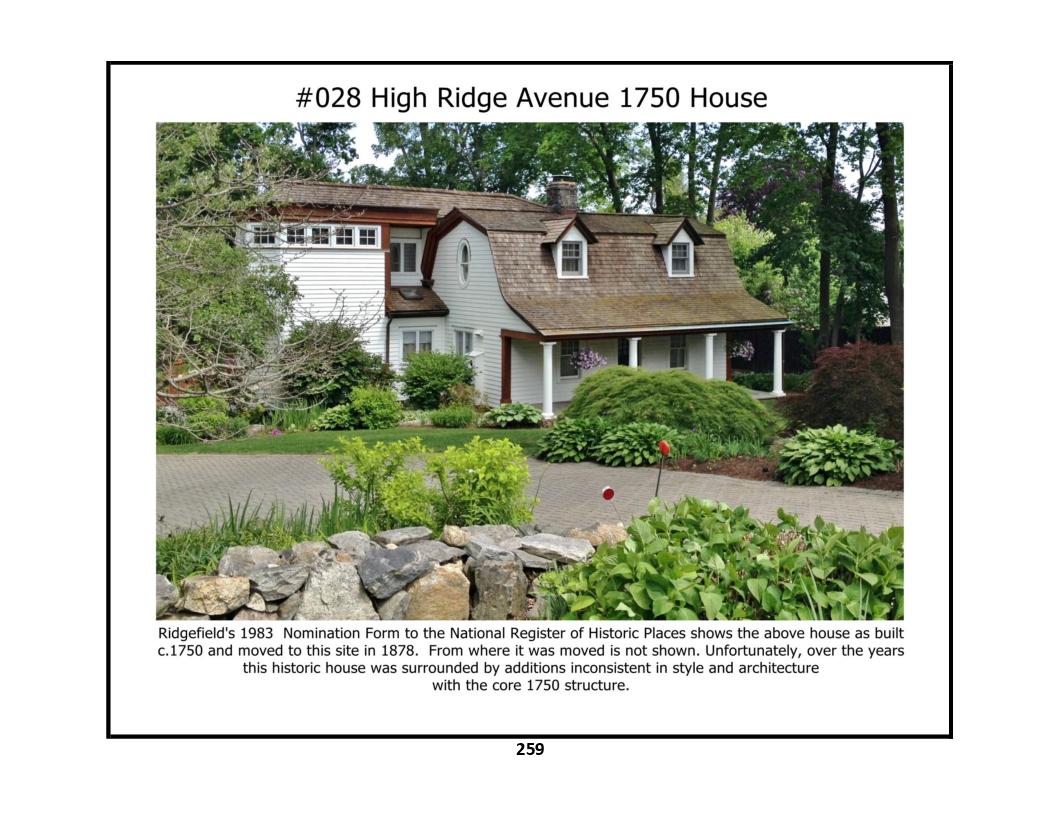
28 High Ridge Avenue - photo 1
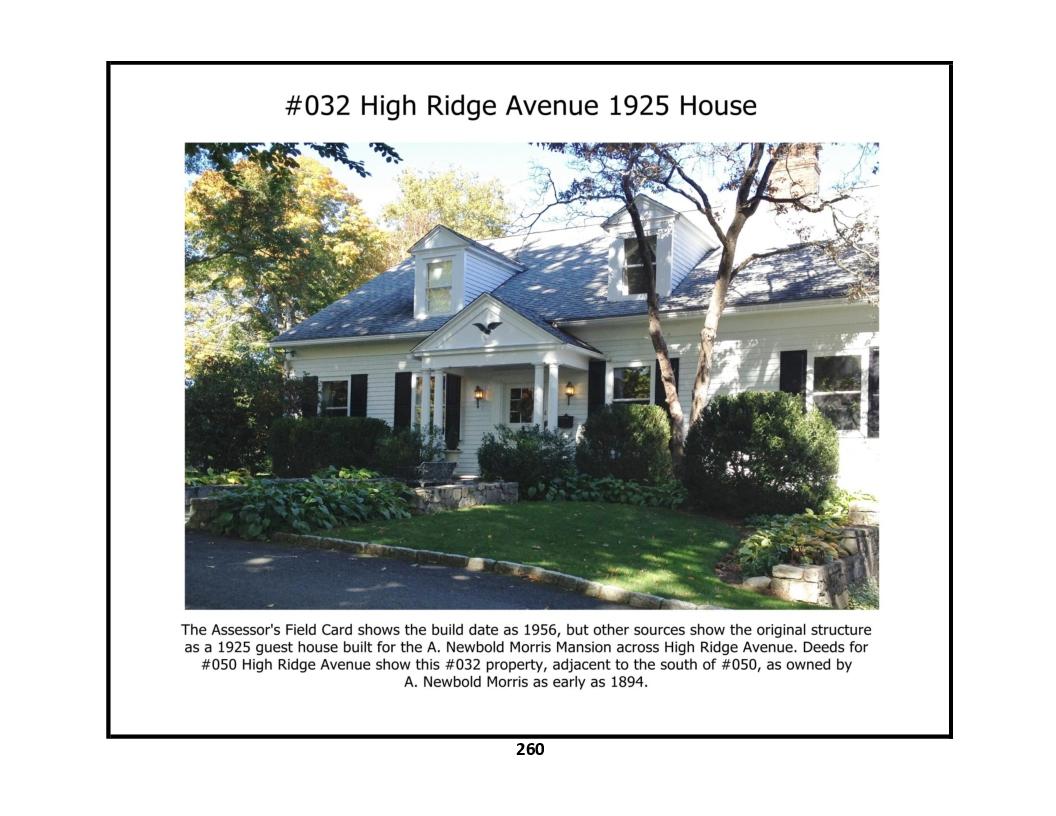
32 High Ridge Avenue - photo 1
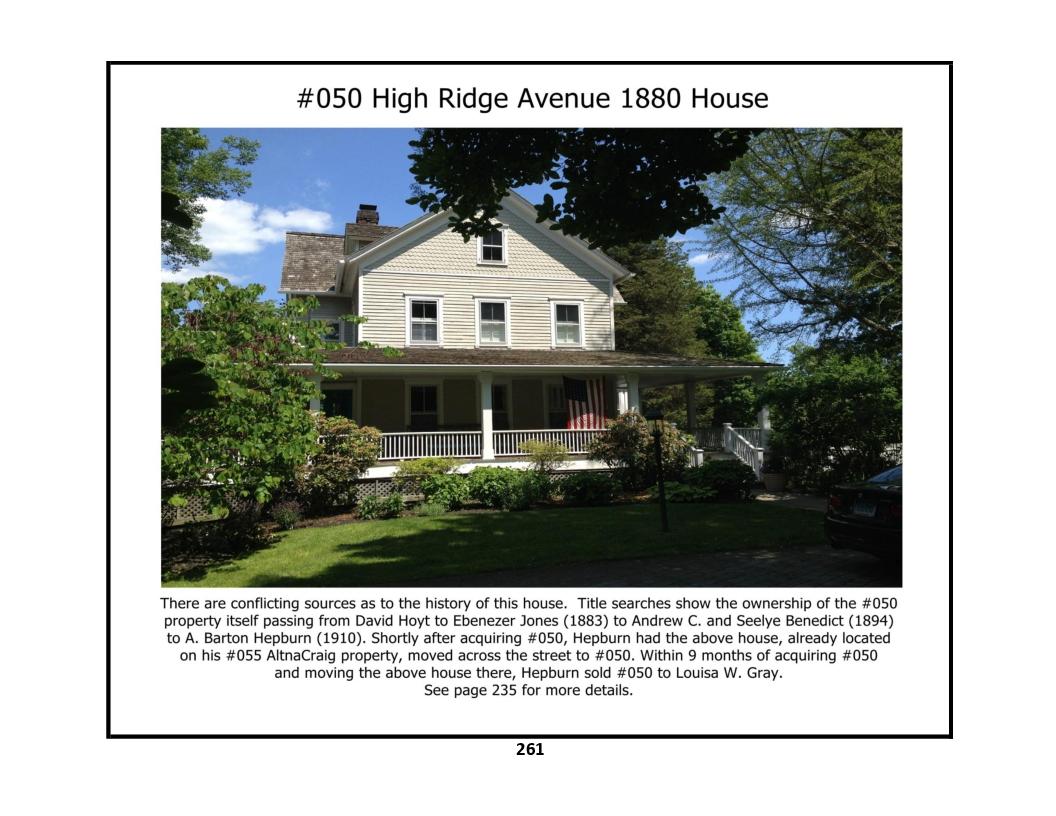
50 High Ridge Avenue - photo 1
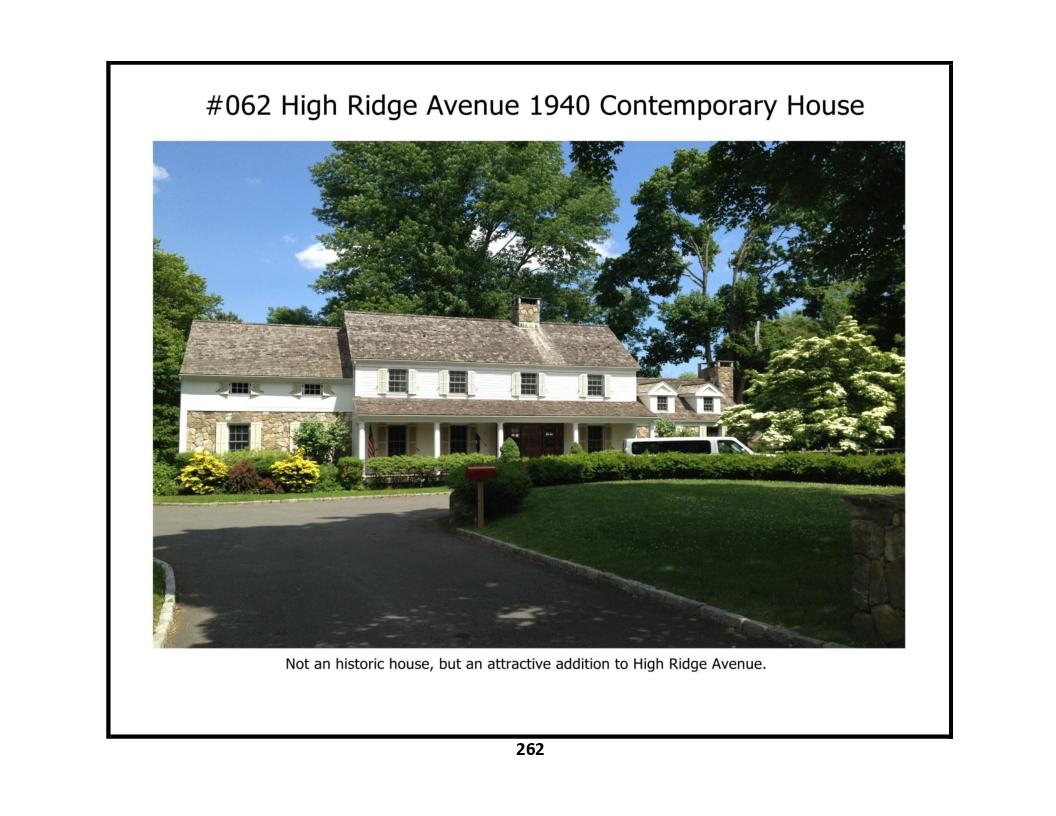
62 High Ridge Avenue - photo 1
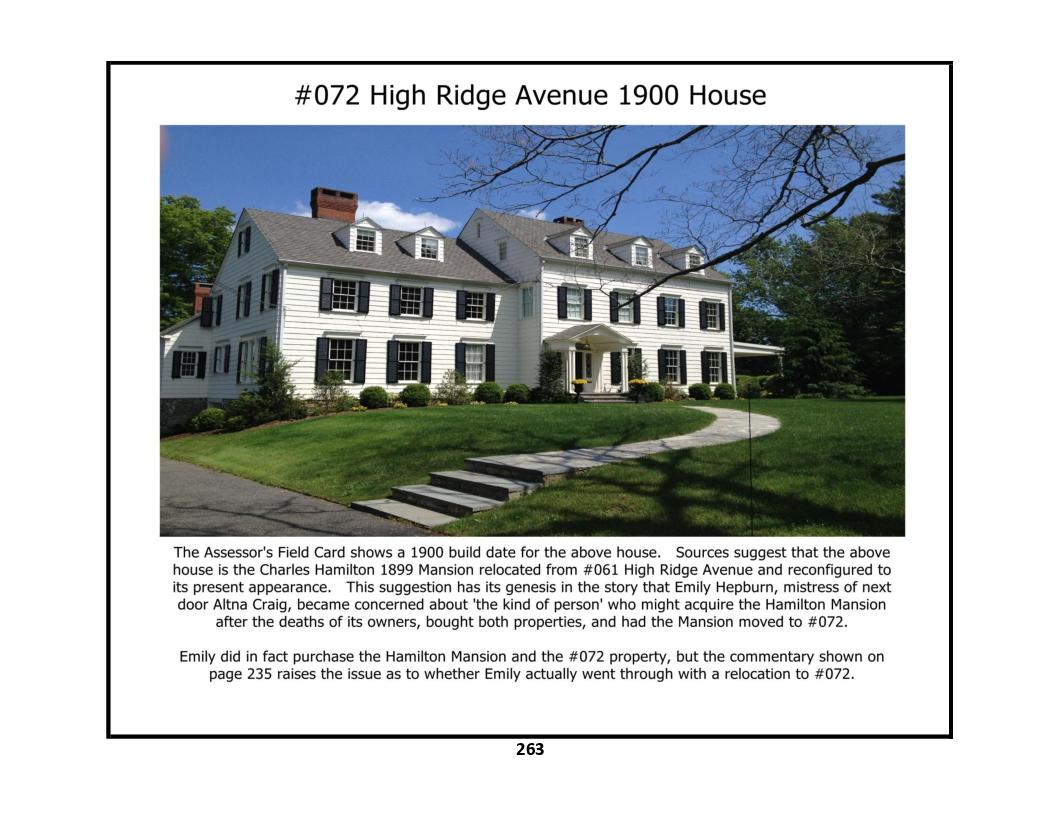
72 High Ridge Avenue - photo 1
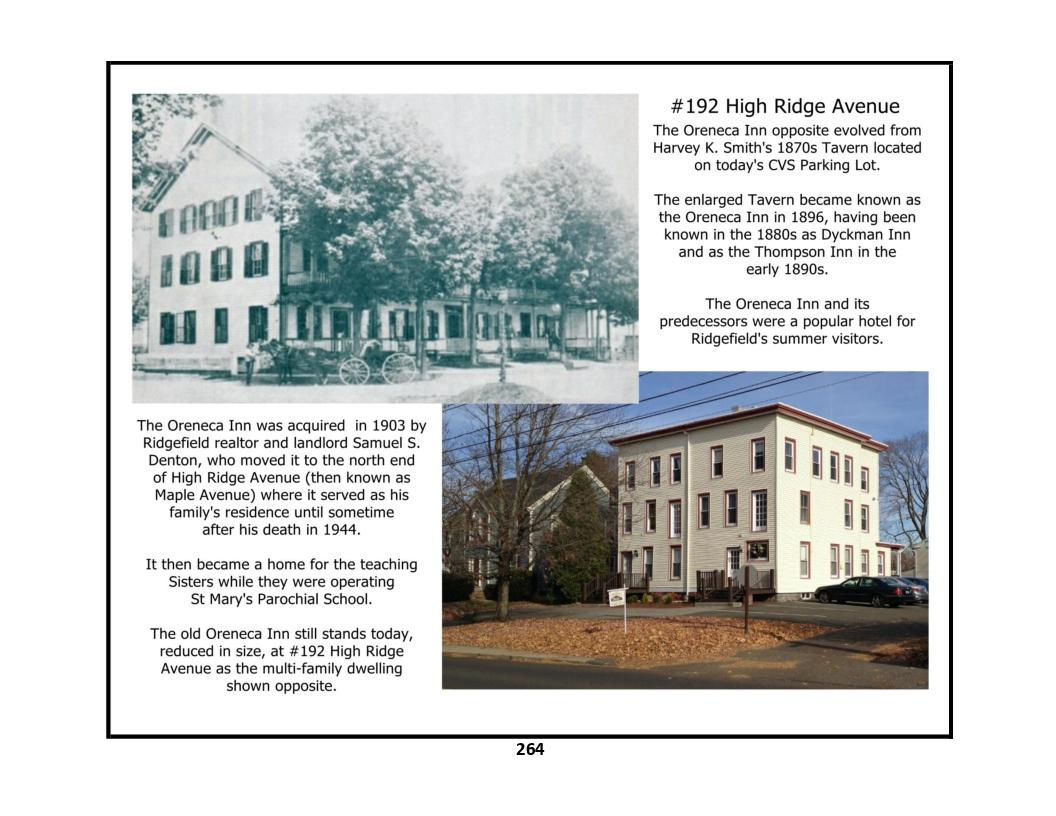
192 High Ridge Avenue - photo 1
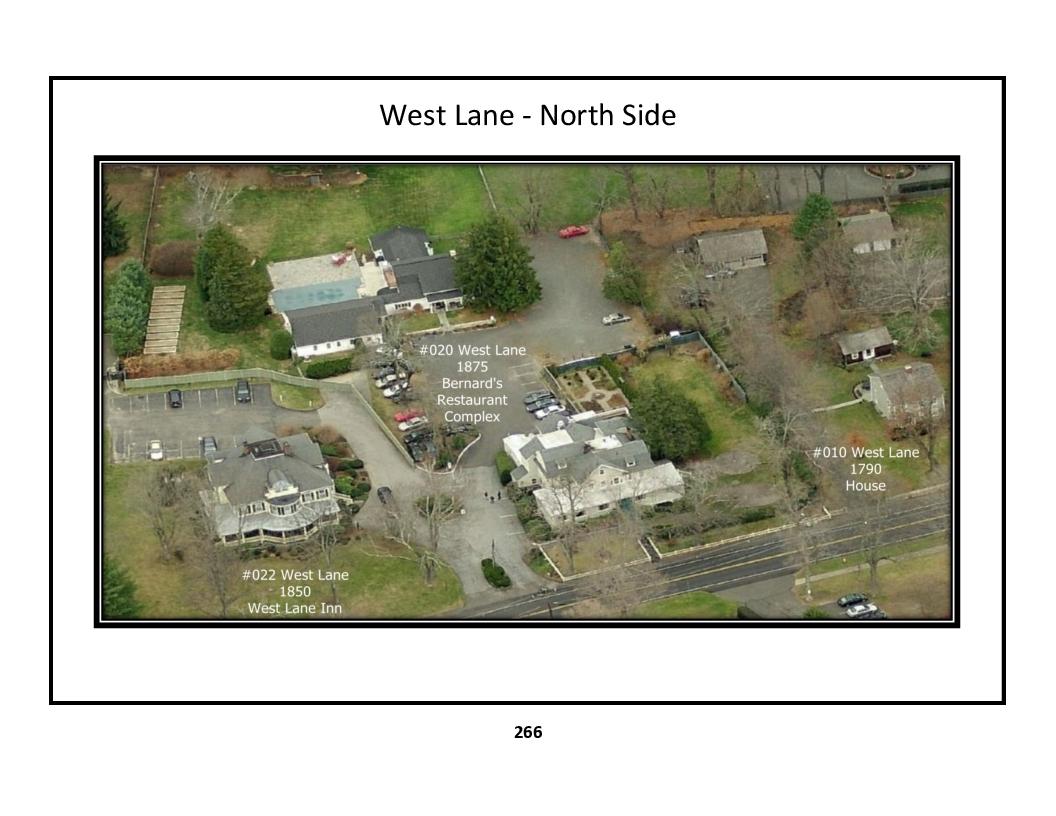
Aerial Views: West Lane - North Side - photo a
Street Level Views: West Lane - North Side
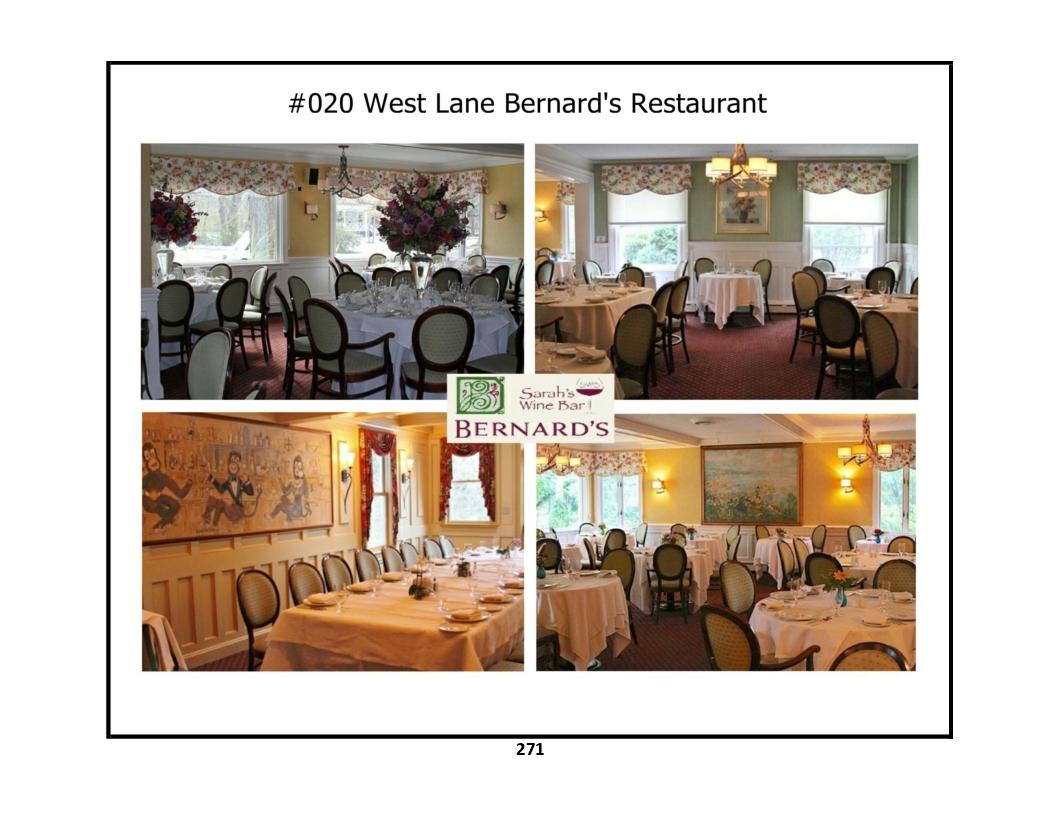
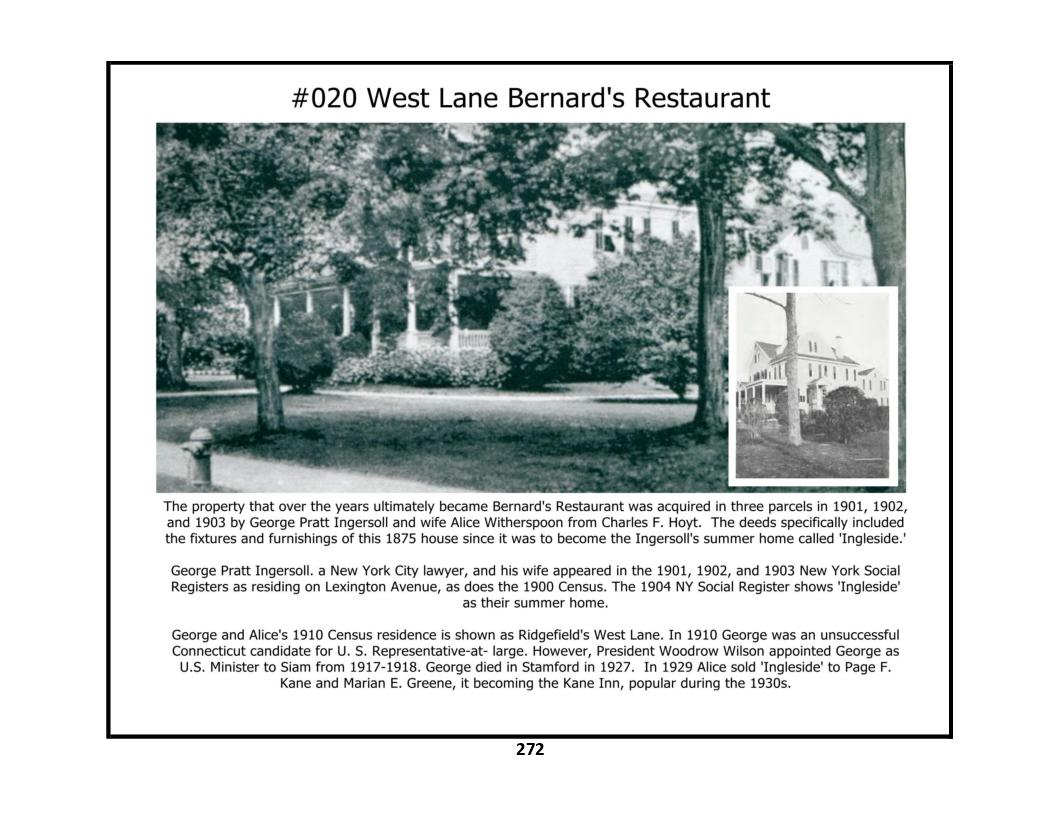
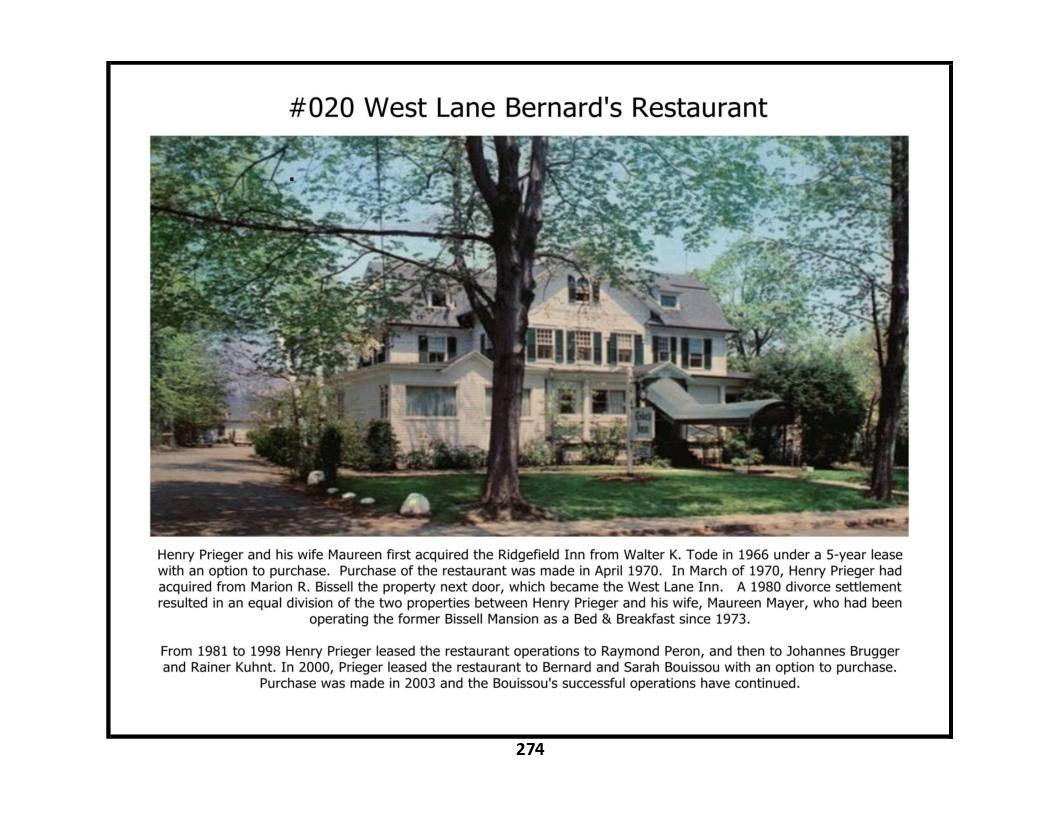
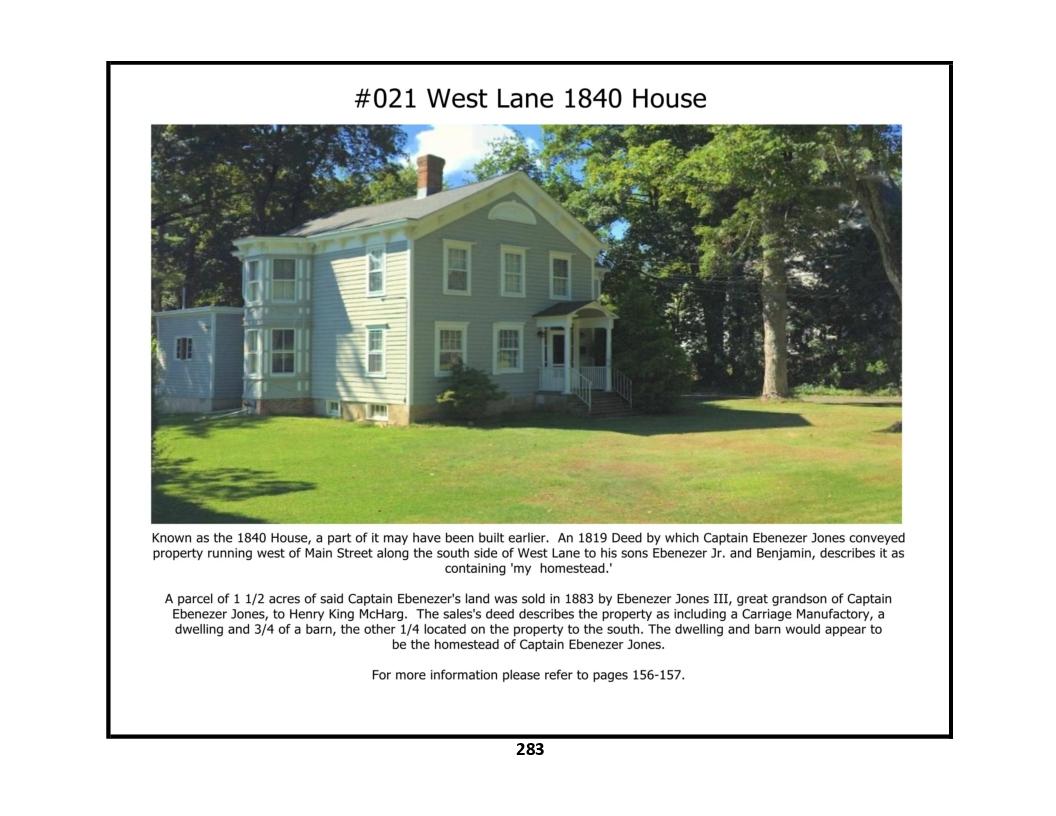
20 West Lane - photos 1, 2, 3, 4, 5
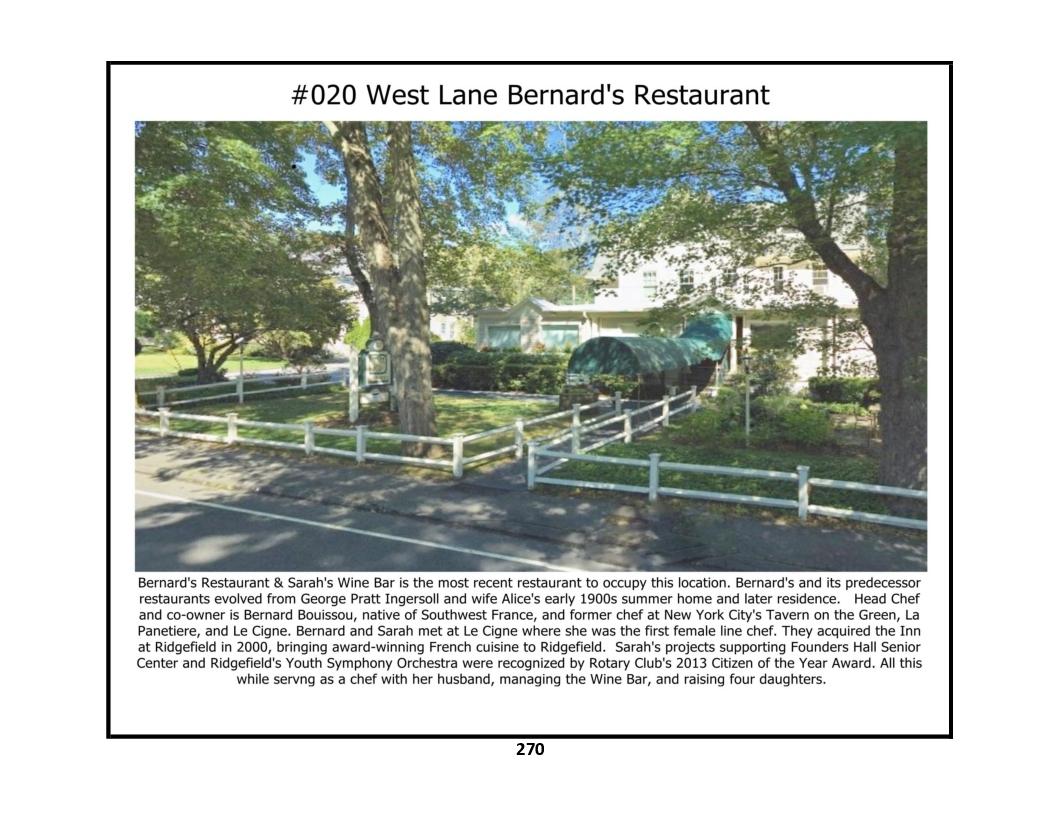
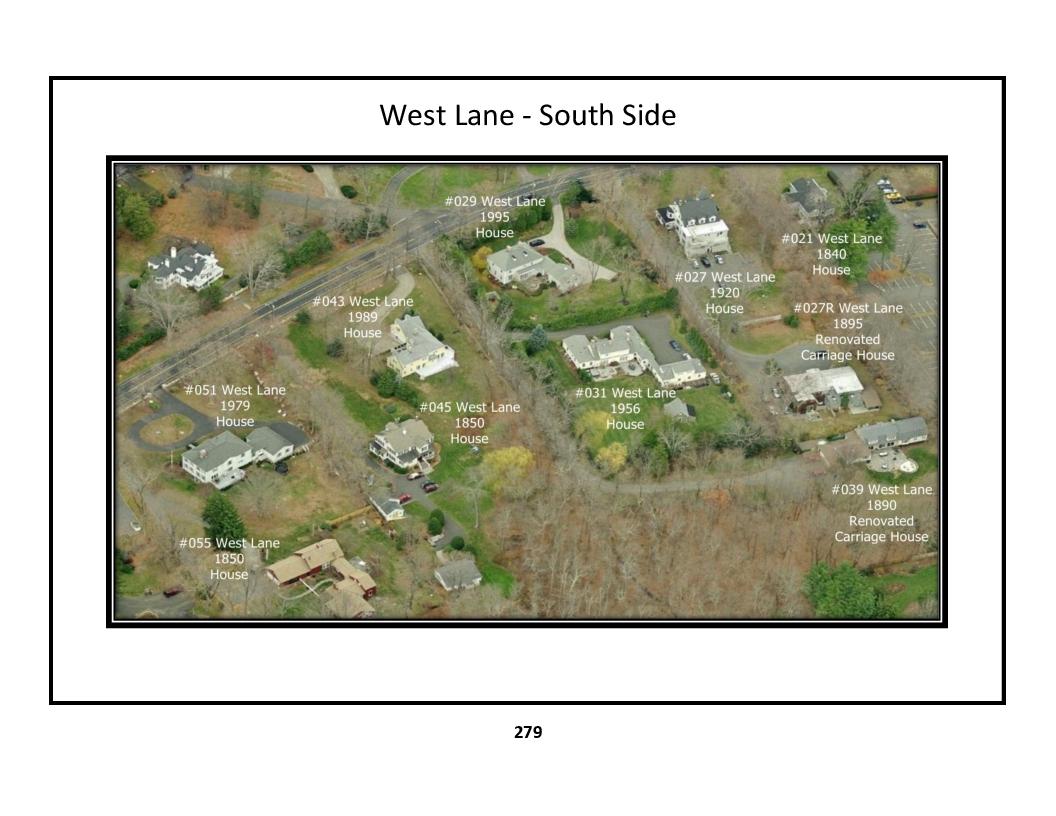
Aerial Views: West Lane - South Side - photo a
Street Level Views: West Lane - South Side
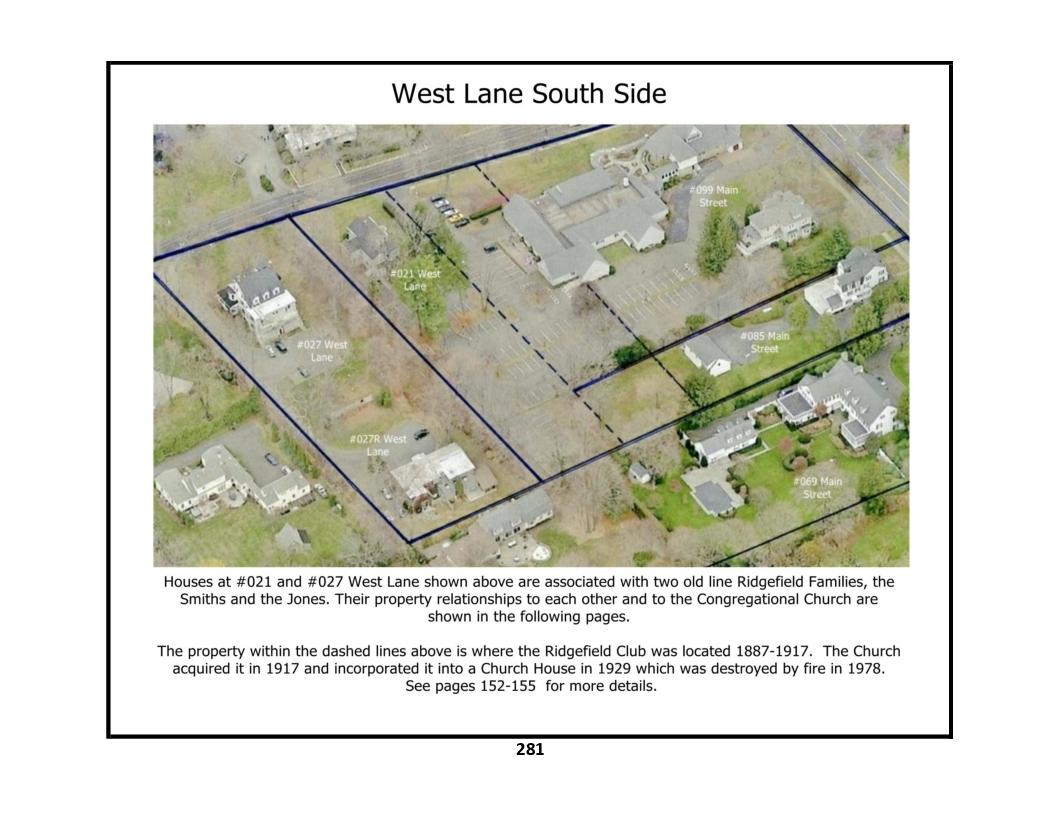
Aerial Views: West Lane - South Side - Aerial Plot Map - photo a
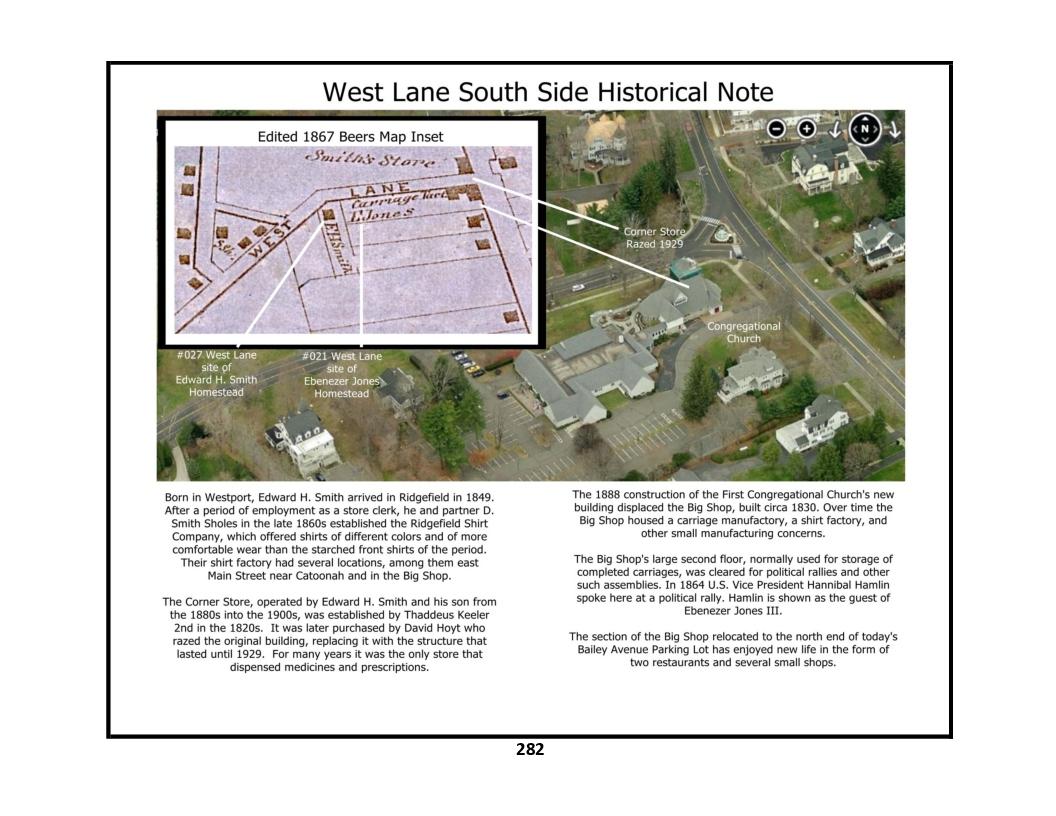
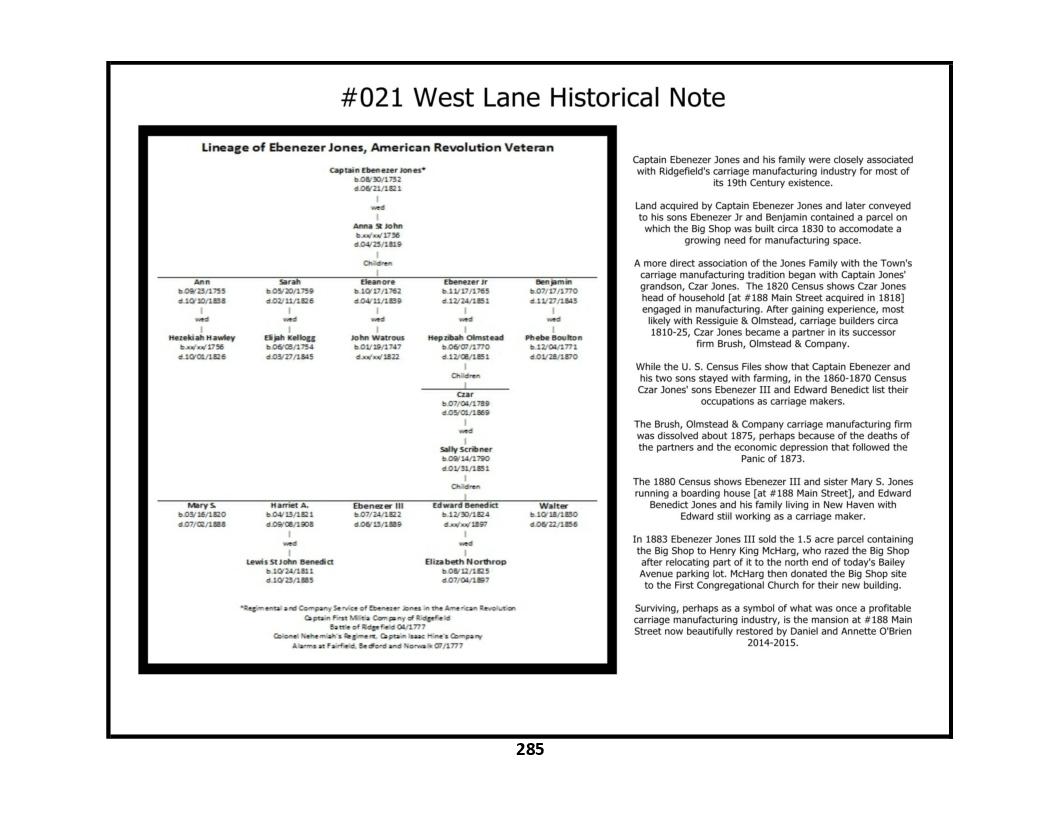
Aerial Views: West Lane - South Side - Historical Note - a
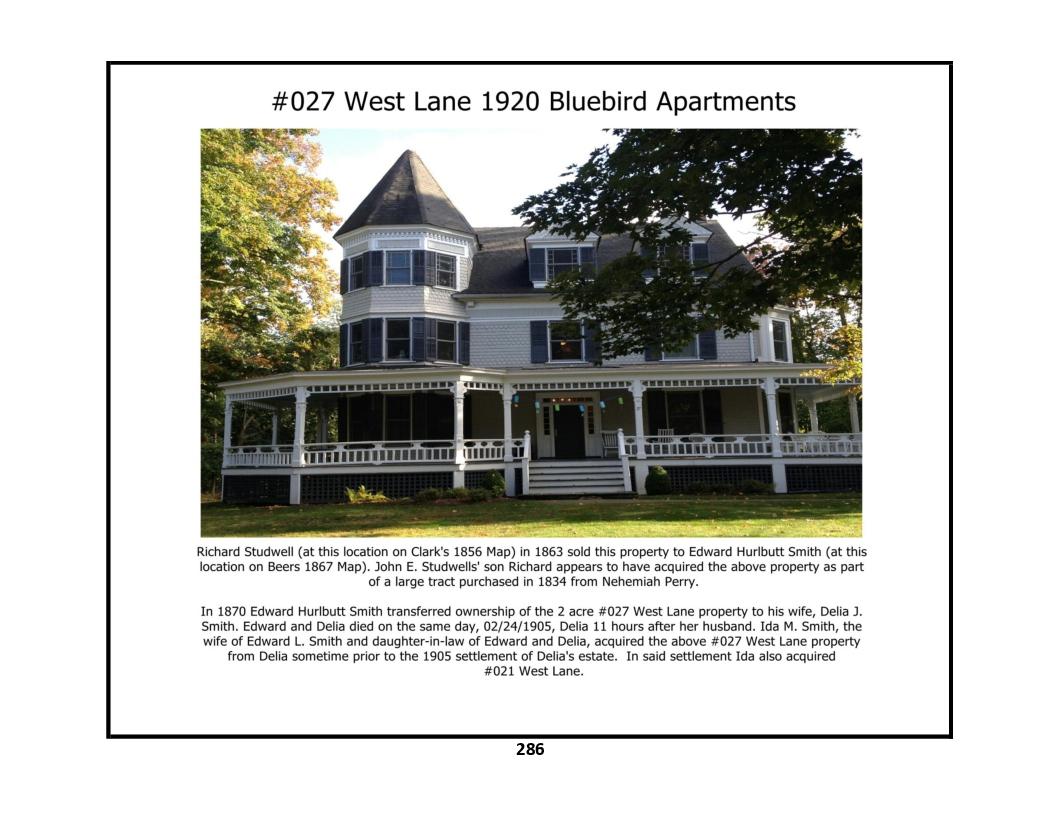
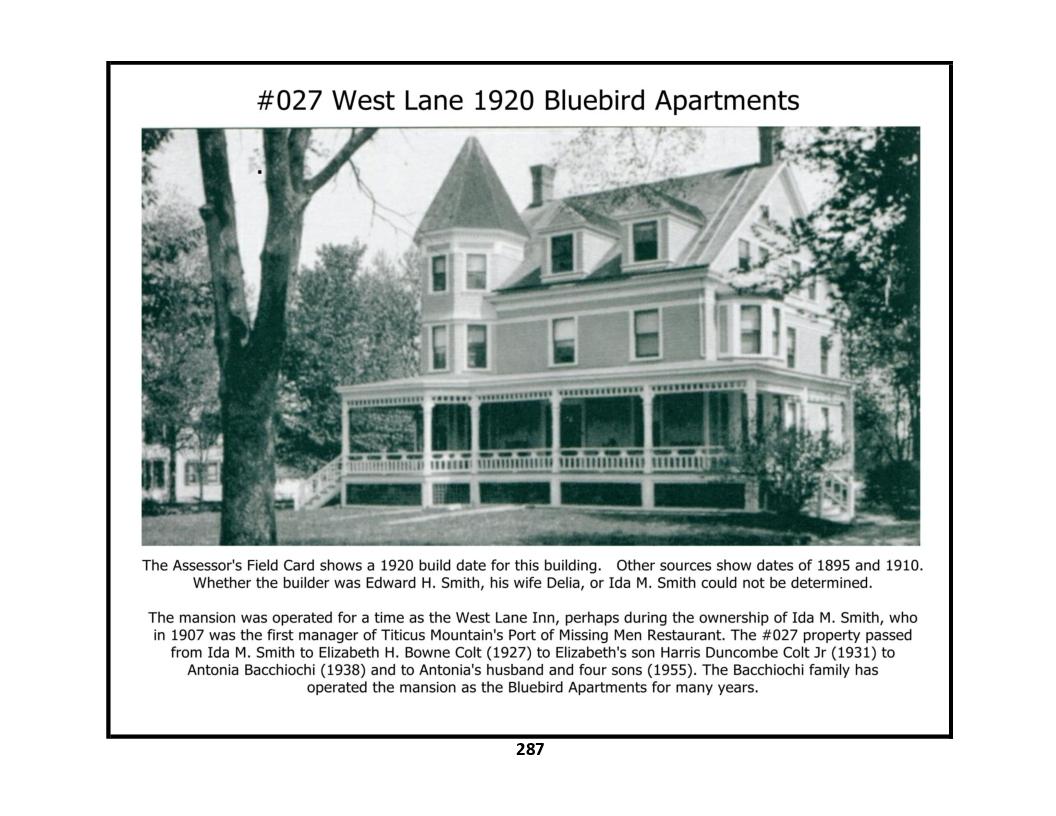
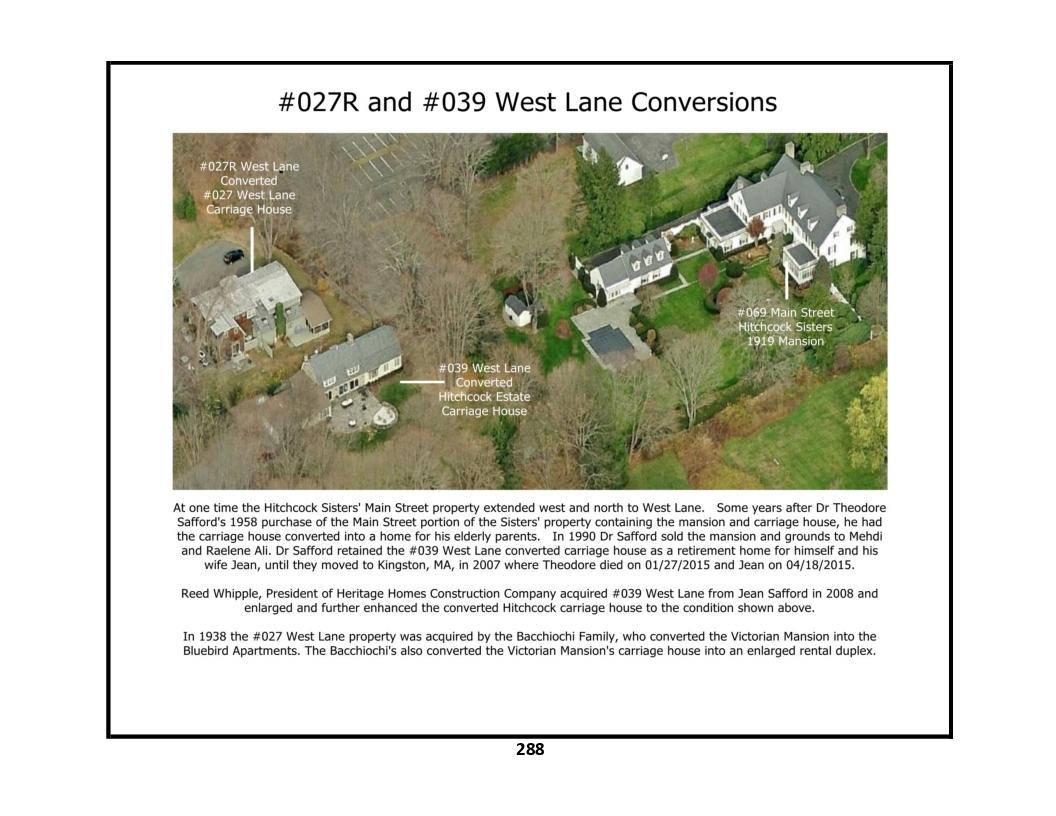
27R and 39 West Lane Conversions - photo 1
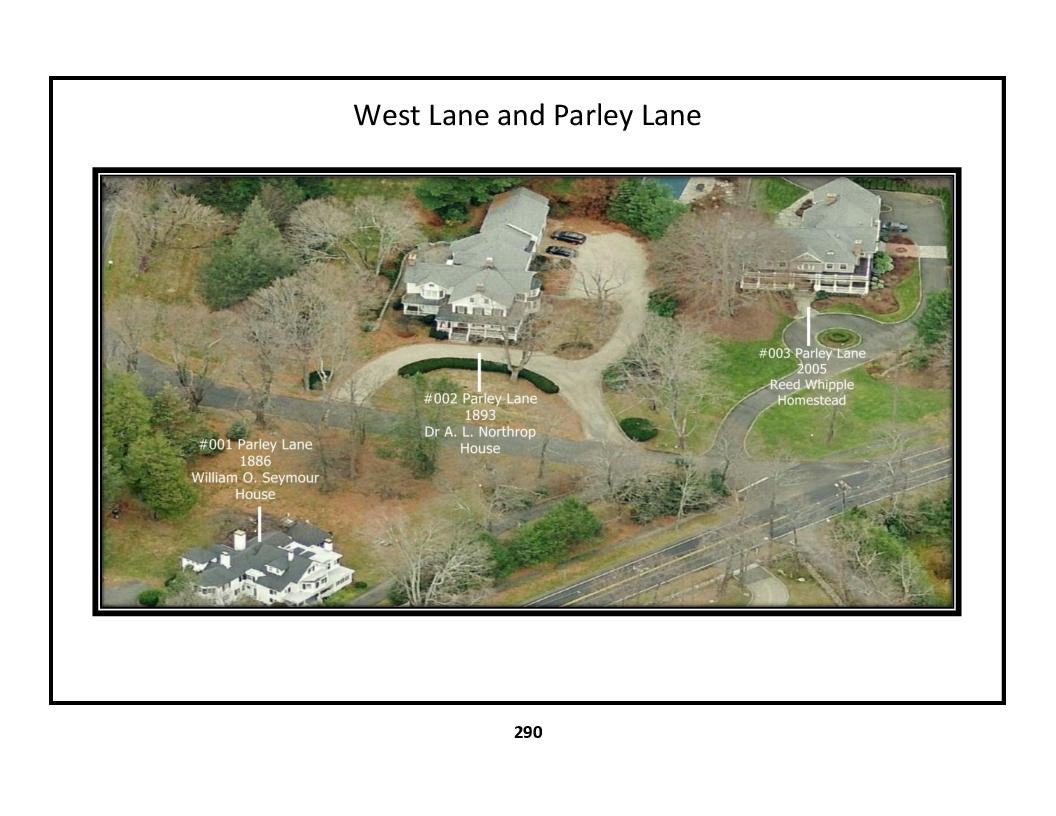
Aerial and Street Level Views: West Lane - Parley Lane - photo a
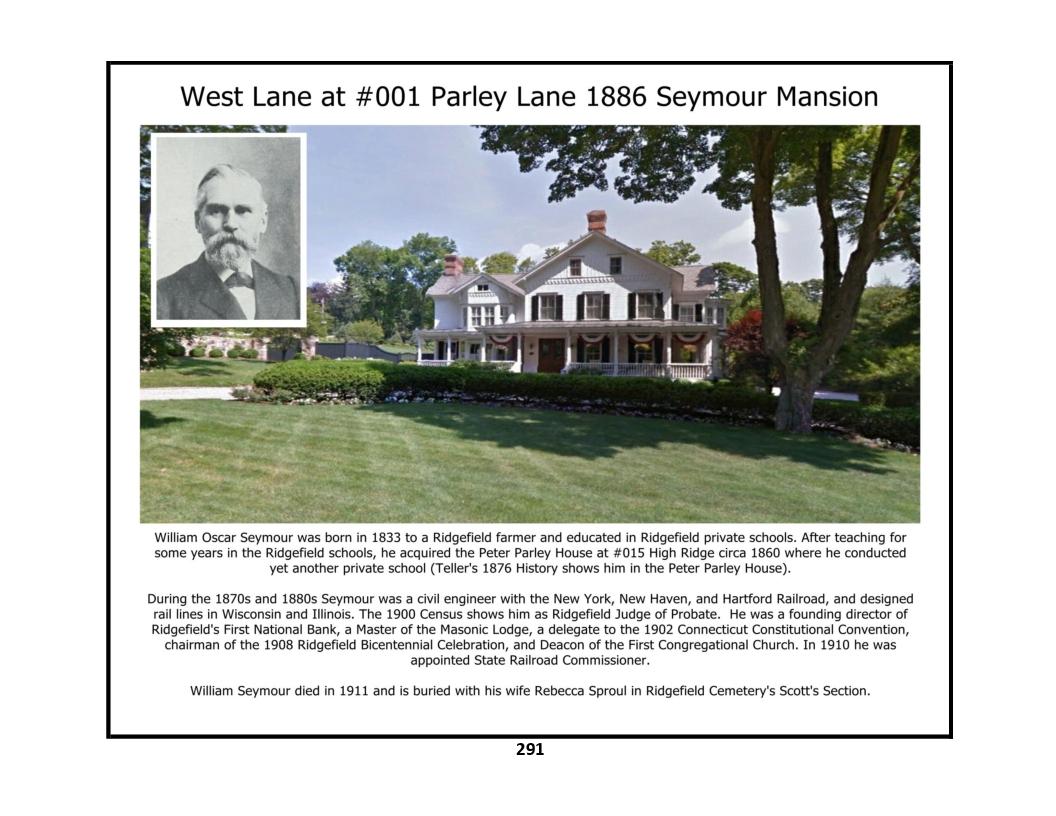
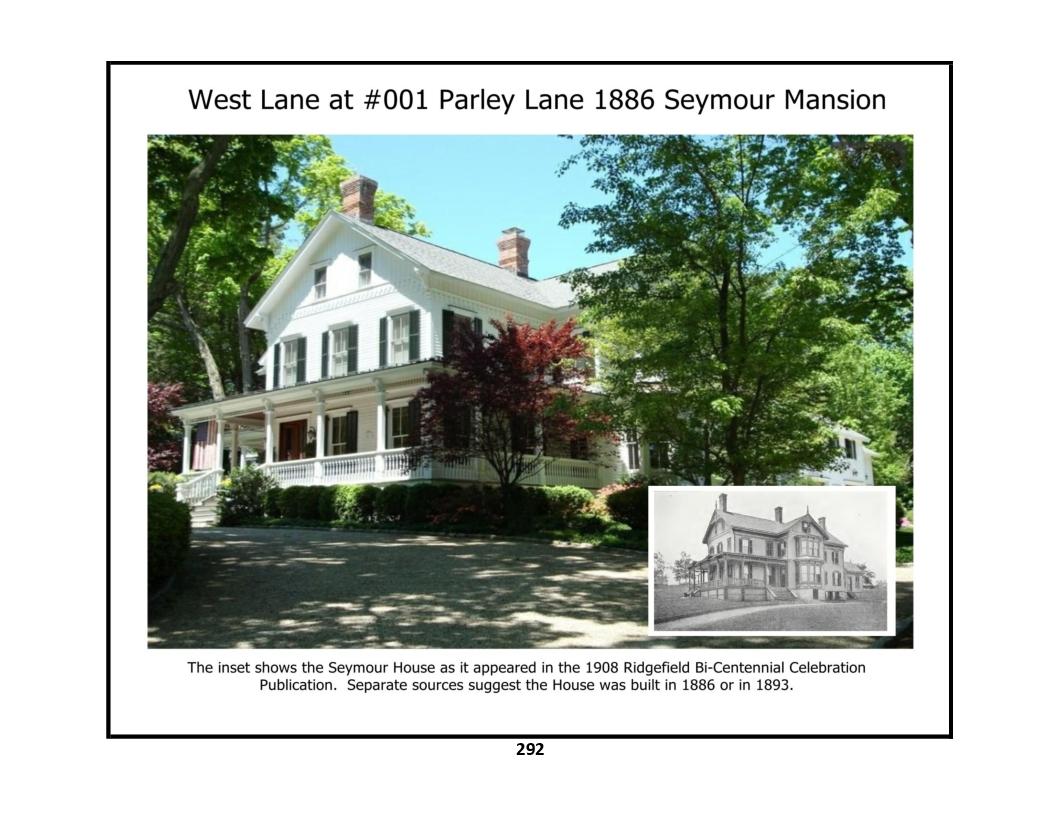
West Lane at 1 Parley Lane - photos 1, 2, 3
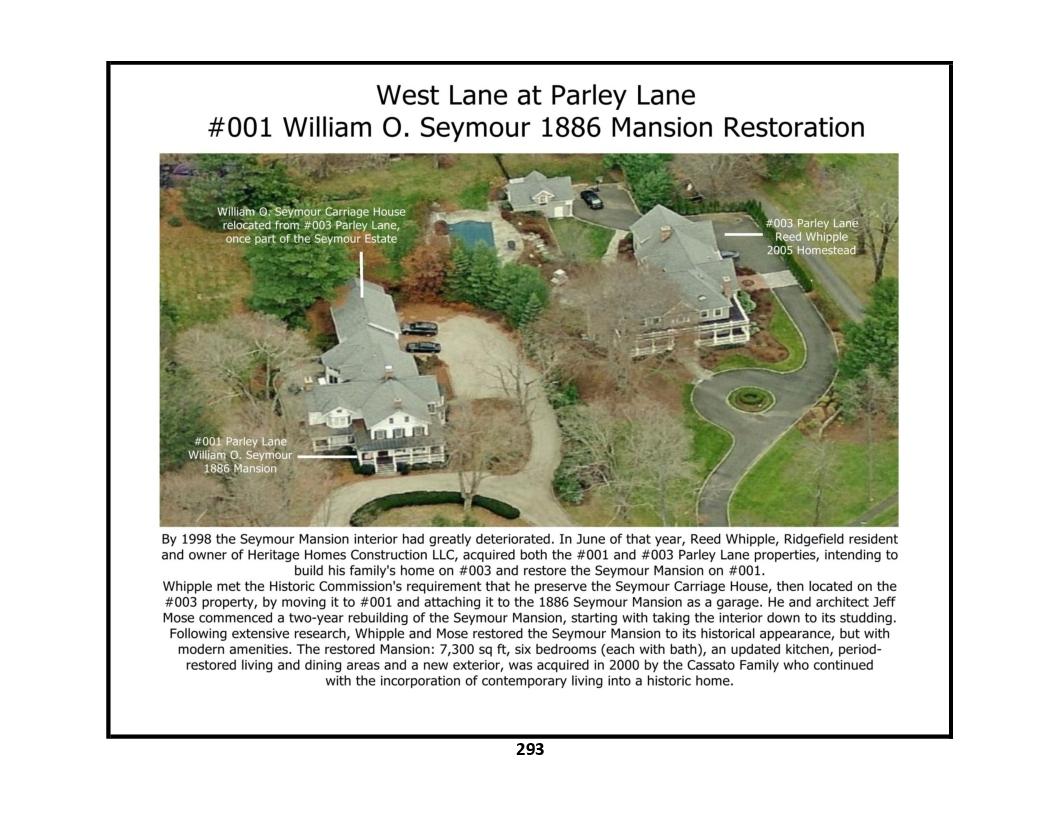
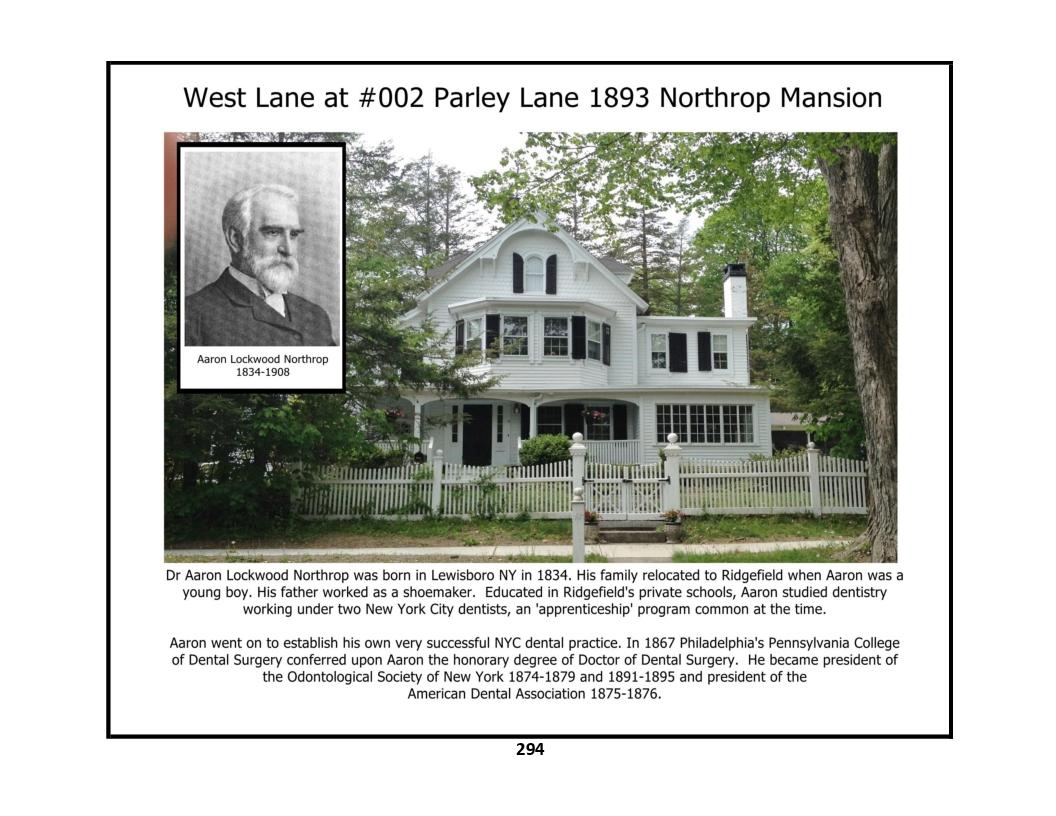
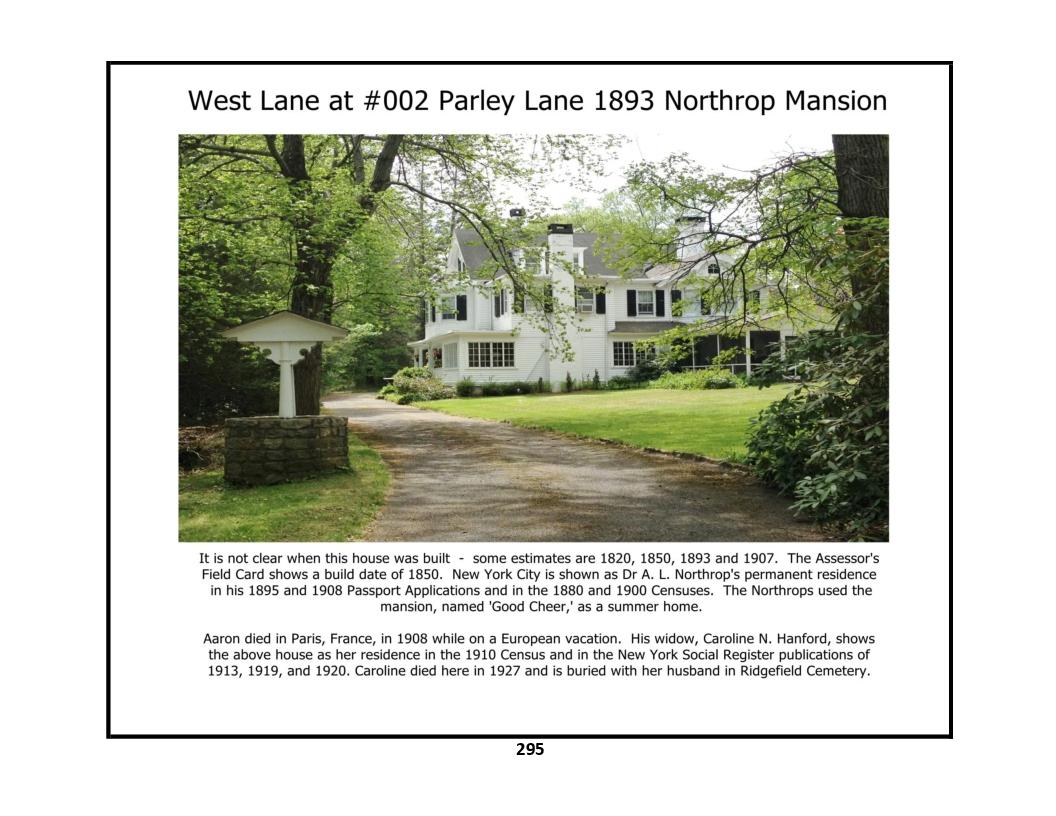
West Lane at 2 Parley Lane - photos 1, 2
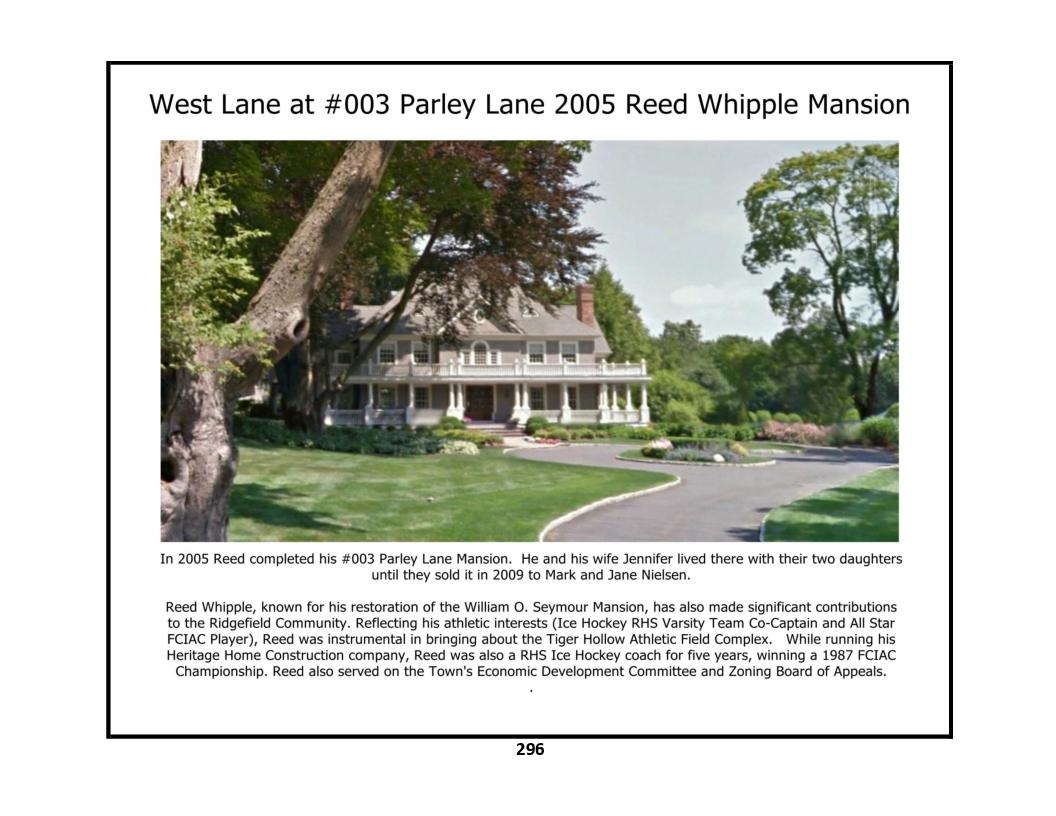
West Lane at 3 Parley Lane - photo 1